Pack 3
BUILD INSTRUCTIONS
Instructions for building your USS Constitution model ship
Your model of the USS Constitution is divided into 12 packs.
You will need to follow the step-by-step assembly photos, the plans and the explanatory texts below.
Please save the leftover materials from each pack for use when instructed to do so at a later stage of the assembly instructions.
The IP sheets displayed below are drawings of laser-cut parts and photo-etched brass parts and will serve as a guide for identification of some parts.
Use the PARTS REFERENCE table to help locate the parts.
The PL-00 templates (printed at 1/1 scale) included in each pack will serve as a guide for building the frames.
Please check the list below to ensure you have all the tools required for building your wooden ship.
When removing a part, cut the ribs that join the part to the wooden plate with a cutter.
Remove the parts carefully so as not to break them.
Keep and store the parts in their frames. Only remove the parts you are working on in each step.
Extra support can be found on our forum or from the Expert Directory page of our website.
PARTS LIST
| Material | Quantity | |
| Boards 2001-17 – 2001-19 | Wood | 3 |
| Wooden Strips | ||
| 5 x 5 x 400 mm | Oak | 14 |
| 3 x 3 x 400 mm | Lime wood | 7 |
| 2 x 5 x 600 mm | Lime wood | 10 |
| Rod (ø10 mm x 450 mm) | Mahogany | 1 |
| Other Parts | ||
| Ring (for mast MT24 – ø10 mm) | 6 | |
| Ring (for mast MT125 – ø8 mm) | 2 | |
| Templates | ||
| Assembly template PL-06 | 1 |
Tools you will need: cutting mat, pencil, cutting knife, fine-grit sandpaper or sponge sandpaper, file, white wood glue, super glue (cyanoacrylate glue), masking tape, set square, hacksaw, sanding block, 30 cm steel ruler, clamps, moulding scriber tool
PACK 03 IDENTIFICATION SHEETS
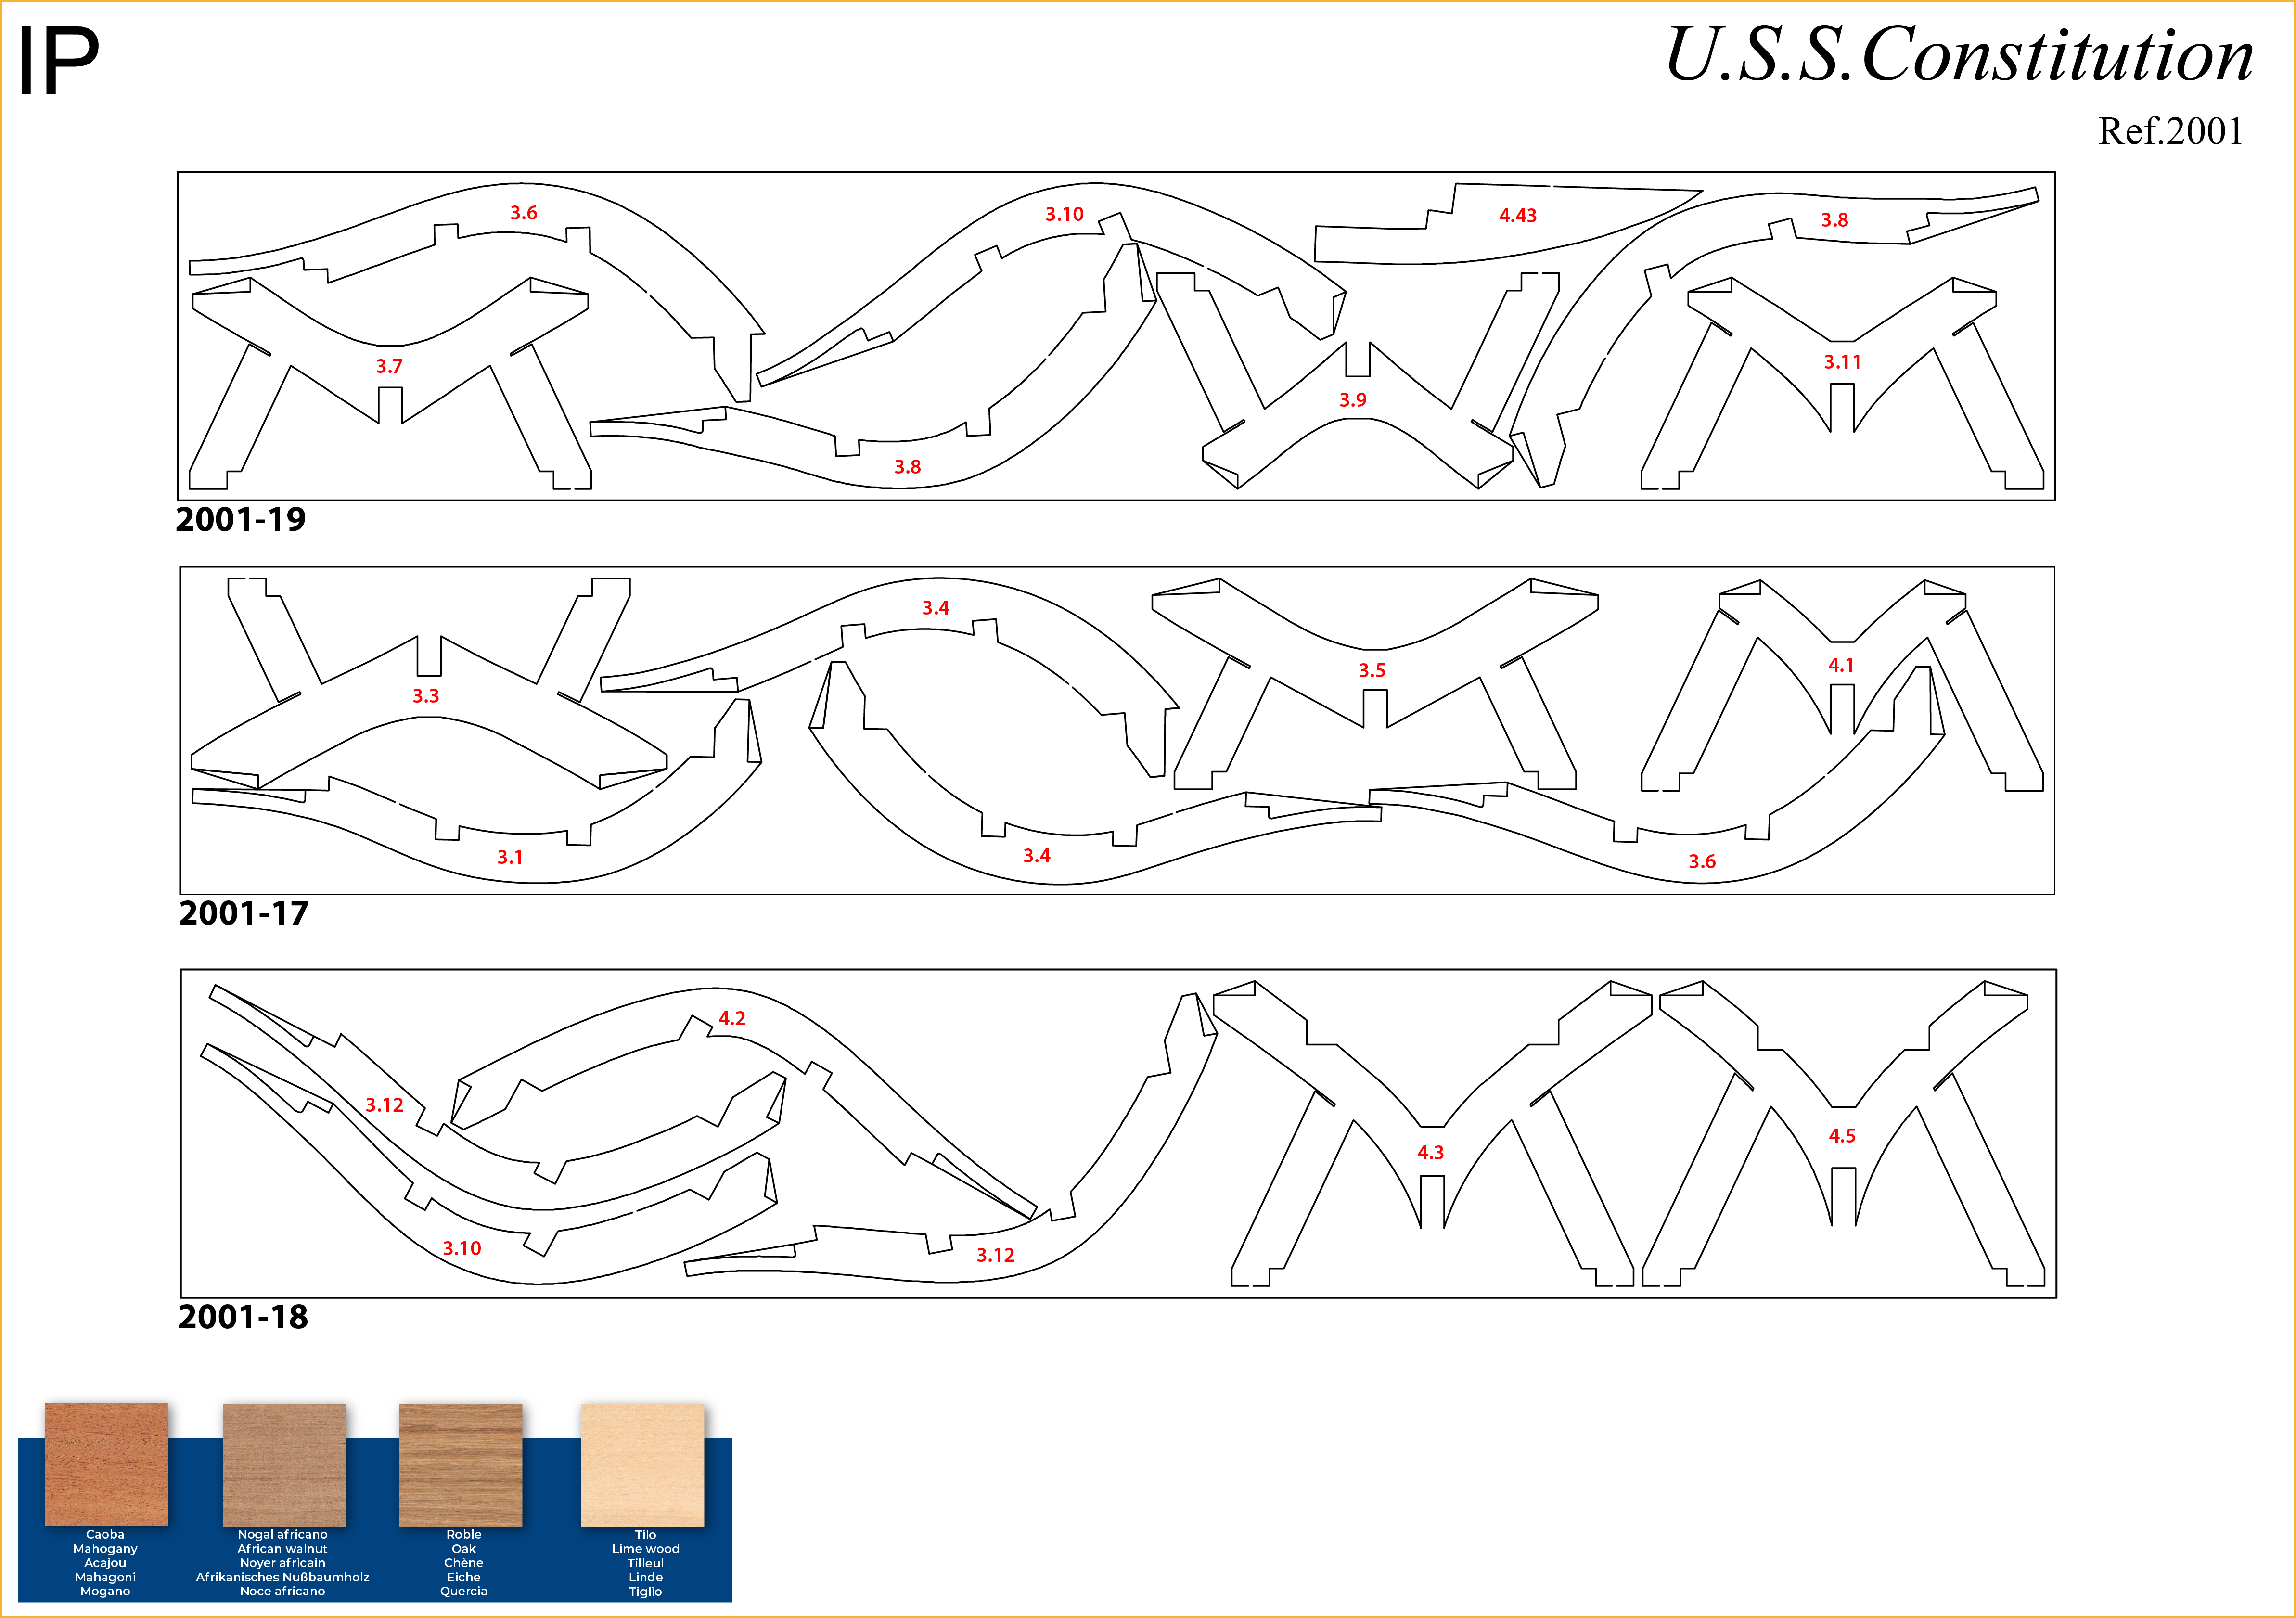
PARTS REFERENCE
PART NO | IP-SHEET LOCATION | PART NO | IP-SHEET LOCATION |
| 3.1 | 2001-13 + 2001-17 | 3.8 | 2001-19 |
| 3.2 | 2001-13 | 3.9 | 2001-19 |
| 3.3 | 2001-17 | 3.10 | 2001-18 + 2001-19 |
| 3.4 | 2001-17 | 3.11 | 2001-19 |
| 3.5 | 2001-17 | 3.12 | 2001-18 |
| 3.6 | 2001-17 + 2001-19 | 3.26 | 2001-11 |
| 3.7 | 2001-19 |
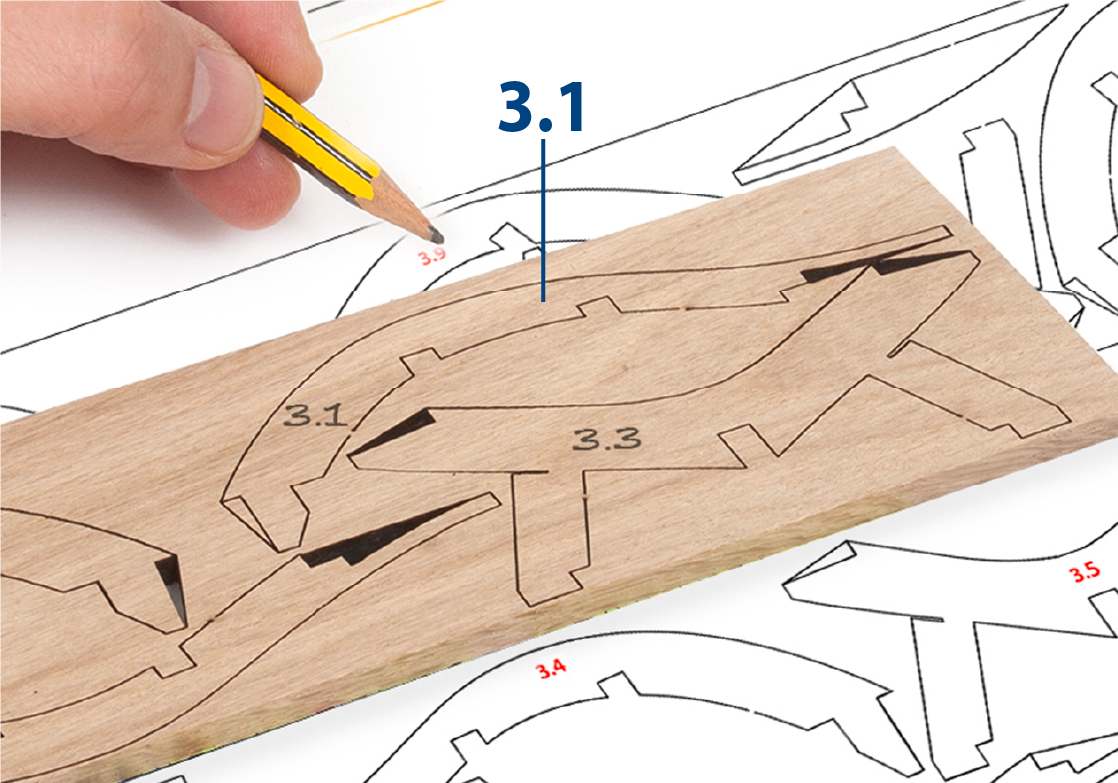
ステップ 1
Use a pencil to transfer the numbers from the IP sheets to the wooden boards.
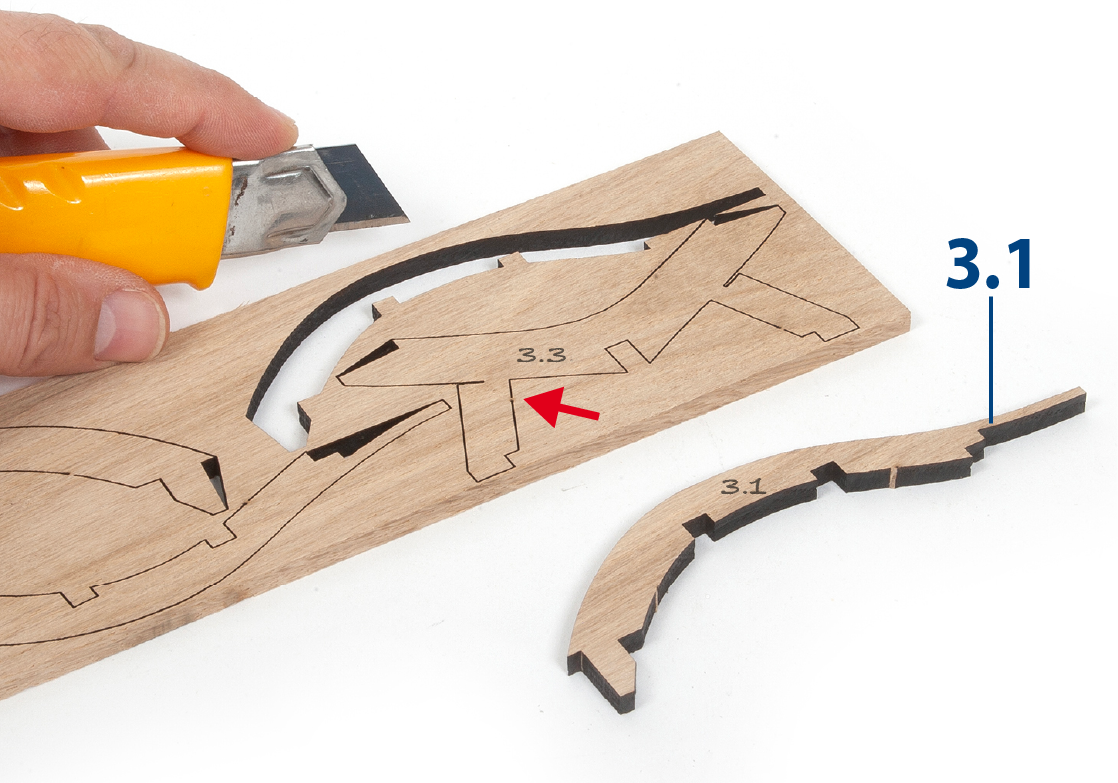
ステップ 2
Cut the ribs that join the pieces to the plates with a cutter so that they can be removed without damaging them. Only remove the parts you are working on in each step.
ステップ 3
Place the parts on a flat surface and sand them with fine-grit sandpaper or sponge-sandpaper.
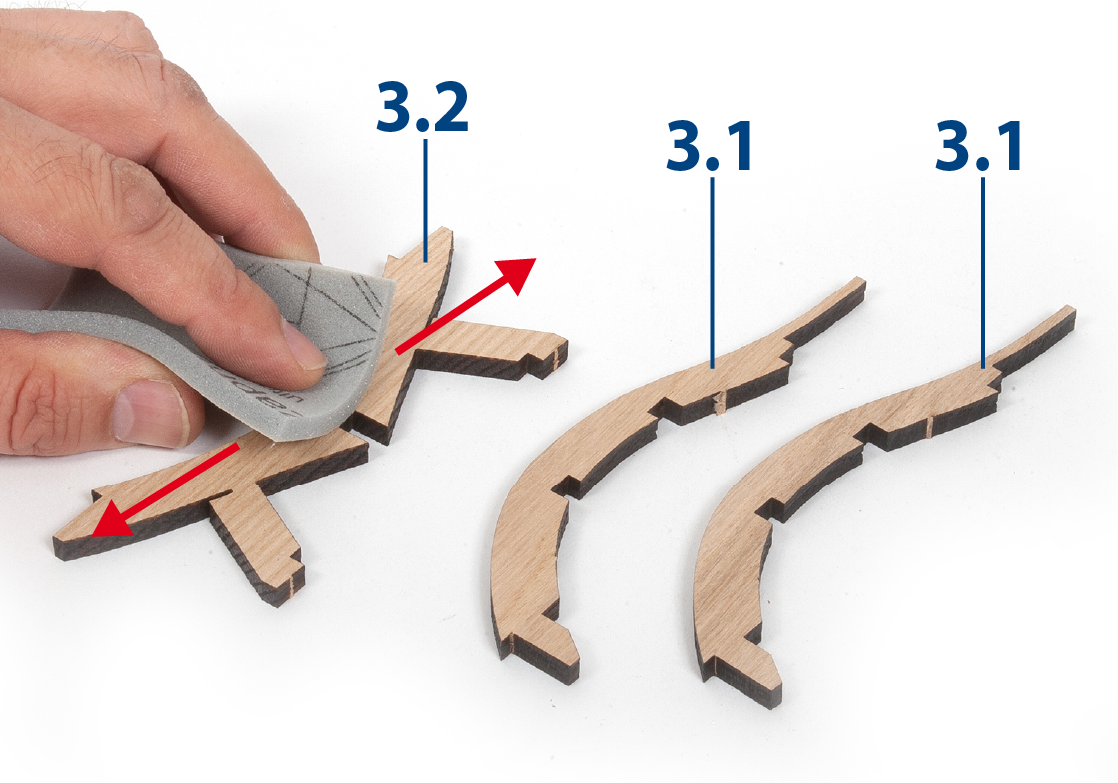
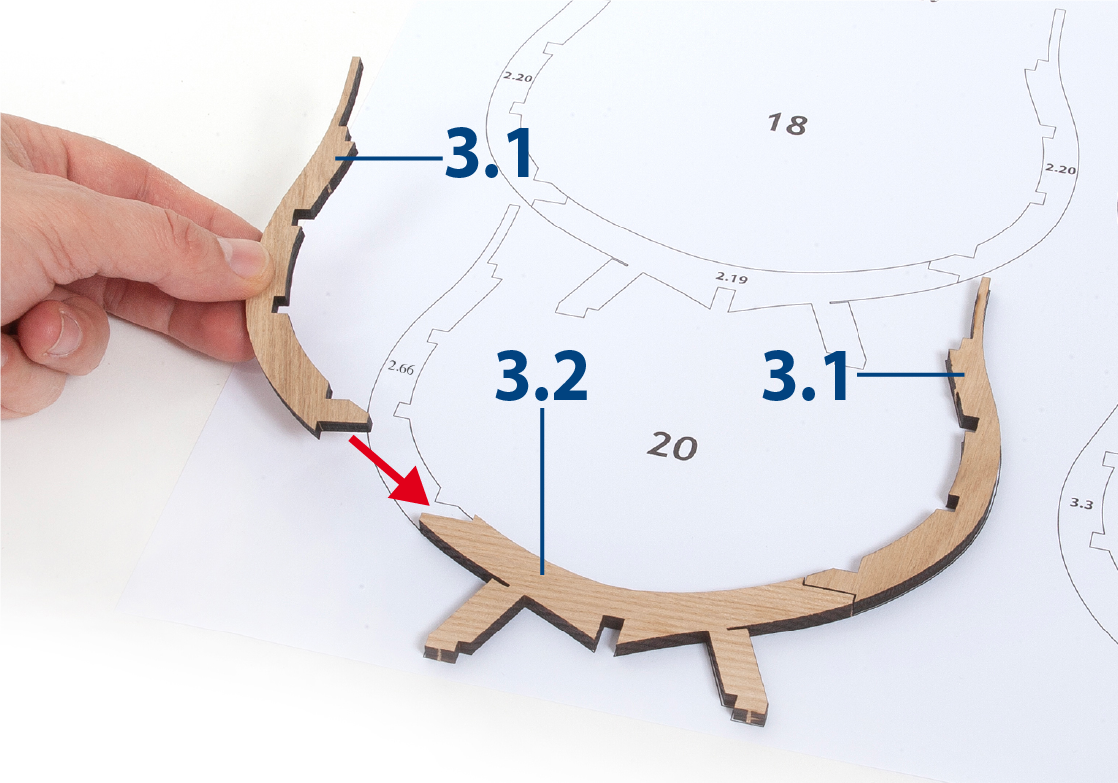
ステップ 4
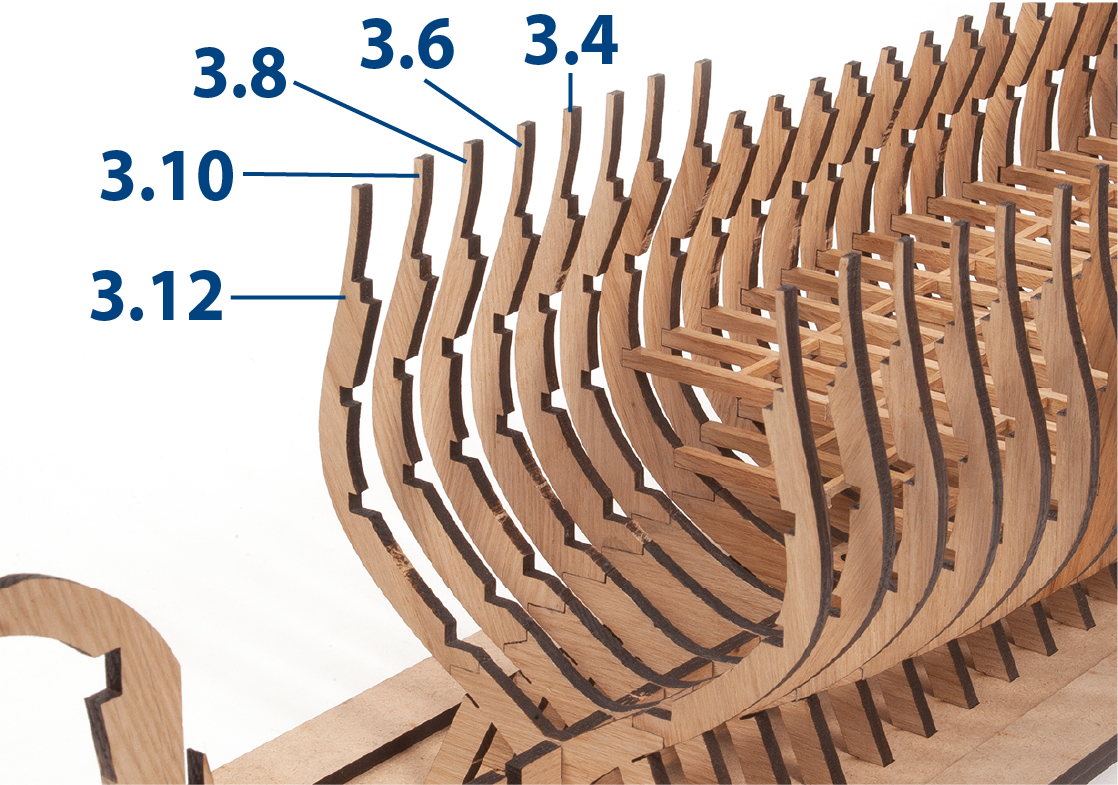
Place parts 3.1 and 3.2 on the figure of frame 20 to check their fit then glue the pieces together.
ステップ 5
Construct frames 20 to 25 with templates PL-05 and PL-06.
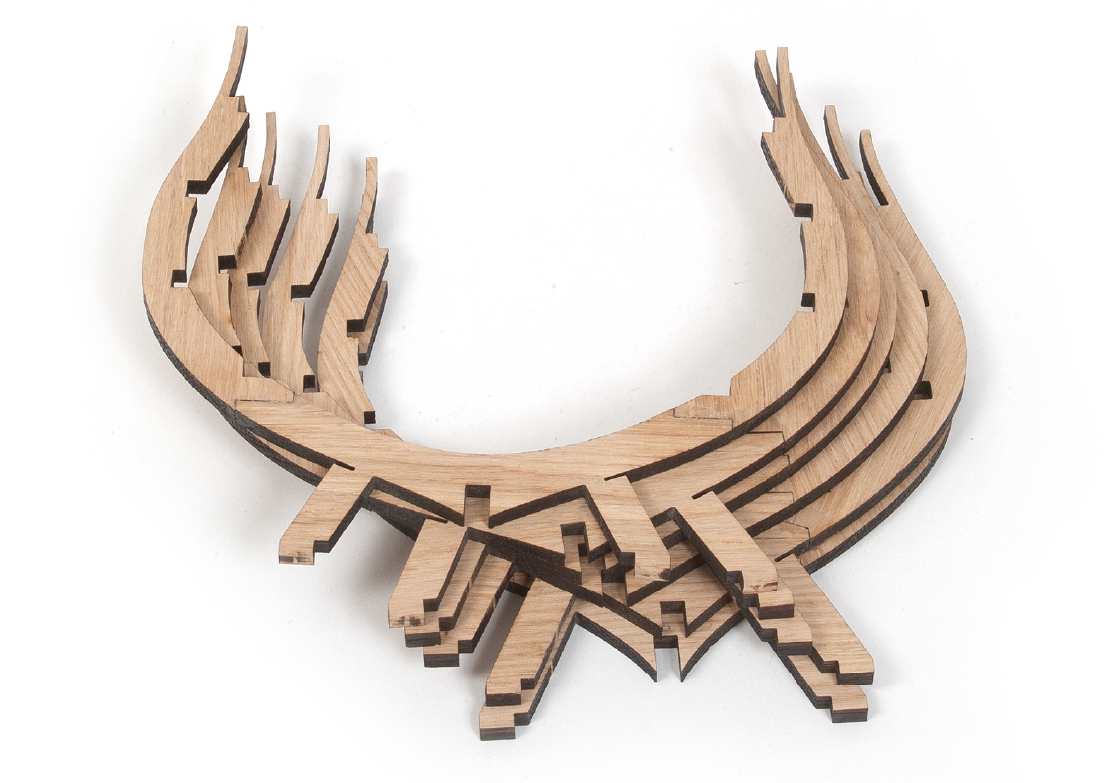
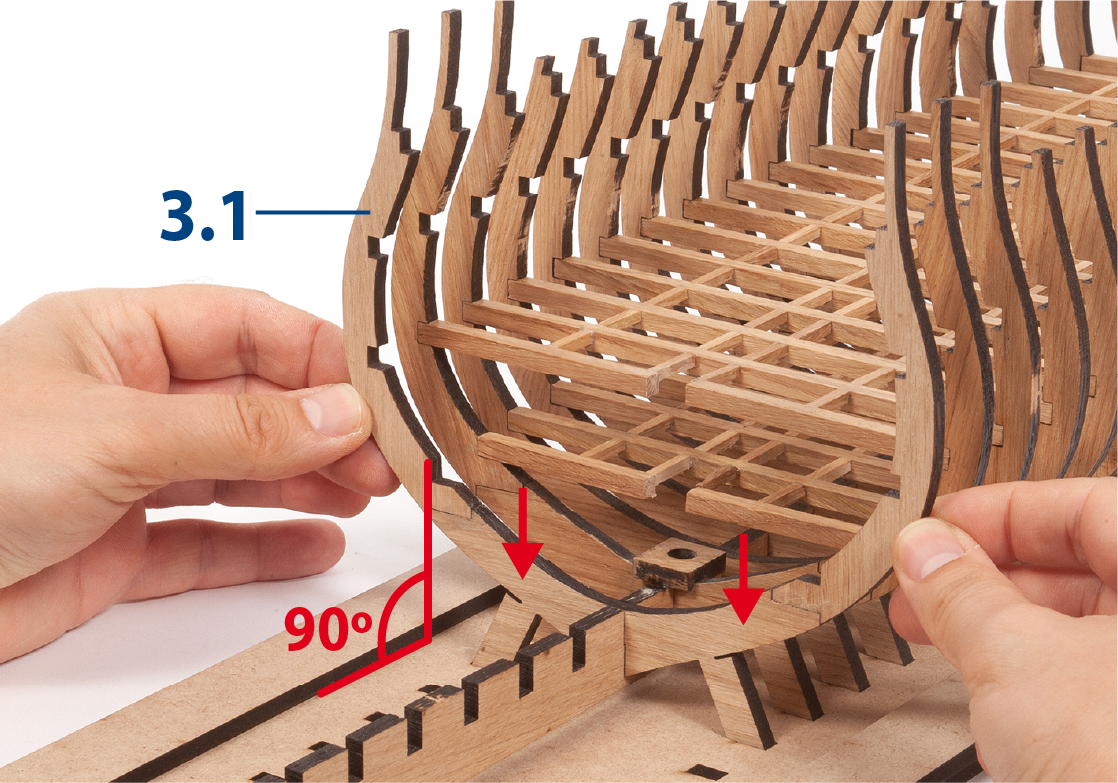
ステップ 6
Insert and glue frame 20 into the structure.
ステップ 7
Proceed in the same way to insert and glue frames 21 to 25.
ステップ 8
Cut parts 3.13 to 3.18 to length (5 x 5mm) and glue them into the lower recesses of the frames.
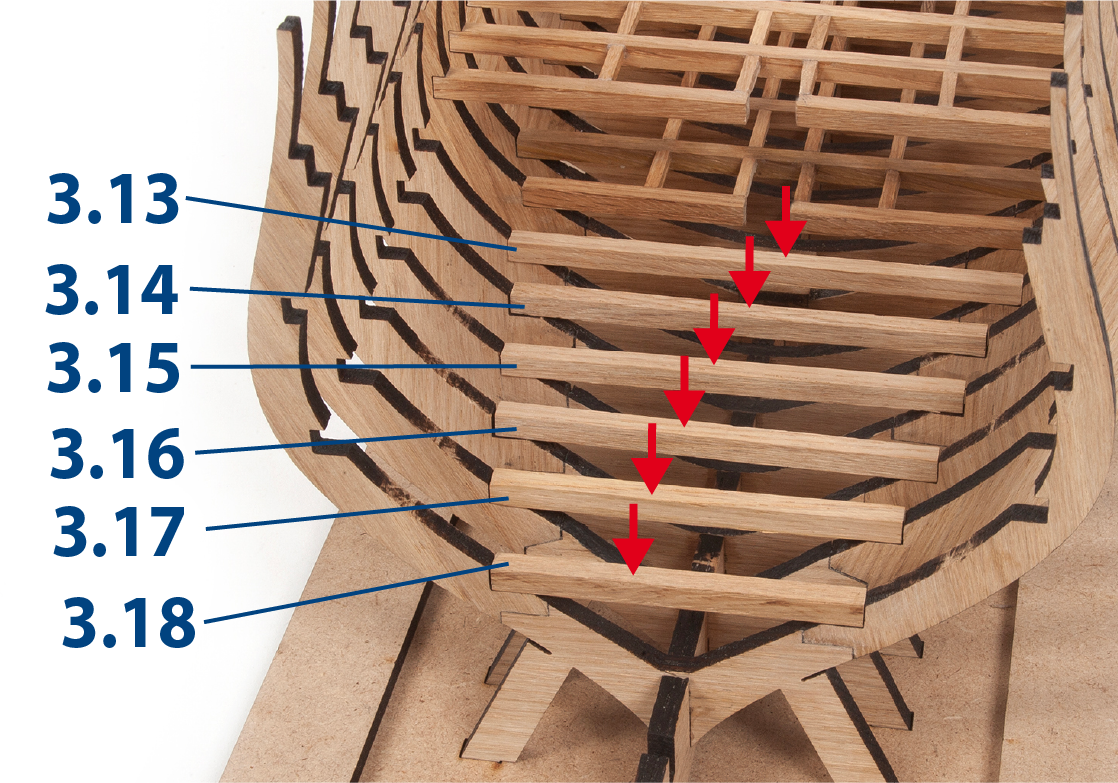
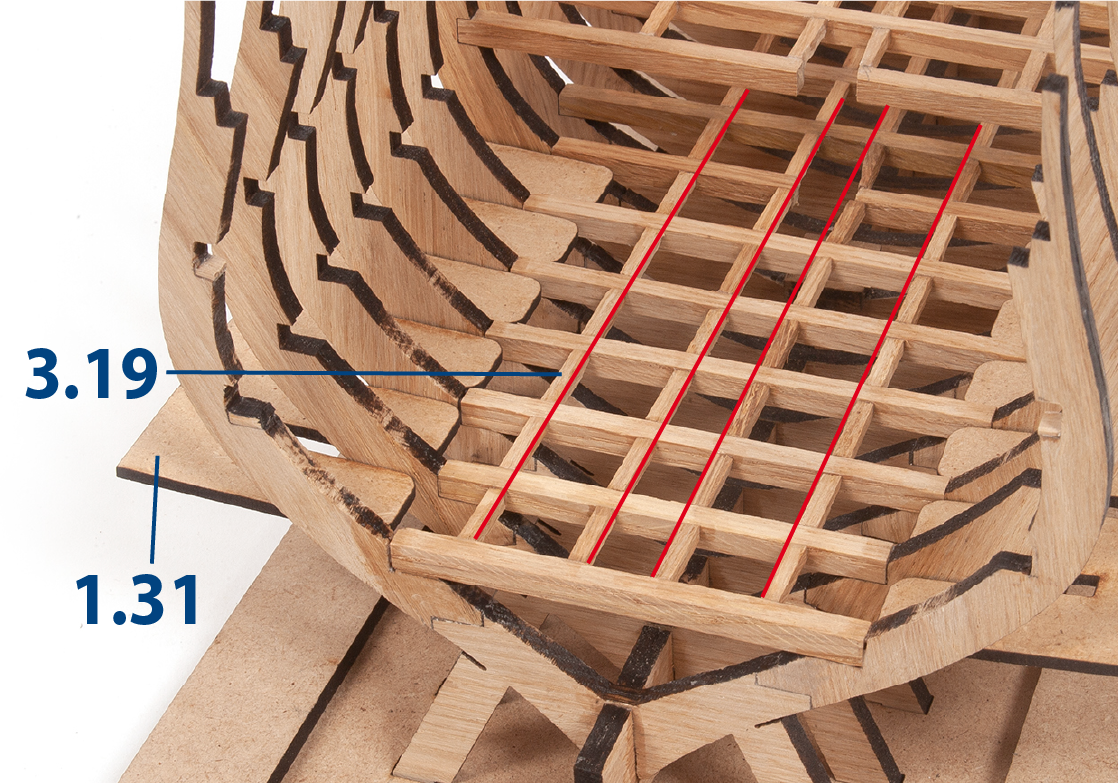
ステップ 9
Insert, without gluing, pieces 1.31, one on each side of the frame.
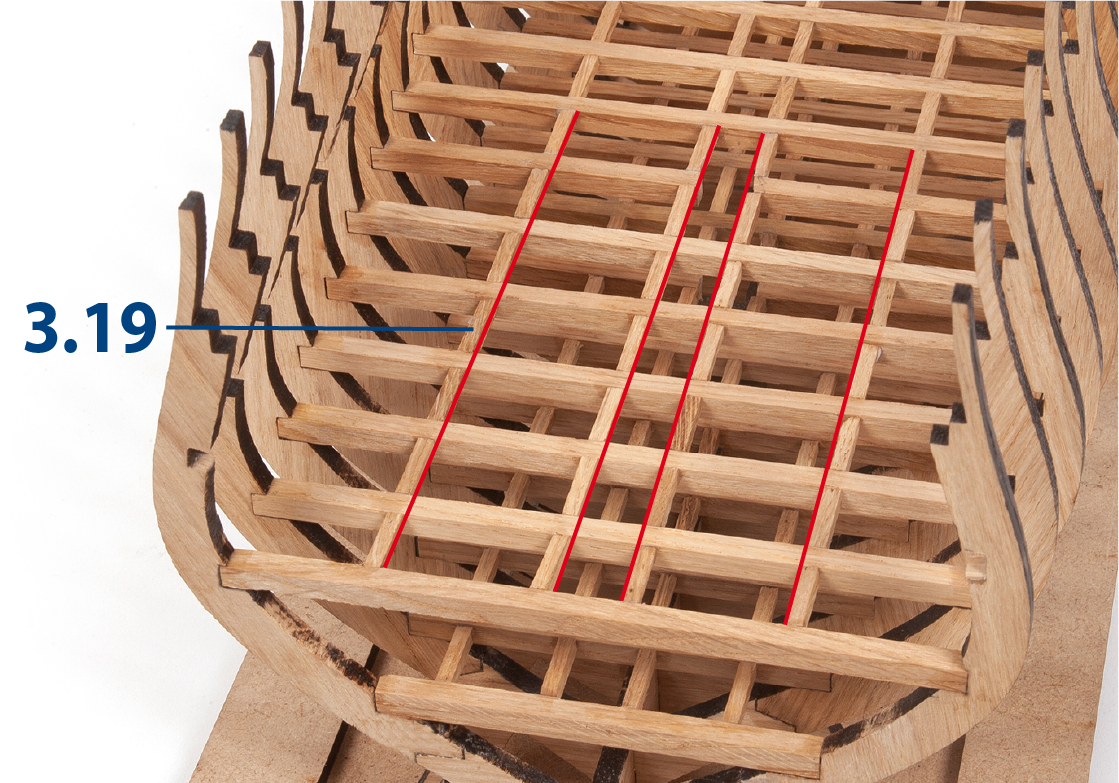
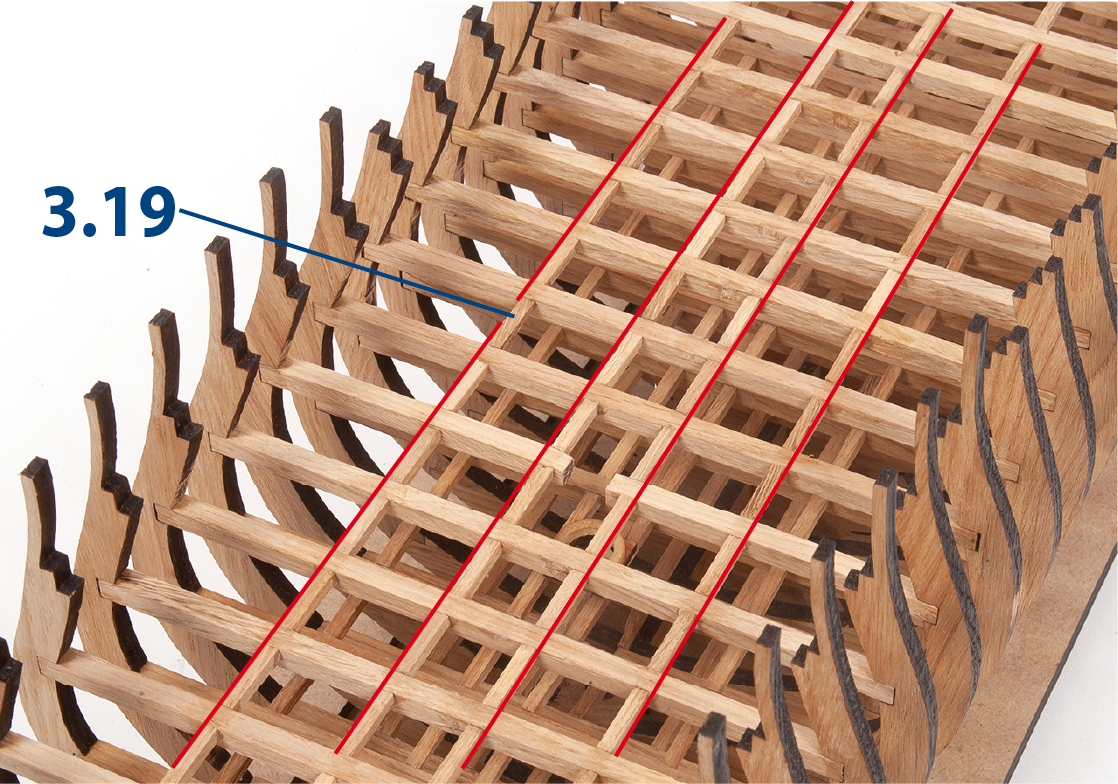
Cut to length the pieces 3.19 (3 x 3mm) and glue them in continuity with those already in place.
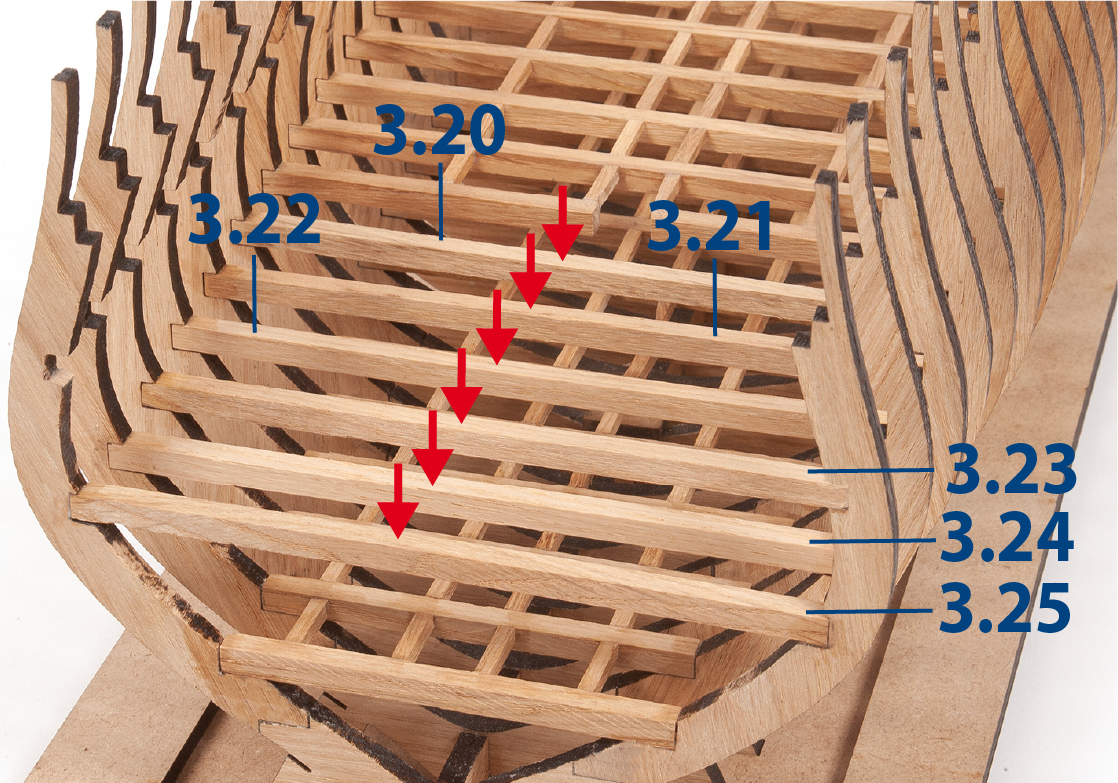
ステップ 10
Cut to length and glue parts 3.20 to 3.25 (5 x 5mm).
ステップ 11
Insert, without gluing, pieces 1.31, one on each side of the frame.
Cut to size and glue the pieces together 3.19 (3 x 3mm). It is recommended that you use white glue to glue the wooden parts together.
ステップ 12
Fitting the masts
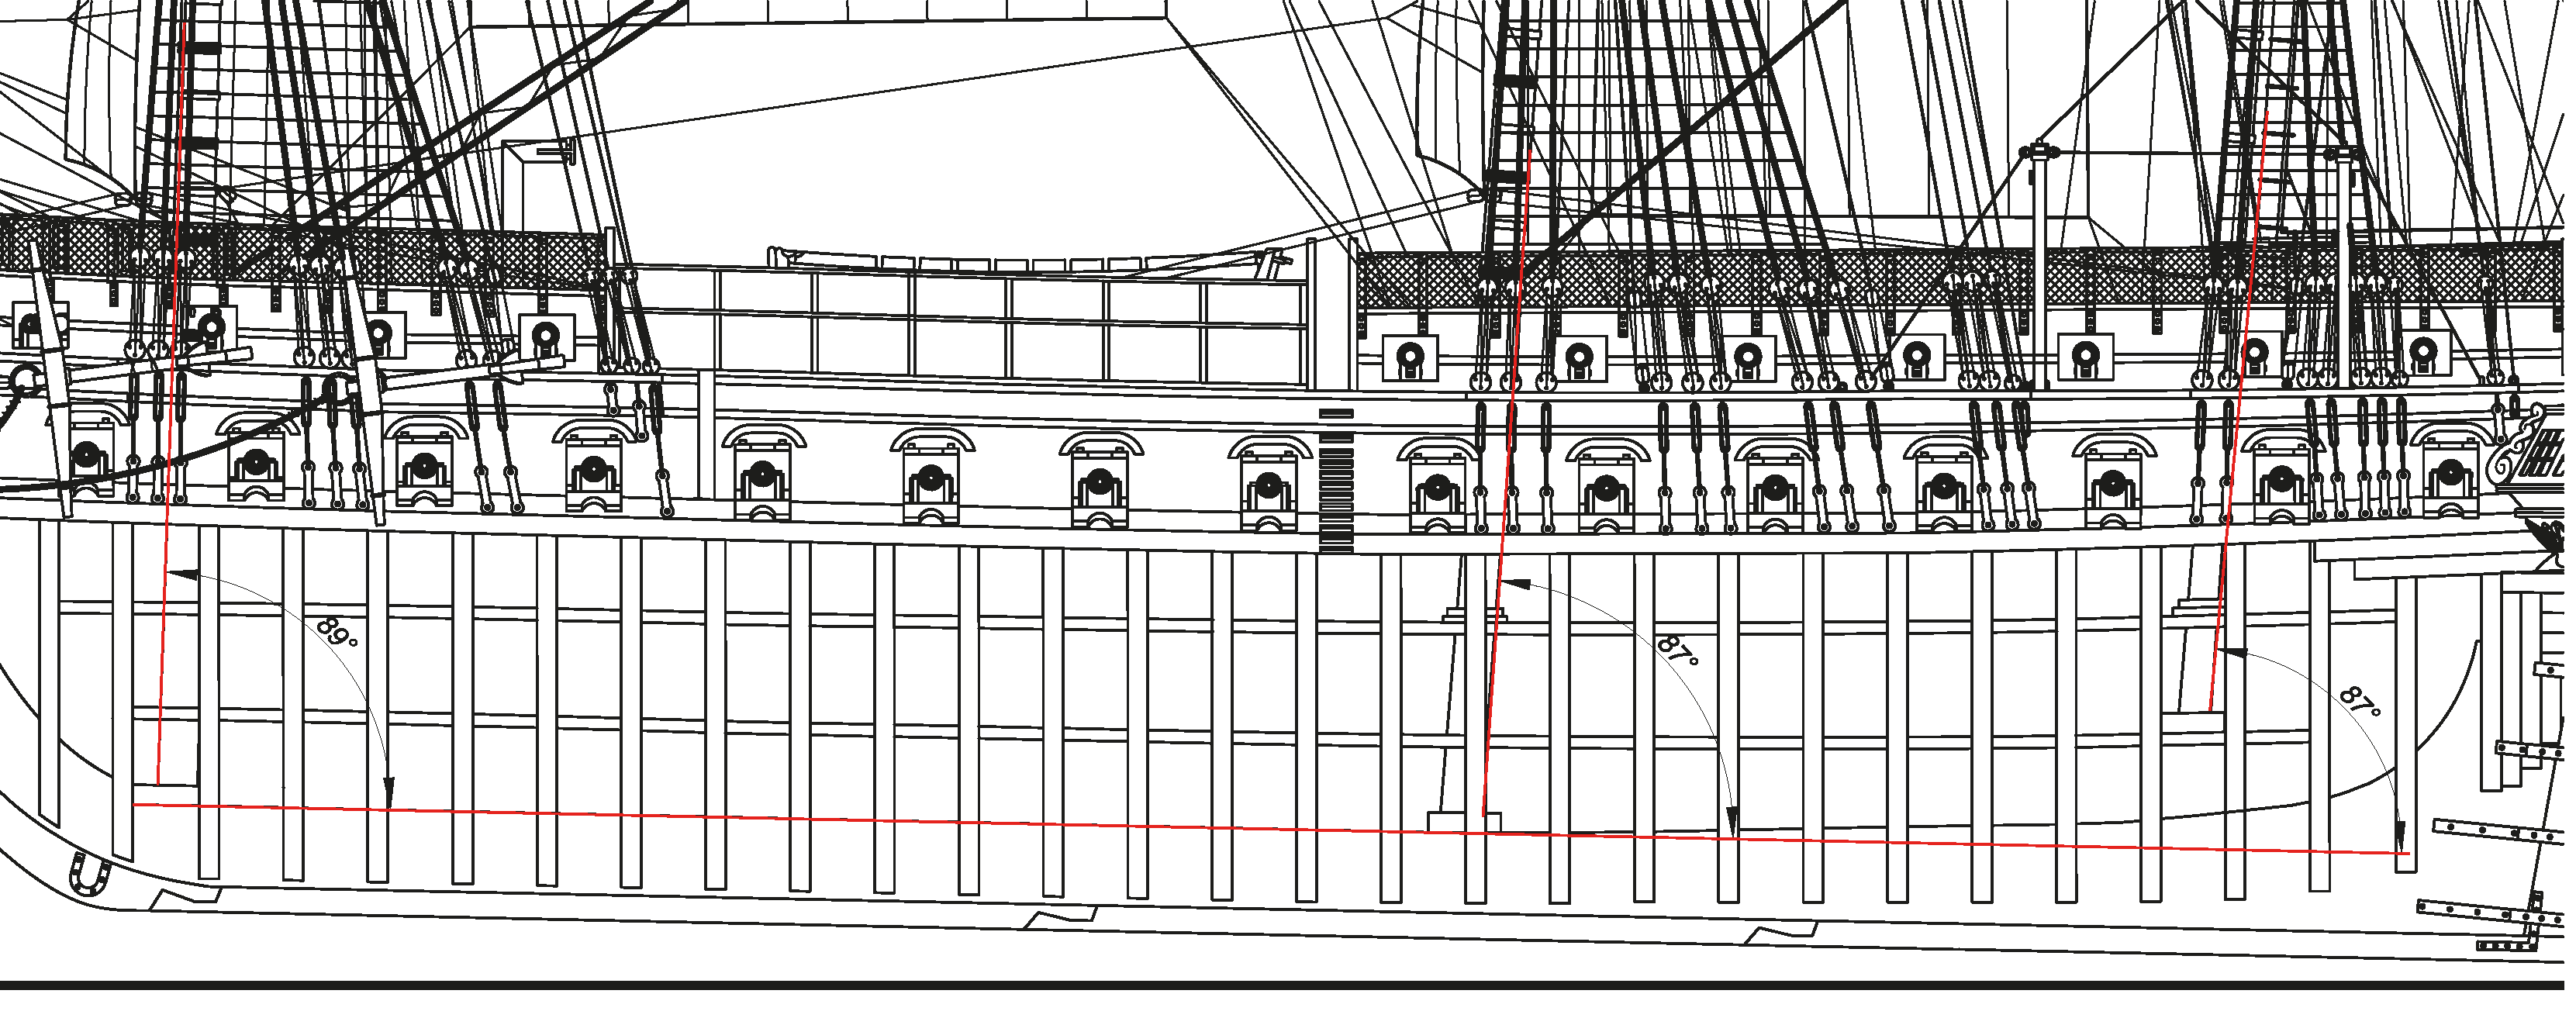
You will now start to fit components for the masts. In pack 5 you will receive a 1:1 scale elevation drawing showing the ship in detail.
This image is a section of the drawing showing the masts, along with their angles to the hull, as a reference. Please note that the angles shown here are a guideline only and may differ slightly according to the fit of the parts on your individual model.
ステップ 13
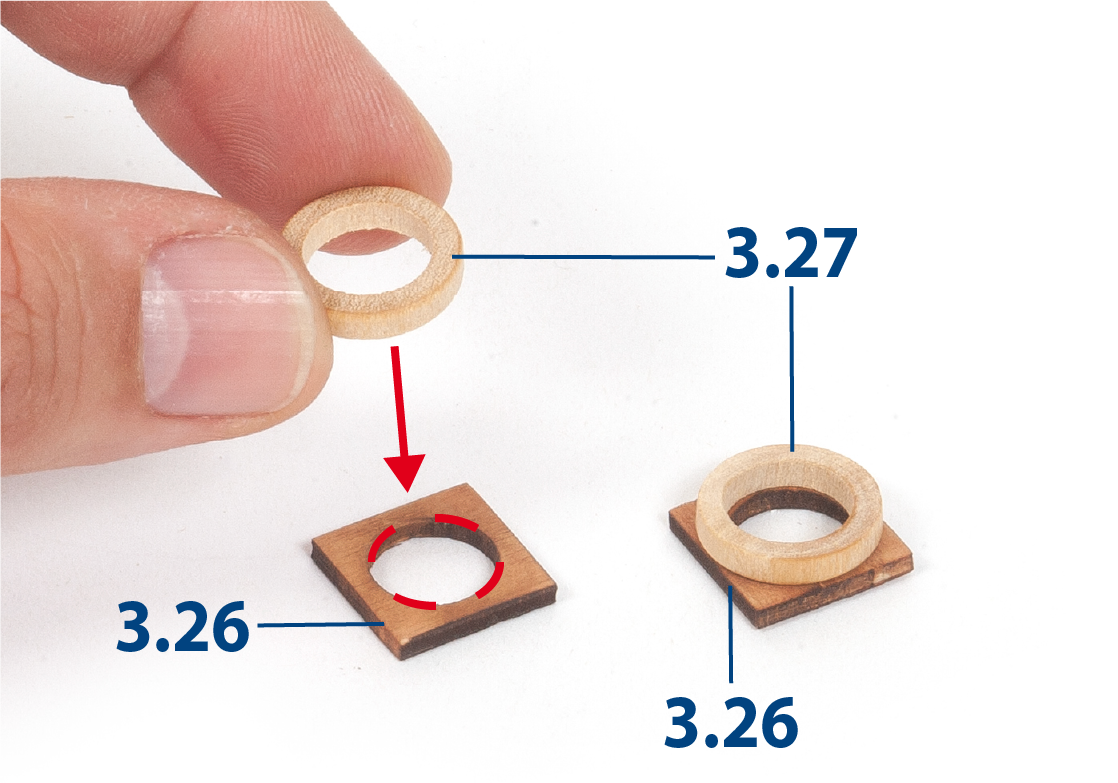
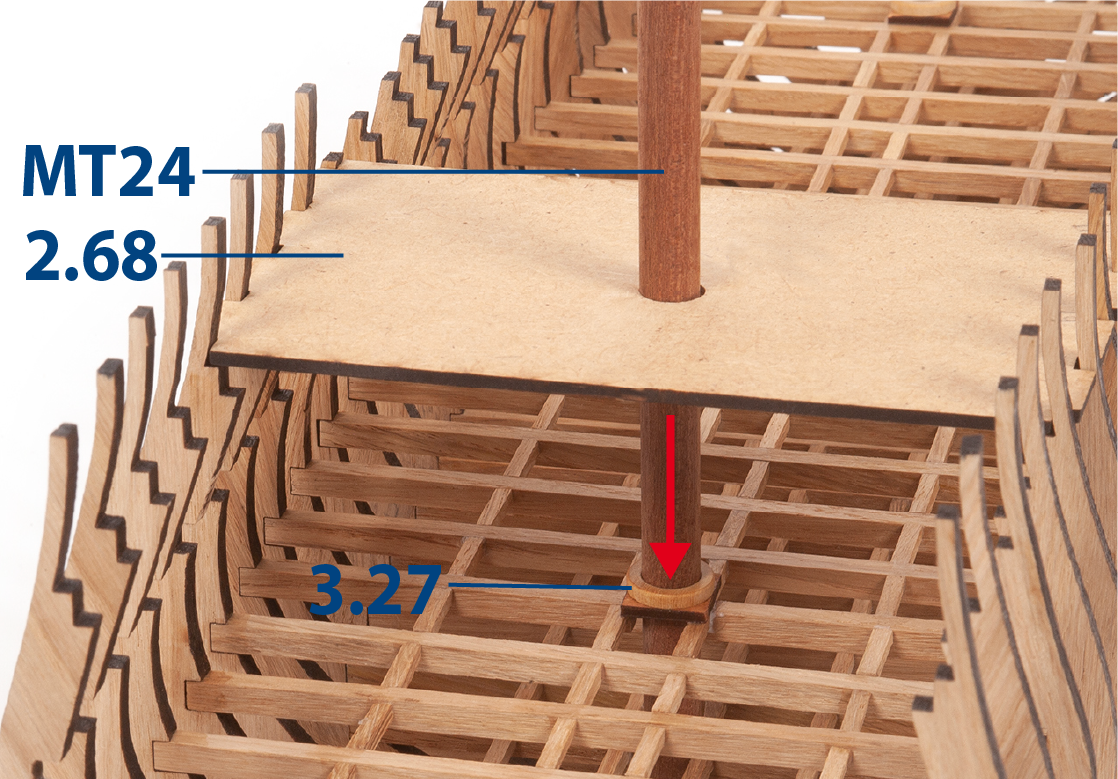
Glue a 3.27 ring (ø10 mm) centred on a 3.26 piece. Repeat the process to get another set of the same.
You can check that you have the correct ring by test-fitting it onto mast MT24.
ステップ 14
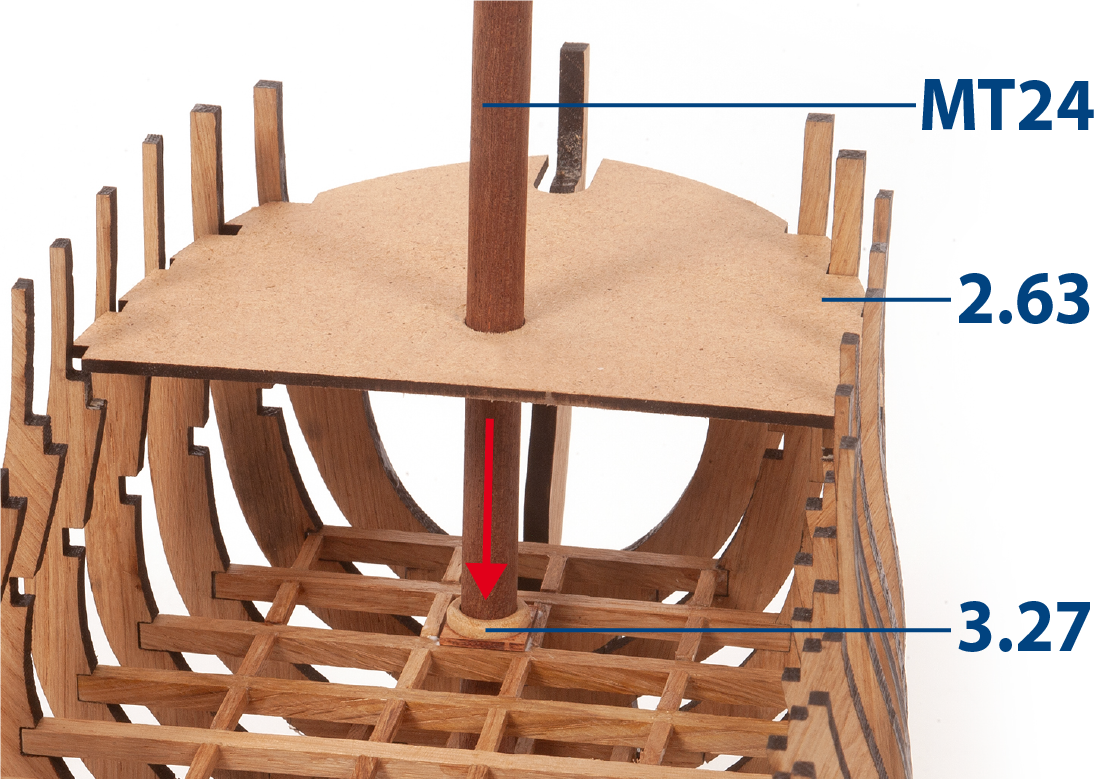
Use parts 2.63 and MT24 to align the holes for the mast. Then glue one of the assemblies together permanently.
Use a craft knife to enlarge the hole 3.27 if the mast fit is too tight.
ステップ 15
Proceed in the same way to line up the holes for the centre mast, using parts MT24 and 2.68. Glue the other assembly.
Use a craft knife to enlarge the hole 3.27 if the mast fit is too tight.
ステップ 16
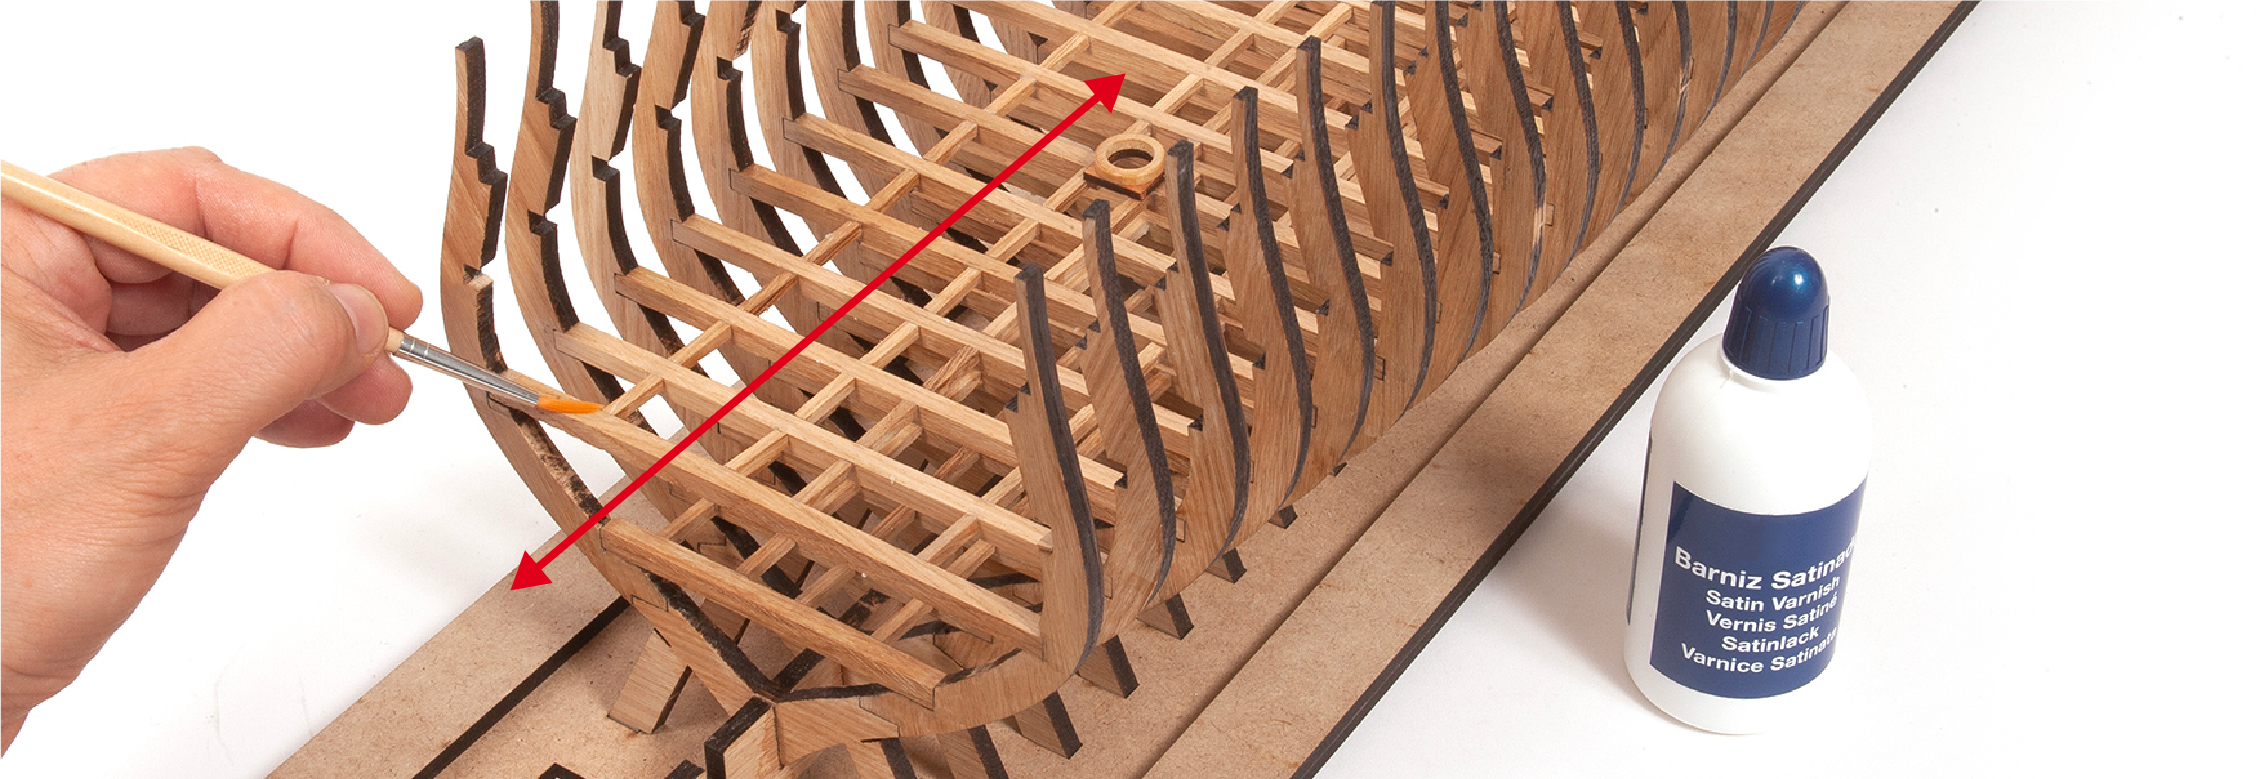
Apply varnish to all added parts.
ステップ 1
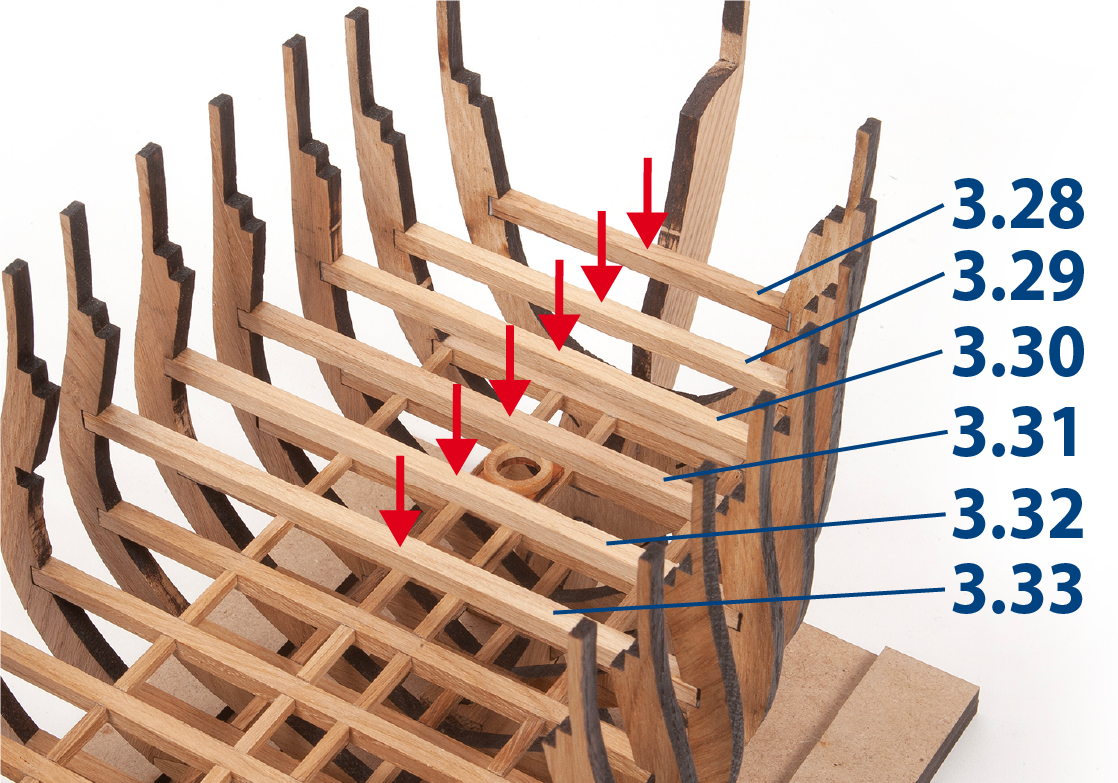
Cut to length and glue parts 3.28 to 3.33 (5 x 5mm).
ステップ 2
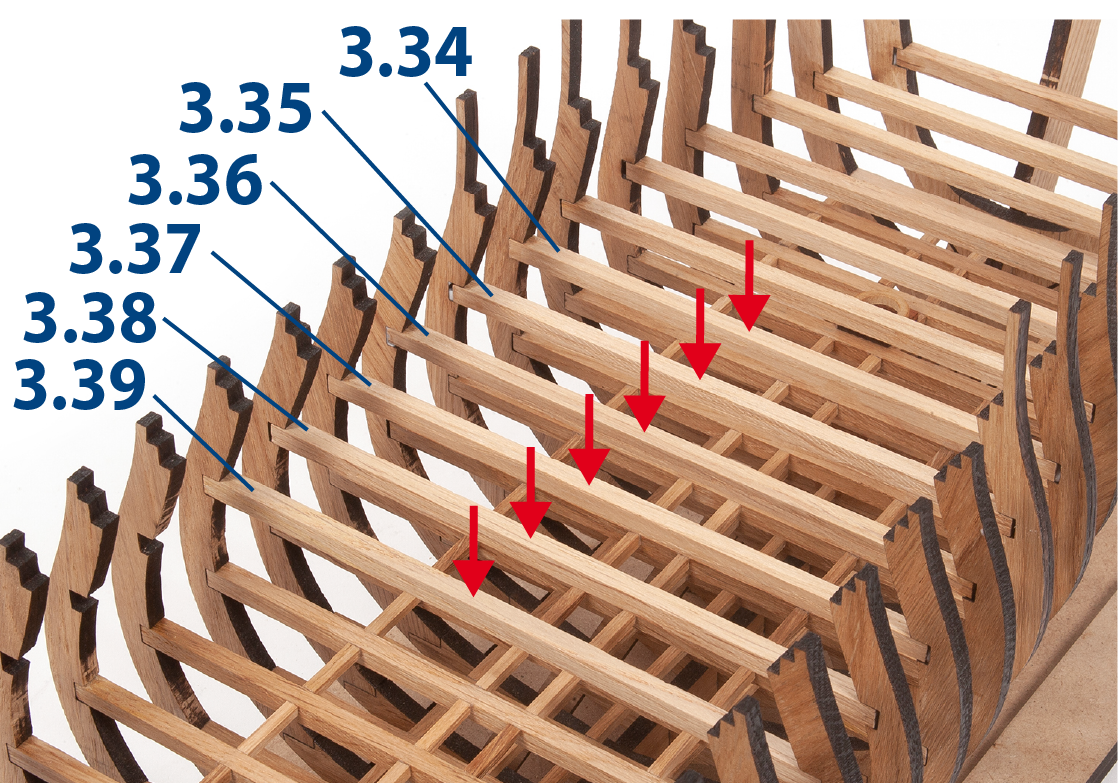
Cut to length and glue parts 3.34 to 3.39 (5 x 5mm).
ステップ 3
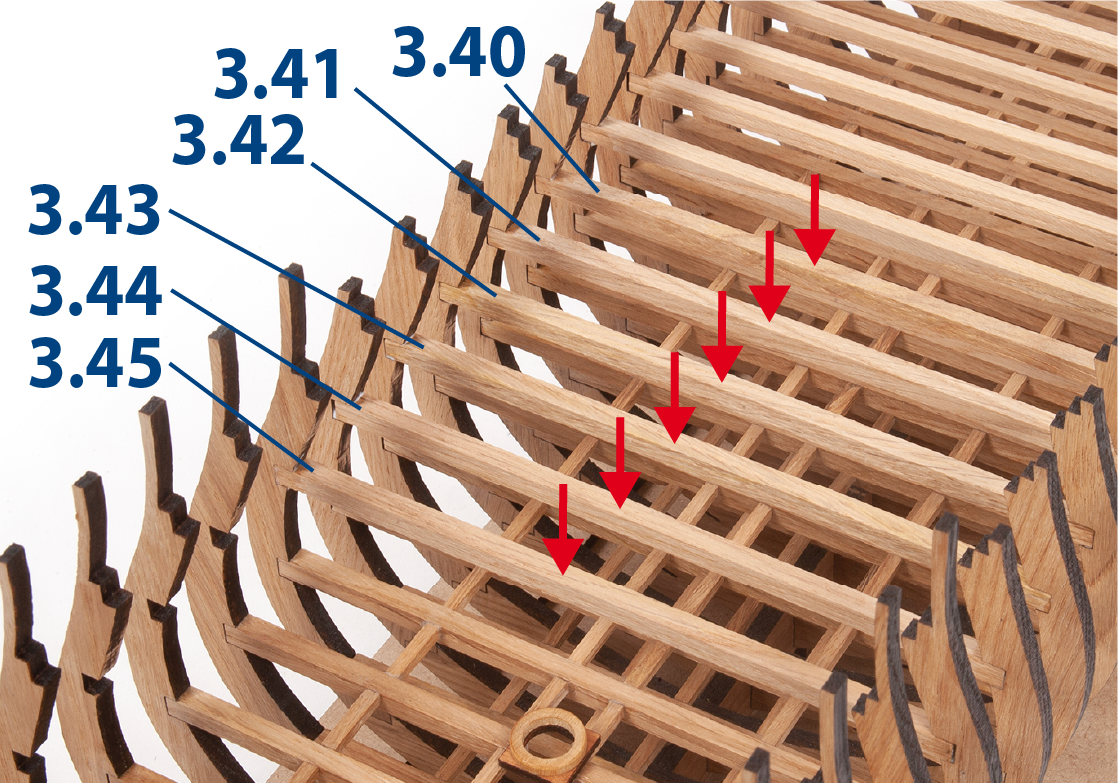
Cut to length and glue pieces 3.40 to 3.45 (5 x 5mm).
ステップ 4
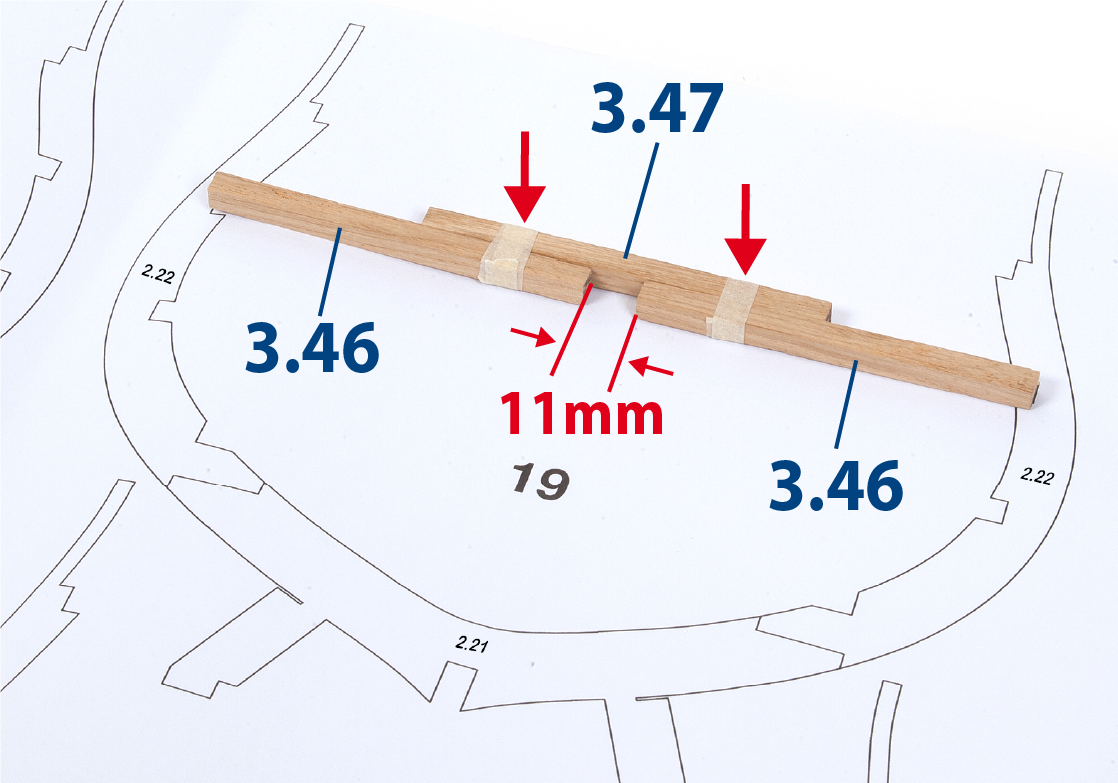
Use a 5 x 5mm strip and the template for frame 19 to cut two pieces 3.46 and one piece 3.47 to size. Temporarily join these pieces together with two pieces of masking tape.
ステップ 5
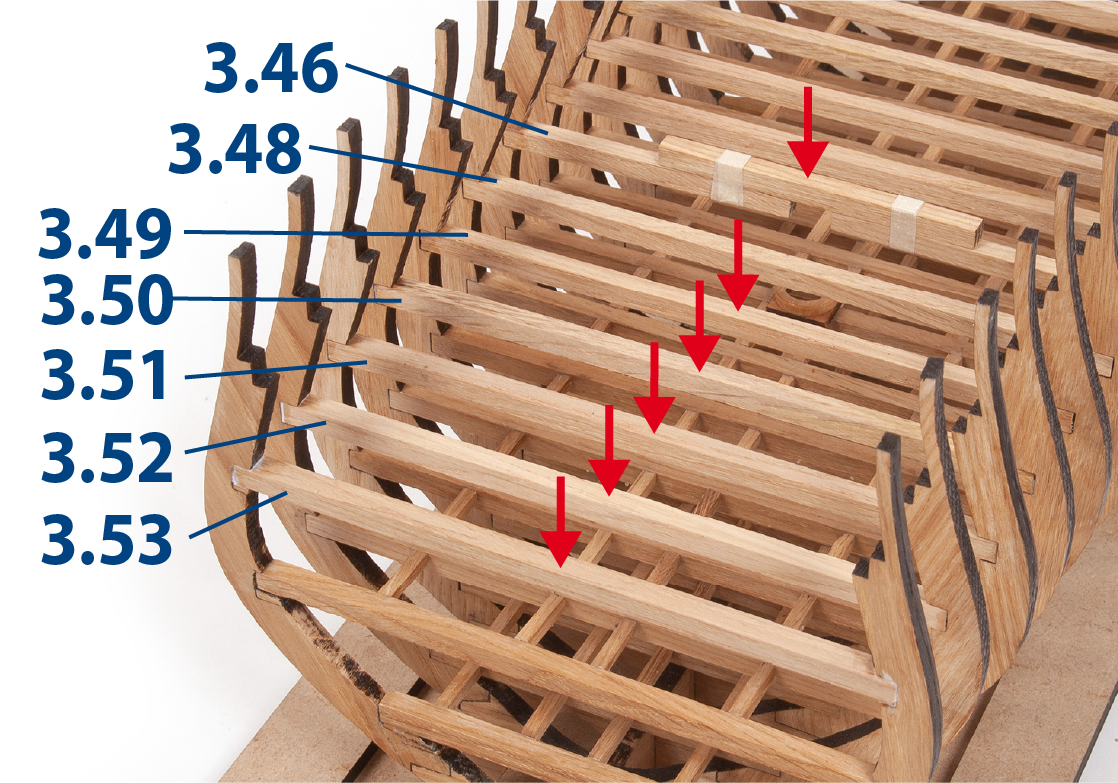
Glue parts 3.46 to 3.53 (5 x 5mm) into the recesses of the following frames.
Once the glue on 3.46 has dried you can remove the masking tape and temporary join.
ステップ 6
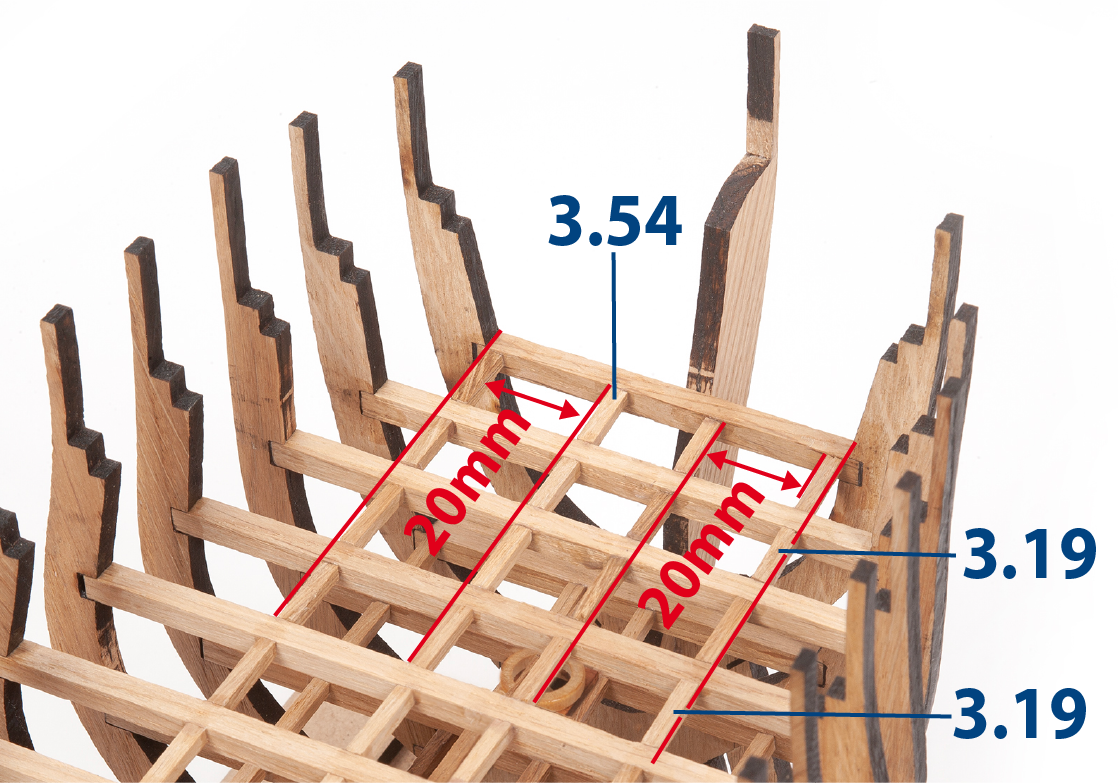
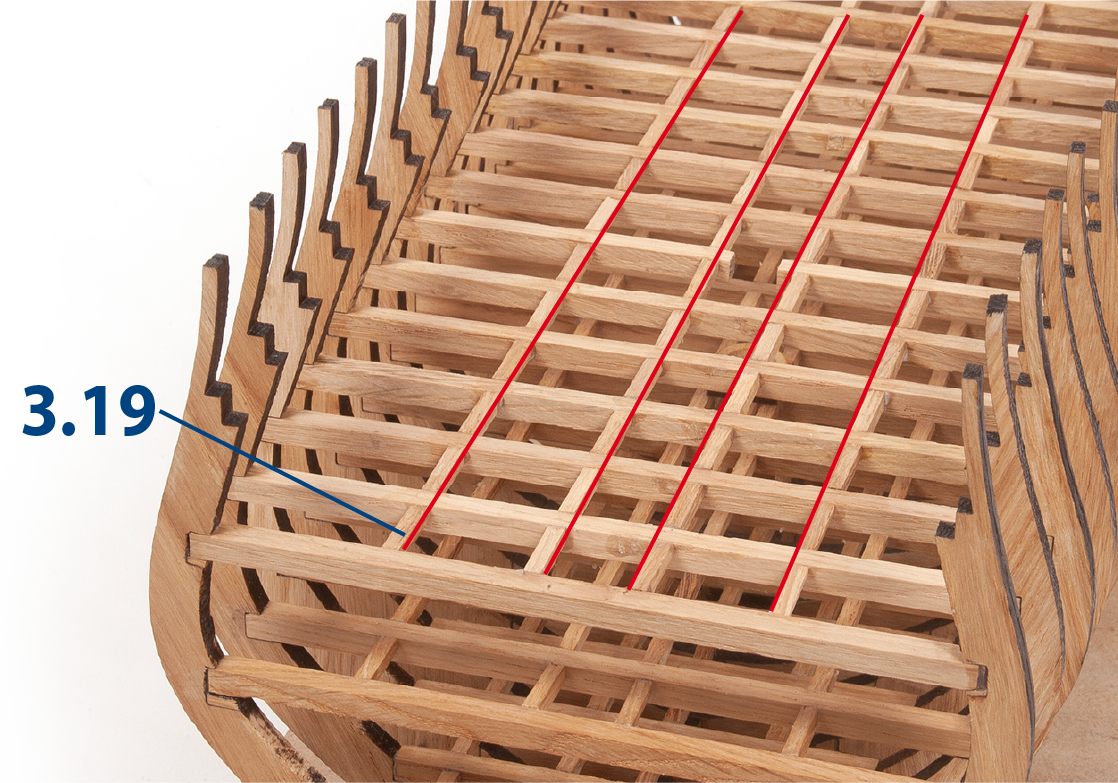
Cut to size four pieces 3.54 (3 x 3mm) and glue them in place. Then cut and glue the pieces 3.19 after the previous ones.
ステップ 7
Continue gluing pieces 3.19 in line with the previous ones.
ステップ 8
A total of 92 pieces of part 3.19 must be glued in place.
ステップ 9
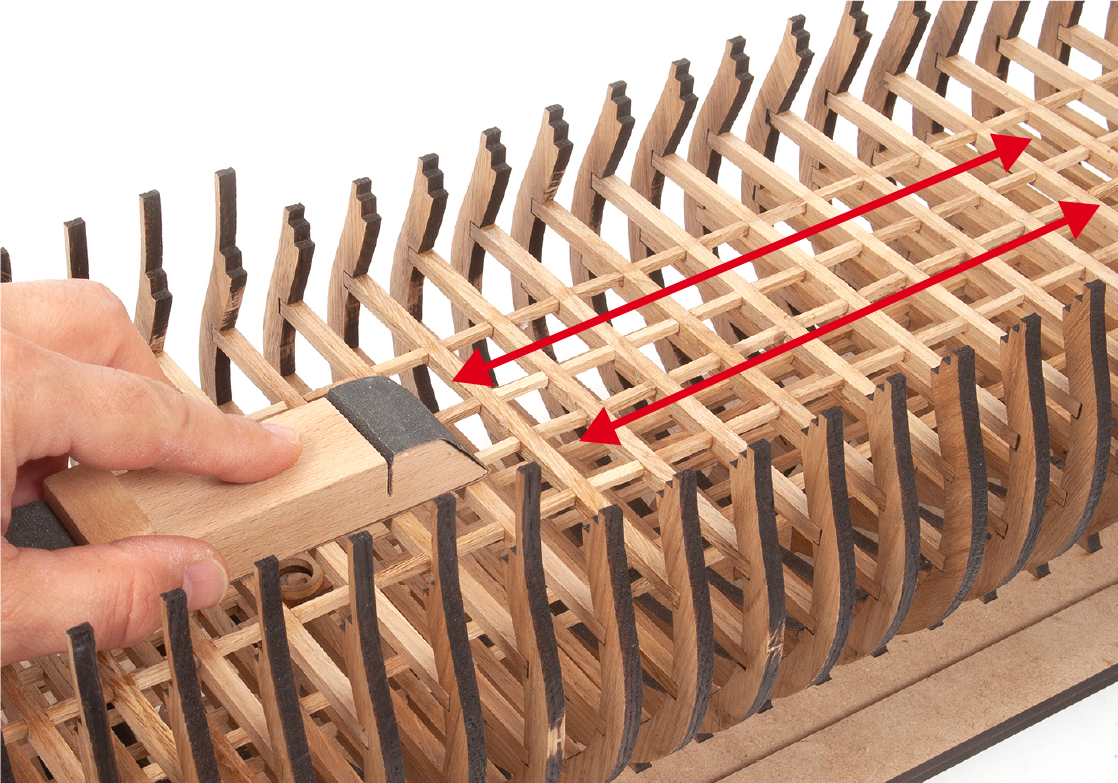
Sand the parts added to the structure with fine-grit sandpaper.
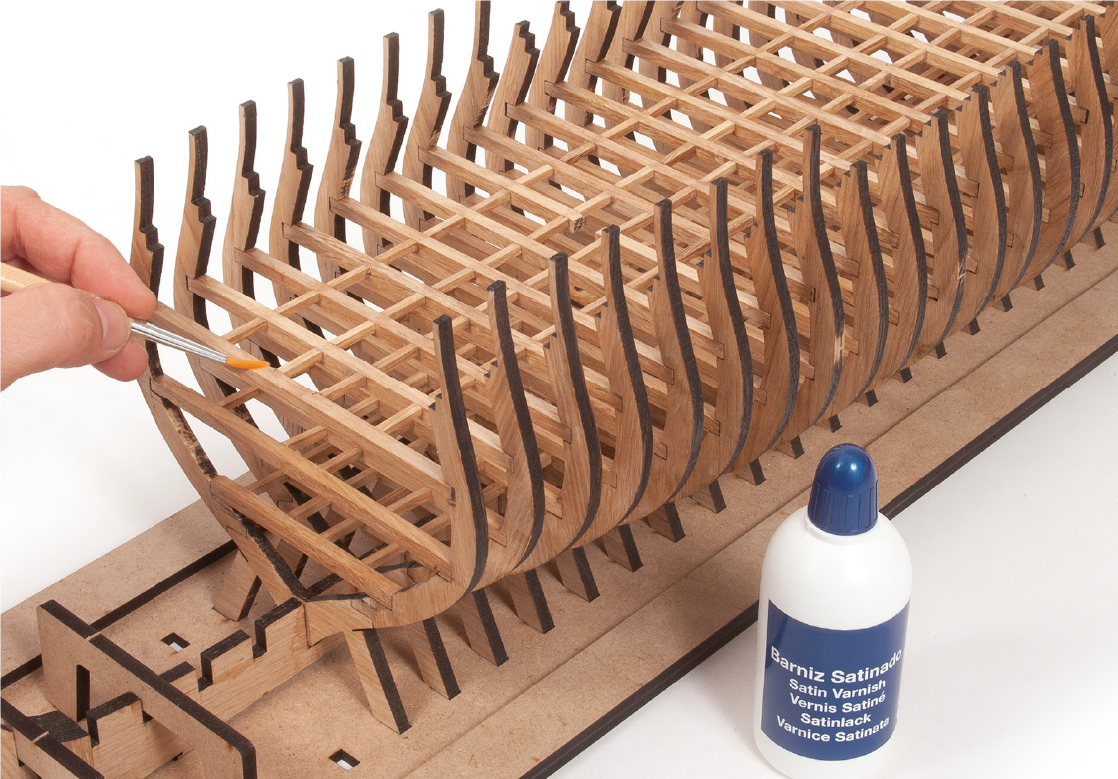
ステップ 10
Apply varnish to all added parts, except the top face of the parts in this area of the structure.
ステップ 11
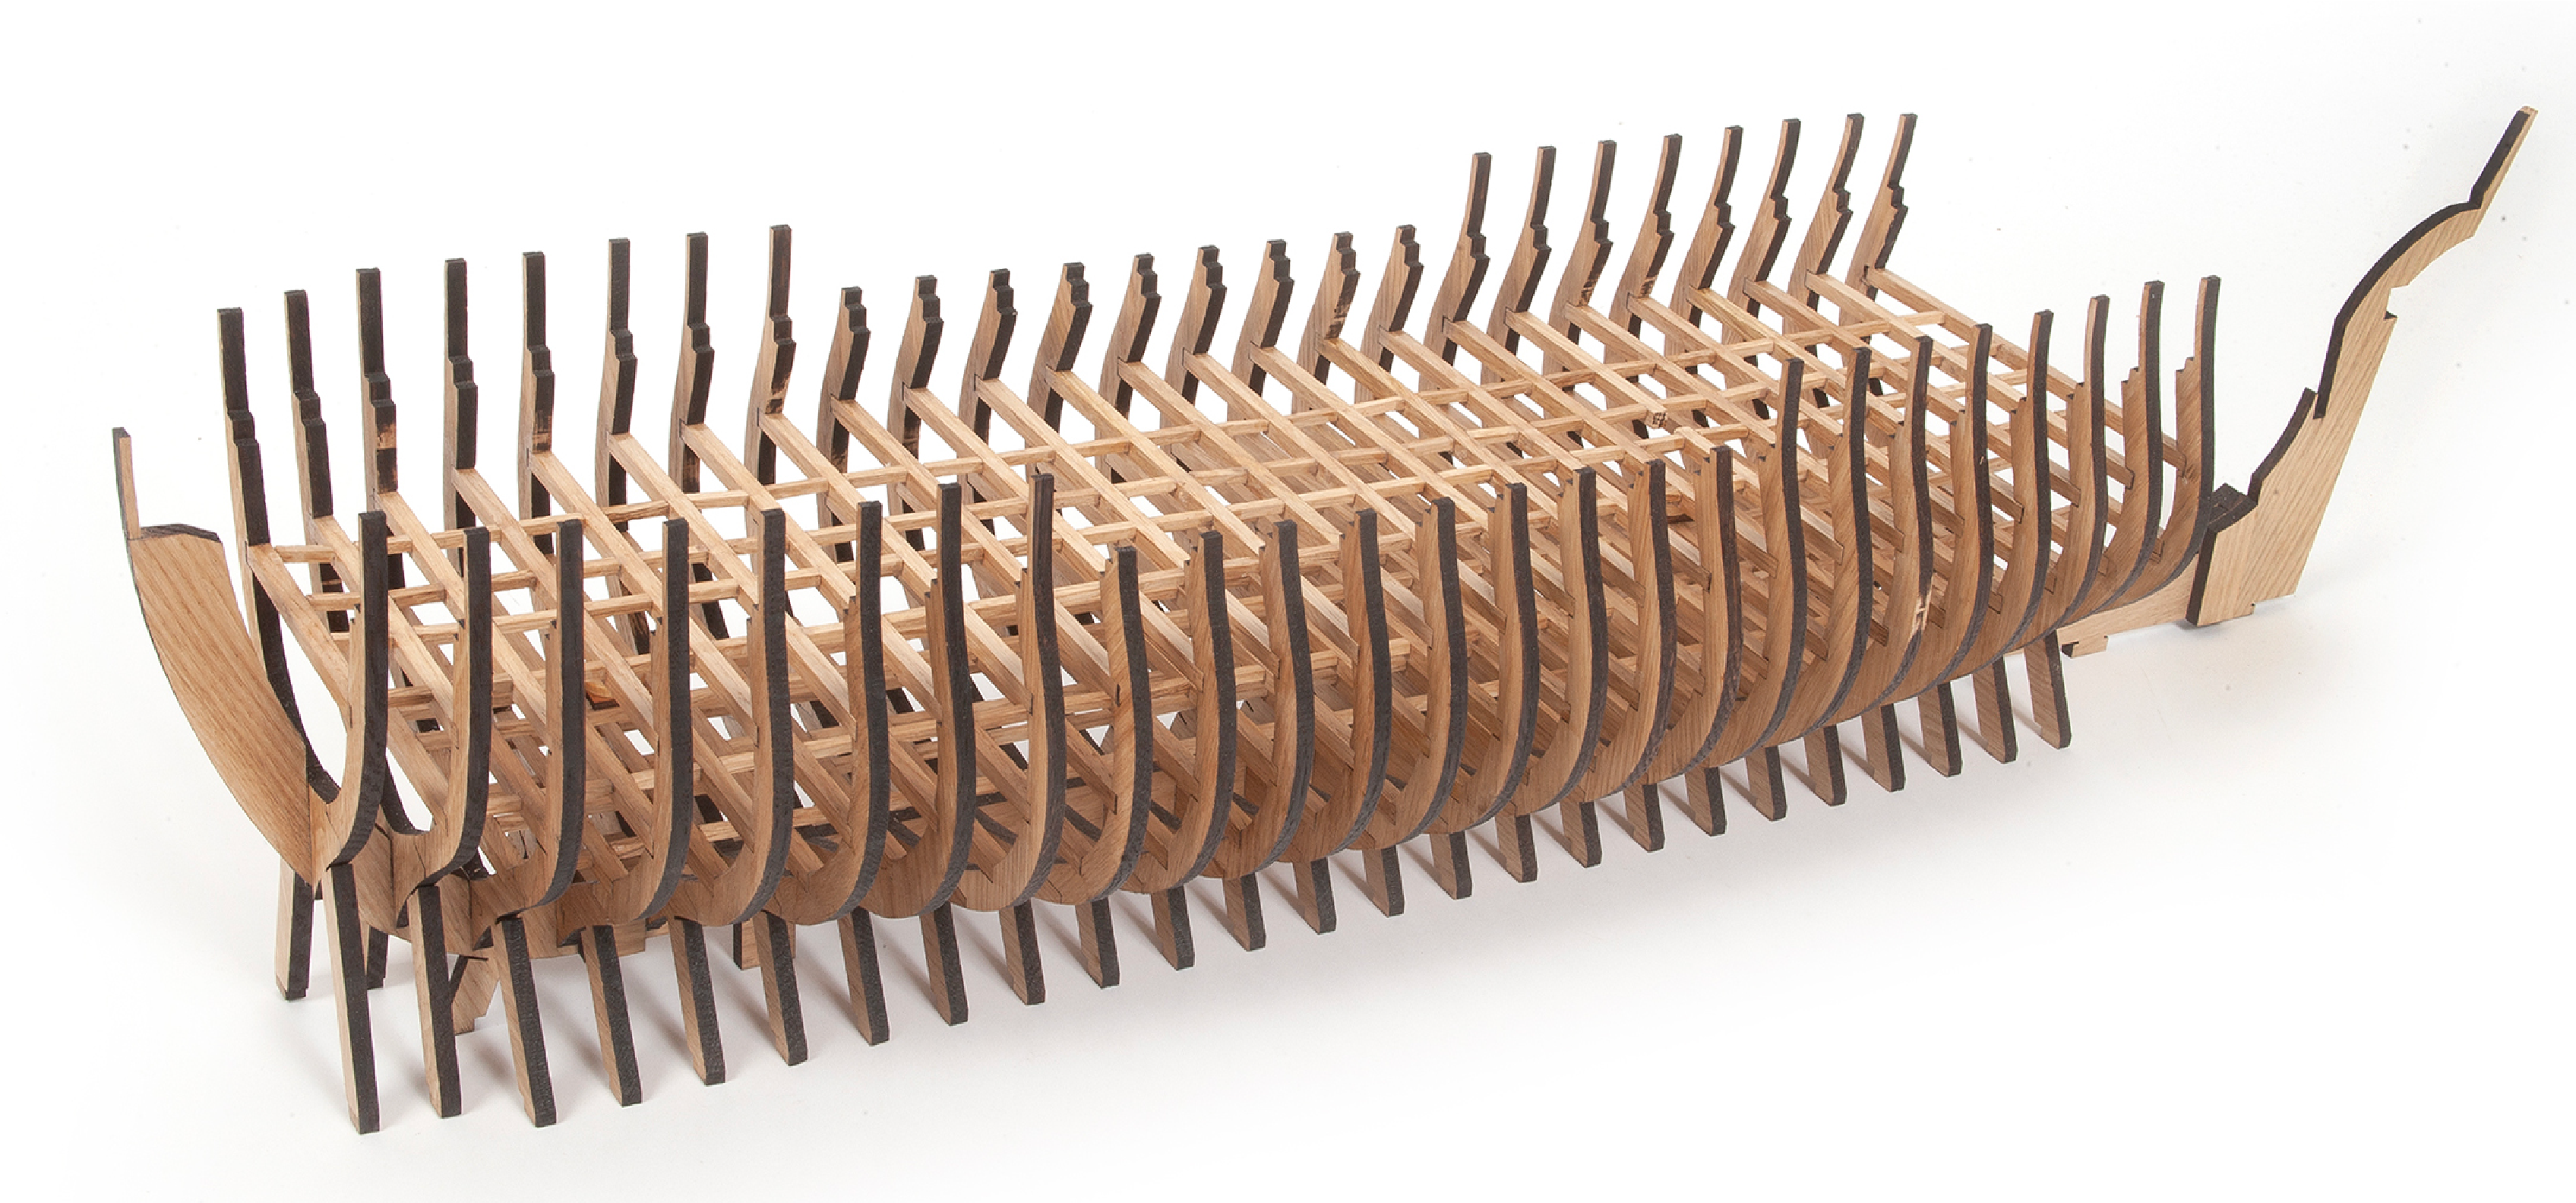
In this image we show you how the structure should look like once this stage of the assembly has been completed.