Pack 07
BUILD INSTRUCTIONS
Instructions for building your Cutty Sark model ship
Your model of the Cutty Sark is divided into 12 packs.
You will need to follow the step-by-step assembly photos, the plans and the explanatory texts below.
Please save the leftover materials from each pack for use when instructed to do so at a later stage of the assembly instructions.
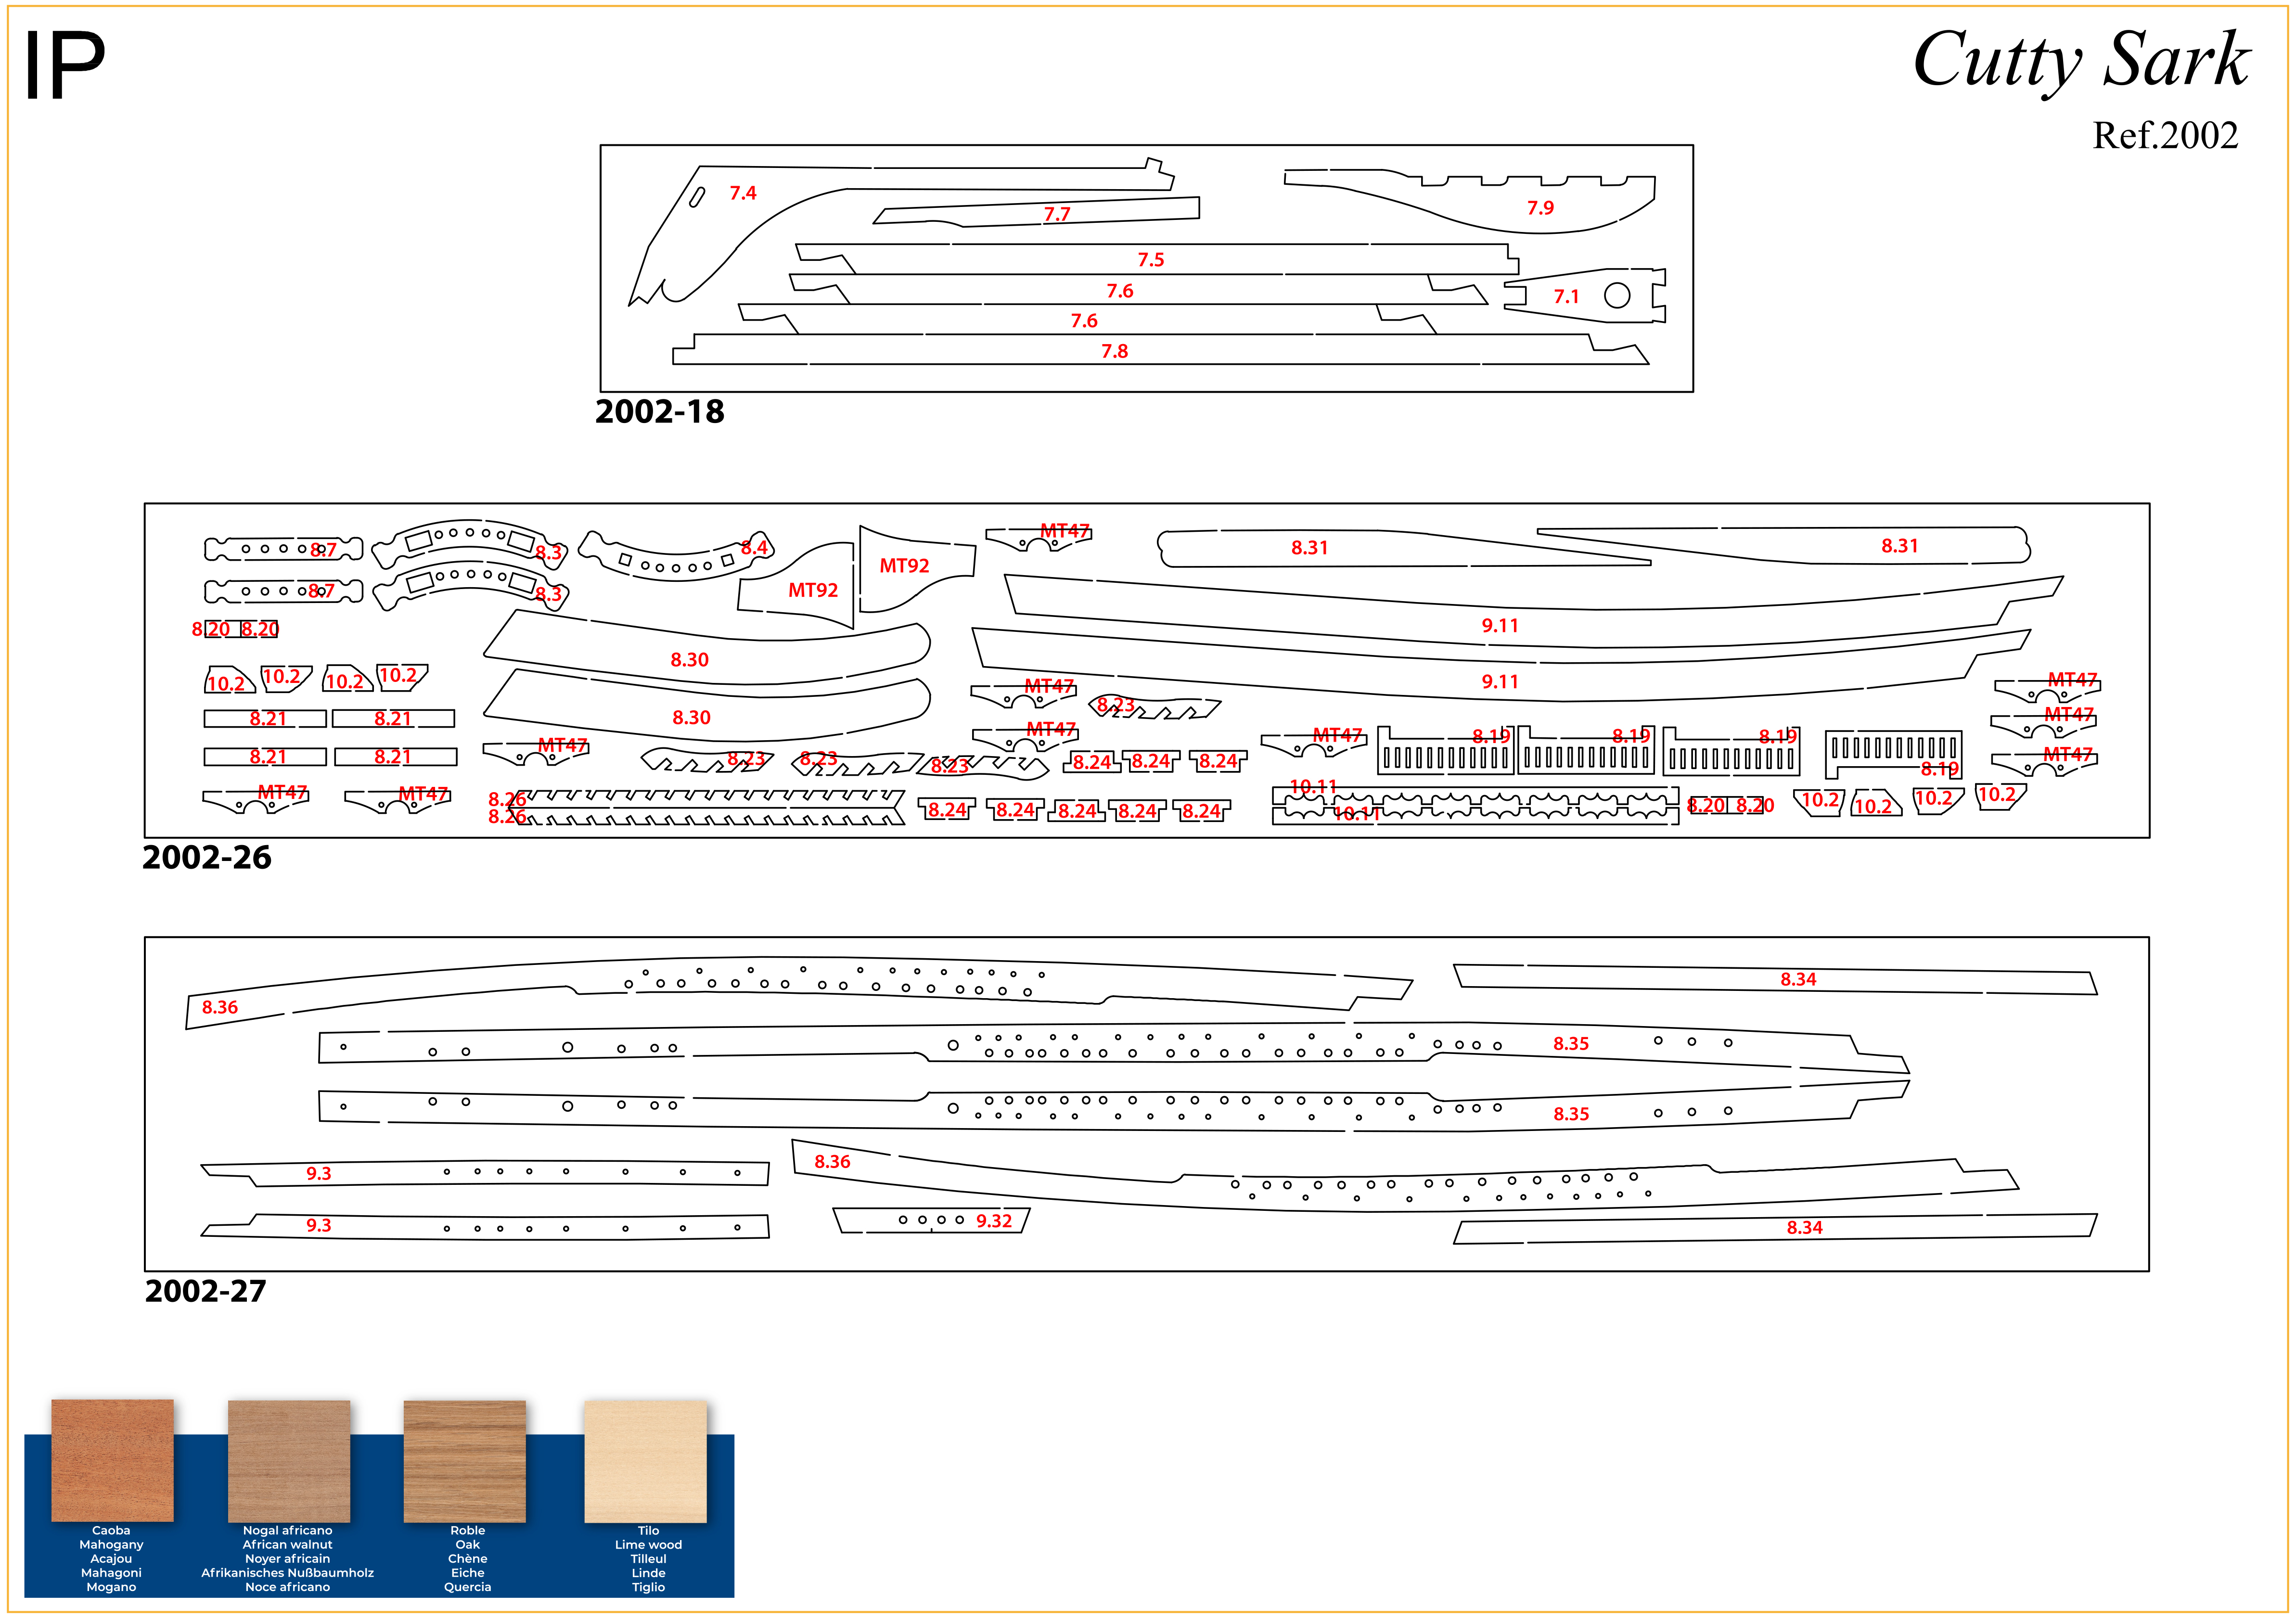
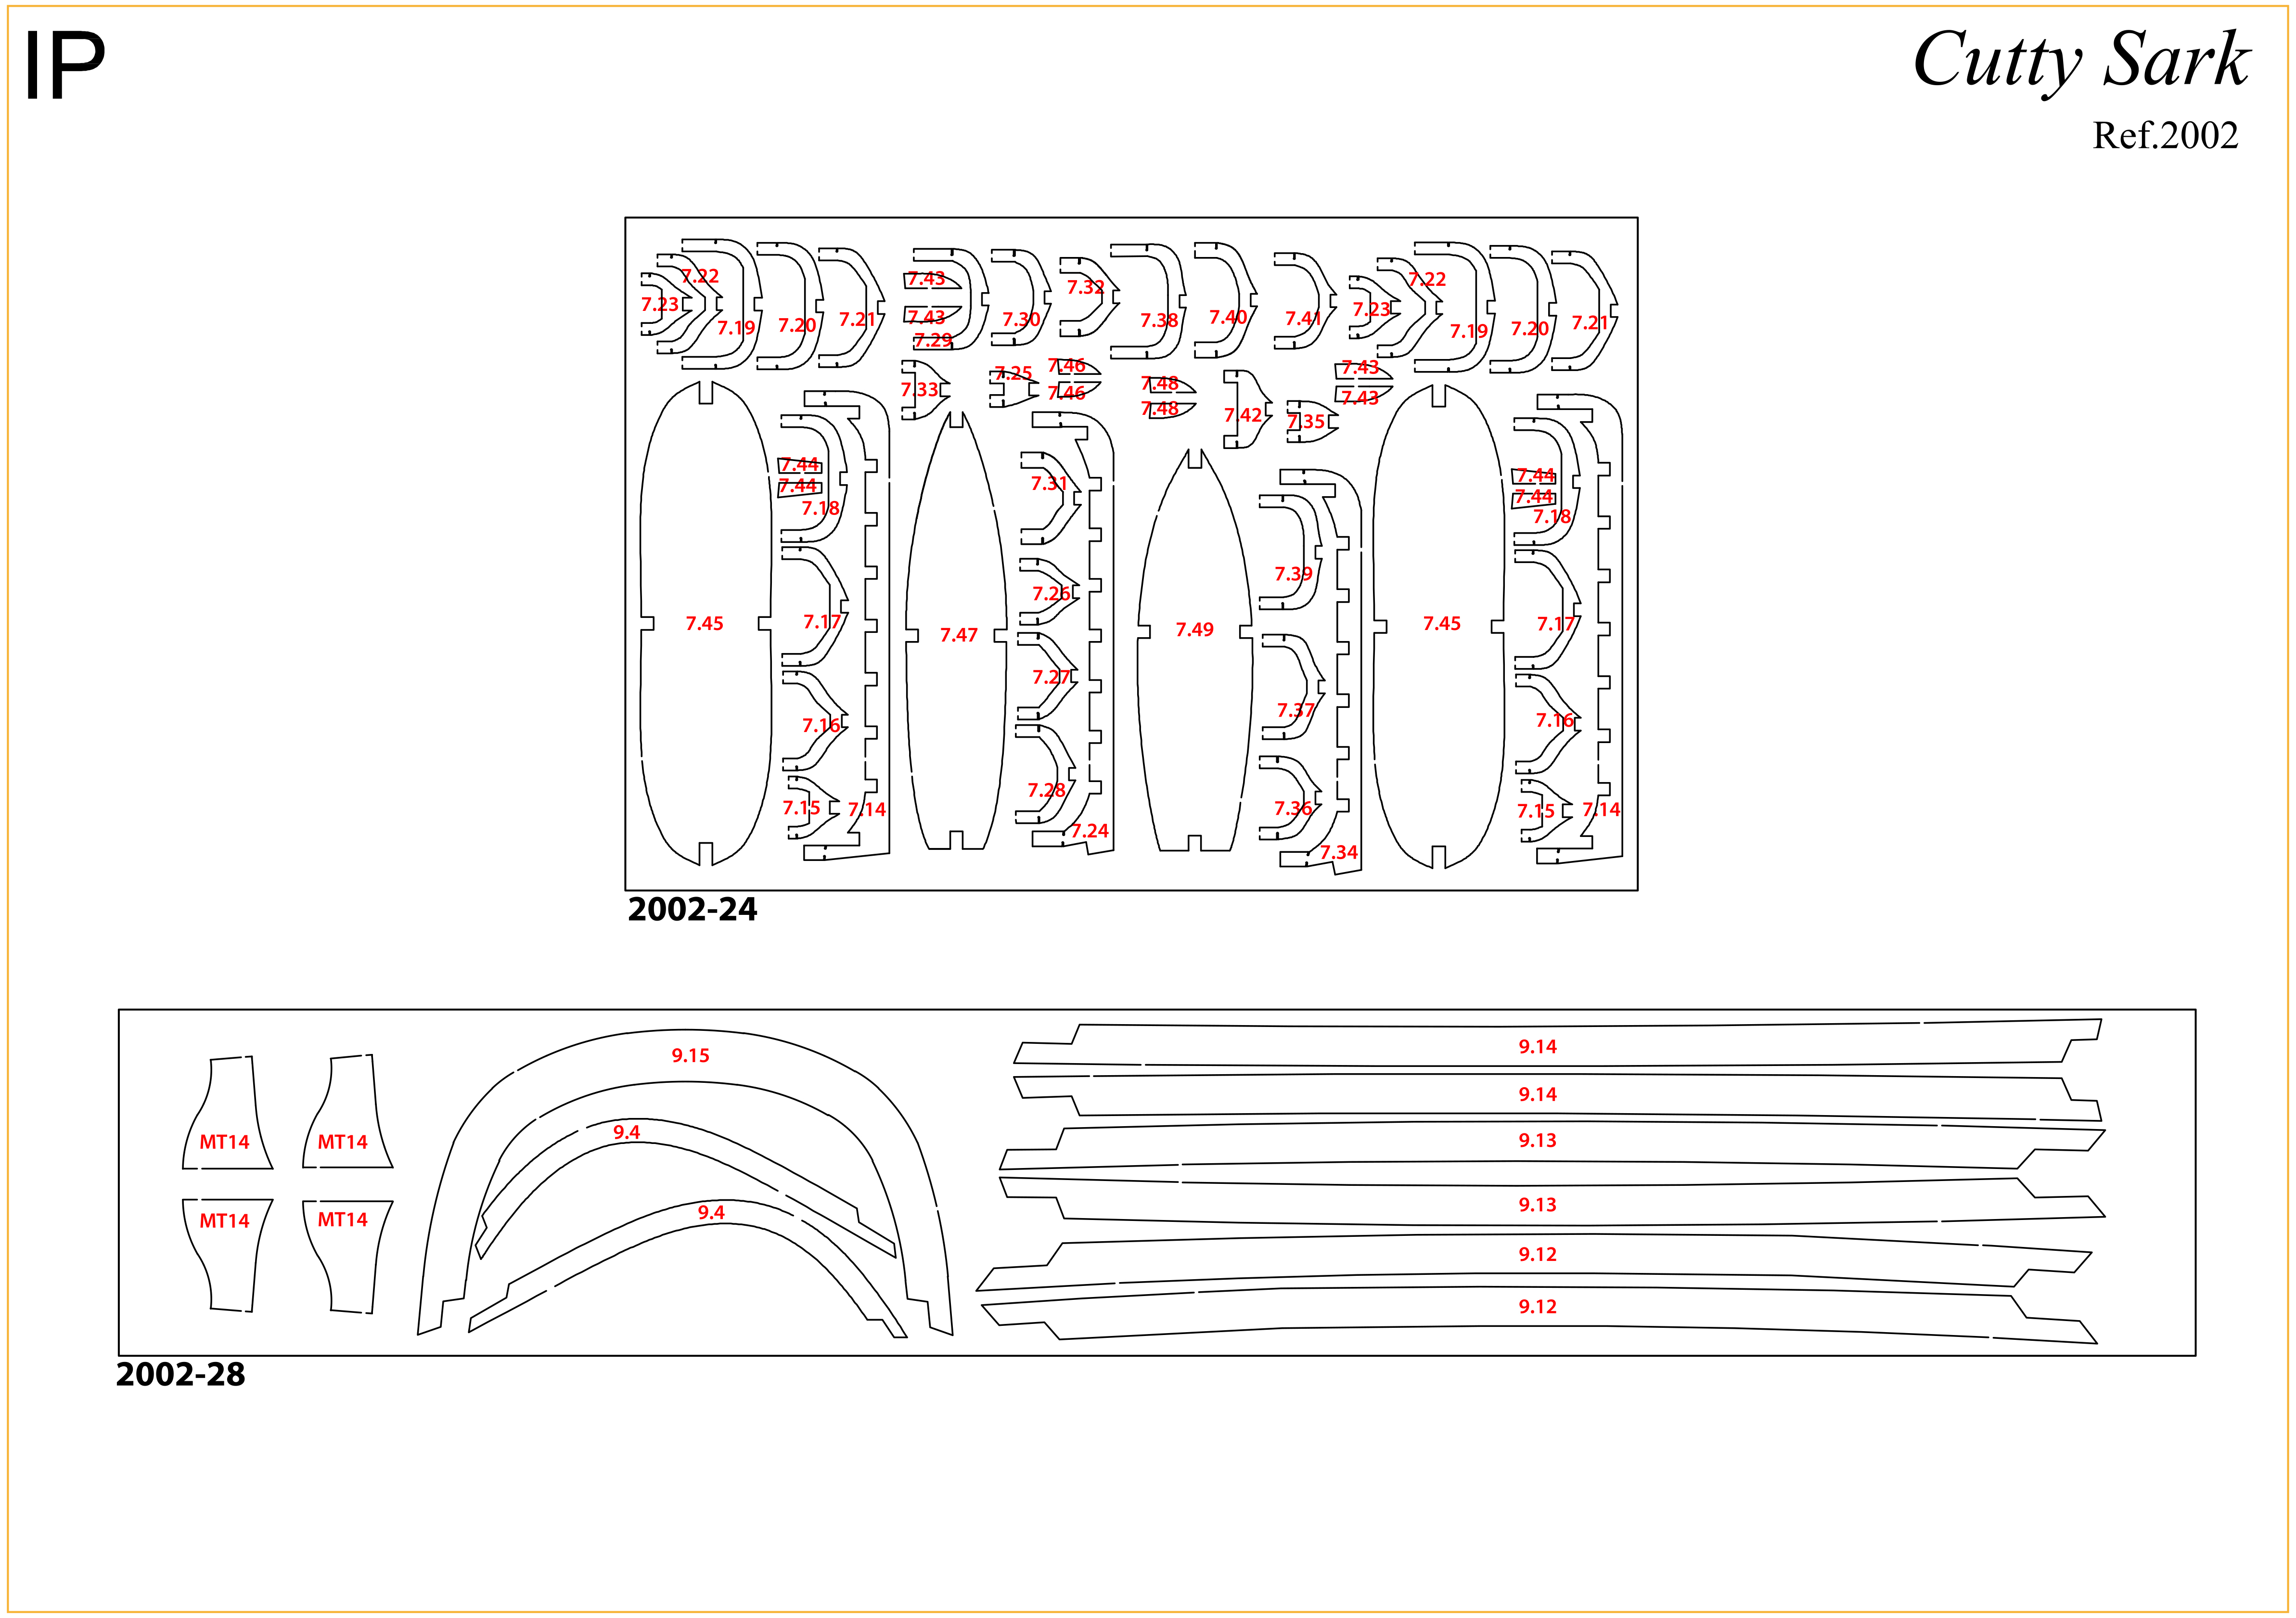
The IP sheets displayed below are drawings of laser-cut parts and photo-etched brass parts and will serve as a guide for identification of some parts.
Use the PARTS REFERENCE table to help locate the parts.
The PL-00 templates (printed at 1/1 scale) will serve as a guide for building the frames.
Please check the list below to ensure you have all the tools required for building your wooden ship.
When removing a part, cut the ribs that join the part to the wooden plate with a cutter.
Remove the parts carefully so as not to break them.
Keep and store the parts in their frames. Only remove the parts you are working on in each step.
Extra support can be found on our forum.
PARTS LIST
| Material | Quantity | |
| Wooden Boards | ||
| 2002-18 | Wood | 1 |
| 2002-24 | Wood | 1 |
| 2002-26 | Wood | 1 |
| 2002-27 | Wood | 1 |
| 2002-28 | Wood | 1 |
| Wooden Strips | ||
| 2 x 5 x 600 mm | Lime wood | 10 |
| 2 x 2 x 600 mm | Mahogany | 8 |
| 2 x 2 x 600 mm | Lime wood | 3 |
| 1 x 3 x 600 mm | Lime wood | 20 |
| 4 x 4 x 600 mm | Mahogany | 1 |
| 1 x 5 x 600 mm | Lime wood | 10 |
| 5 x 5 x 600 mm | African walnut | 1 |
| 2 x 5 x 600 mm | Mahogany | 60 |
| Other | ||
| Mooring rope fairlead (9.41) | Brass | 2 |
| Bitt (10mm) (9.31) | Brass | 10 |
| Boat davits (9.22) | Brass | 4 |
| Binnacle (8.2) | Brass | 1 |
| Stair arch (10.22) | Brass | 1 |
| Lifebuoy (8.18) | Brass | 2 |
| Navigation light (8.17) | Brass | 2 |
| Bucket (9.34) | Brass | 2 |
| Signal cannon (9.24) | Brass | 1 |
| Lever (8.14) | Brass | 1 |
| Dorade cowl (9.28) | Brass | 2 |
| Rudder pintles and gudgeons (7.12) | Brass | 8 |
| Flower escutcheon (9.7) | Brass | 2 |
| Chain (1.5 x 1000 mm) | Brass | 1 |
| Wire (ø1.5 x 400 mm) | Brass | 1 |
| Wire (ø1 x 400mm) | Brass | 4 |
| Wire (ø0.5 x 400 mm) | Brass | 25 |
| Walnut dye (100 ml) | 1 |
Tools you will need: cutting mat, pencil, cutting knife, fine-grit sandpaper or sponge sandpaper, file, white wood glue, super glue (cyanoacrylate glue), masking tape, set square, hacksaw, sanding block, 30 cm steel ruler, clamps, moulding scriber tool
PACK 07 IDENTIFICATION SHEETS
For extra support and guidance, John Builds Iconic Military Models demonstrates his build of the Cutty Sark on his YouTube channel, sharing 30+ years of wooden ship-building experience. Experts can be found on our Forum.
Step 1
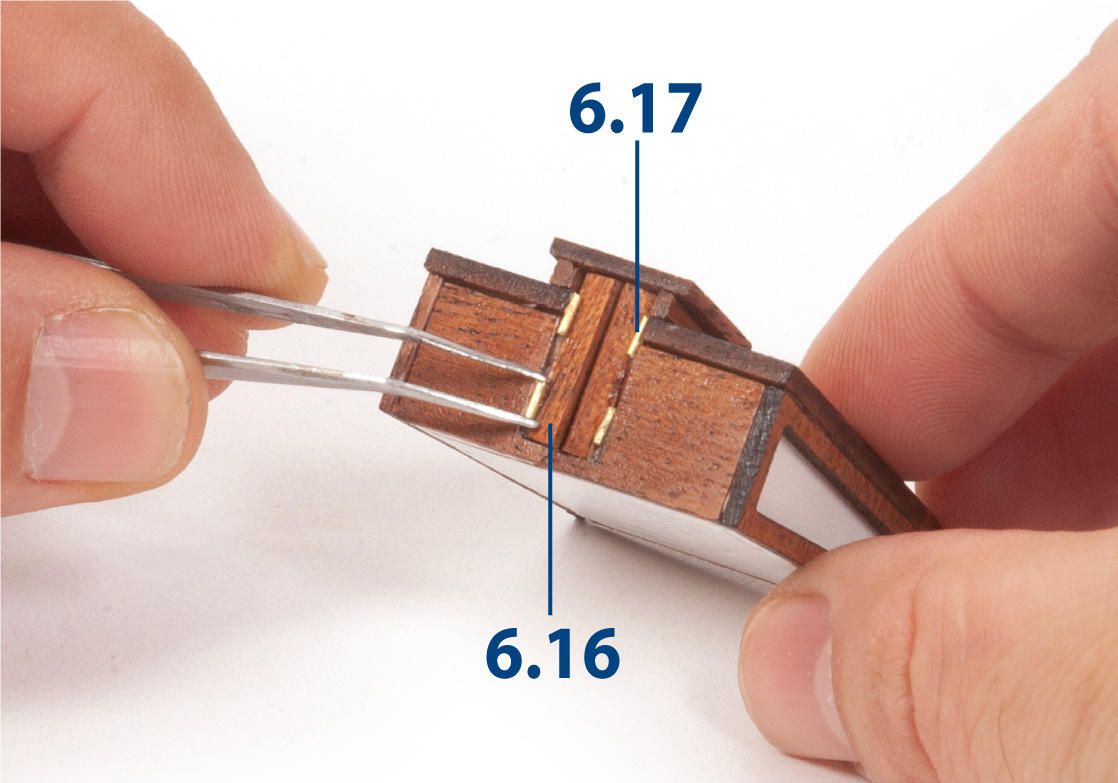
Cut the brass wire to length to create parts 6.17 (ø0.5 x 3 mm). Using tweezers, glue doors 6.16 and hinges 6.17 to the aft hatch from stage 25, as shown.
Step 2
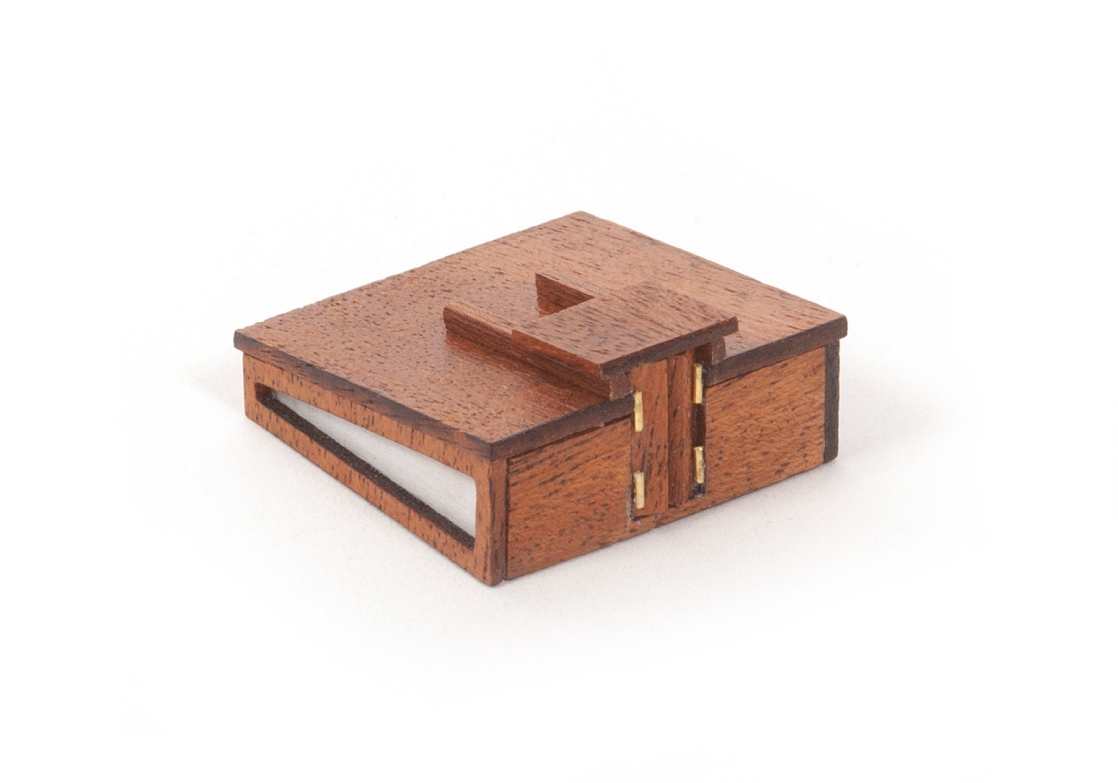
This image shows the completed aft hatch.
Step 3
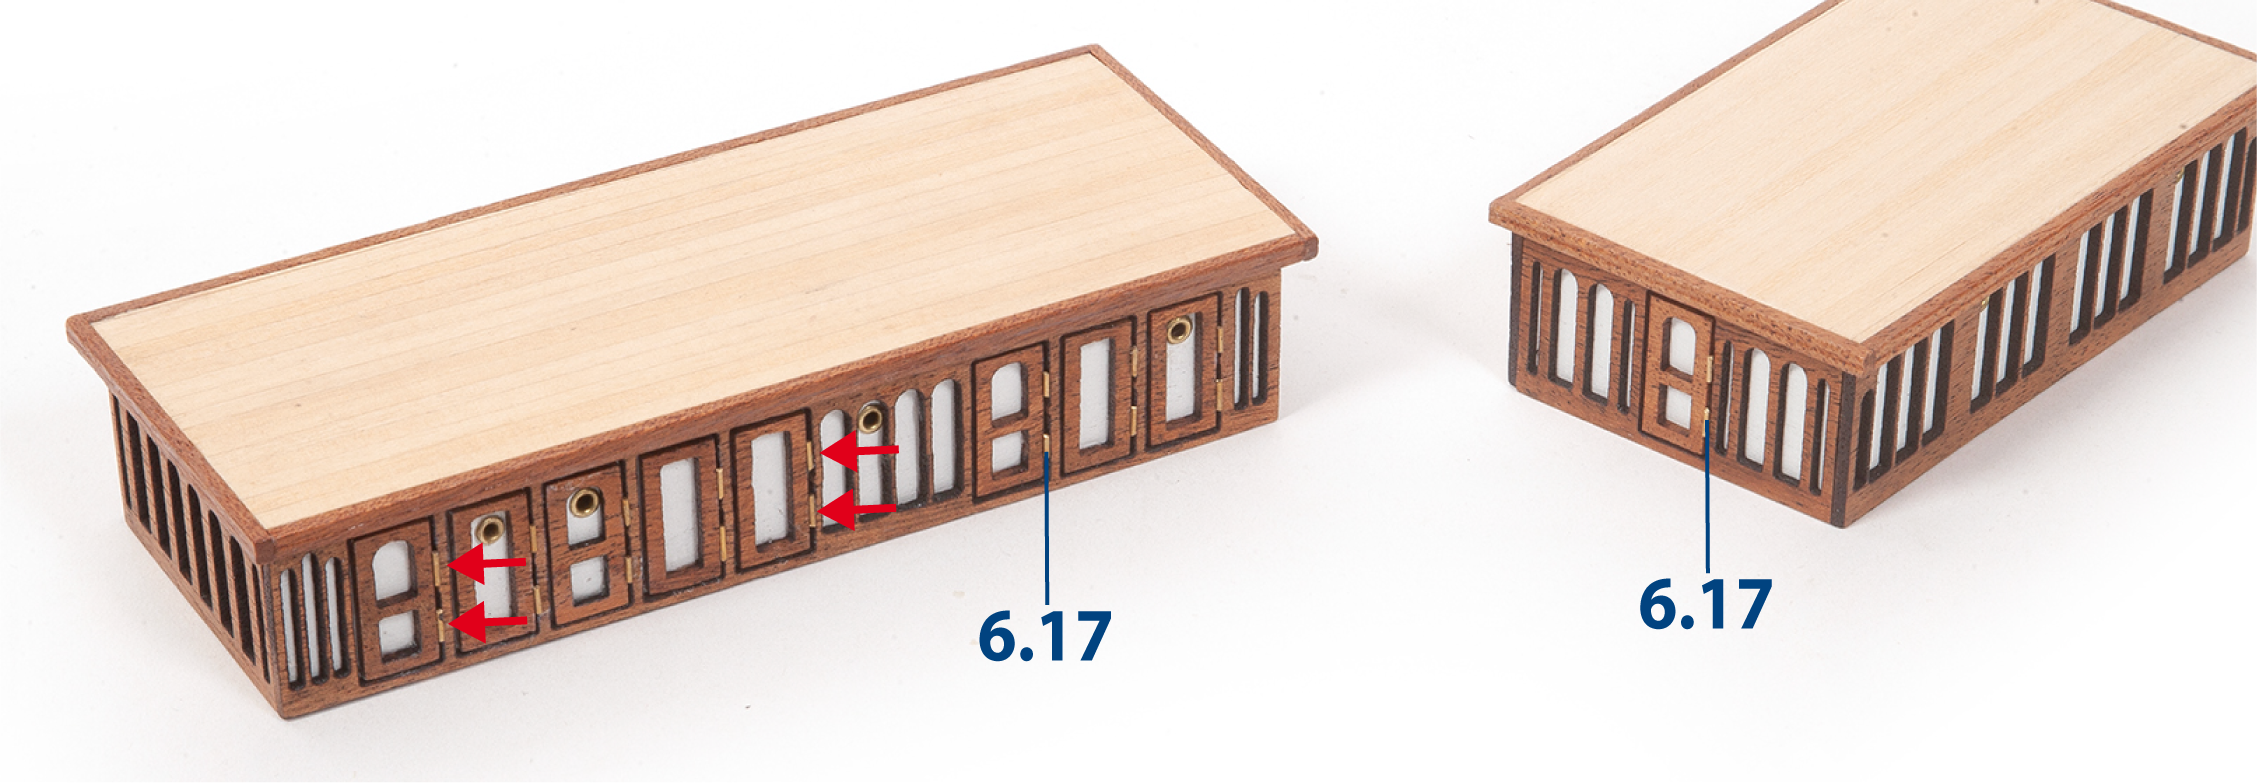
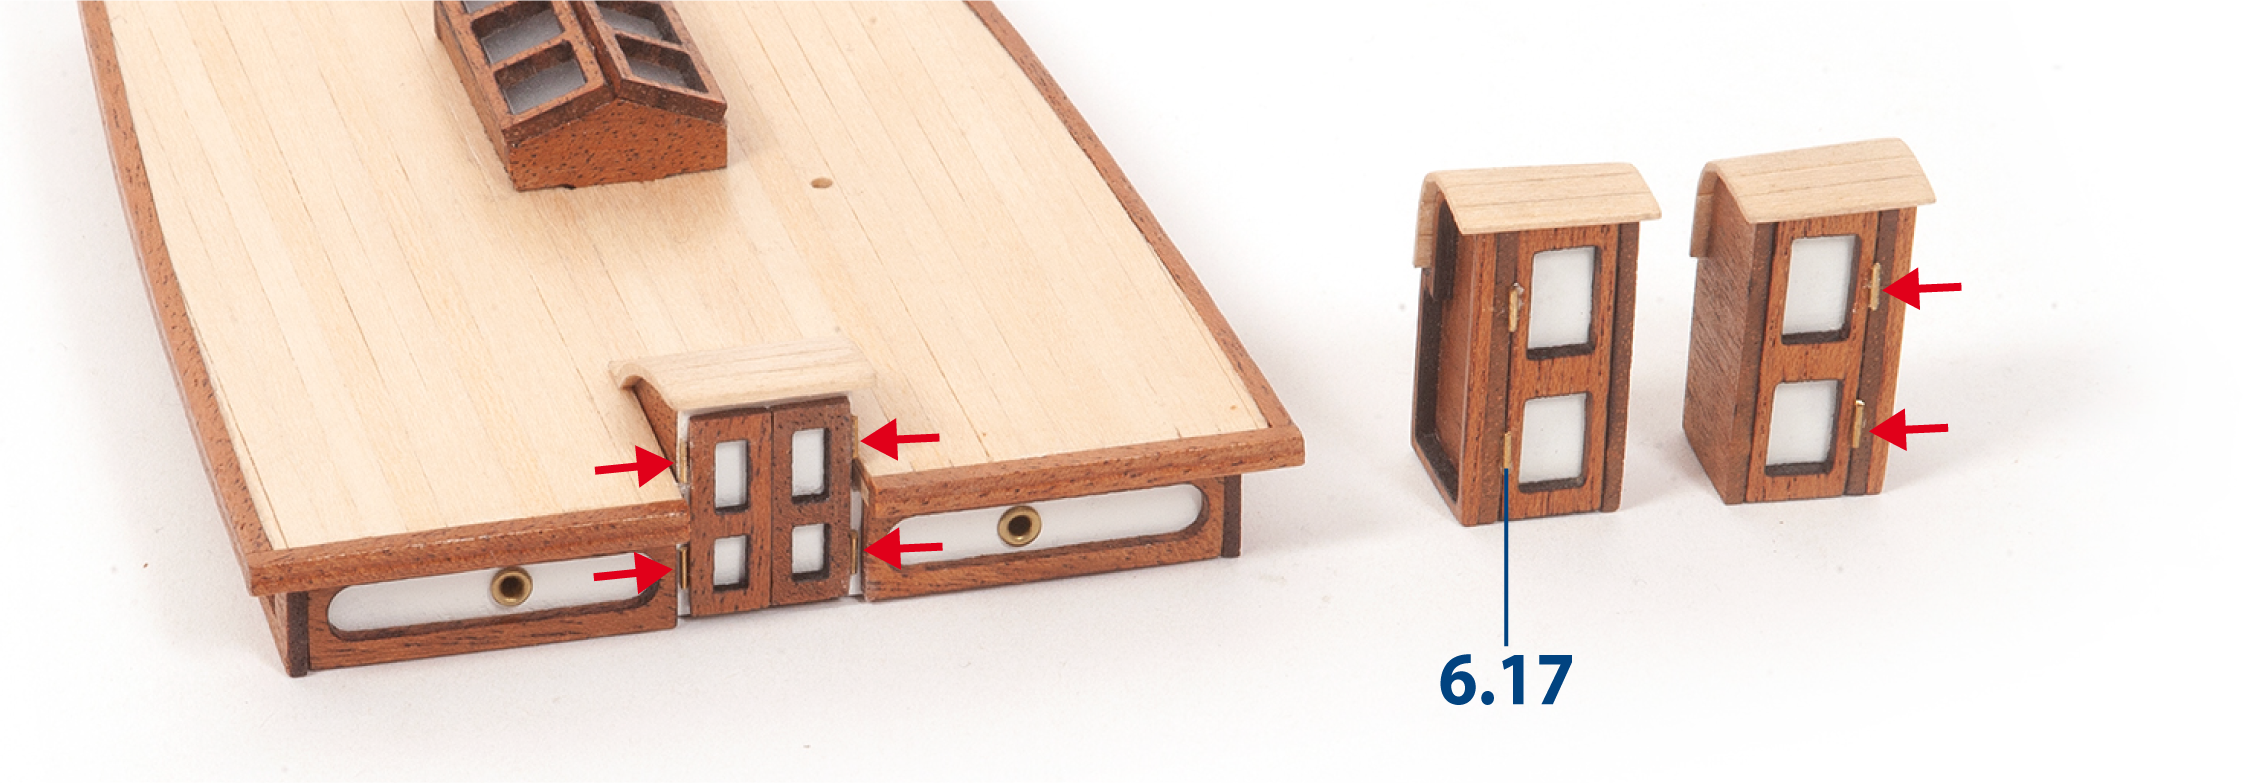
Cut additional parts 6.17 to length and glue them to all the deckhouse doors shown.
Step 4
Repeat this procedure for the doors of the poop deckhouse and latrines.
Step 5
Glue doors 6.23 to the deckhouse from stage 26, and varnish the assembly. Then cut parts 6.17 to length and glue them as shown.
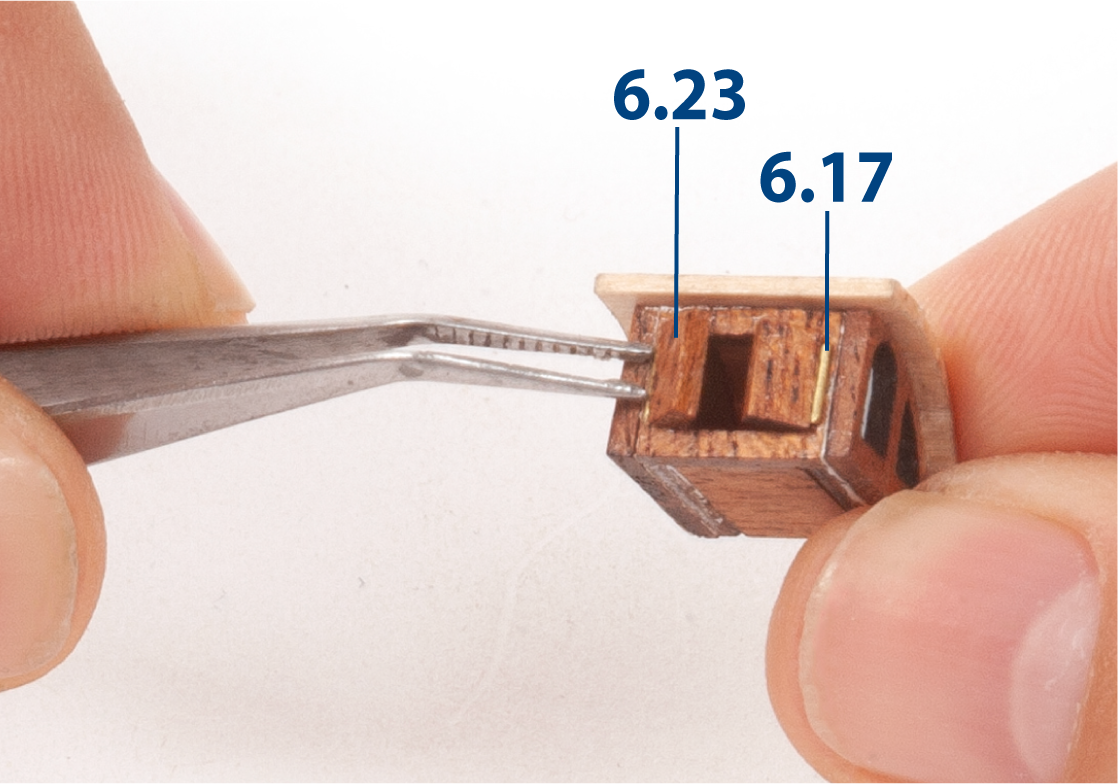
Step 6
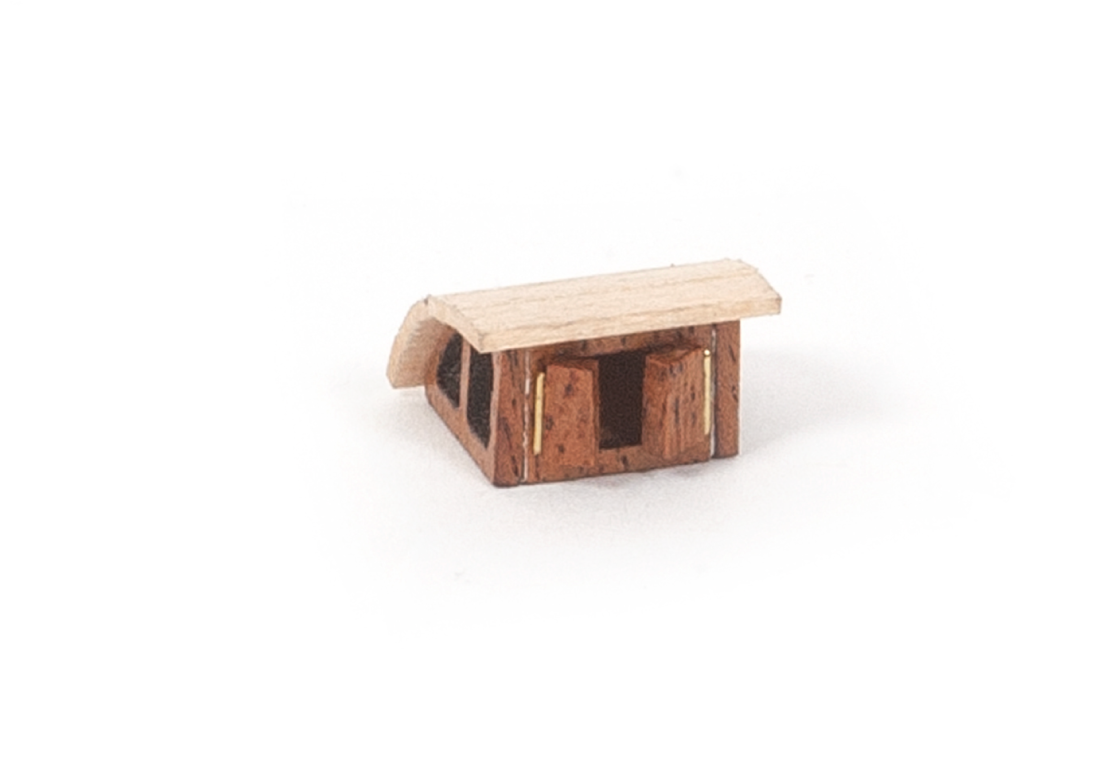
This image shows the completed assembly.
Step 7
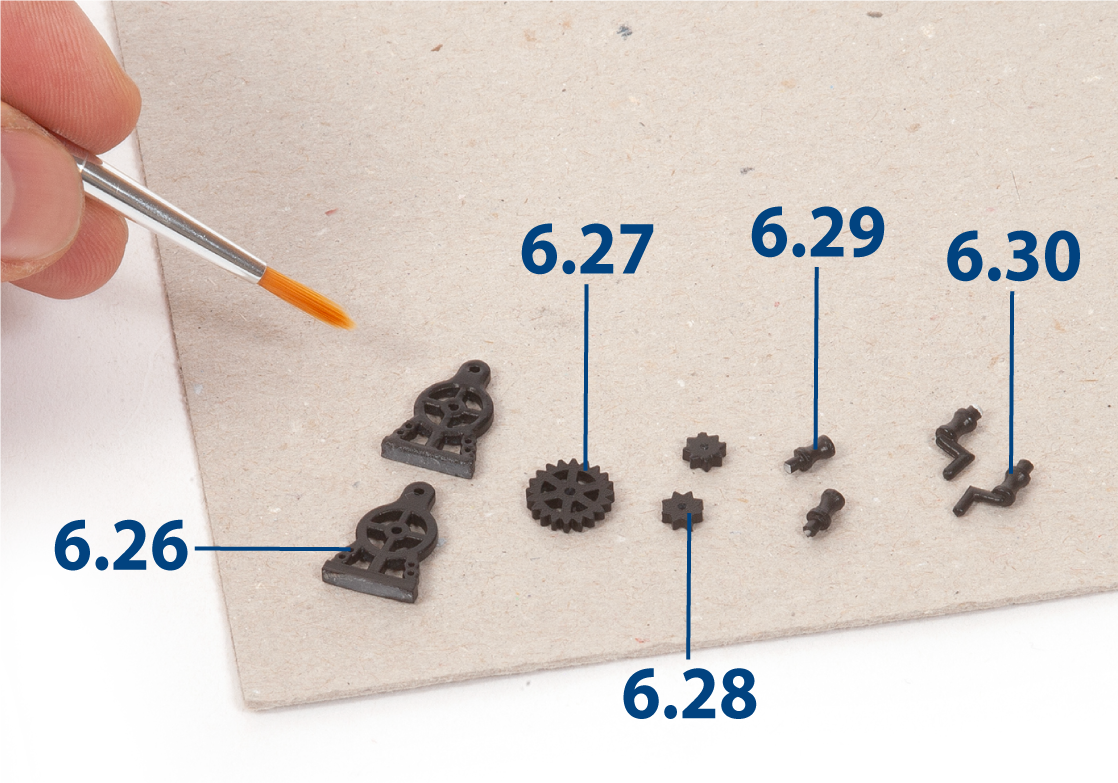
Paint the parts indicated in the image black.
Step 8
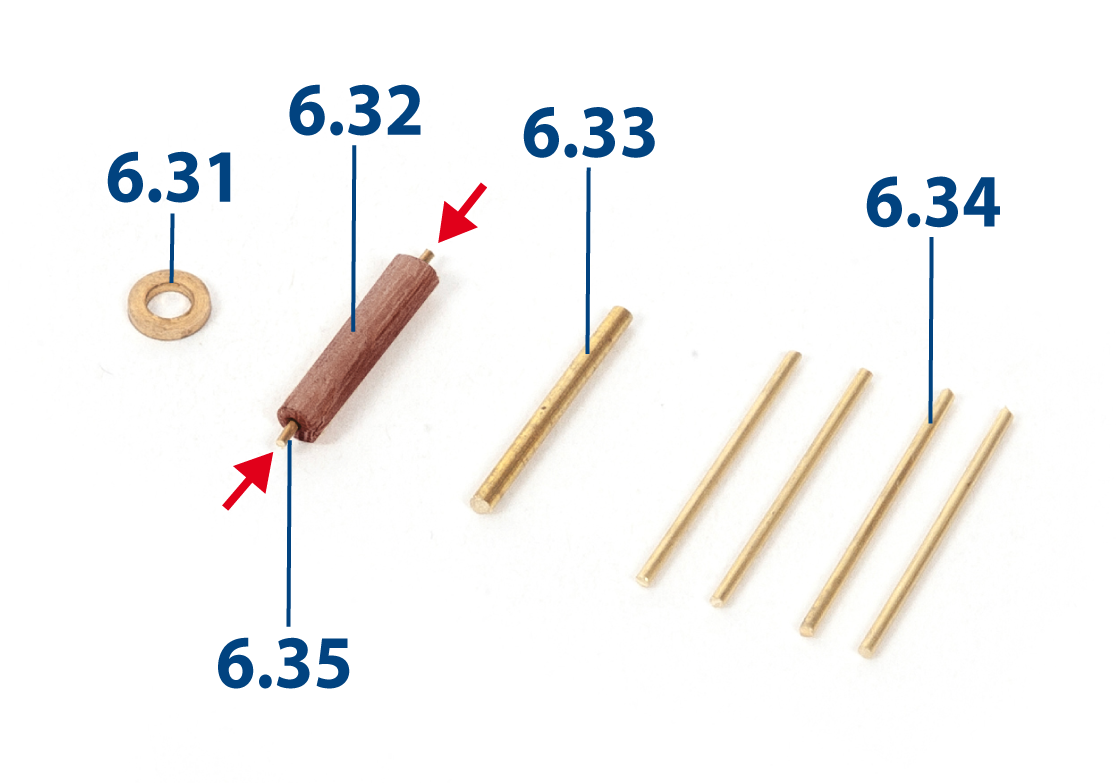
Cut parts 6.32 to 6.35 to length. Drill a hole in each end of part 6.32, then glue one part 6.35 into each hole.
| 6.32 | ø3 x 14 mm, mahogany |
| 6.33 | ø1.5 x 18 mm, brass wire |
| 6.34 | ø1 x 22 mm, brass wire |
| 6.35 | ø1 x 5 mm, brass wire |
Step 9
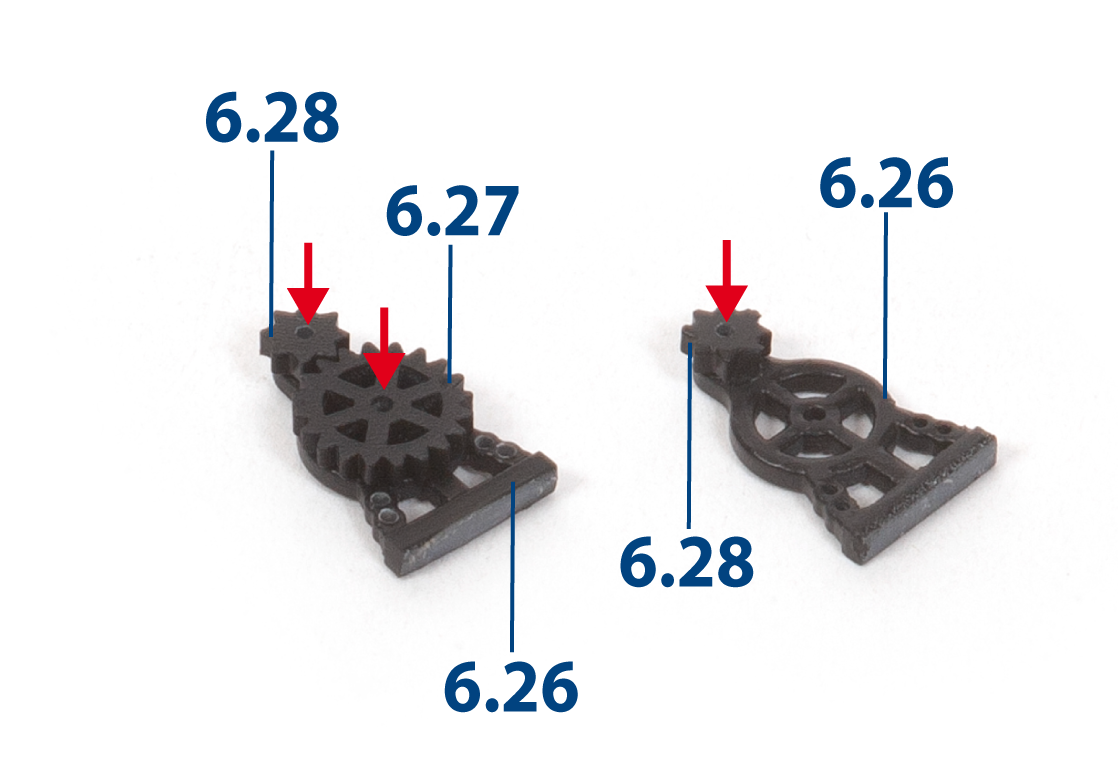
Glue parts 6.27 and 6.28 onto one part 6.26, aligning the holes. Then glue another part 6.28 onto the other part 6.26.
Step 10
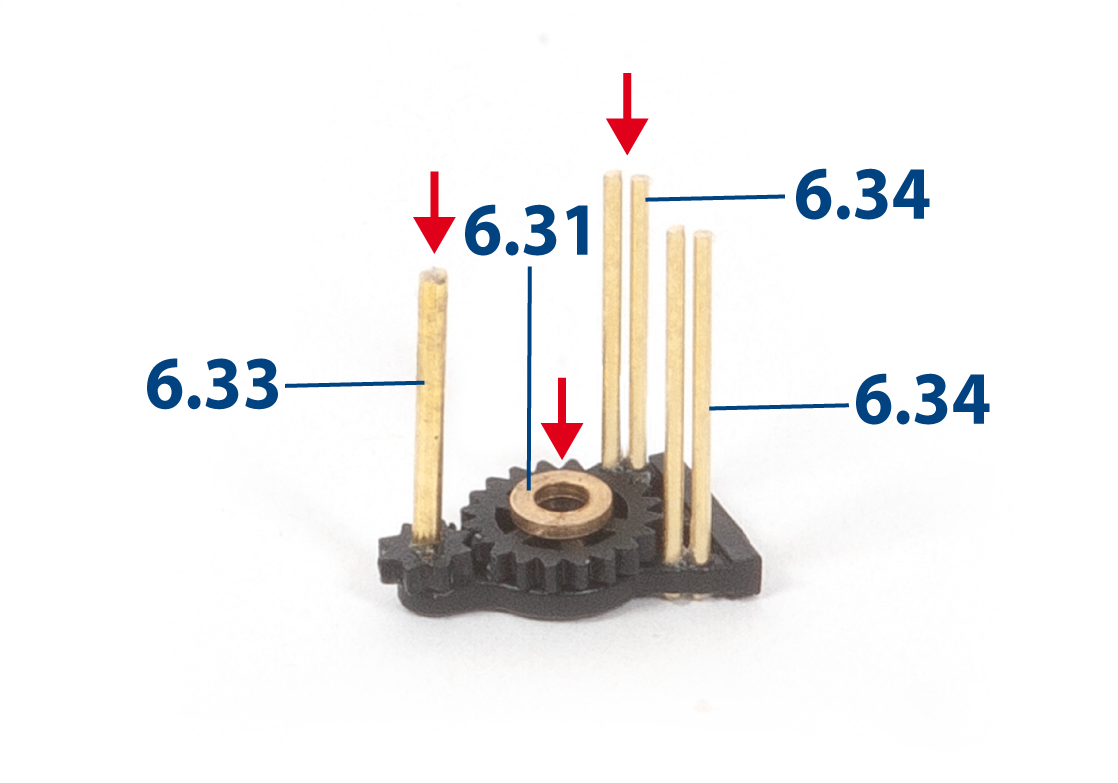
Glue parts 6.31 to 6.34 into the assembly, as shown.
Step 11
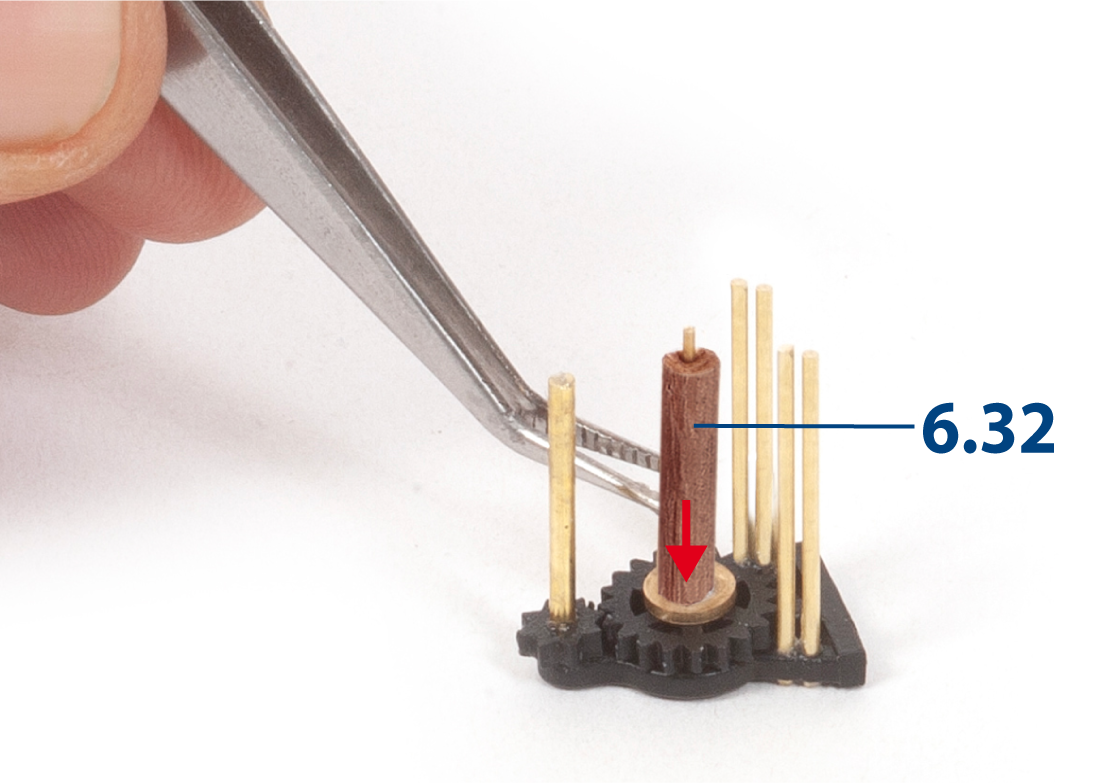
Glue part 6.32 centred on the ring.
Step 12
Glue the other side of the winch to the assembly.
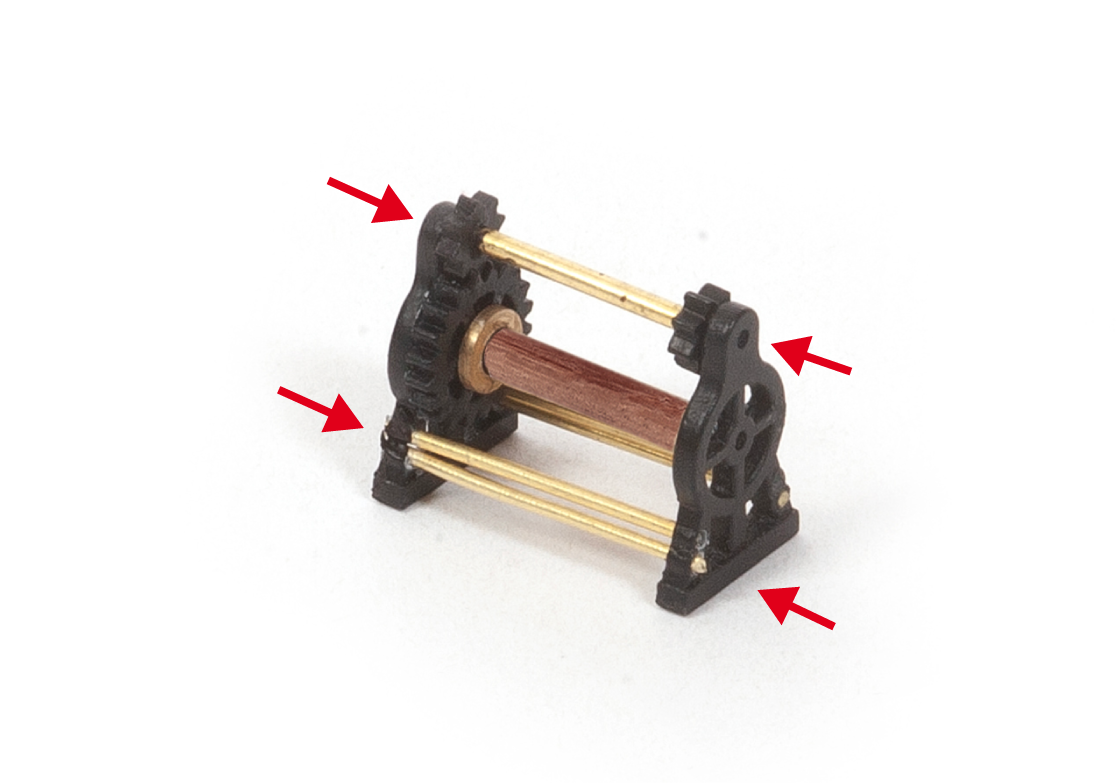
Step 13
Test-fit and glue parts 6.29 and 6.30.
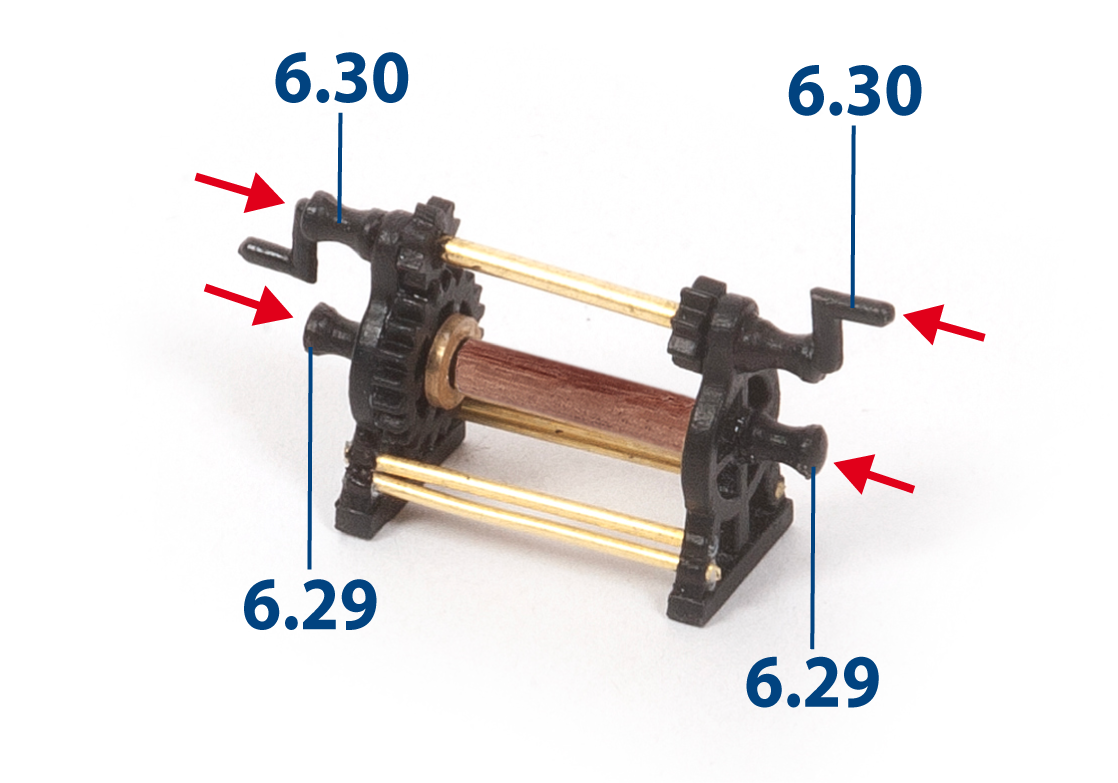
Step 14
You may leave the added parts unpainted or paint them black.
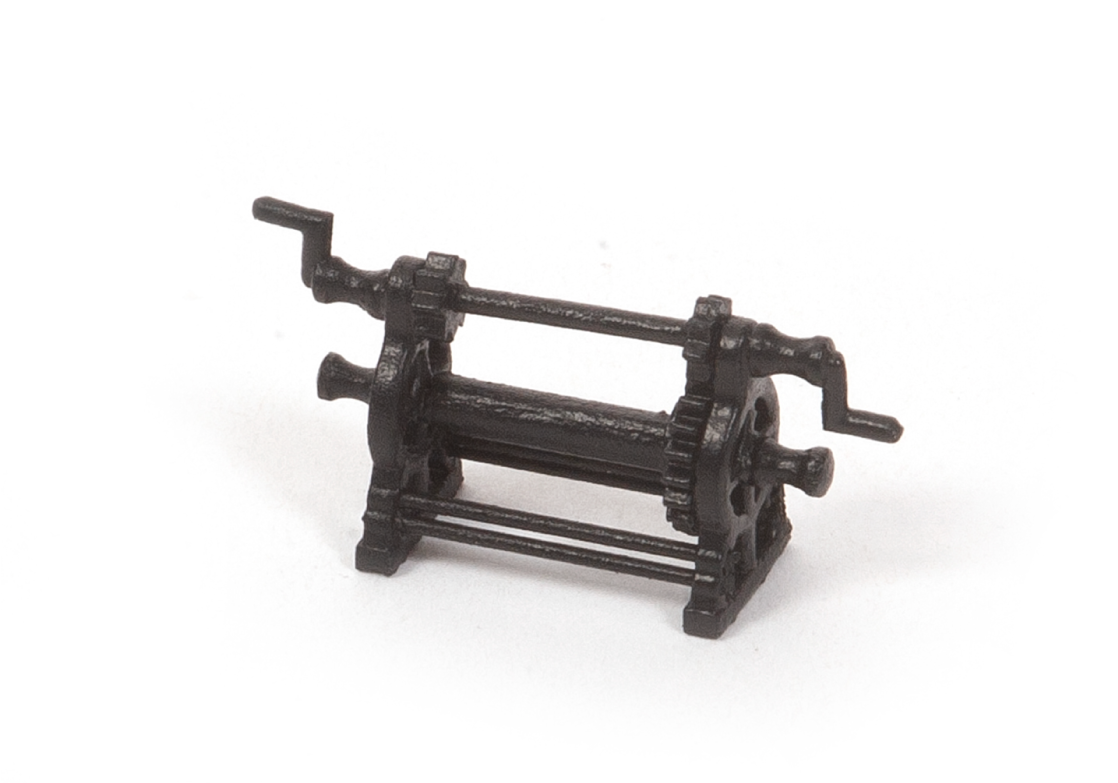
Step 15
Using the dry-brush technique, highlight the raised details with dark red paint. Repeat steps 7–15 to make a second winch.
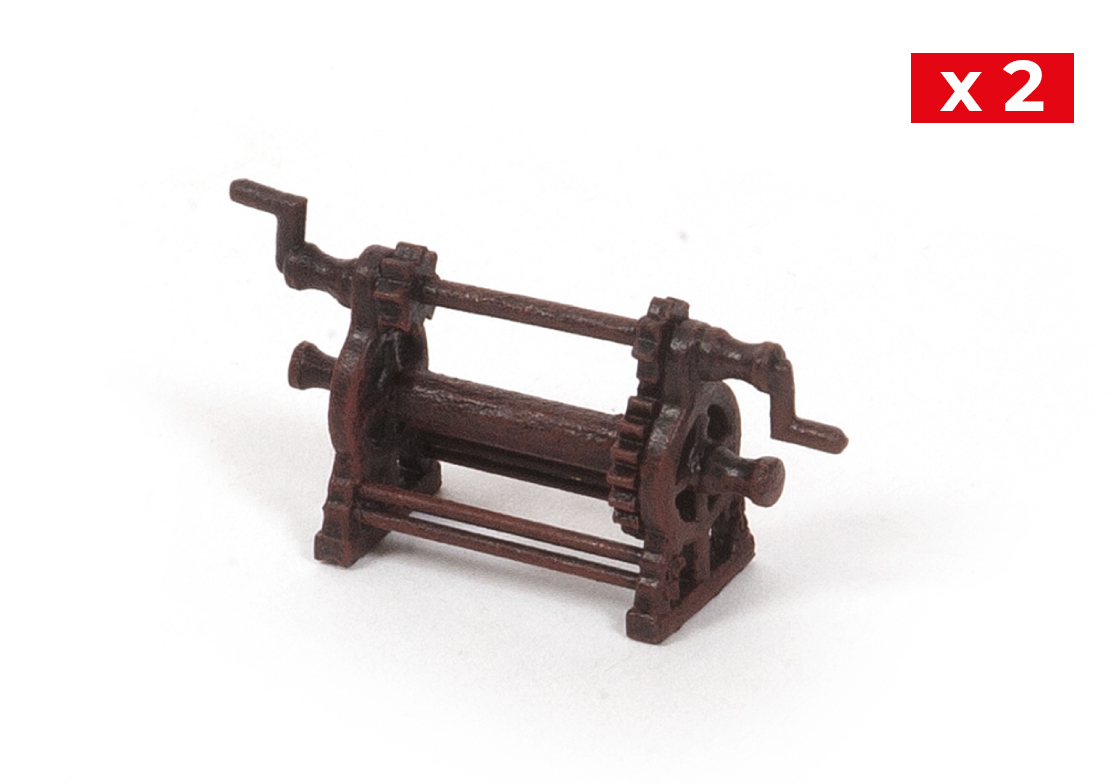
Step 16
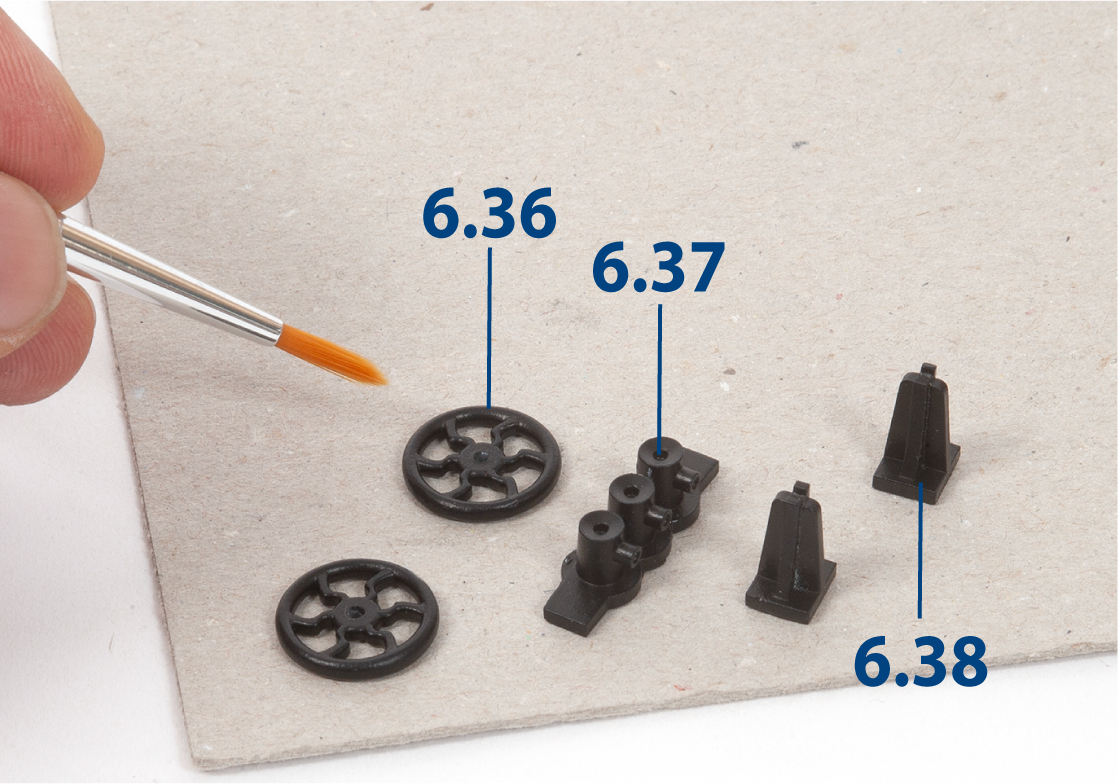
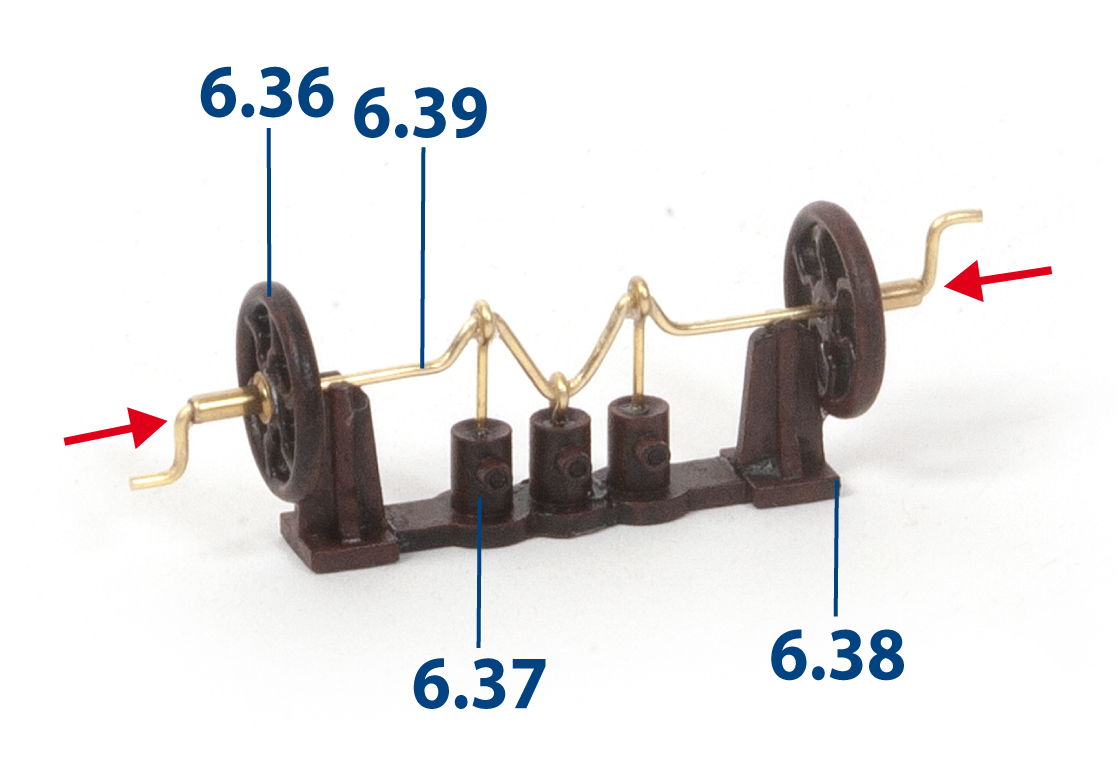
Paint parts 6.36 to 6.38 black.
Step 17
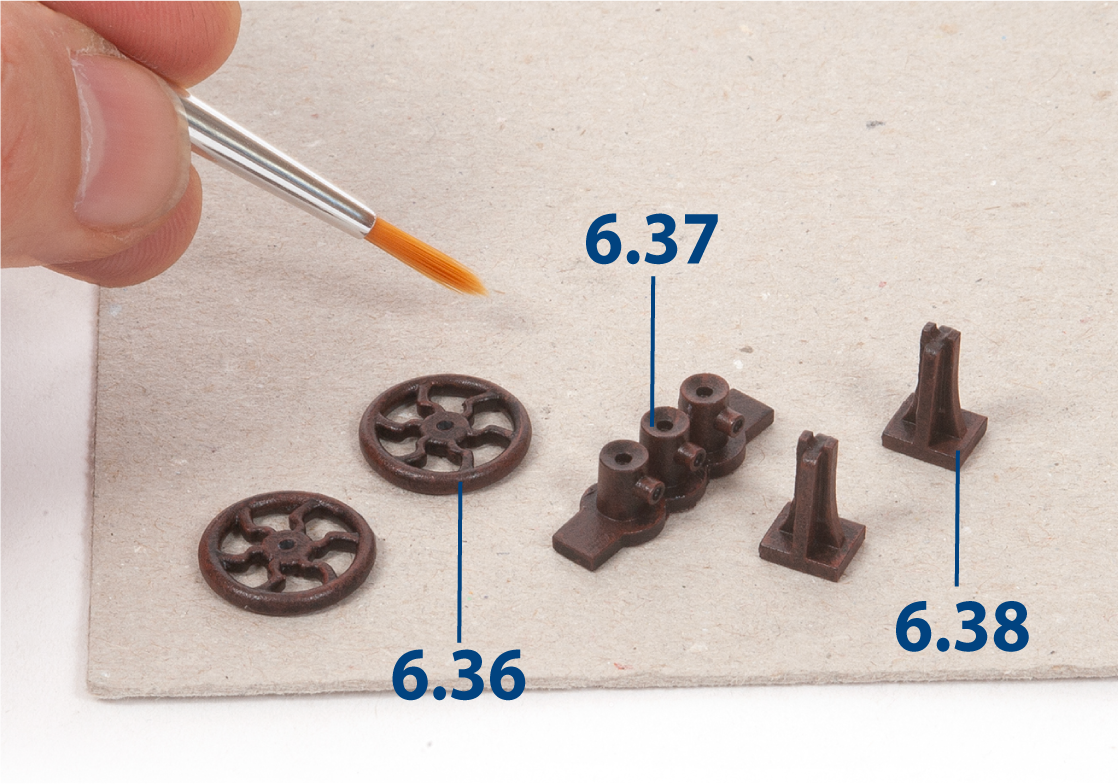
Dry brush the parts with dark red paint.
Step 18
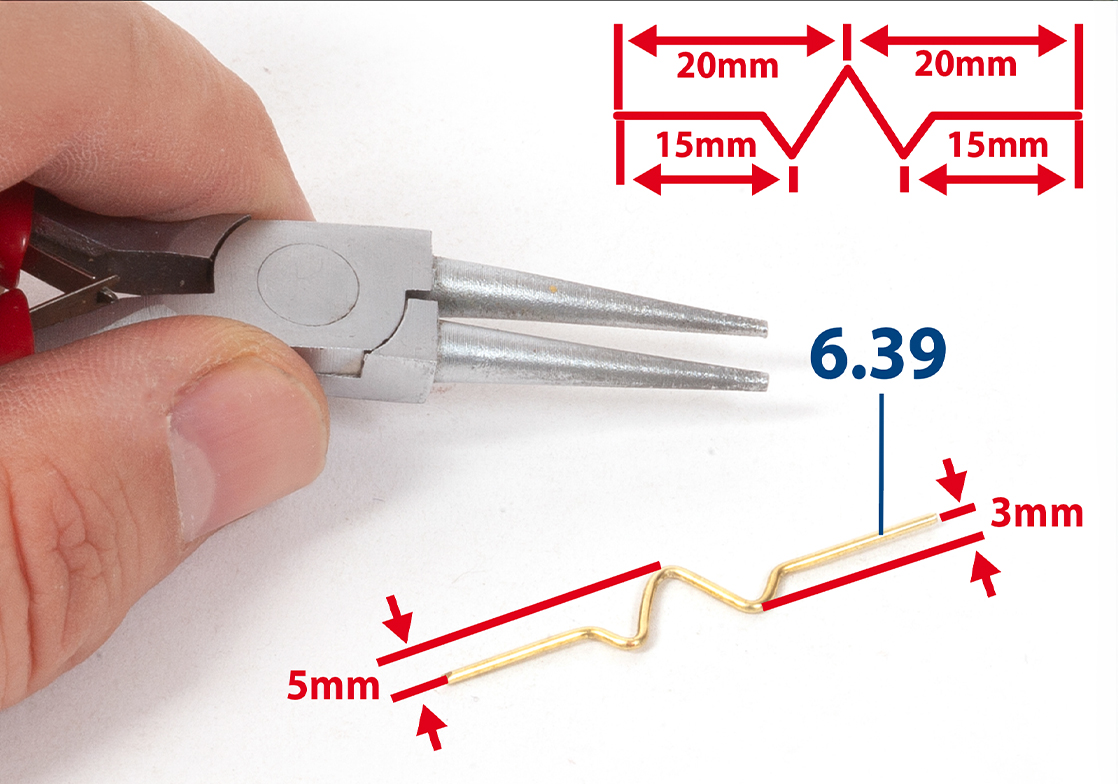
Cut part 6.39 to length (ø1 x 56 mm). Bend the wire into shape, starting in the middle and following the approximate measurements shown in the image.
Step 19
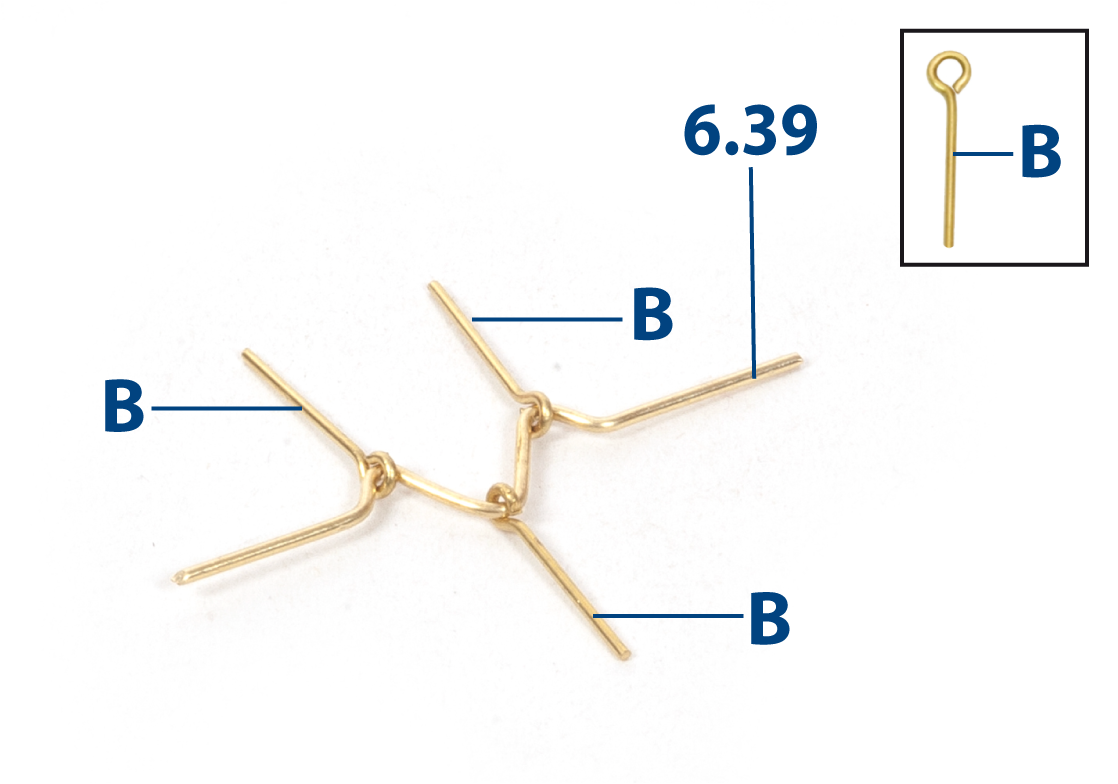
Place three eyebolts B as shown.
Step 20
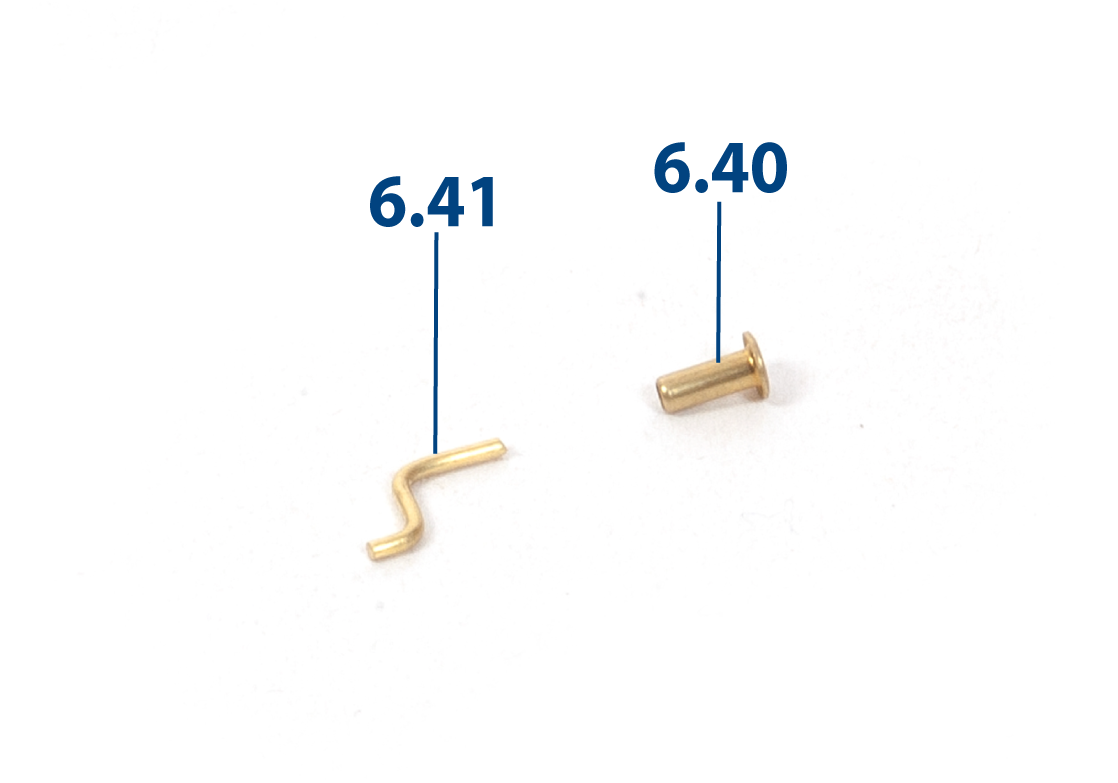
Cut two parts 6.41 to length (Ø 1 x 10 mm) and bend them into shape as shown in the image.
Step 21
Adjust the length of eyebolts B. Glue the parts as shown.
Step 1
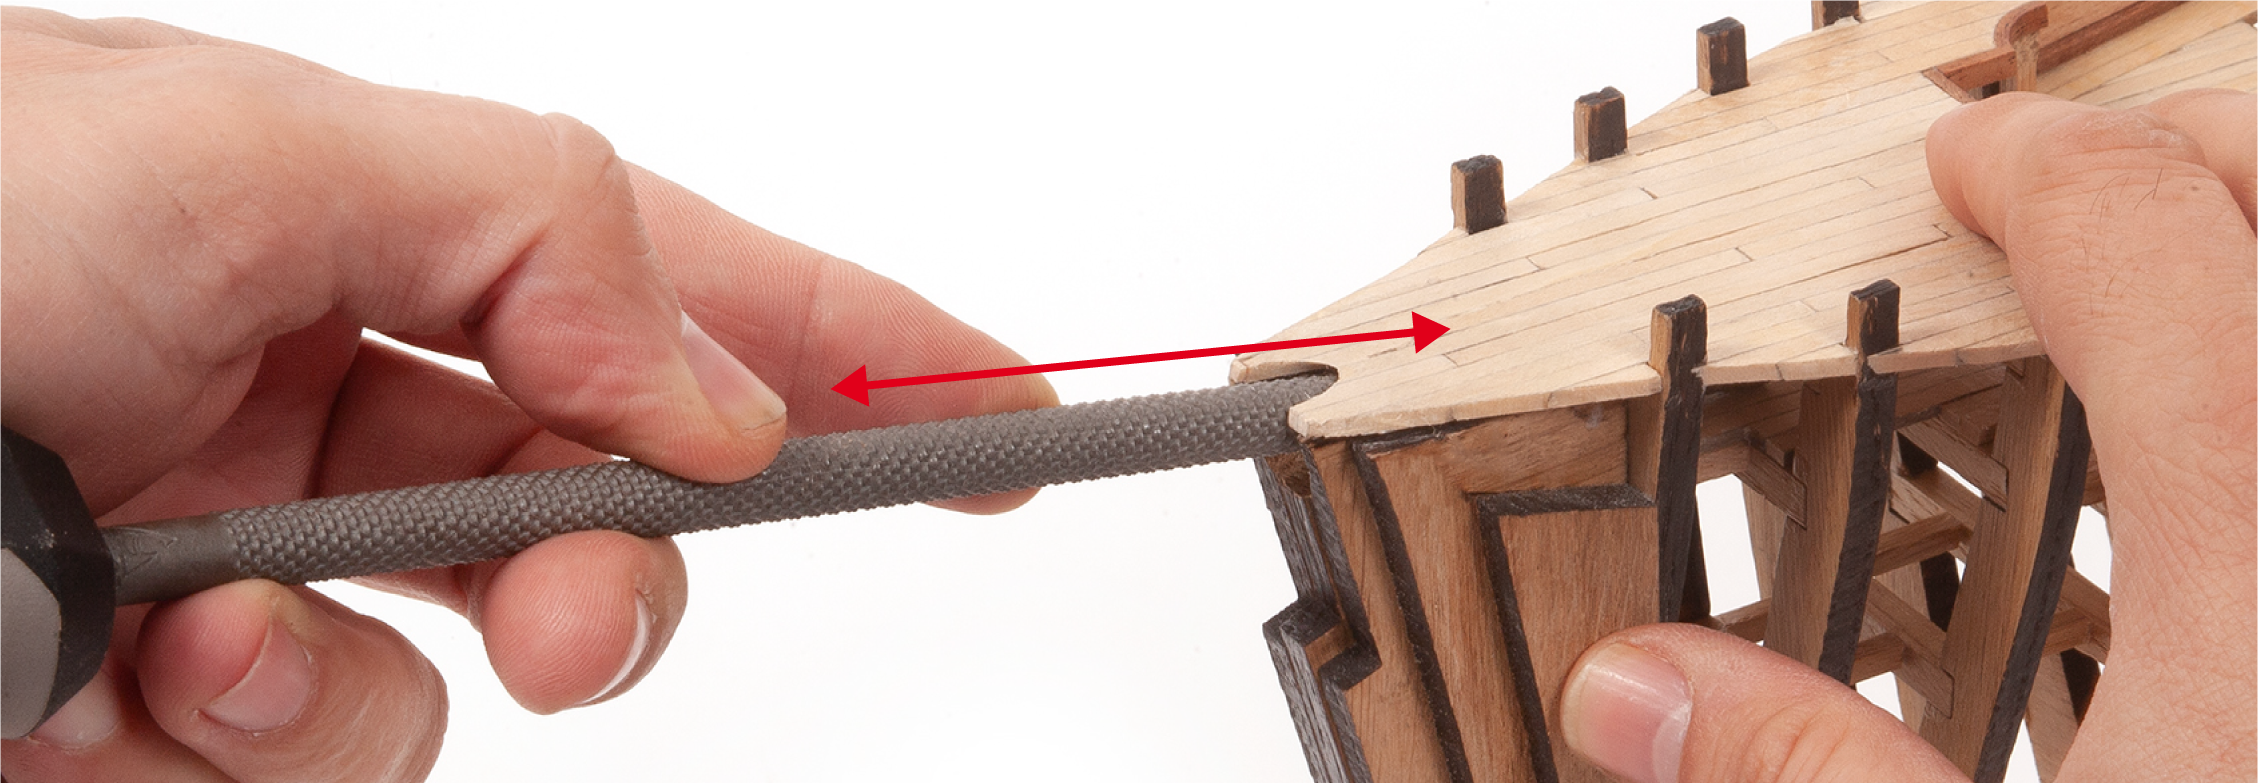
Use a round file to enlarge and smooth the hole for the bowsprit mast.
Step 2
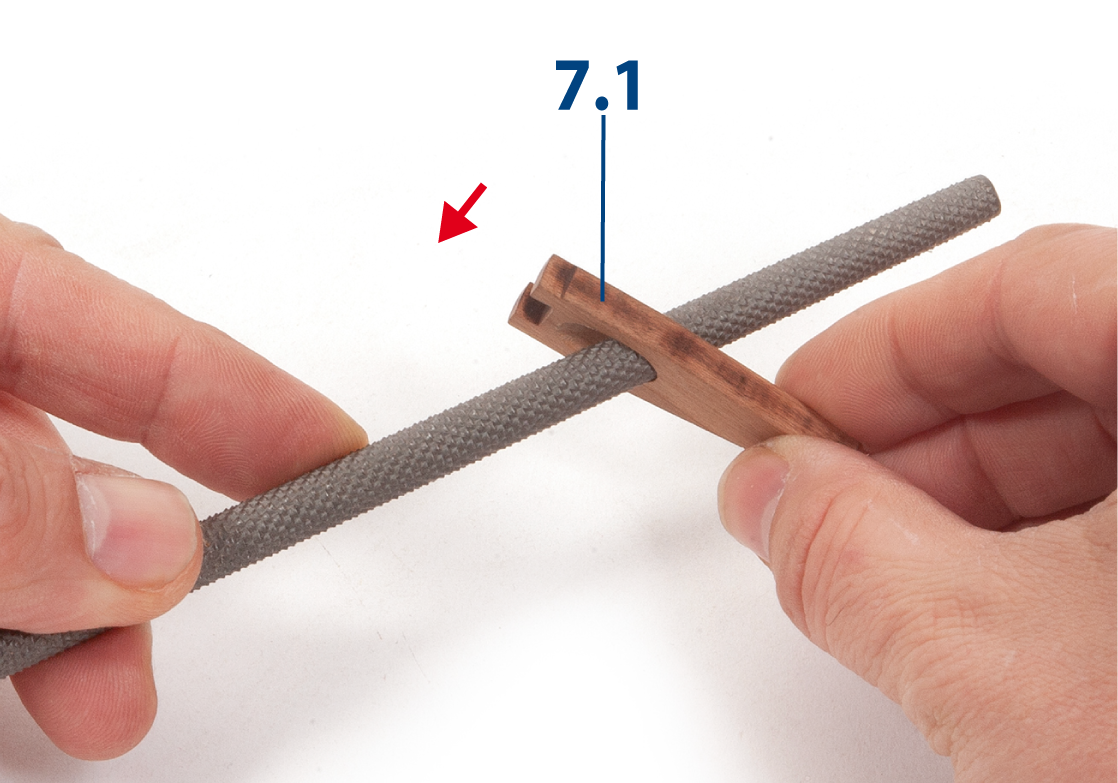
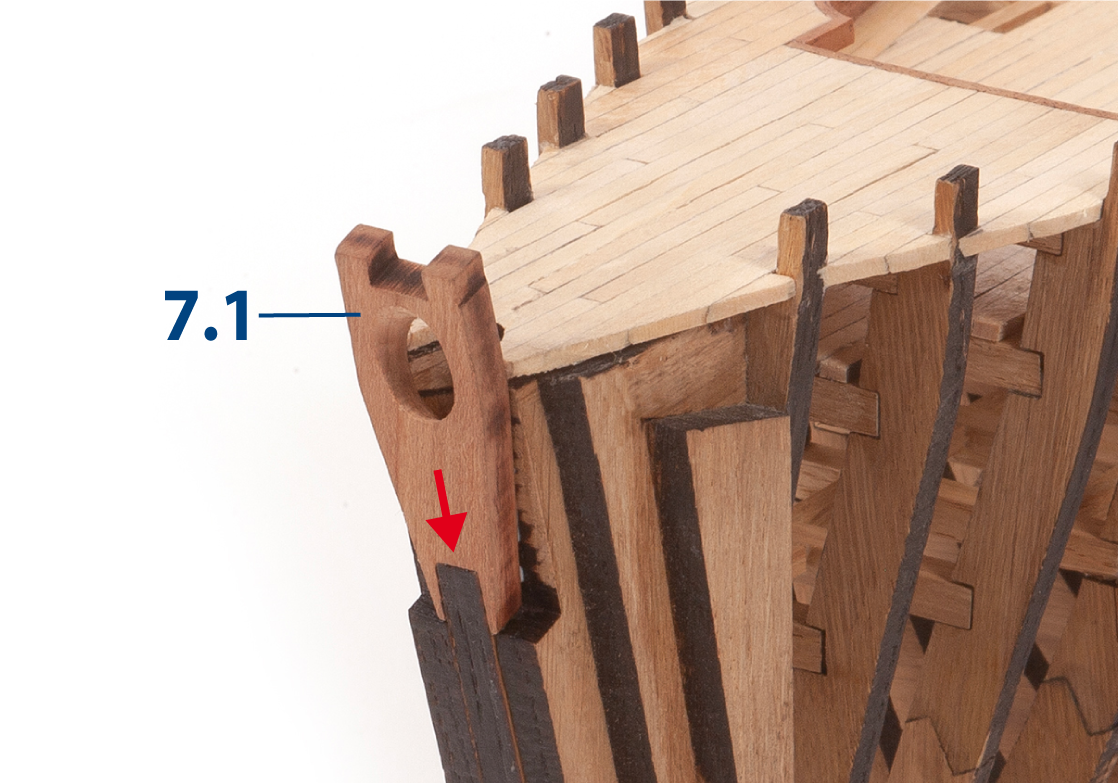
Also enlarge and smooth the hole in part 7.1.
Step 3
Glue part 7.1 to the bow of the hull.
Step 4
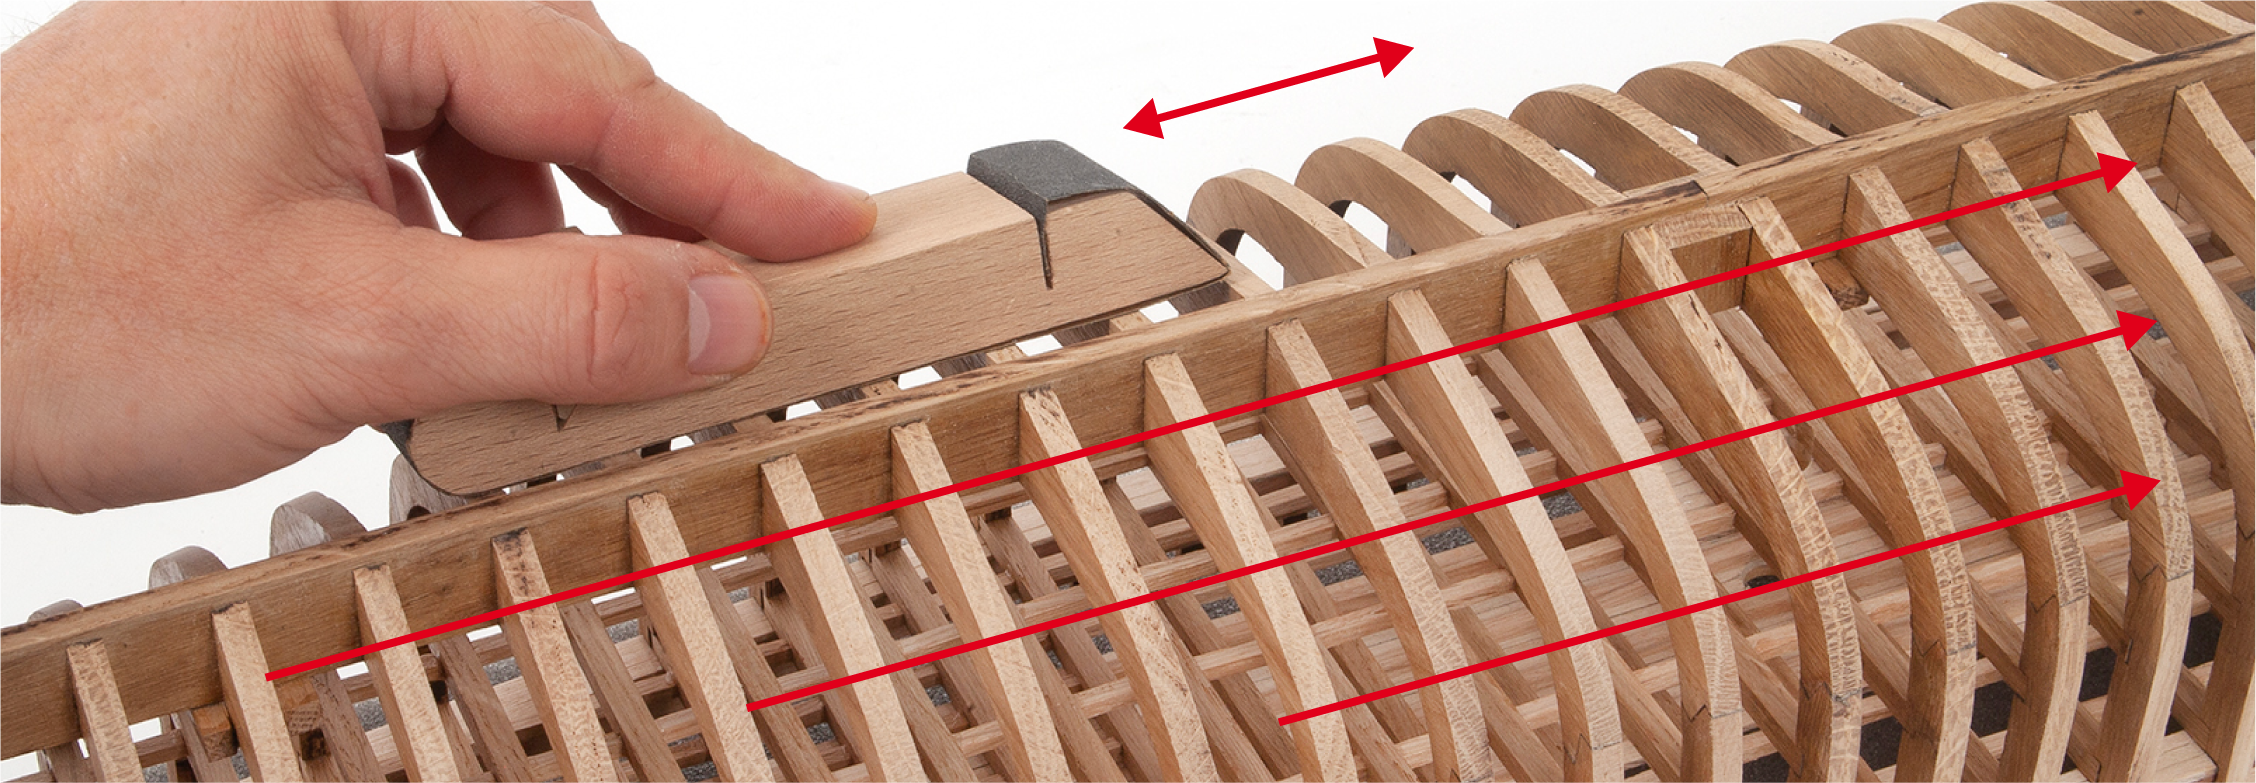
Sand the frames and reinforcements until all traces of the frame extensions have disappeared.

Step 5
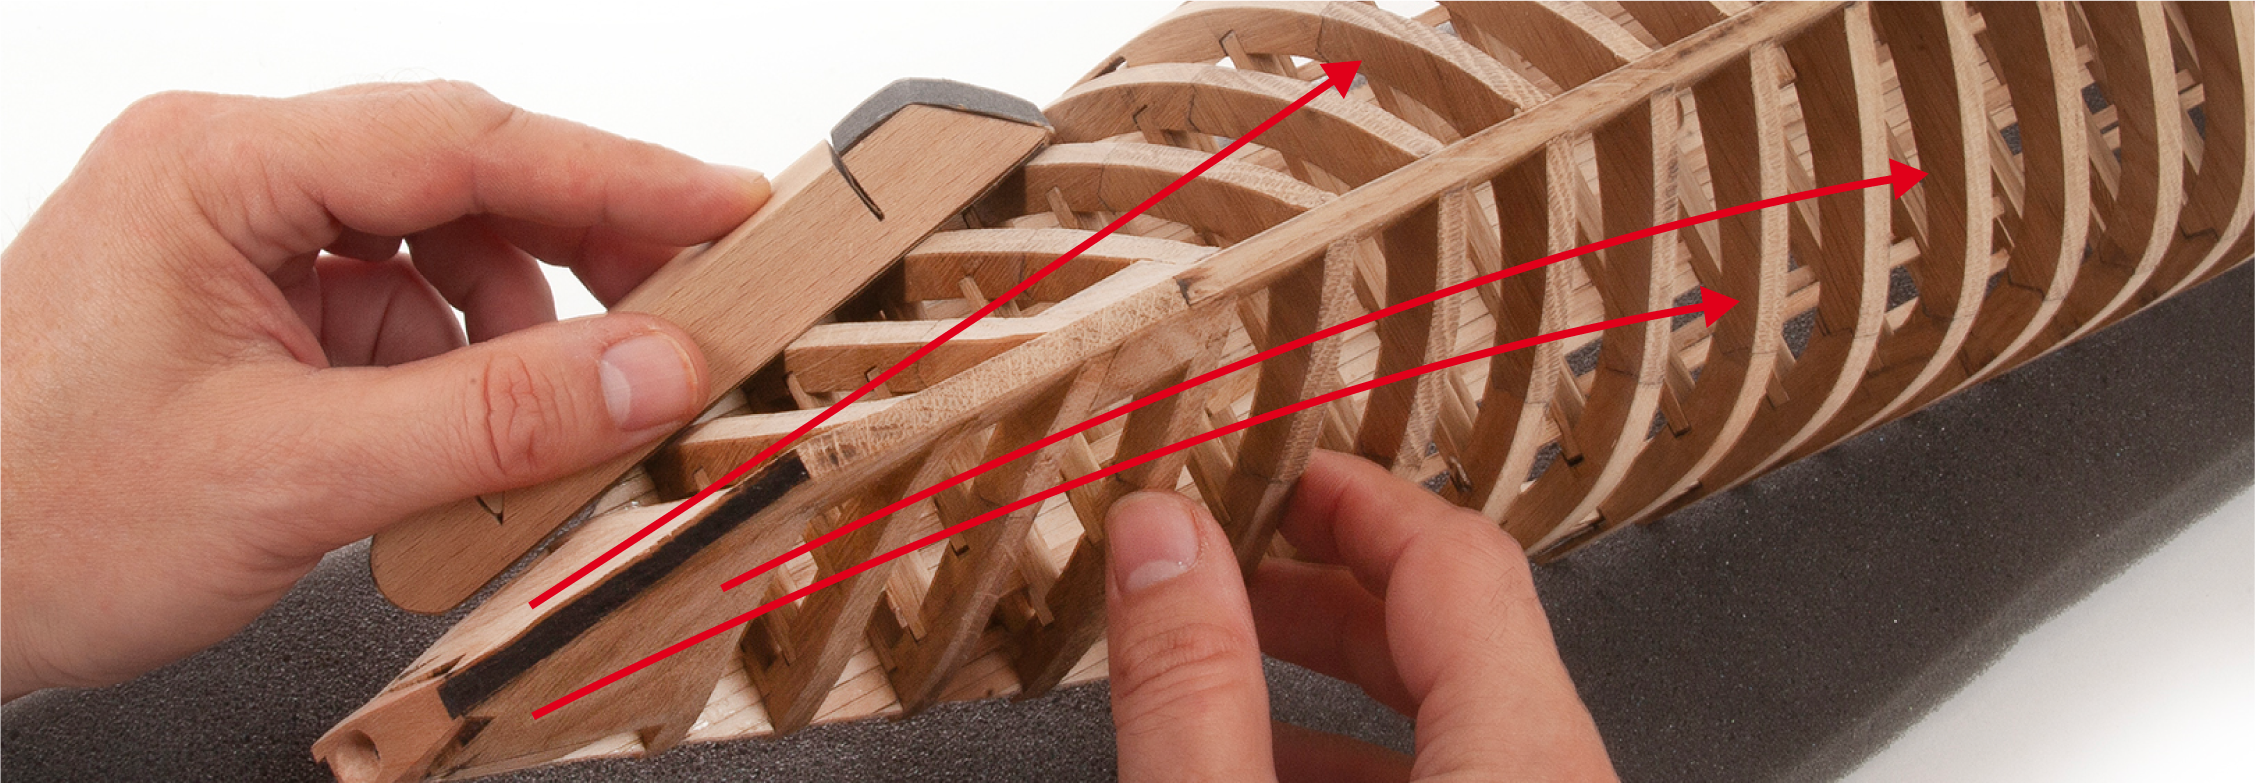
Sand the bow area to match the finish shown in the images below. Work carefully and gradually to avoid damaging the structure.
Step 6
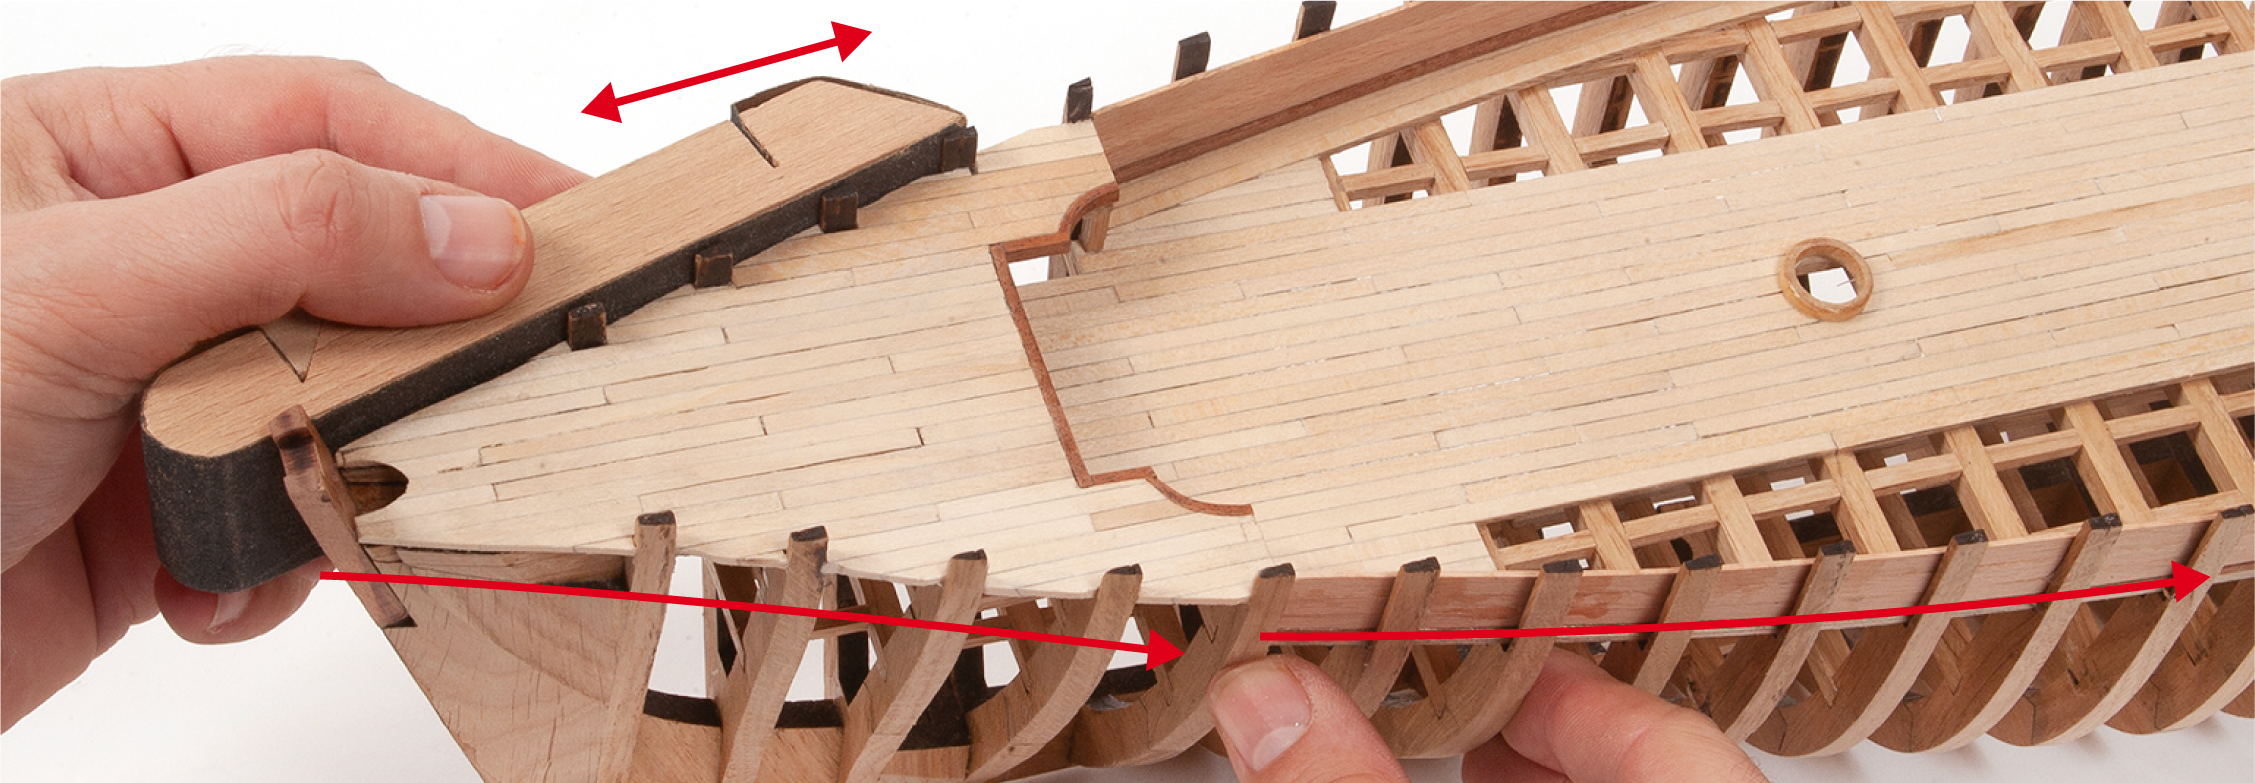
Continue sanding the bow area until the reinforcements follow the curvature of the frames. Sand until you obtain a smooth surface for the planking of the hull.
Step 7
The image shows the bow after sanding.
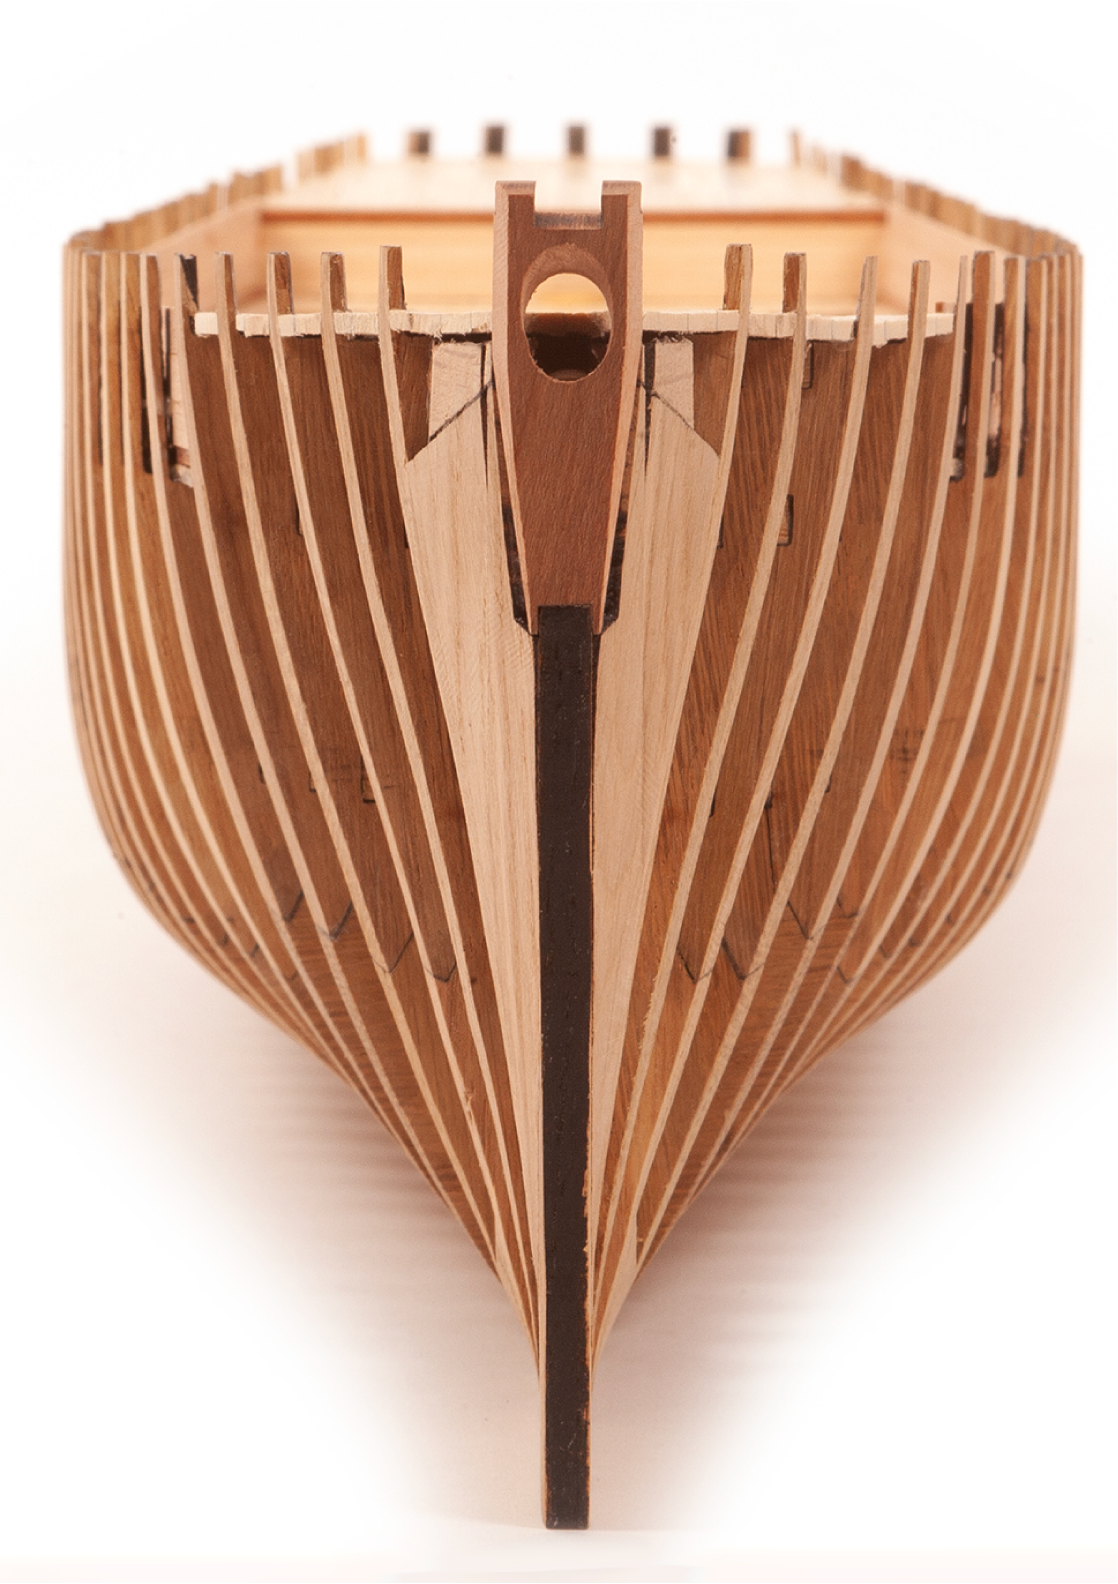
Step 8
The image shows the hull frames after sanding.
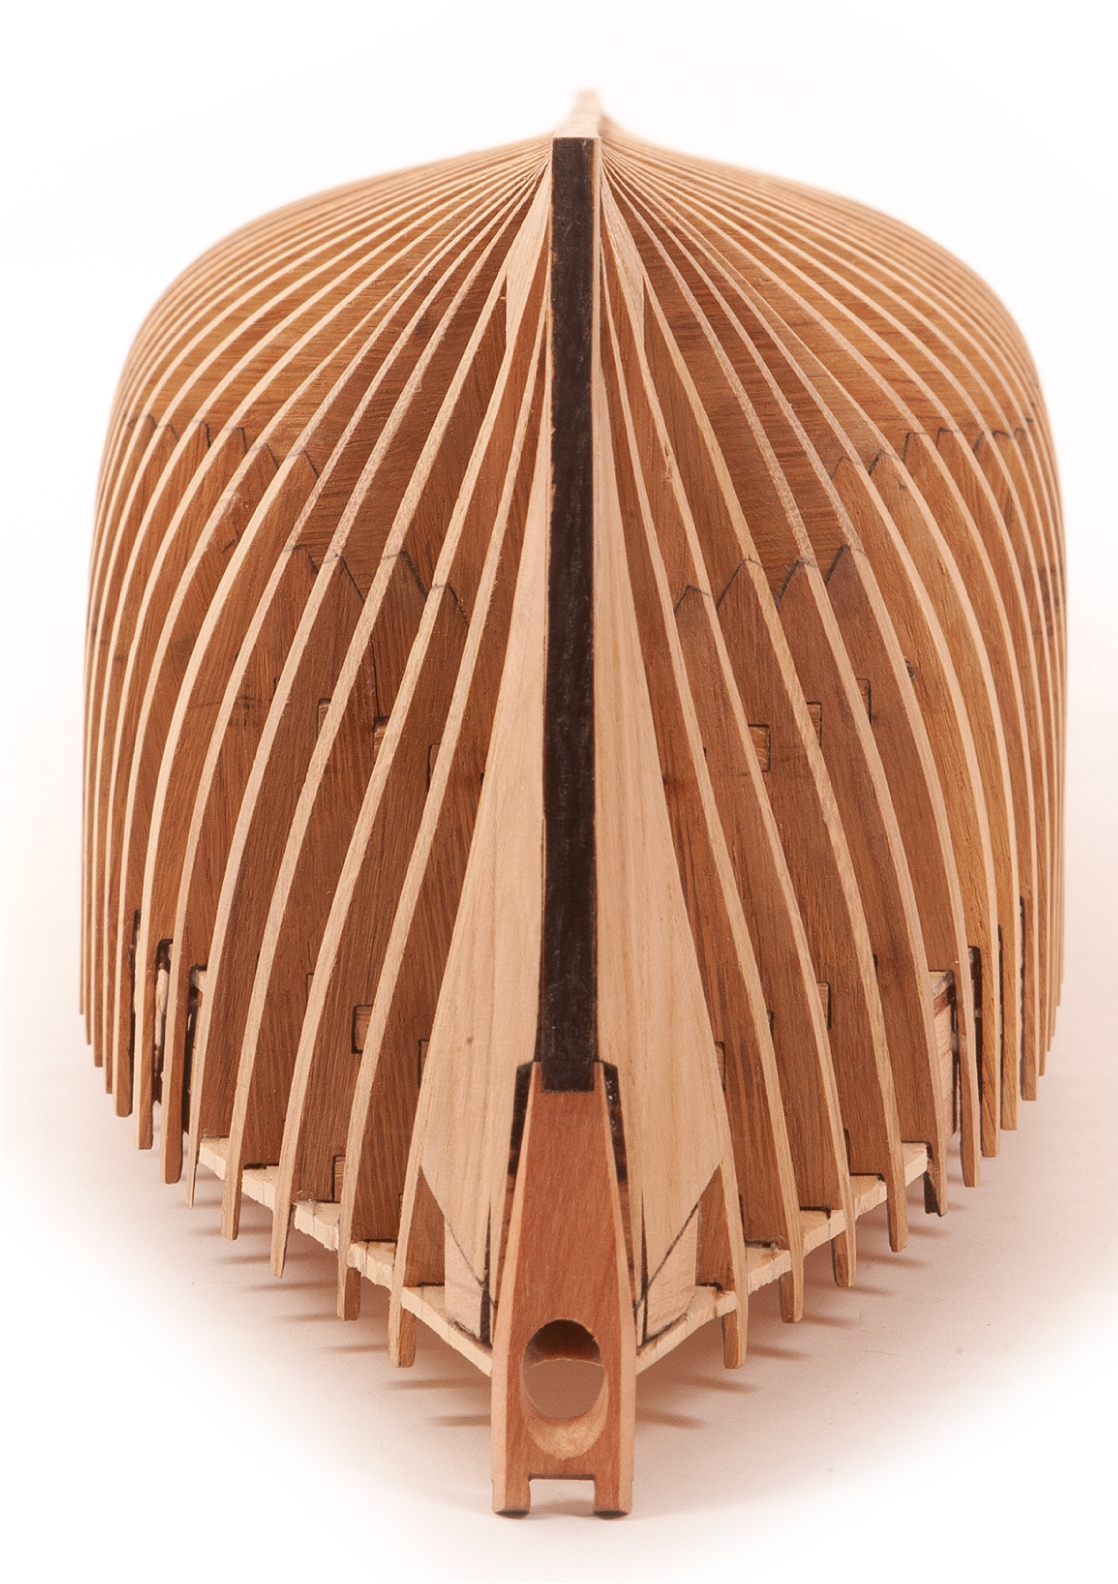
Step 1
Use a half-round file or a curved sanding block to smooth the stern area.
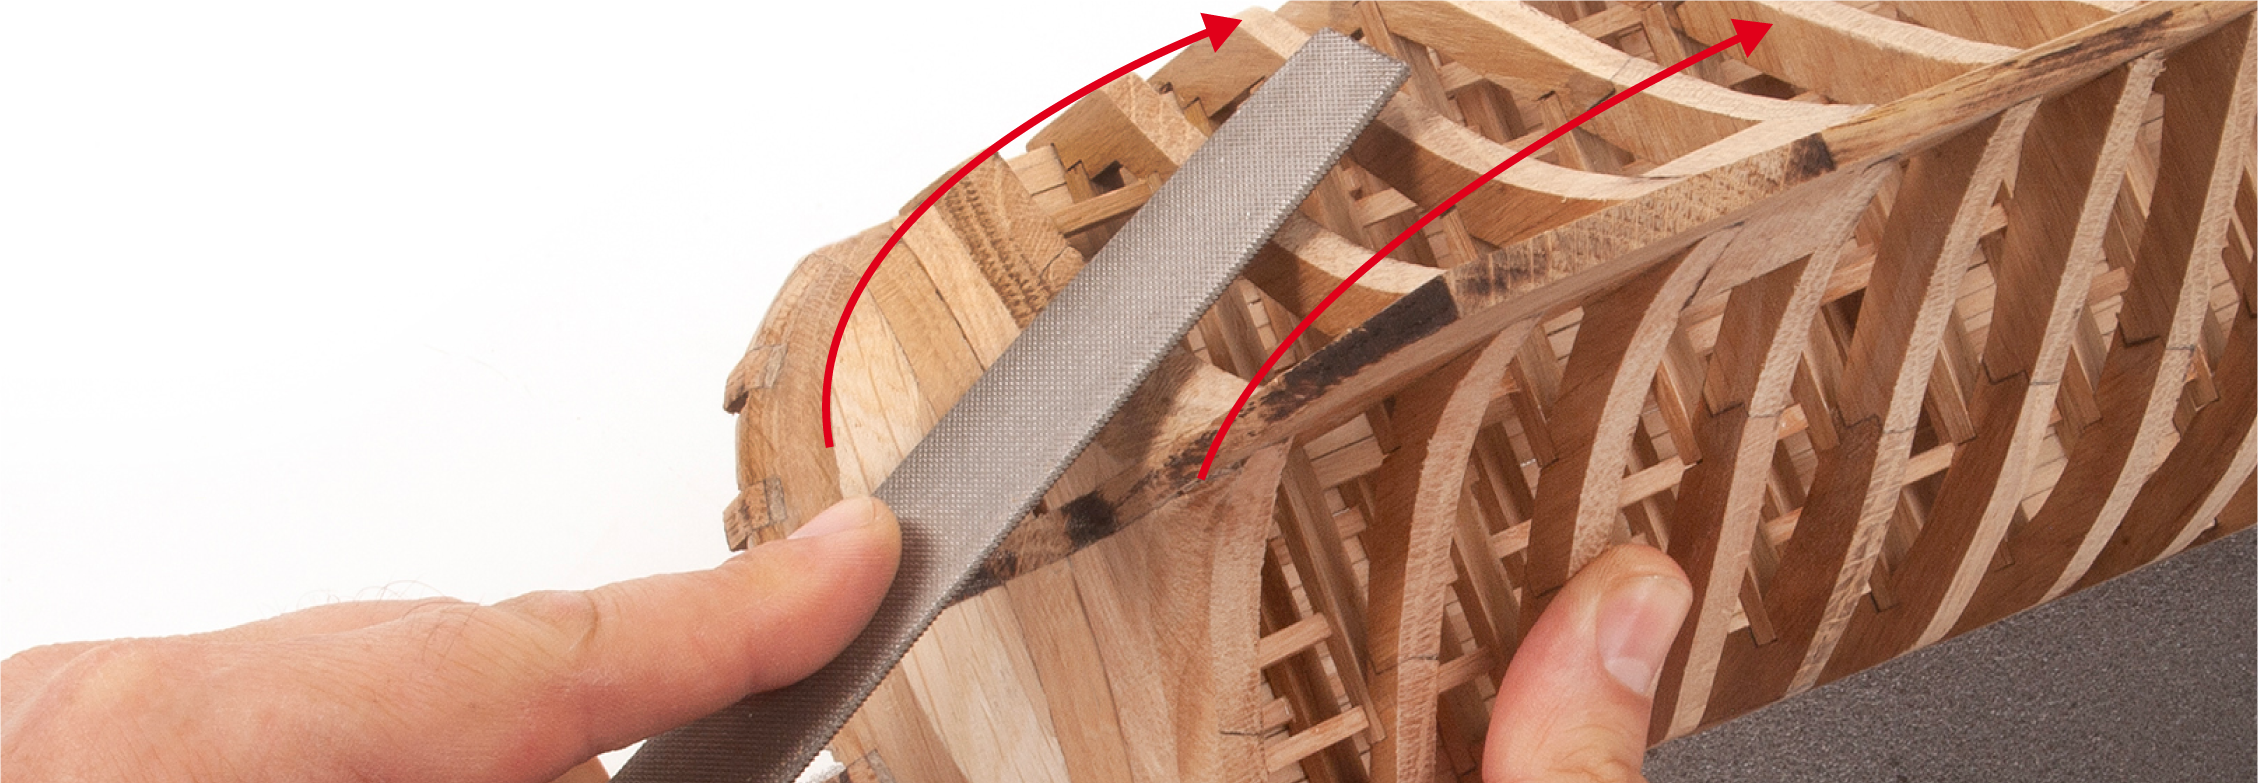
Step 2
Note that the last frames have flat side surfaces that must remain flat.
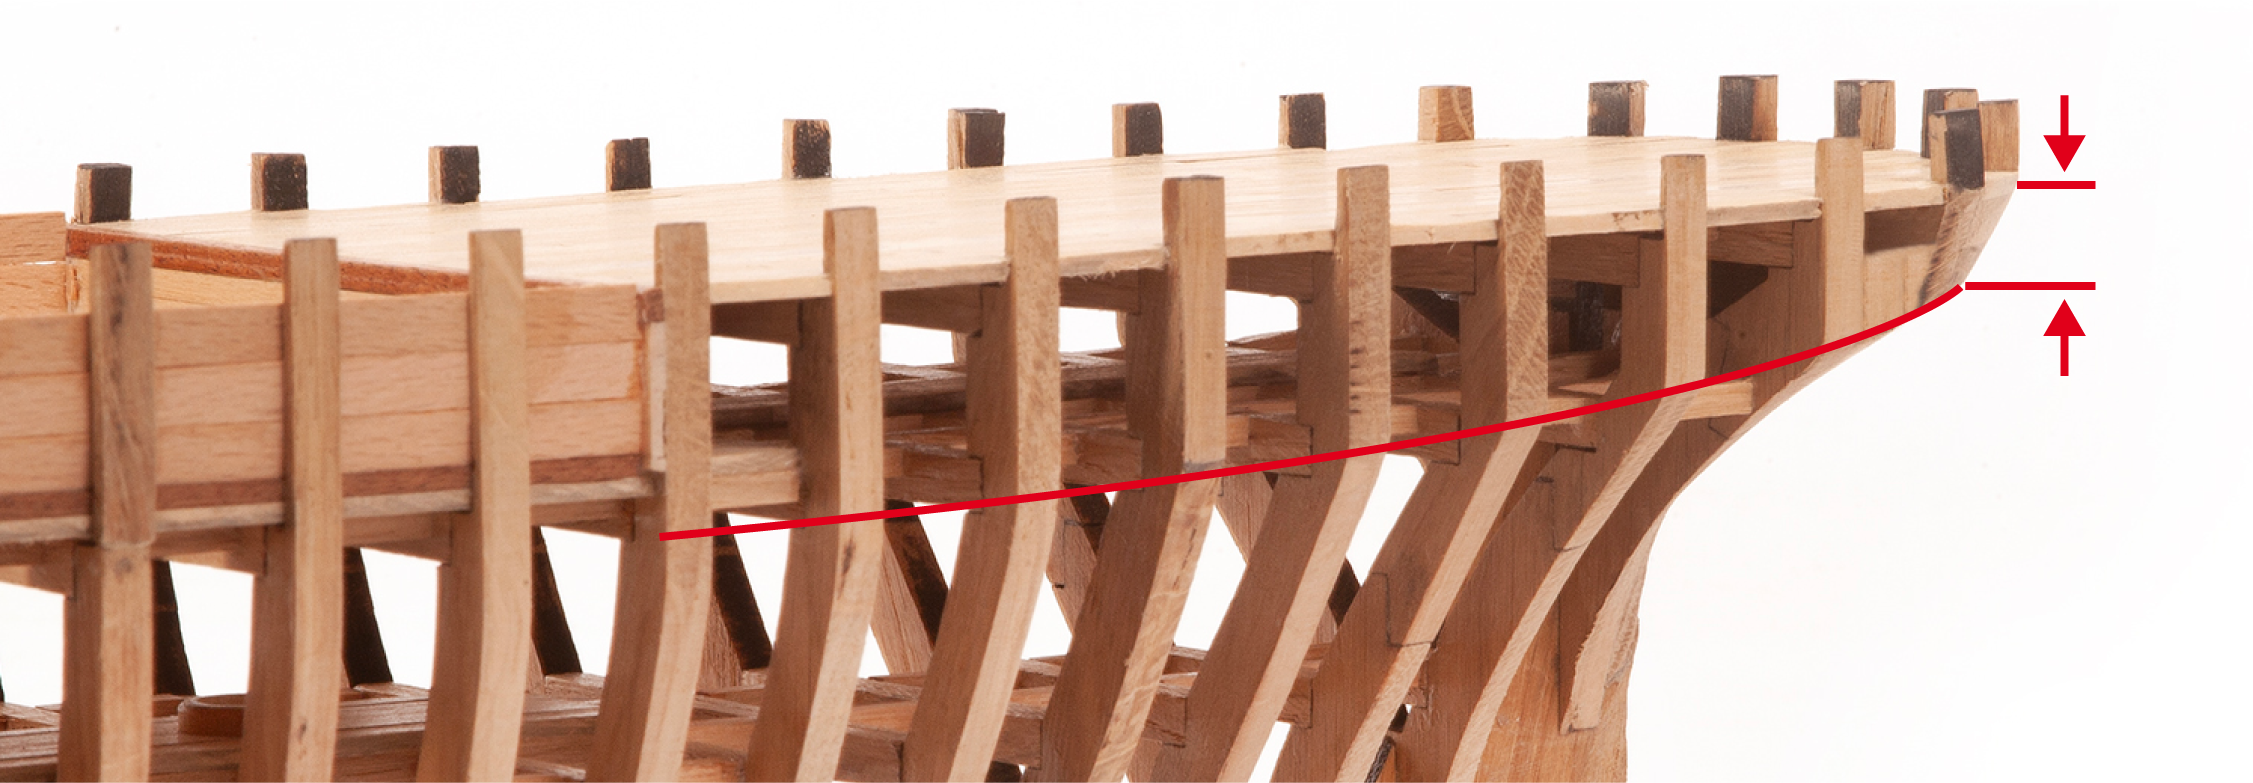
Step 3
The image shows the stern of the hull after sanding.
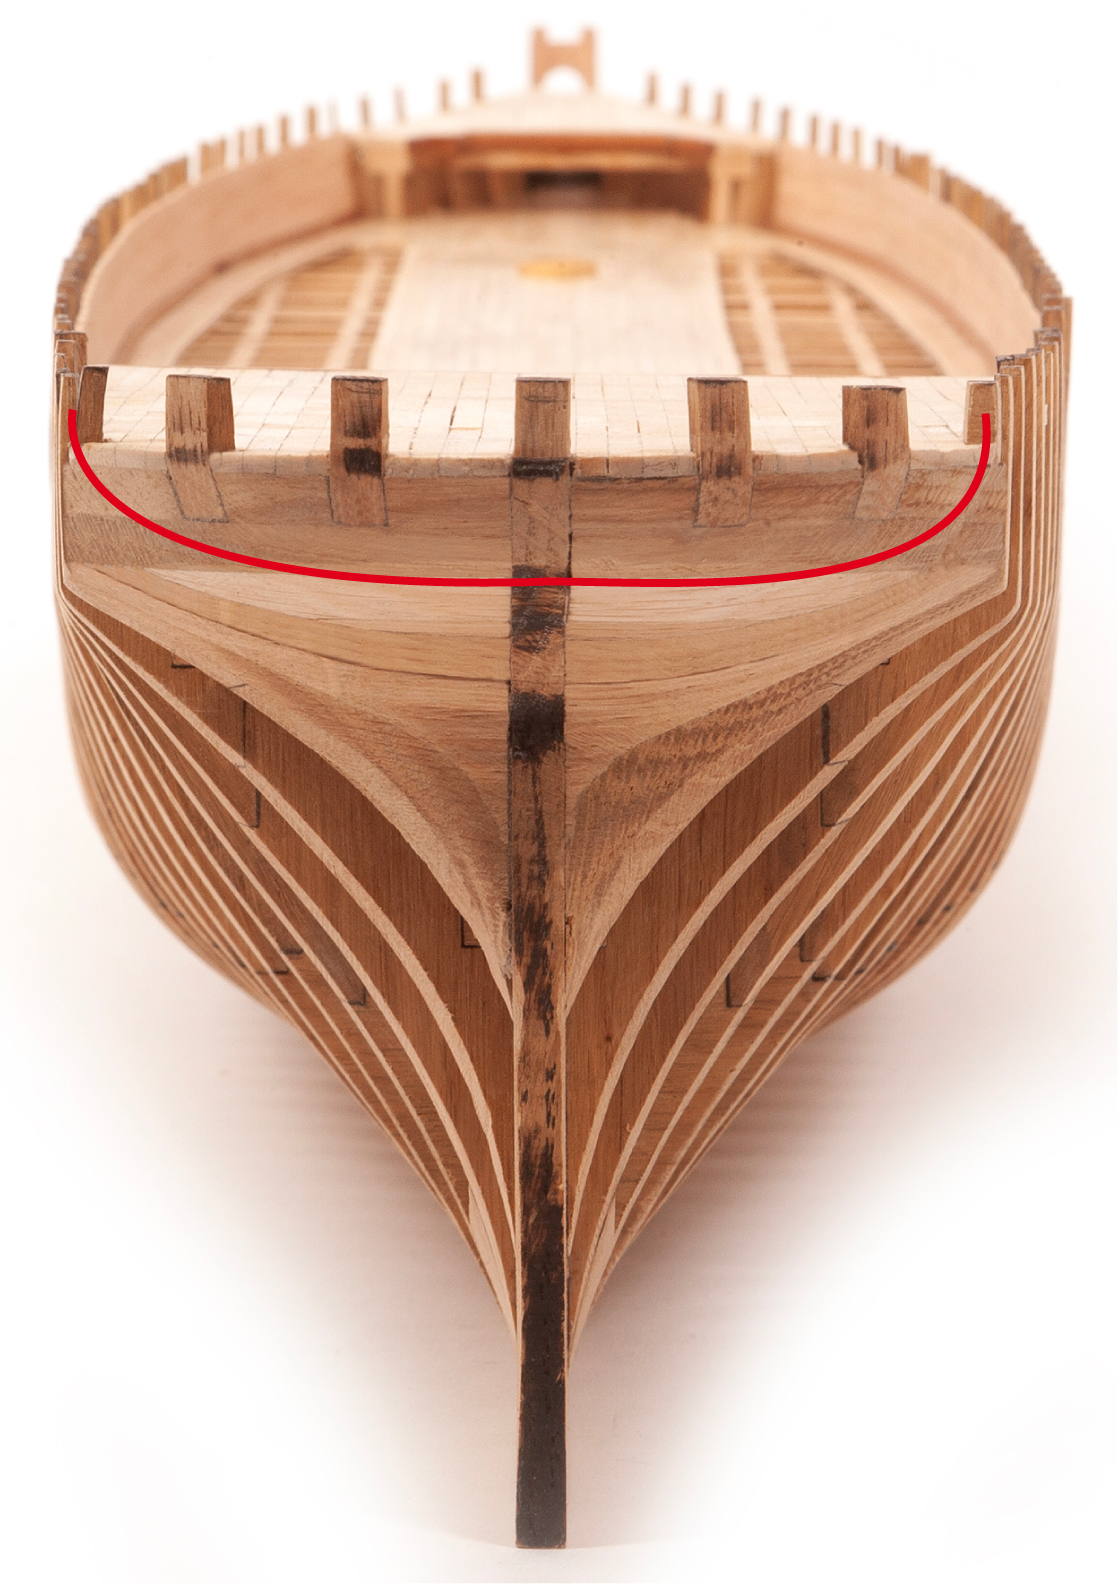
Step 4
The image shows the frames after sanding the stern area.
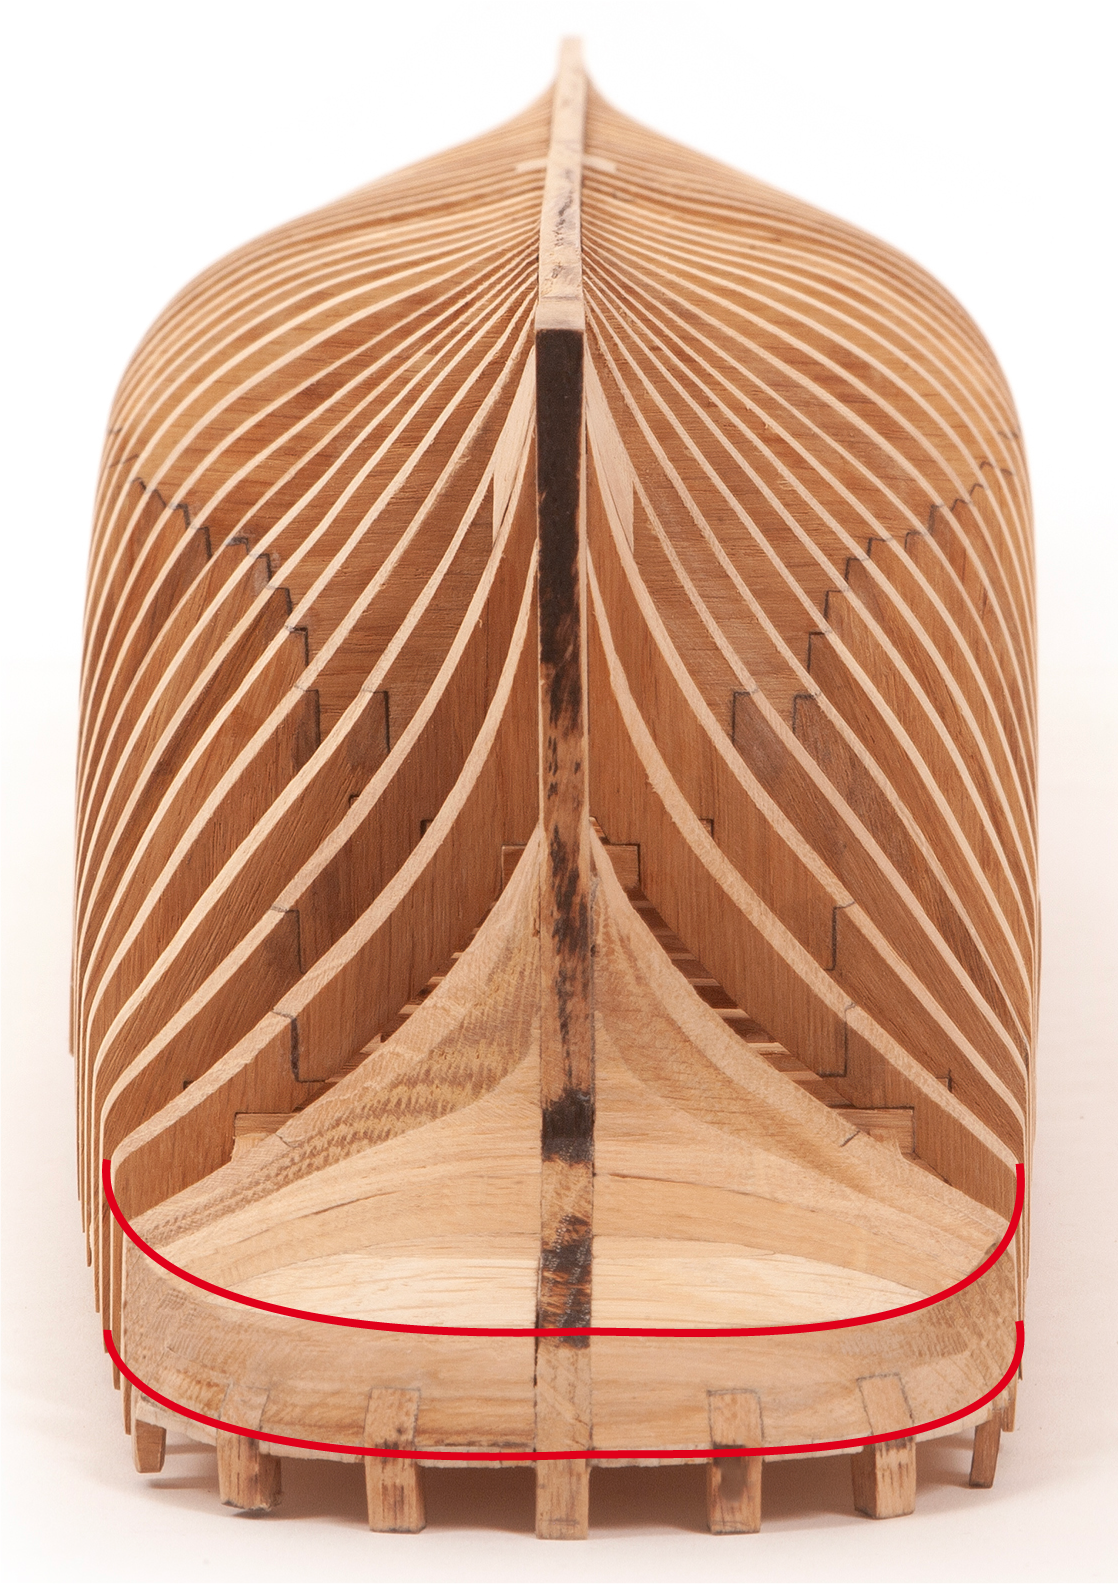
Step 5
This image shows the hull once sanding has been completed.
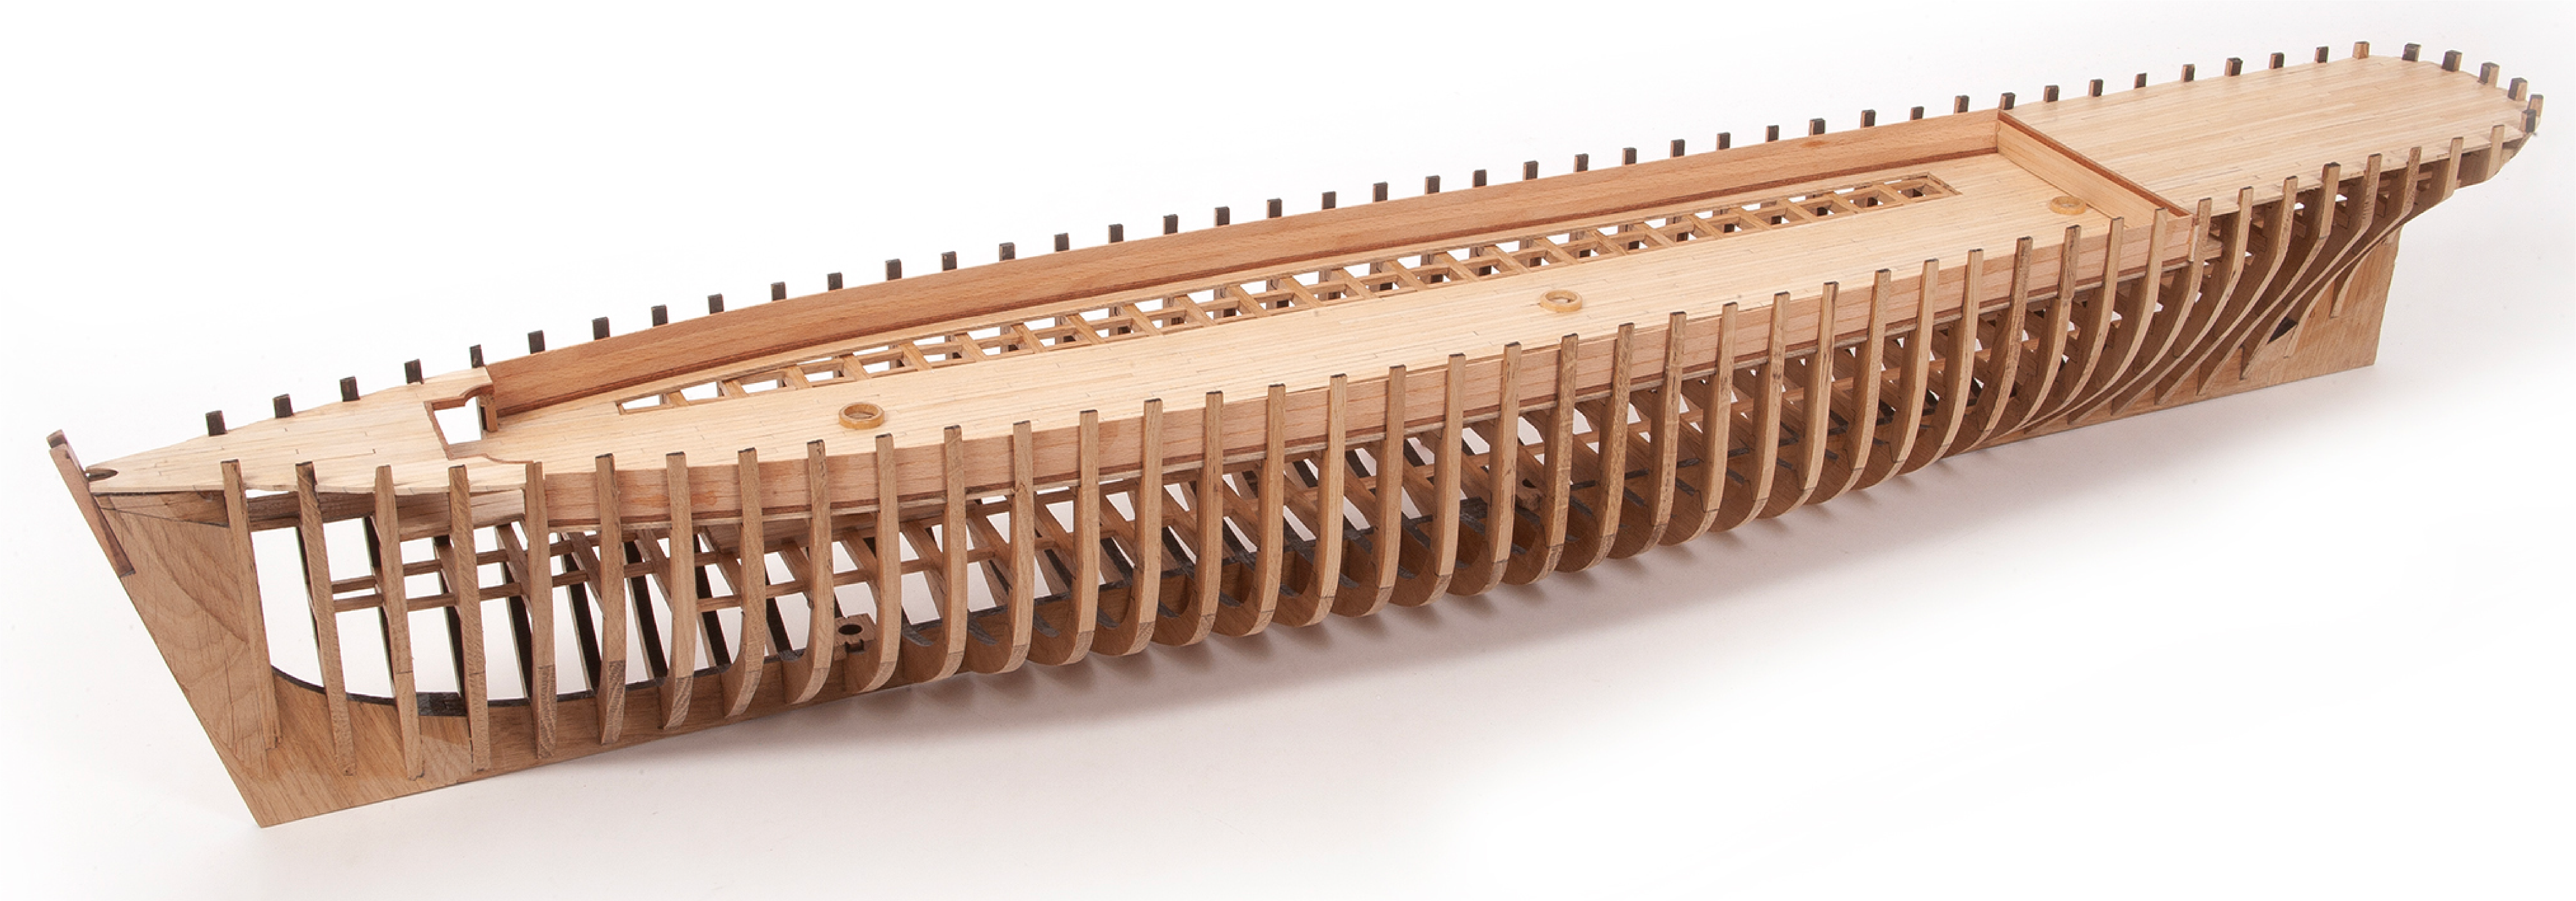
Step 1
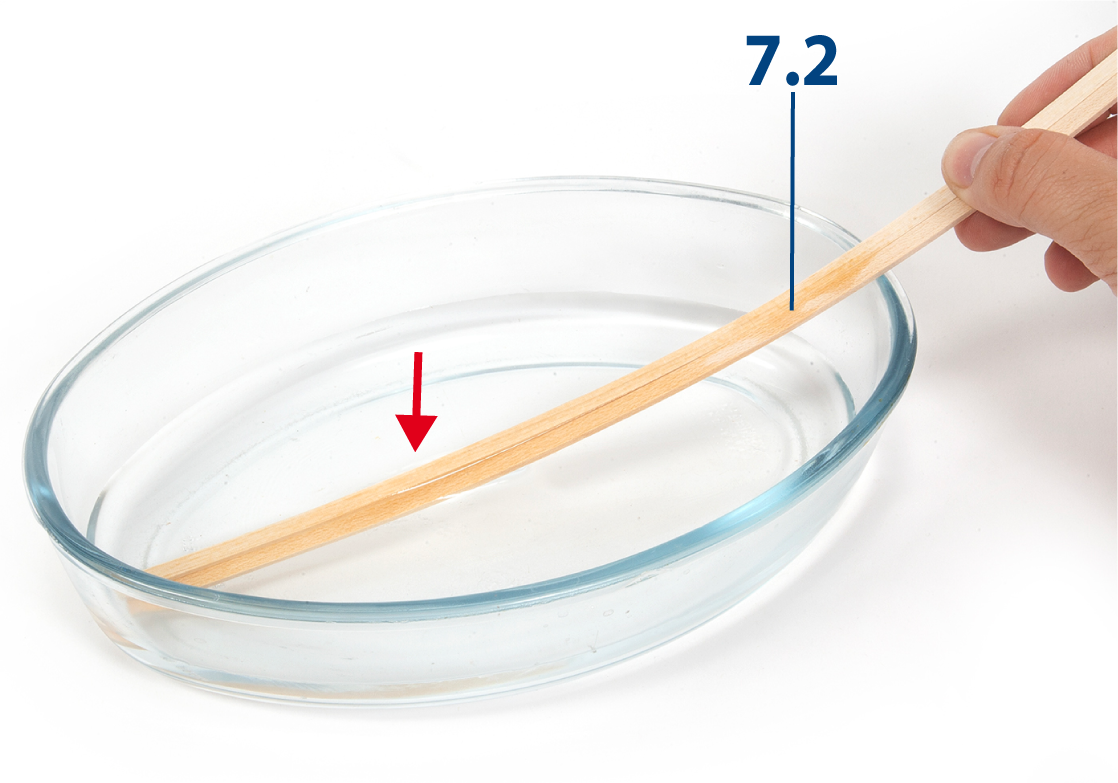
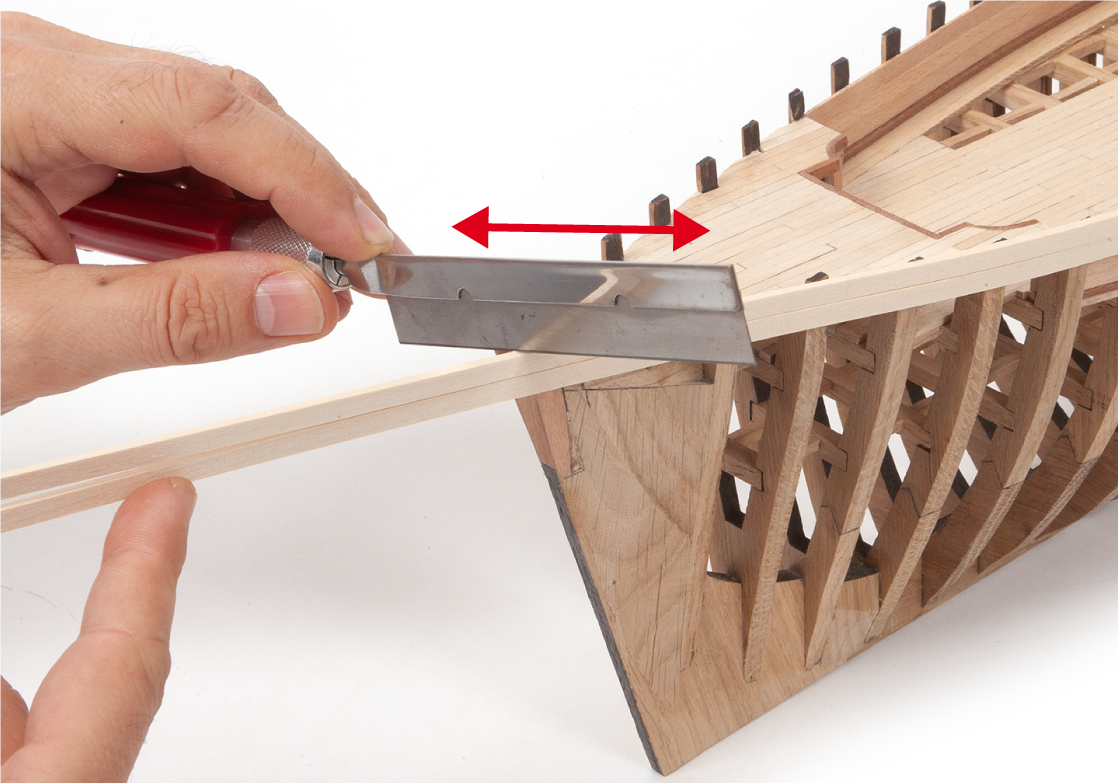
As you continue sanding, slide a wooden strip 7.2 (2 x 5 x 600 mm lime wood) up and down against the hull to identify areas that require additional sanding, as shown.
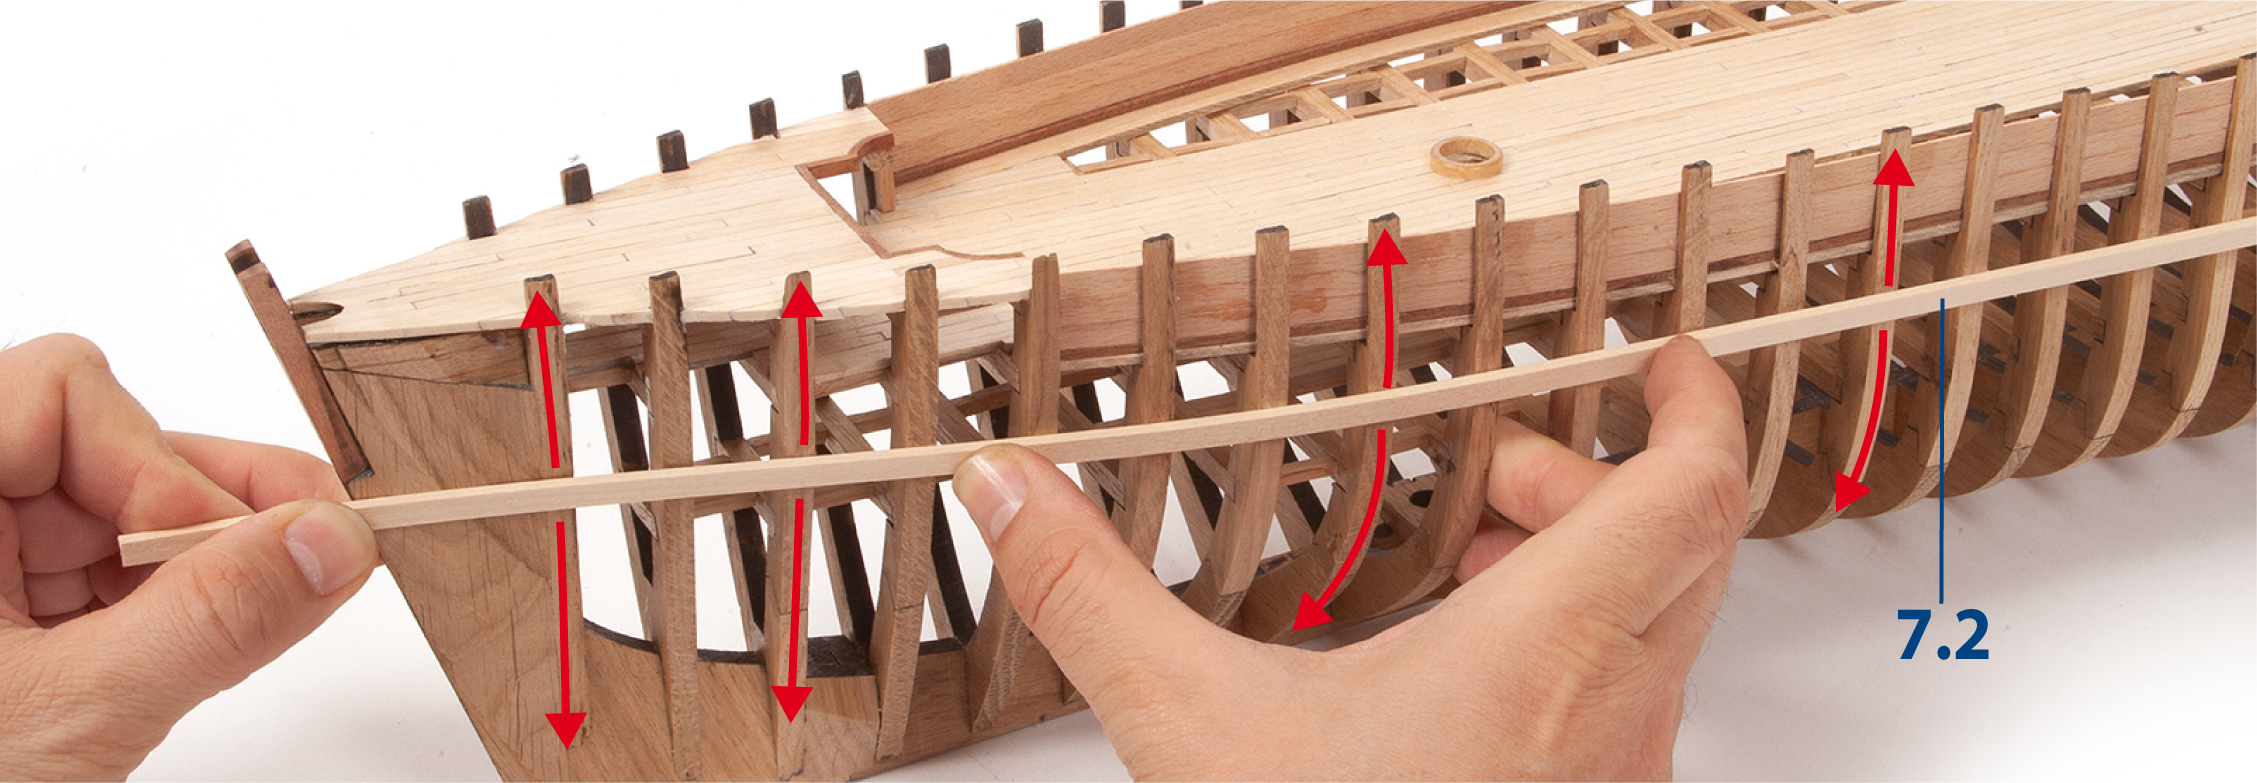
Step 2
Sand two strips 7.2, then soak them in water for approximately 15 minutes.
Step 3
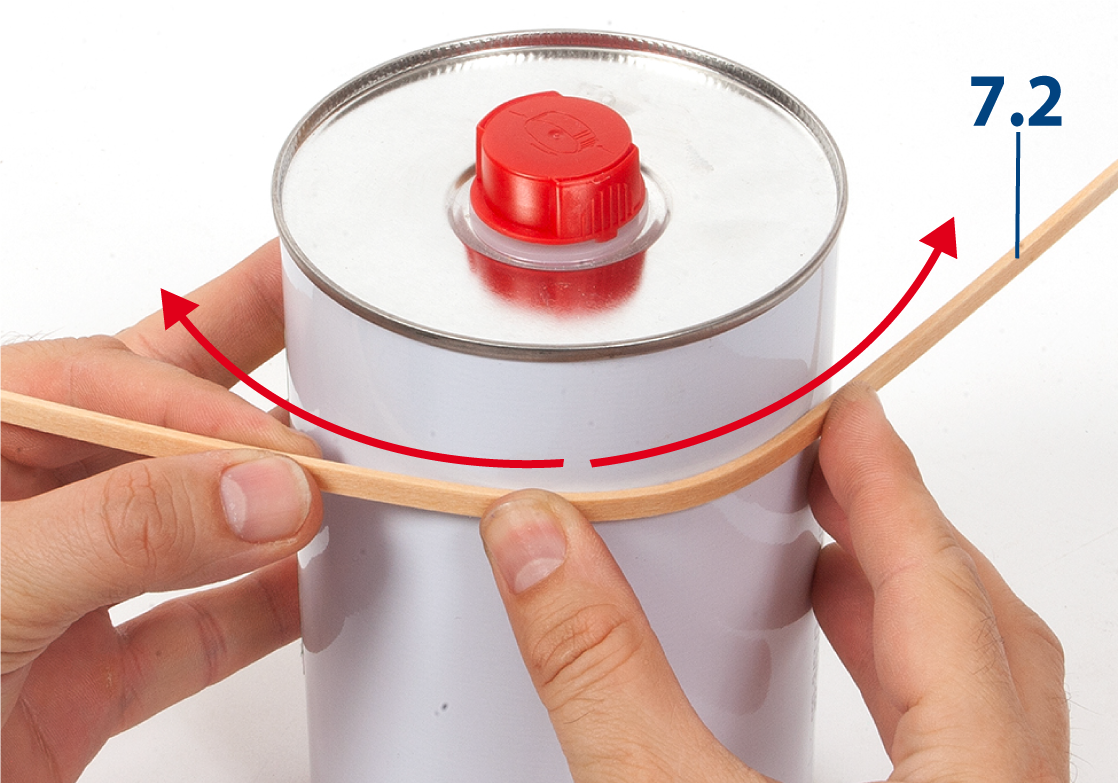
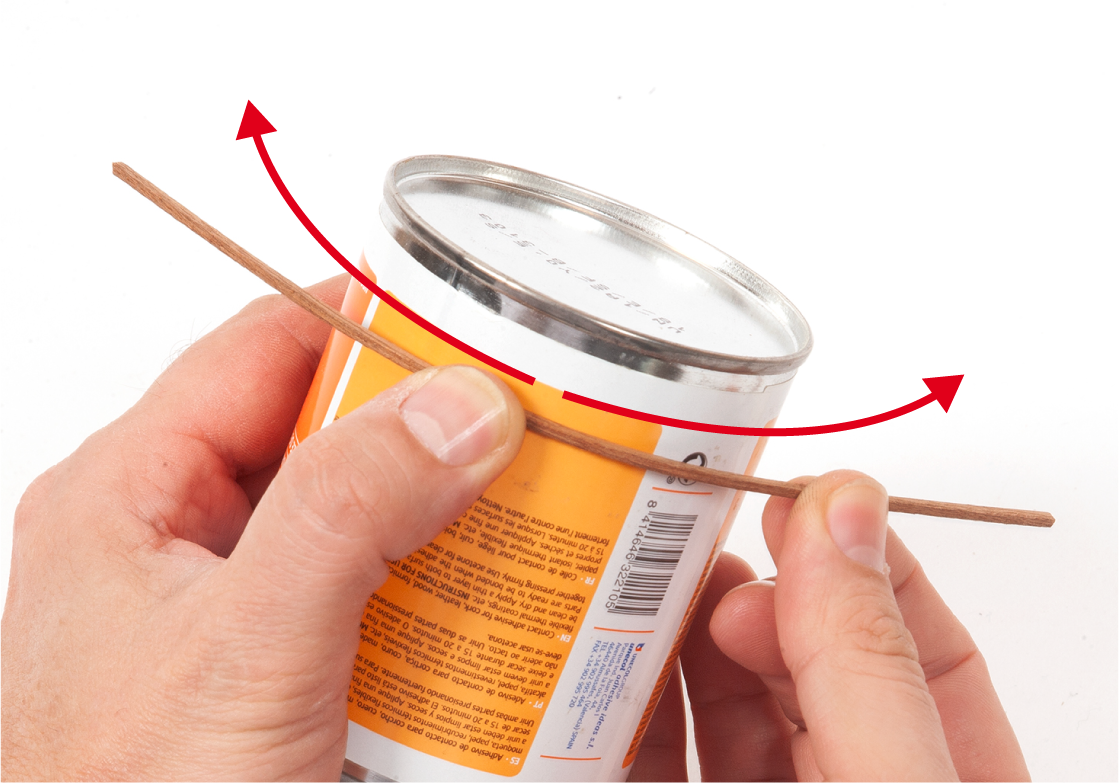
Bend the wooden strips to match the shape of the hull using a cylindrical object, as shown.
Step 4
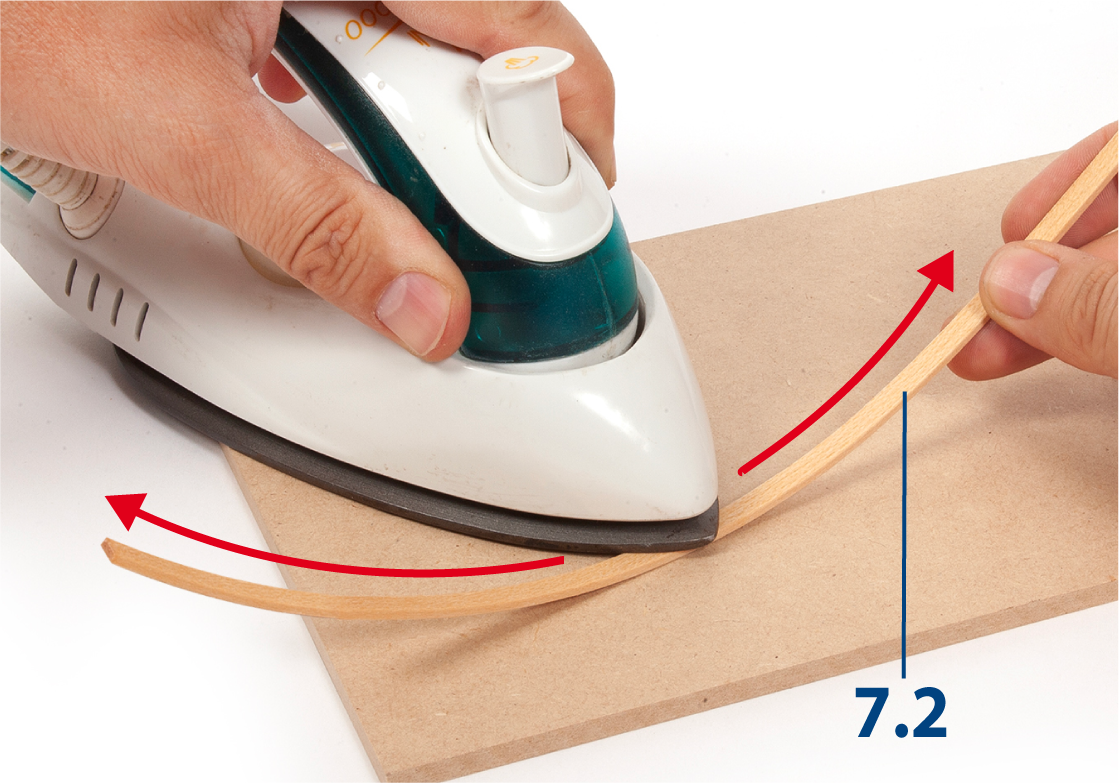
Alternatively, use a soldering iron or a modelling iron to bend the wooden strips to match the curve of the hull.
Step 5
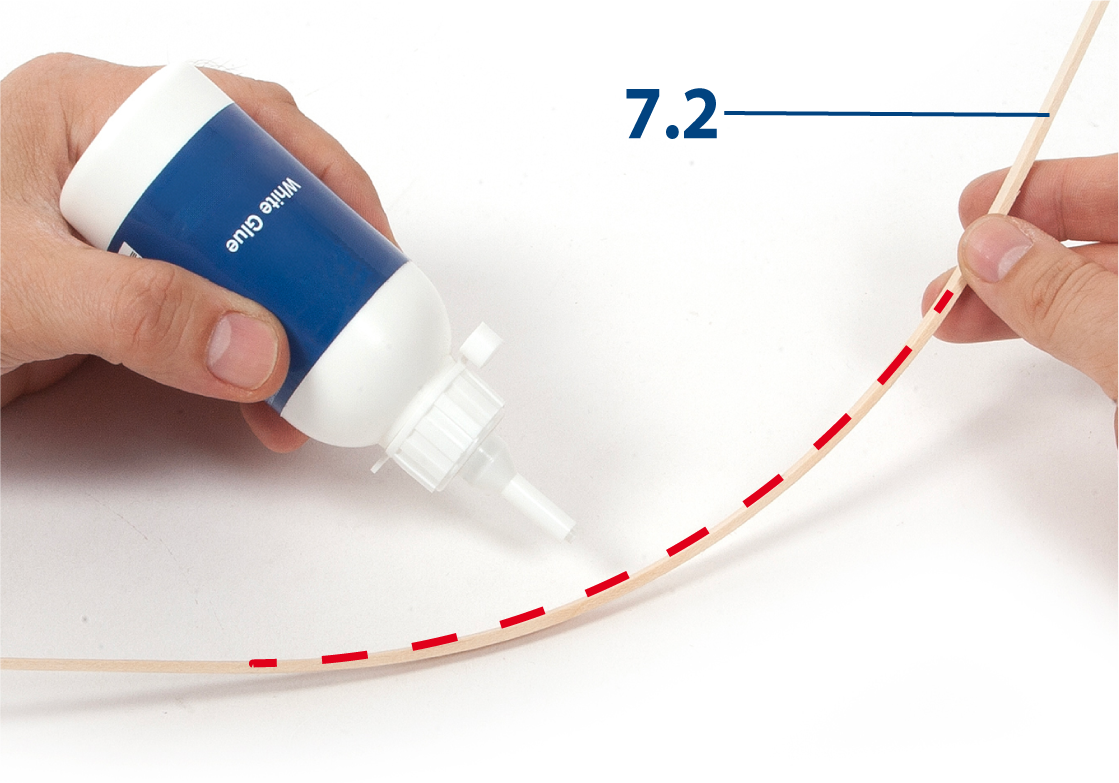
Test-fit the wooden strip at the stern of the hull, as shown in the images below. Then apply PVA glue to every area where the wooden strip will make contact with the hull framework.
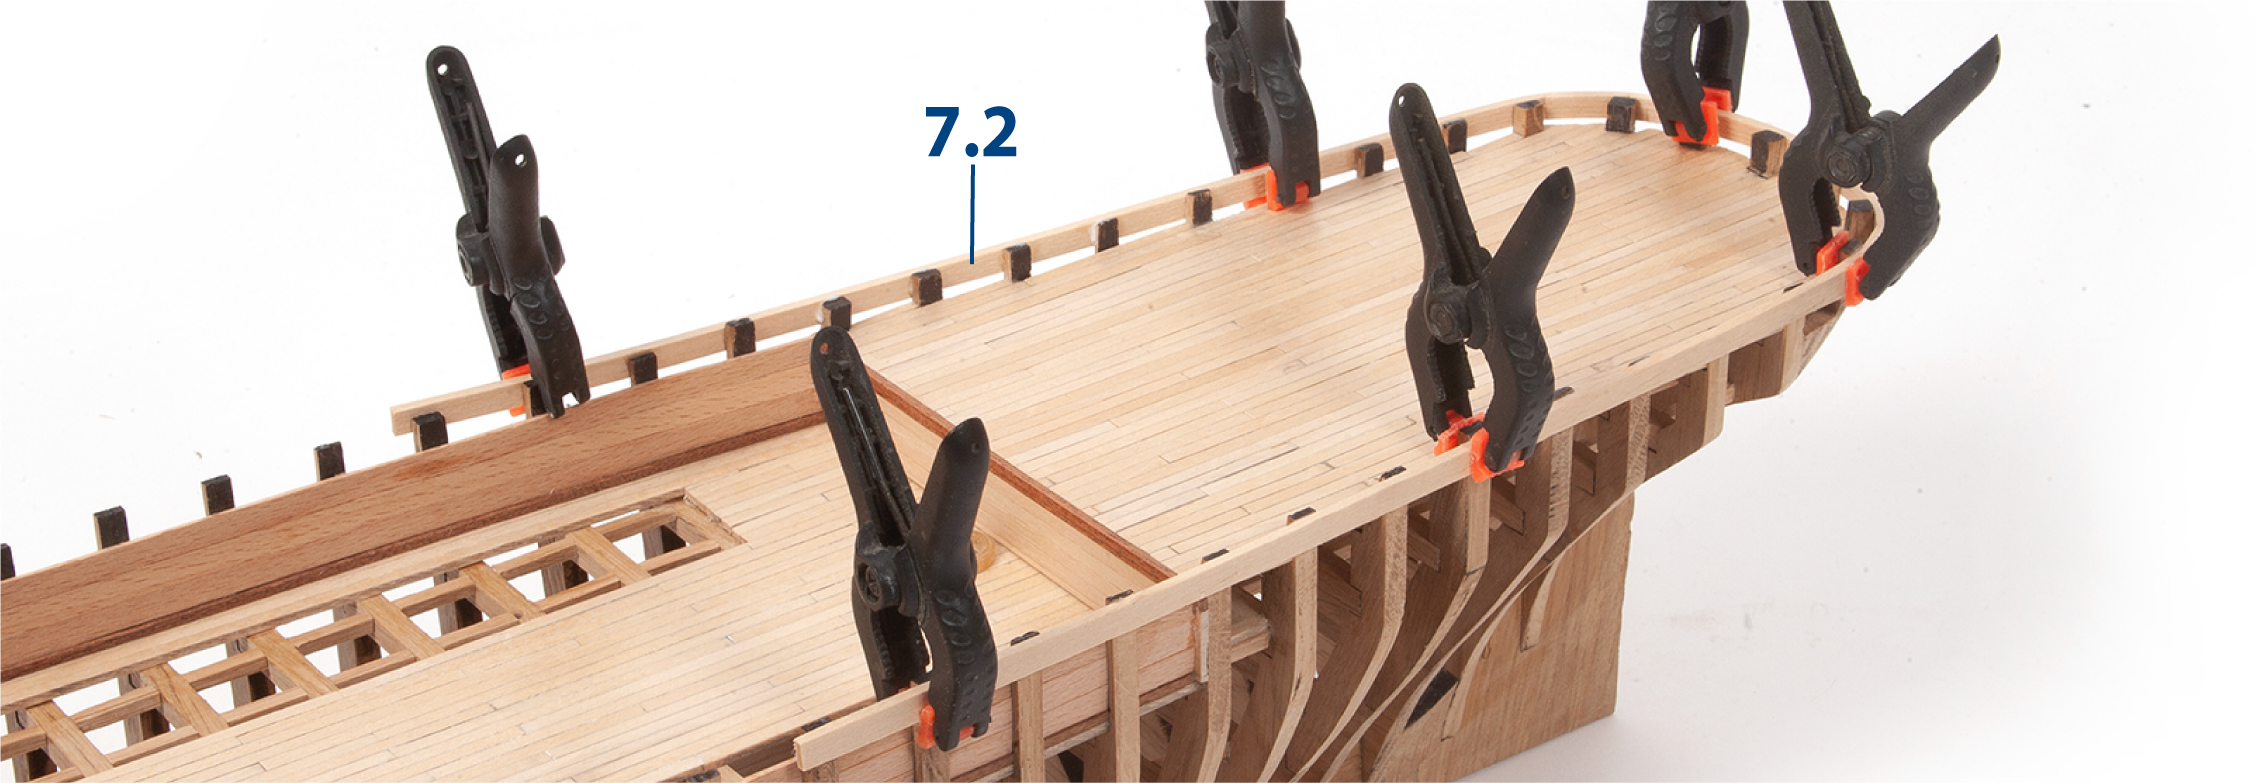
Step 6
Position the wooden strip flush with the top edge of the frames, leaving an equal amount of excess strip extending beyond each side of the hull. Hold the wooden strip in place with clamps until the glue has dried.
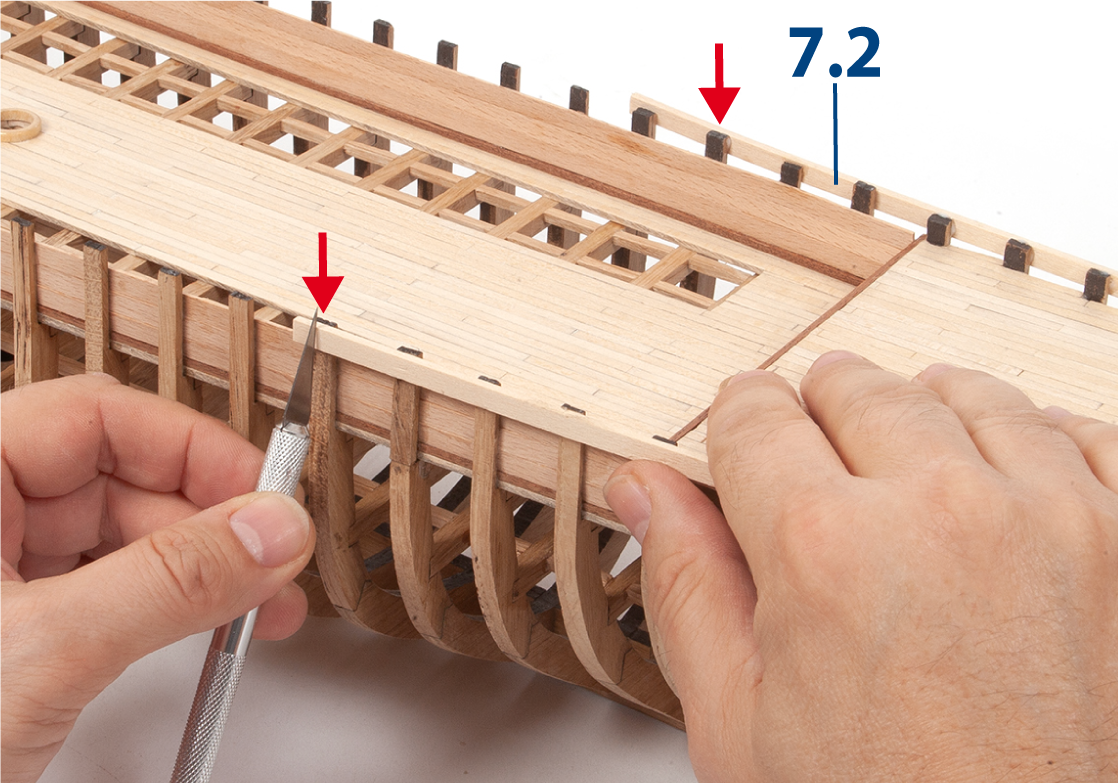
Step 7
Trim the wooden strip in the middle of frame 31. Repeat this process on the opposite side of the hull.
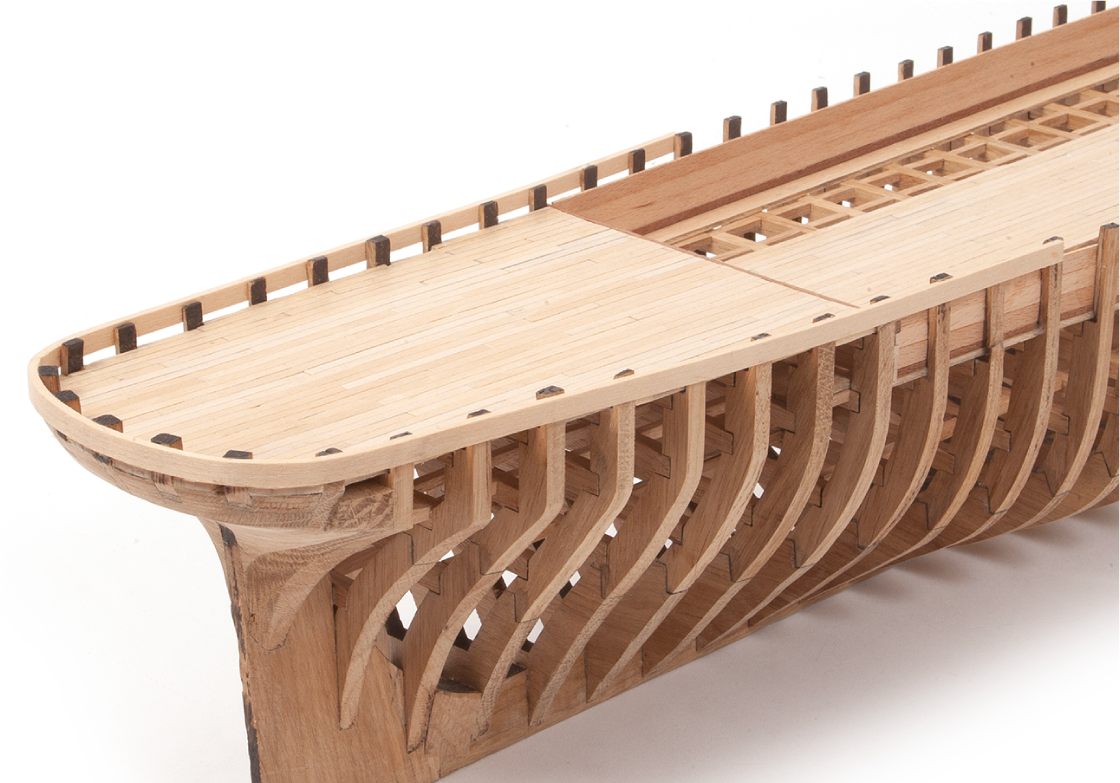
Step 8
The image shows the wooden strip in place.
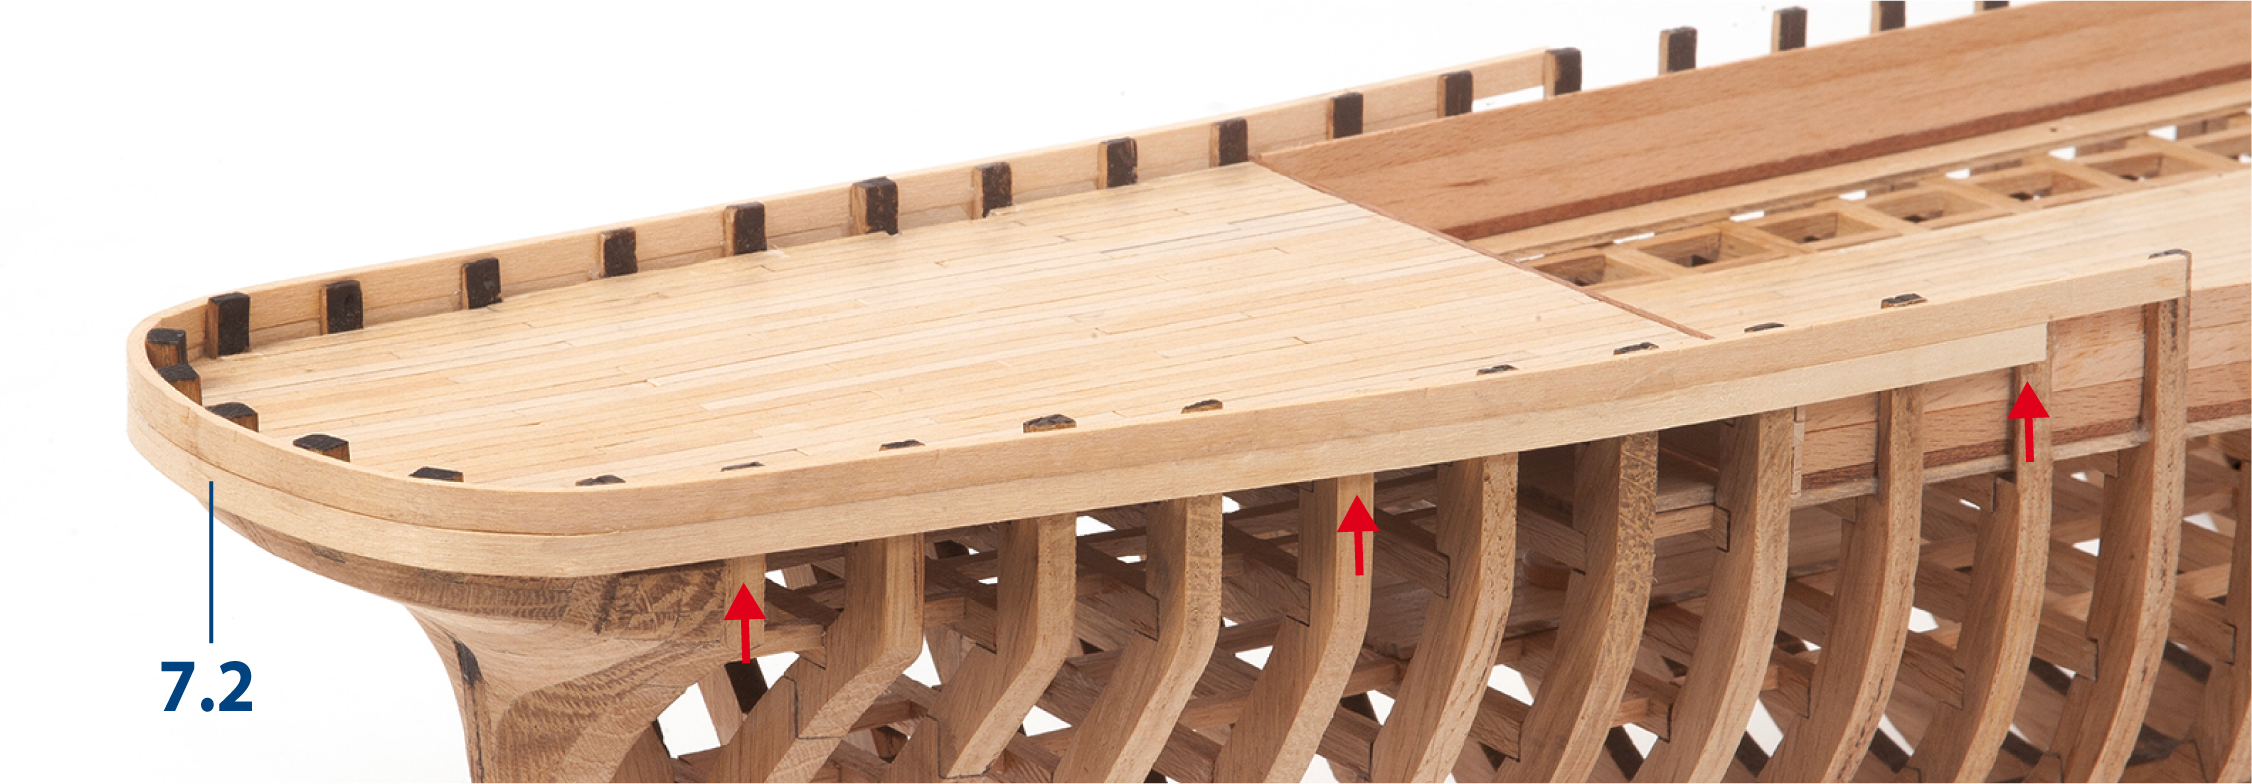
Step 9
Bend and glue another wooden strip 7.2 to match the curve of the hull, positioning it directly below the previous wooden strip. Trim the wooden strip in the middle of frame 32.
Step 10
Continue gluing wooden strips 7.2 until there are two complete rows extending beyond the bow. Alternate the joints so that they are on different frames. Repeat the same procedure on the opposite side of the hull.

Step 1
Trim the wooden strips that extend beyond the front of the hull so that their ends are flush with the hull.
Step 2
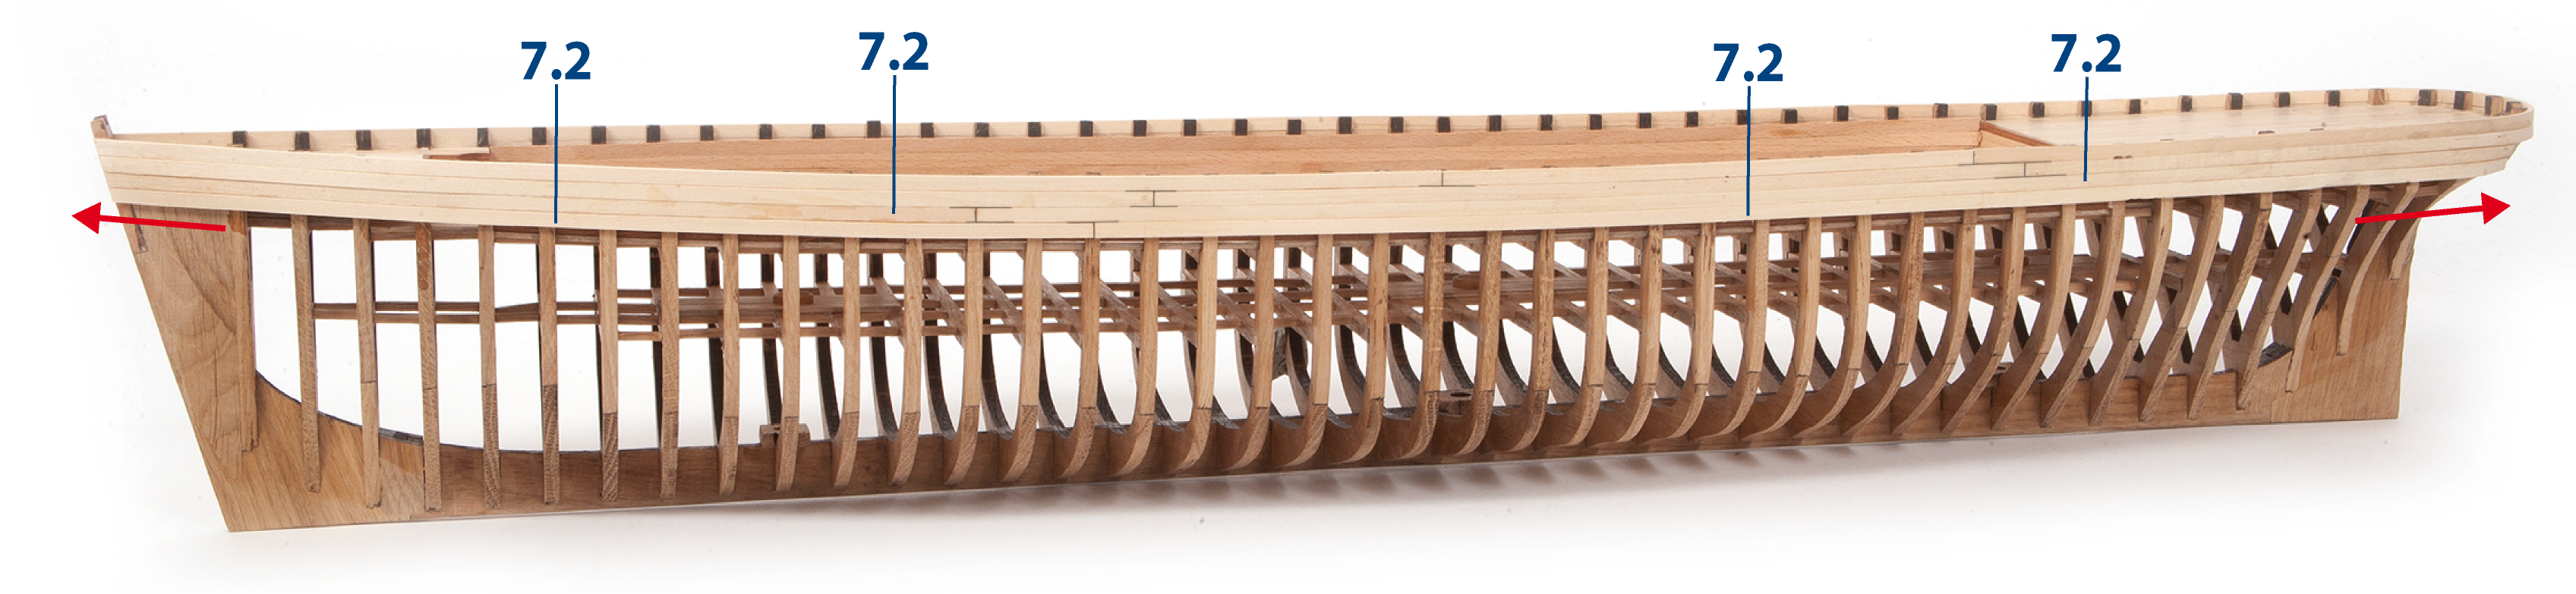
Add two additional rows of wooden strips 7.2 along the length of each side of the hull, alternating the joints.
Step 3
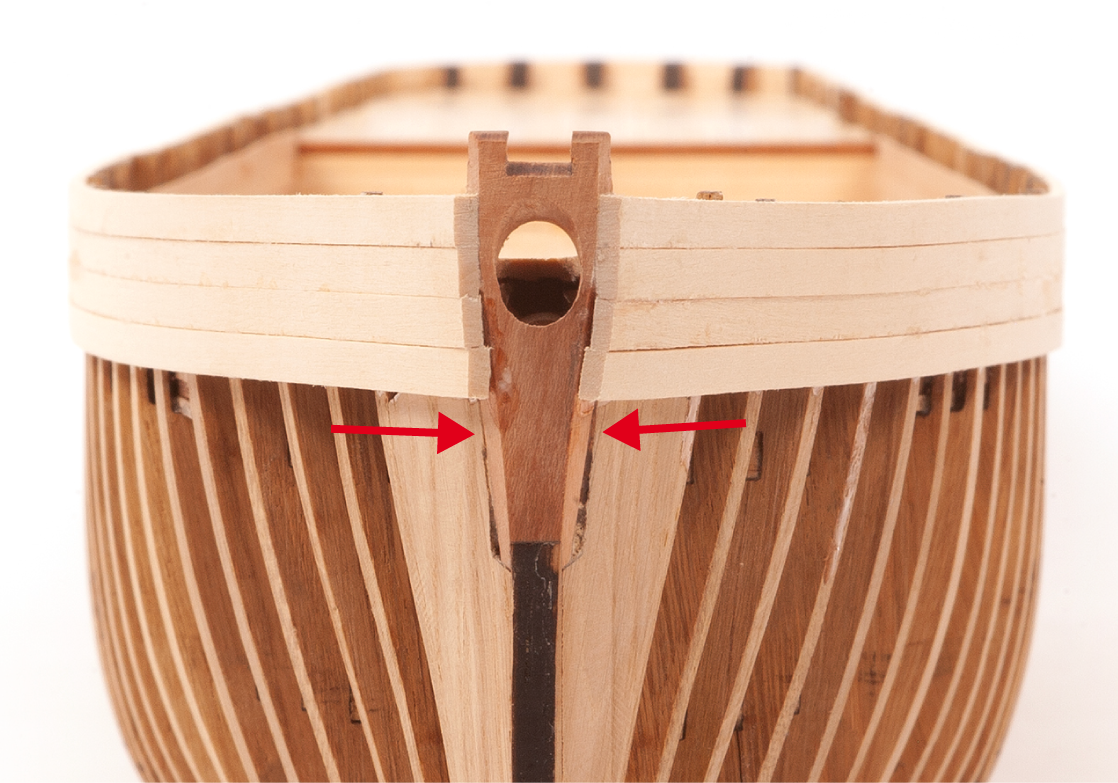
This image shows the bow of the hull.
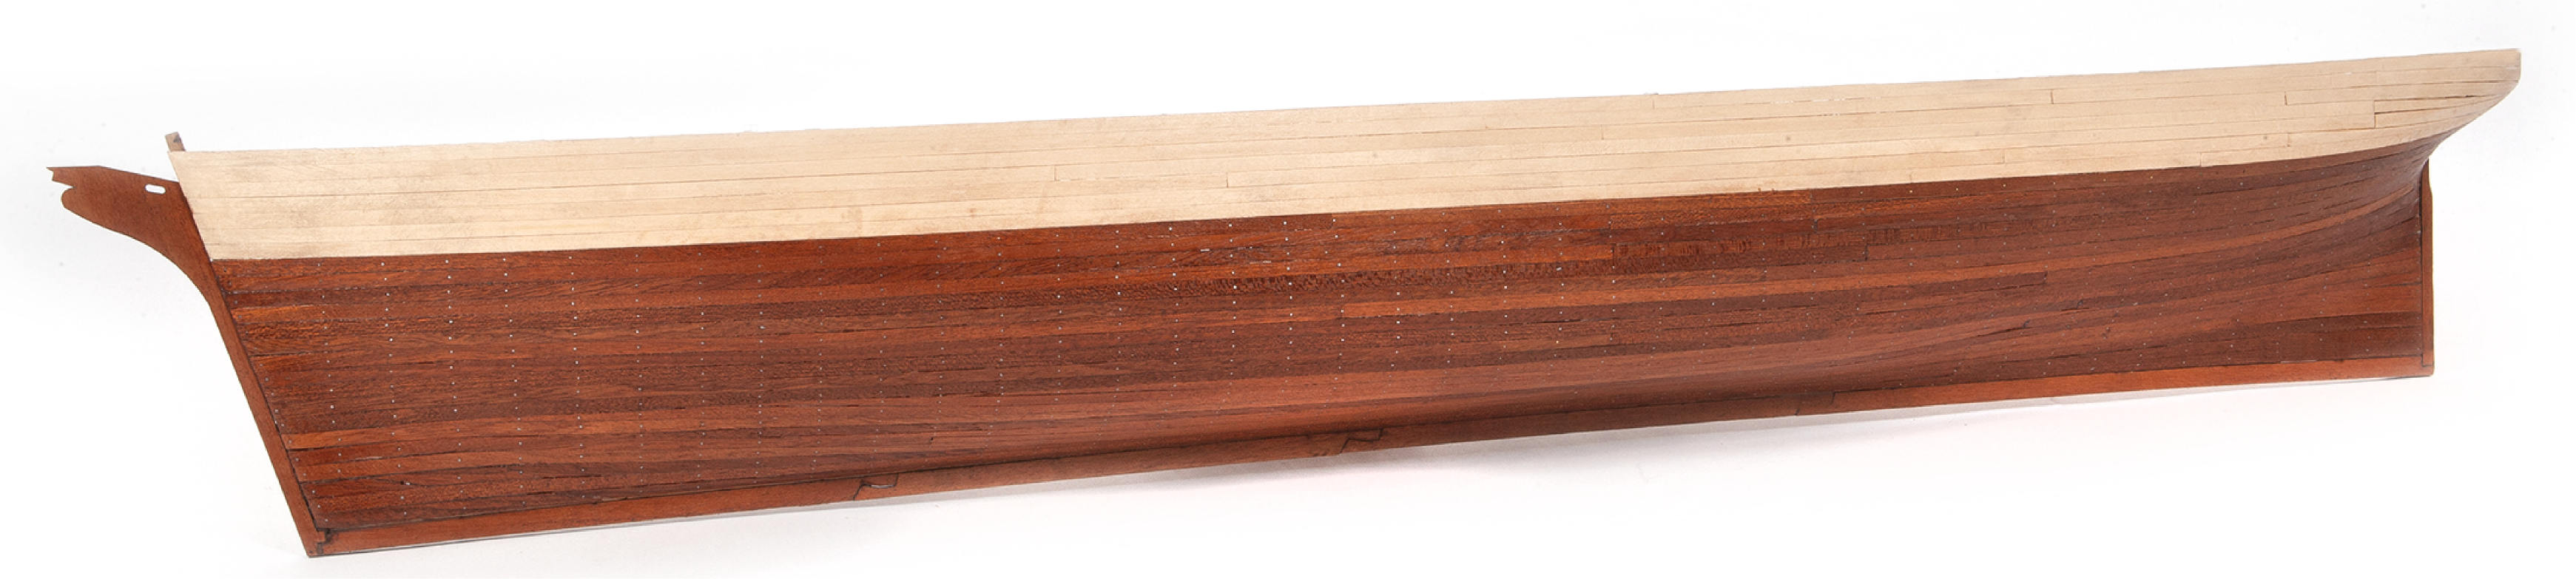
This model is designed with the lower part of the hull left unplanked so that the internal structure remains visible. If you wish to plank the lower part of the hull, refer to the instructions given at the end of this pack before continuing.
If you do not wish to plank the lower part of the hull, continue to follow Step 4.
Step 4
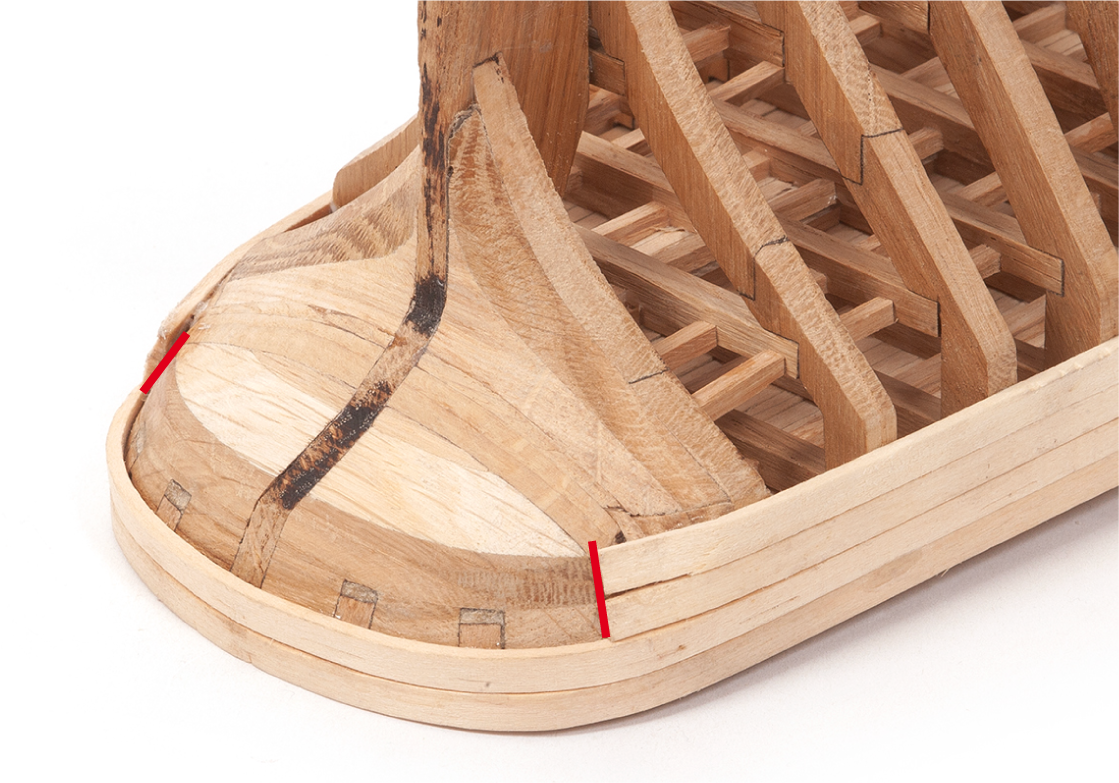
Position the wooden strips in the stern area as shown in the image.
Step 5
Continue adding wooden strips until there are 8 rows on each side.
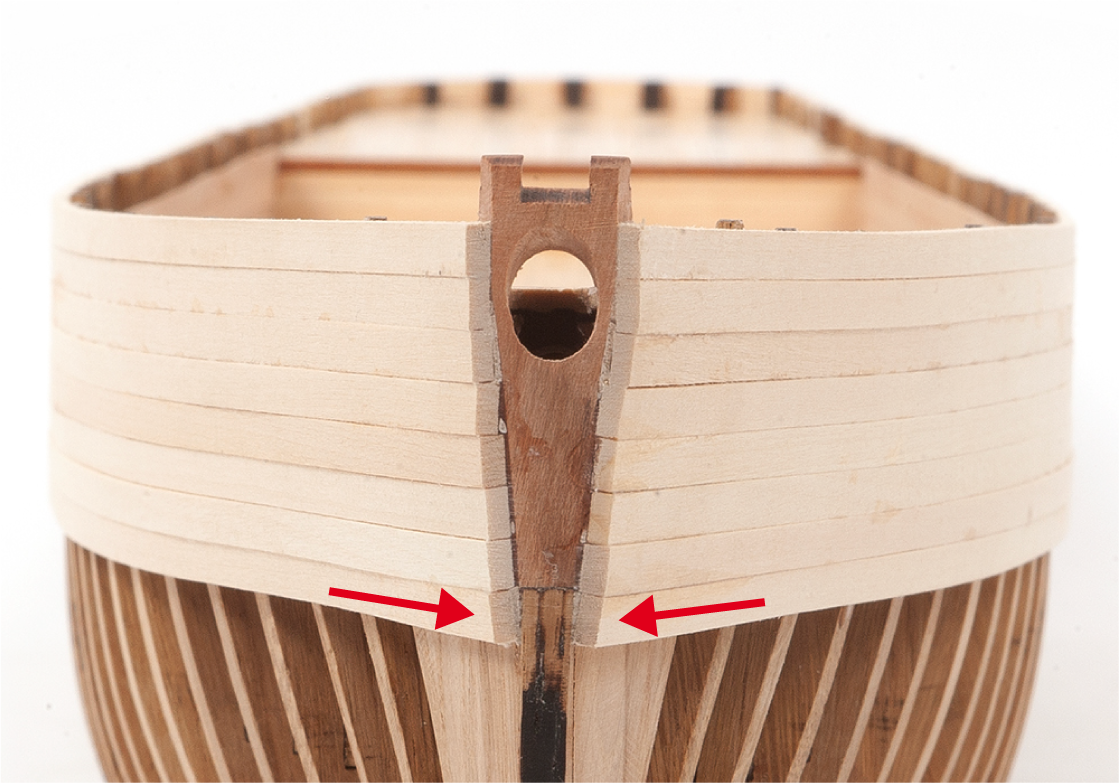
Step 6
This image shows the stern with the planking in place.
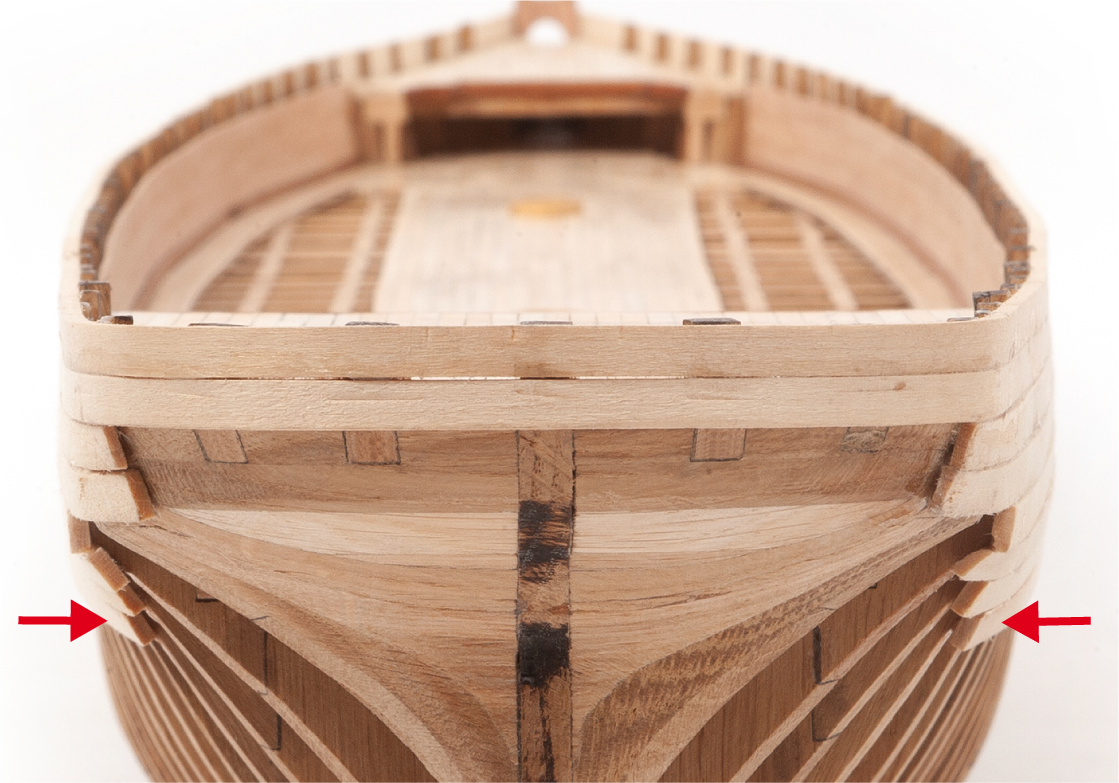
Step 7
This image shows the planking along the length of the hull.

Step 8
Sand the stern planking to bevel the lower section so that it blends smoothly with the rest of the planking, as shown in the image.
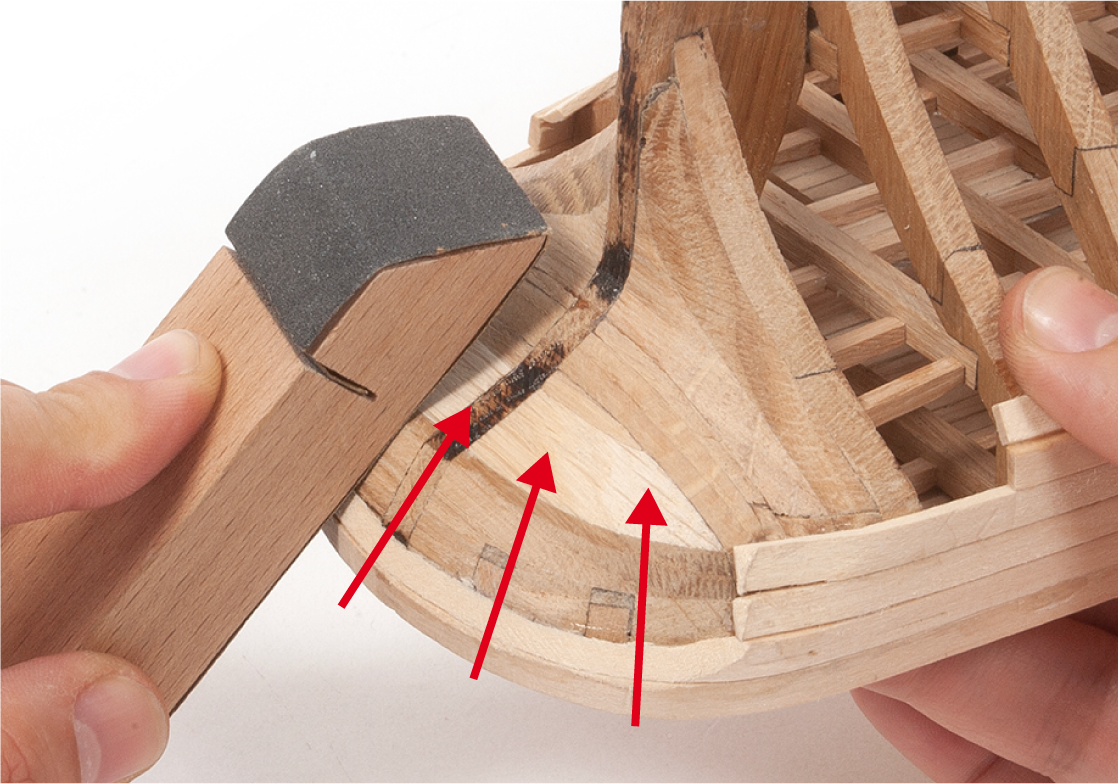
Step 9
At the stern, sand the angled section and the side of the hull to make the surface smooth and continuous.
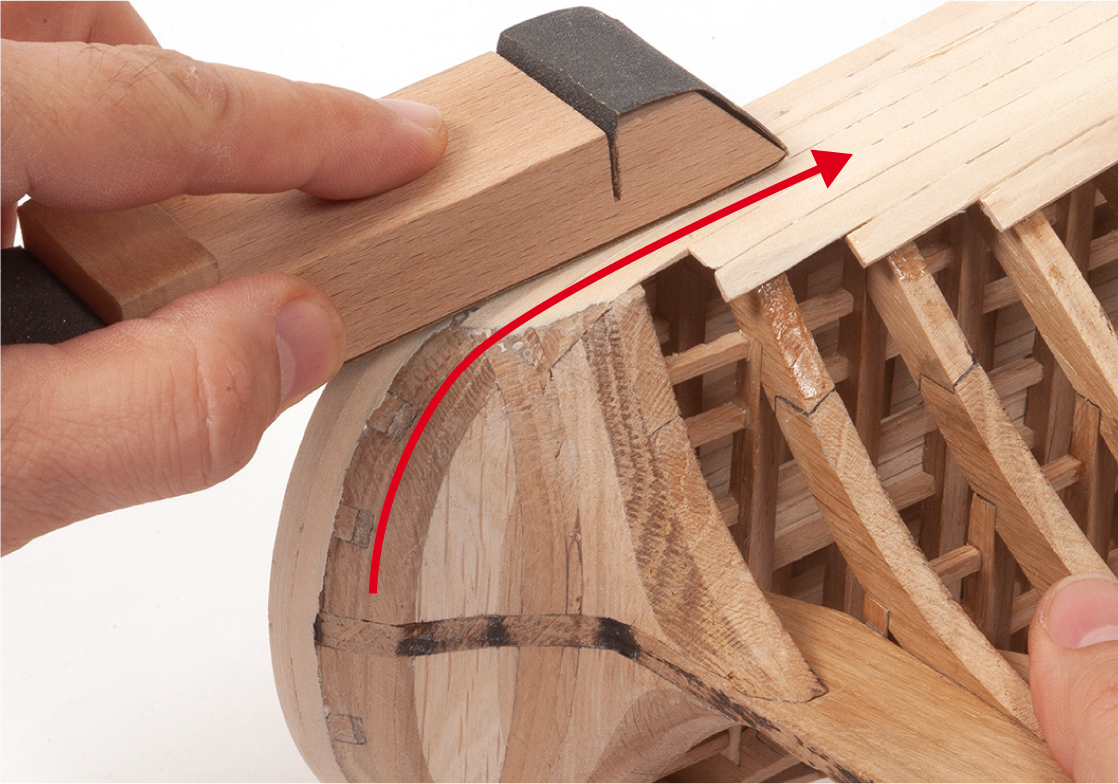
Step 10
Sand the sides of the hull to create an even surface across the planking.
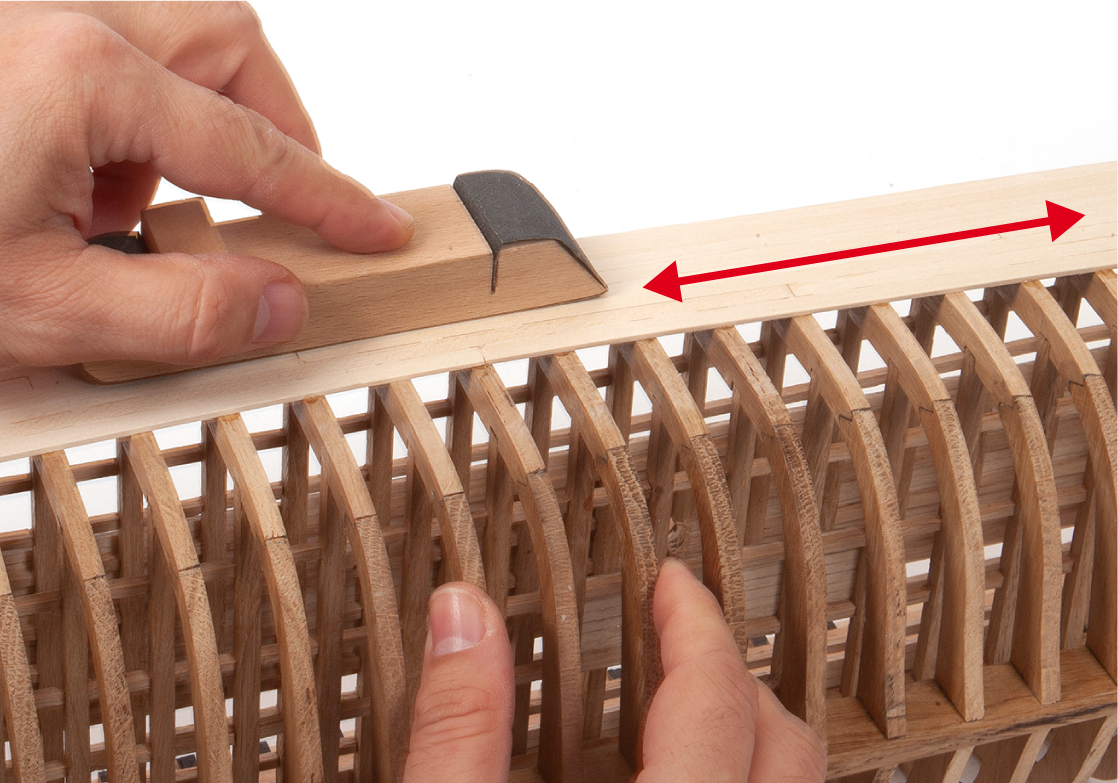
Step 11
Sand the bow area until the ends of the strips taper to a fine edge.
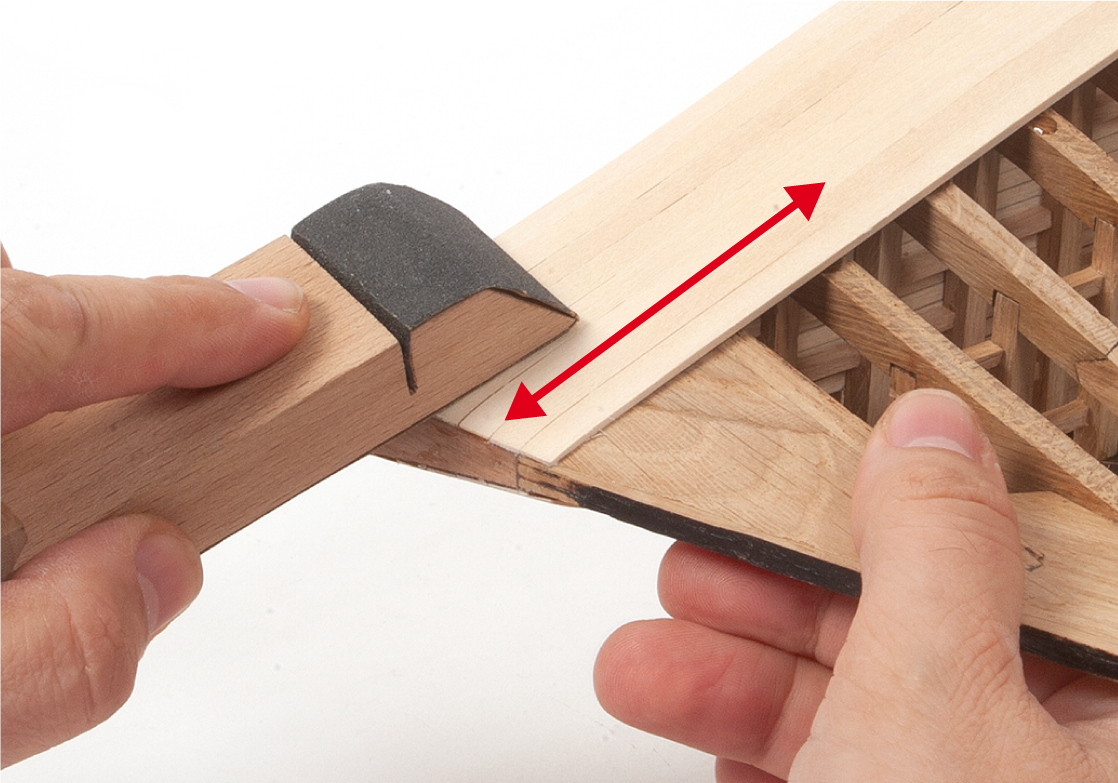
Step 1
The image shows the bow of the hull after sanding.
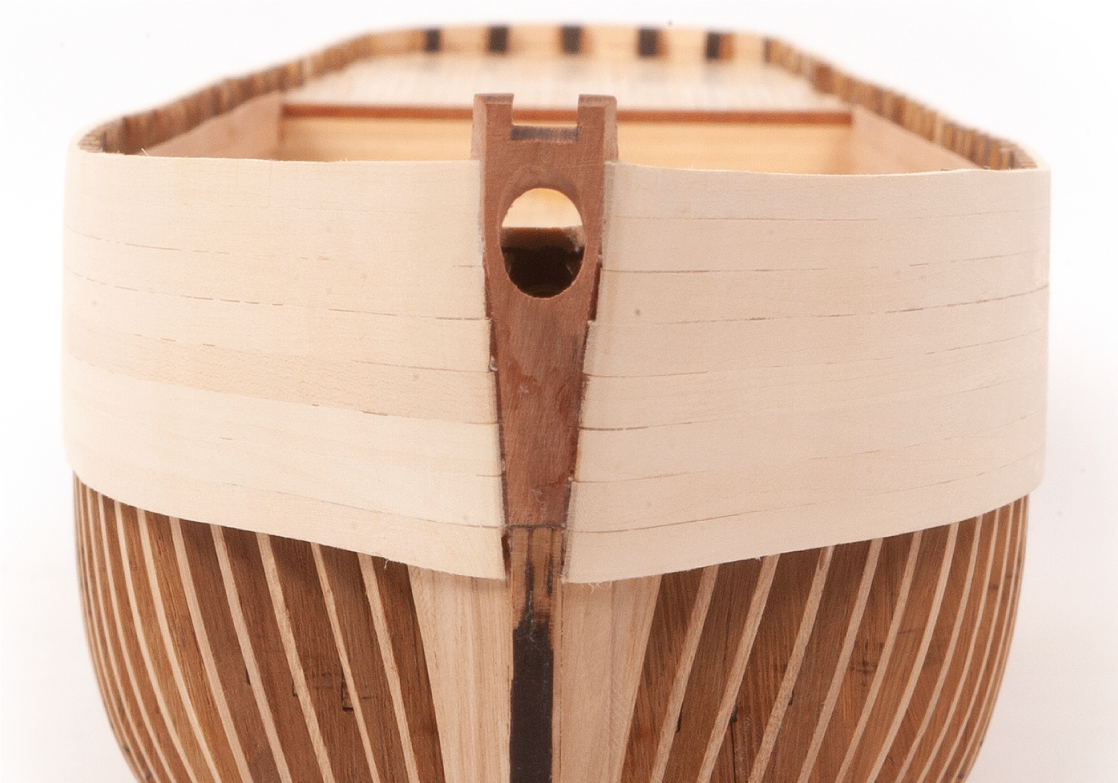
Step 2
This image shows the same area of the hull from another angle.
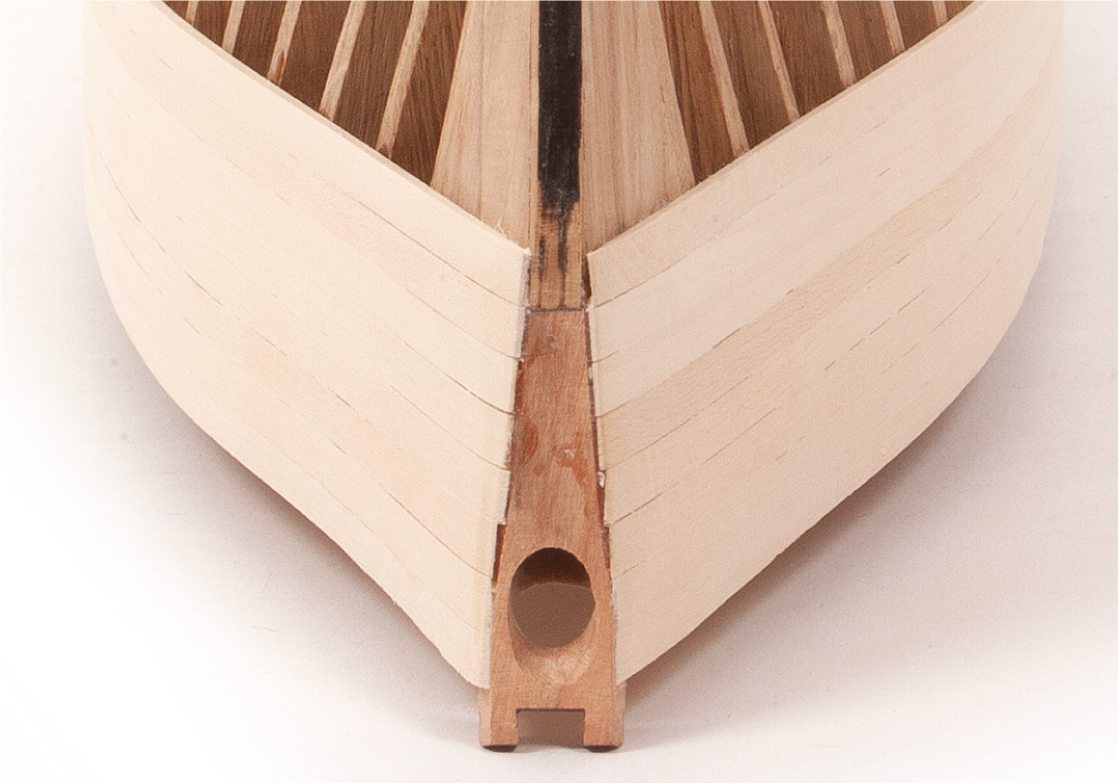
Step 3
This image shows the shape of the different sections in the stern area.
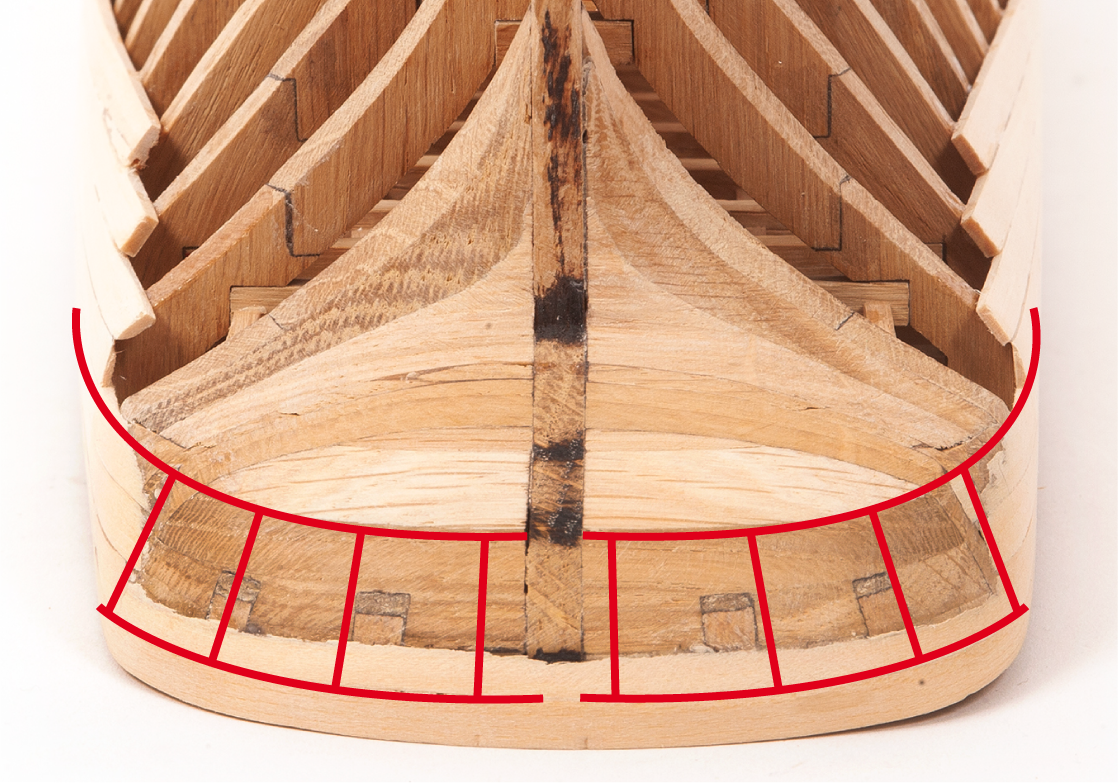
Step 4
This image shows the profile of the stern area.
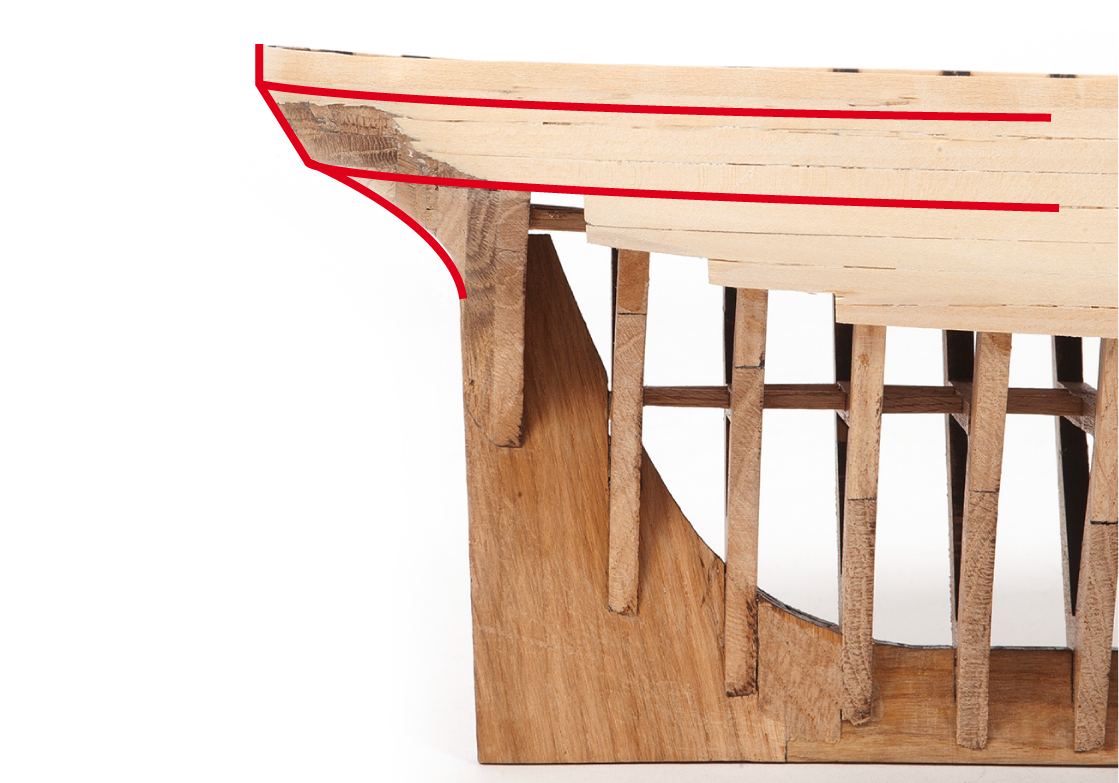
Step 5
Sand the upper edge of the planking until it is level with the frames.
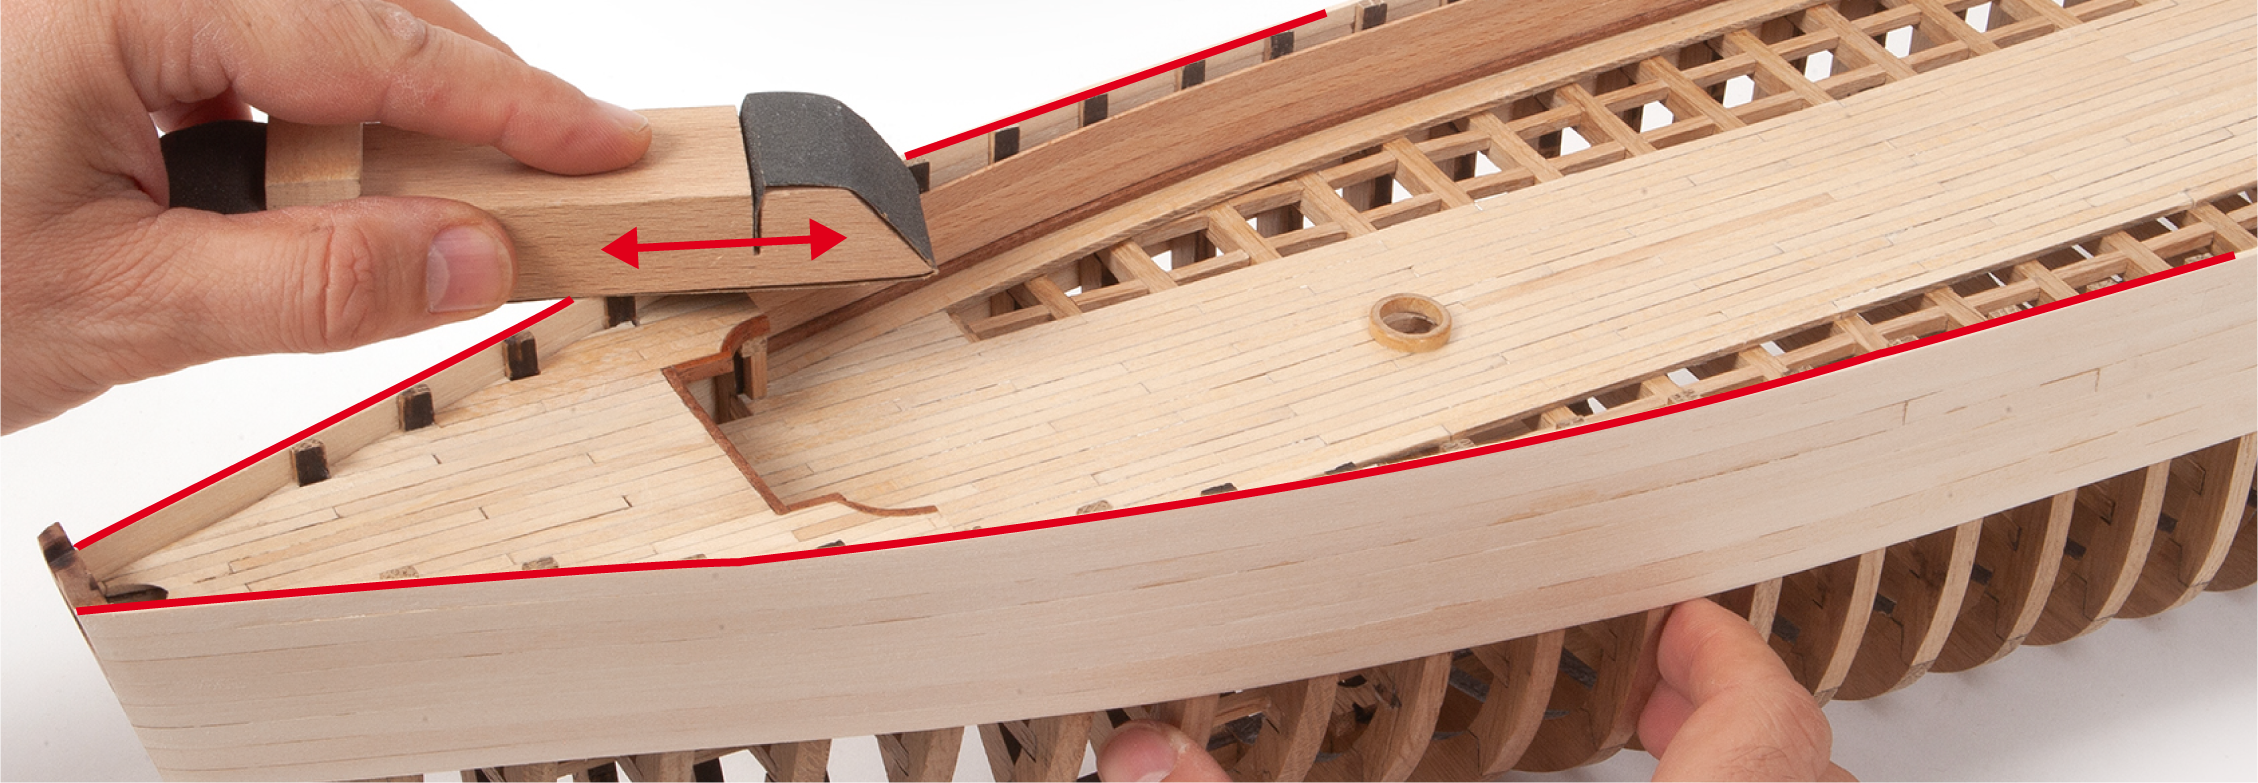
Step 6
Use a grooving tool to create the grooves on the mahogany strips.
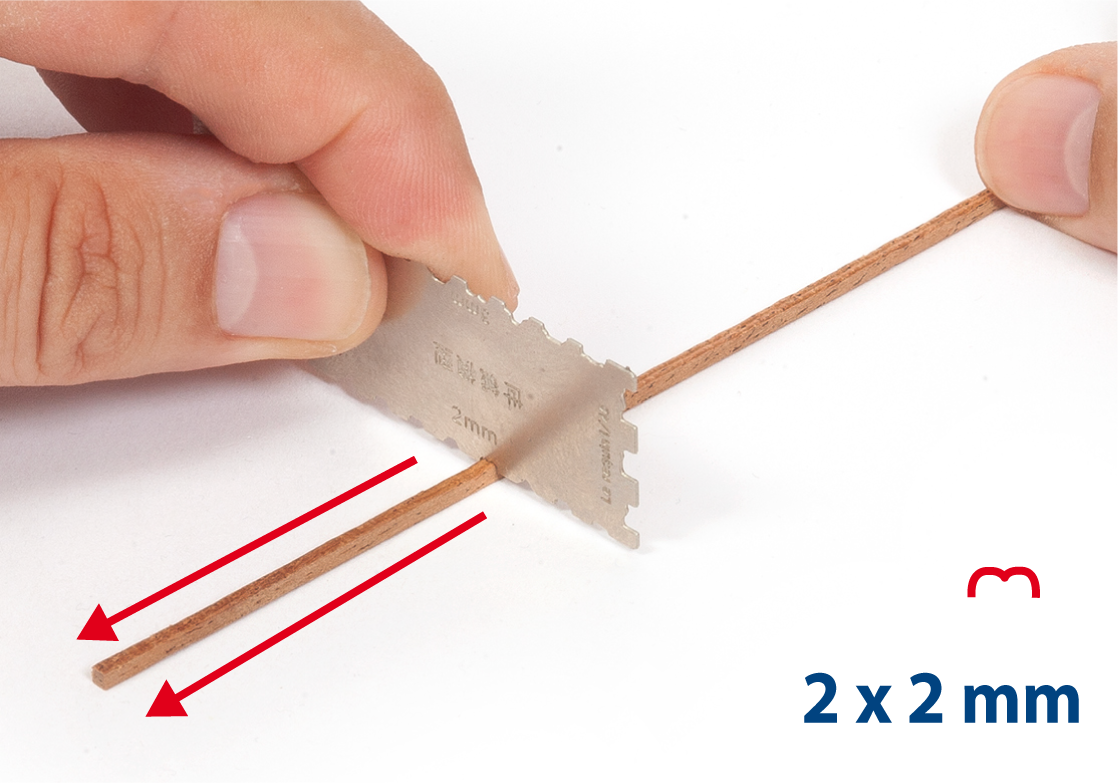
Step 7
Soak the mahogany strips for the stern in water. Bend them to match the shape of the hull using a cylindrical object or an iron.
Step 8
Glue the mahogany strips 7.3 onto the hull as shown on the elevation drawing.

Step 9
This image shows the mahogany strips 7.3 at the bow.
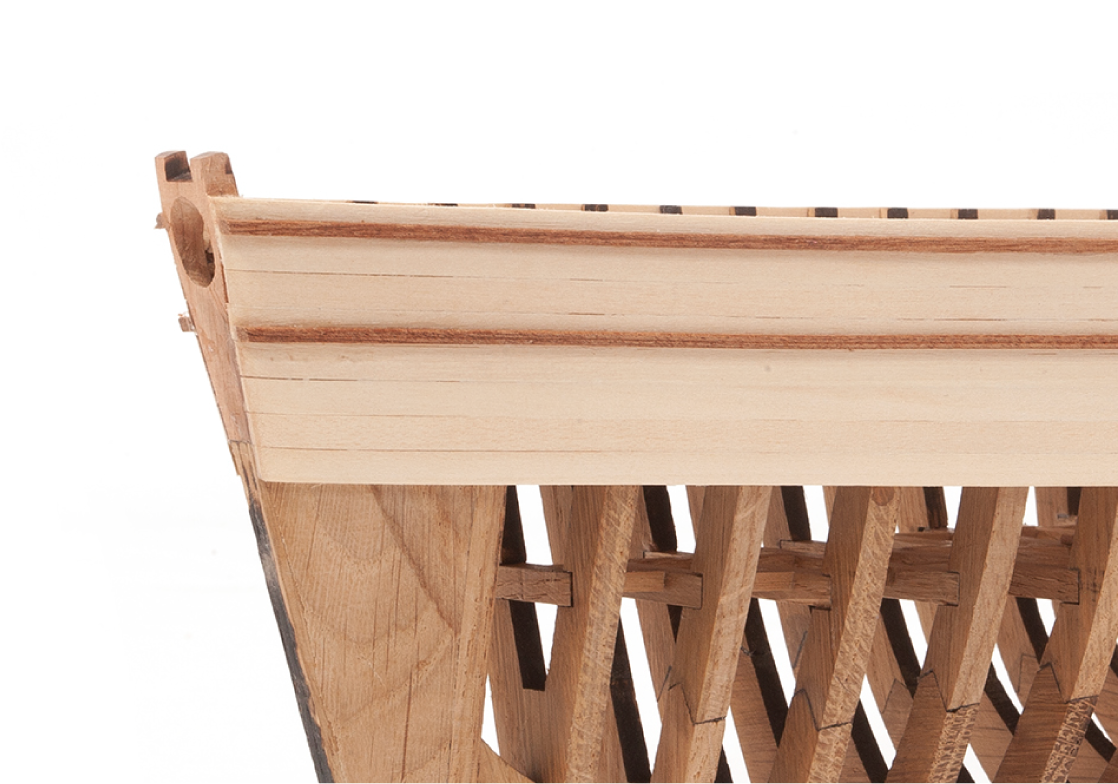
Step 10
This image shows the mahogany strips 7.3 at the stern.
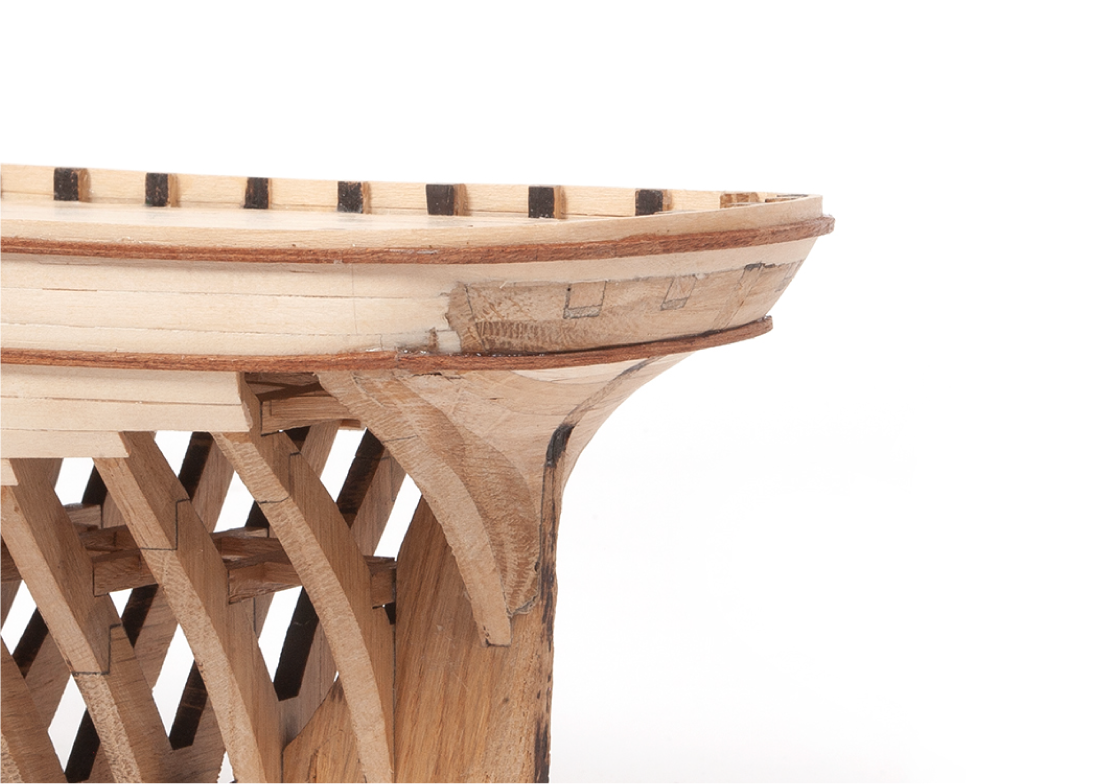
Step 11
Smooth the area between the mahogany strips at the stern.
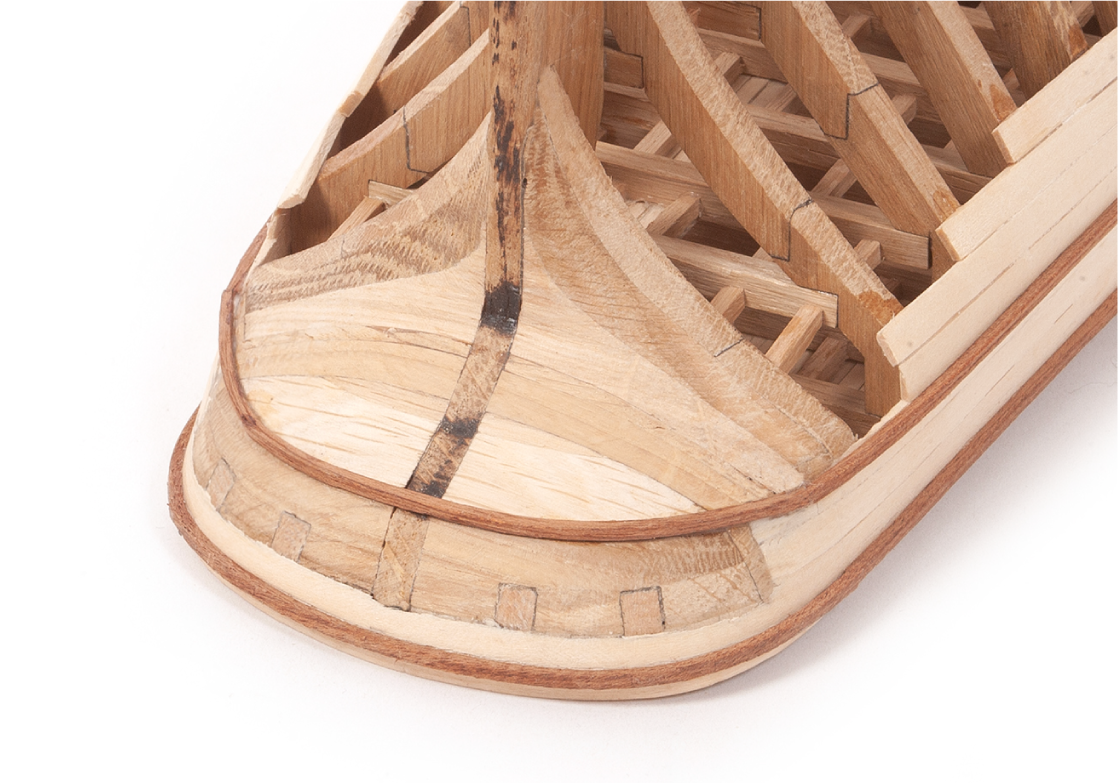
Step 12
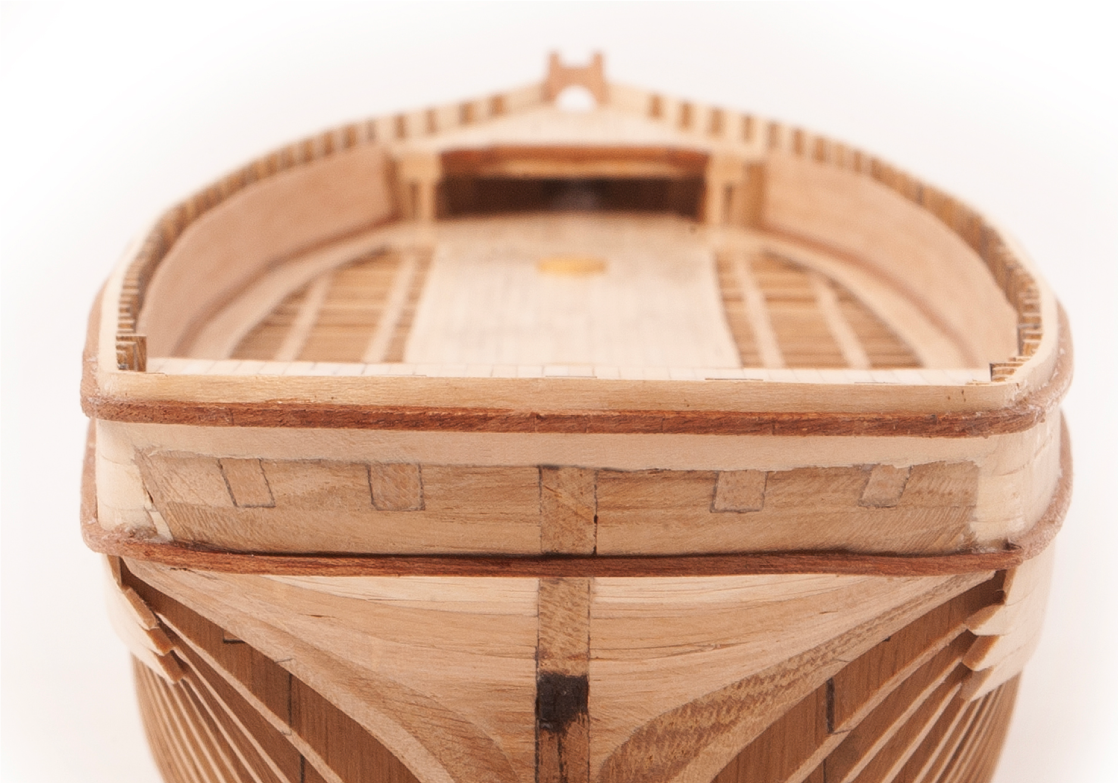
This image shows the stern with the mahogany strips in place.
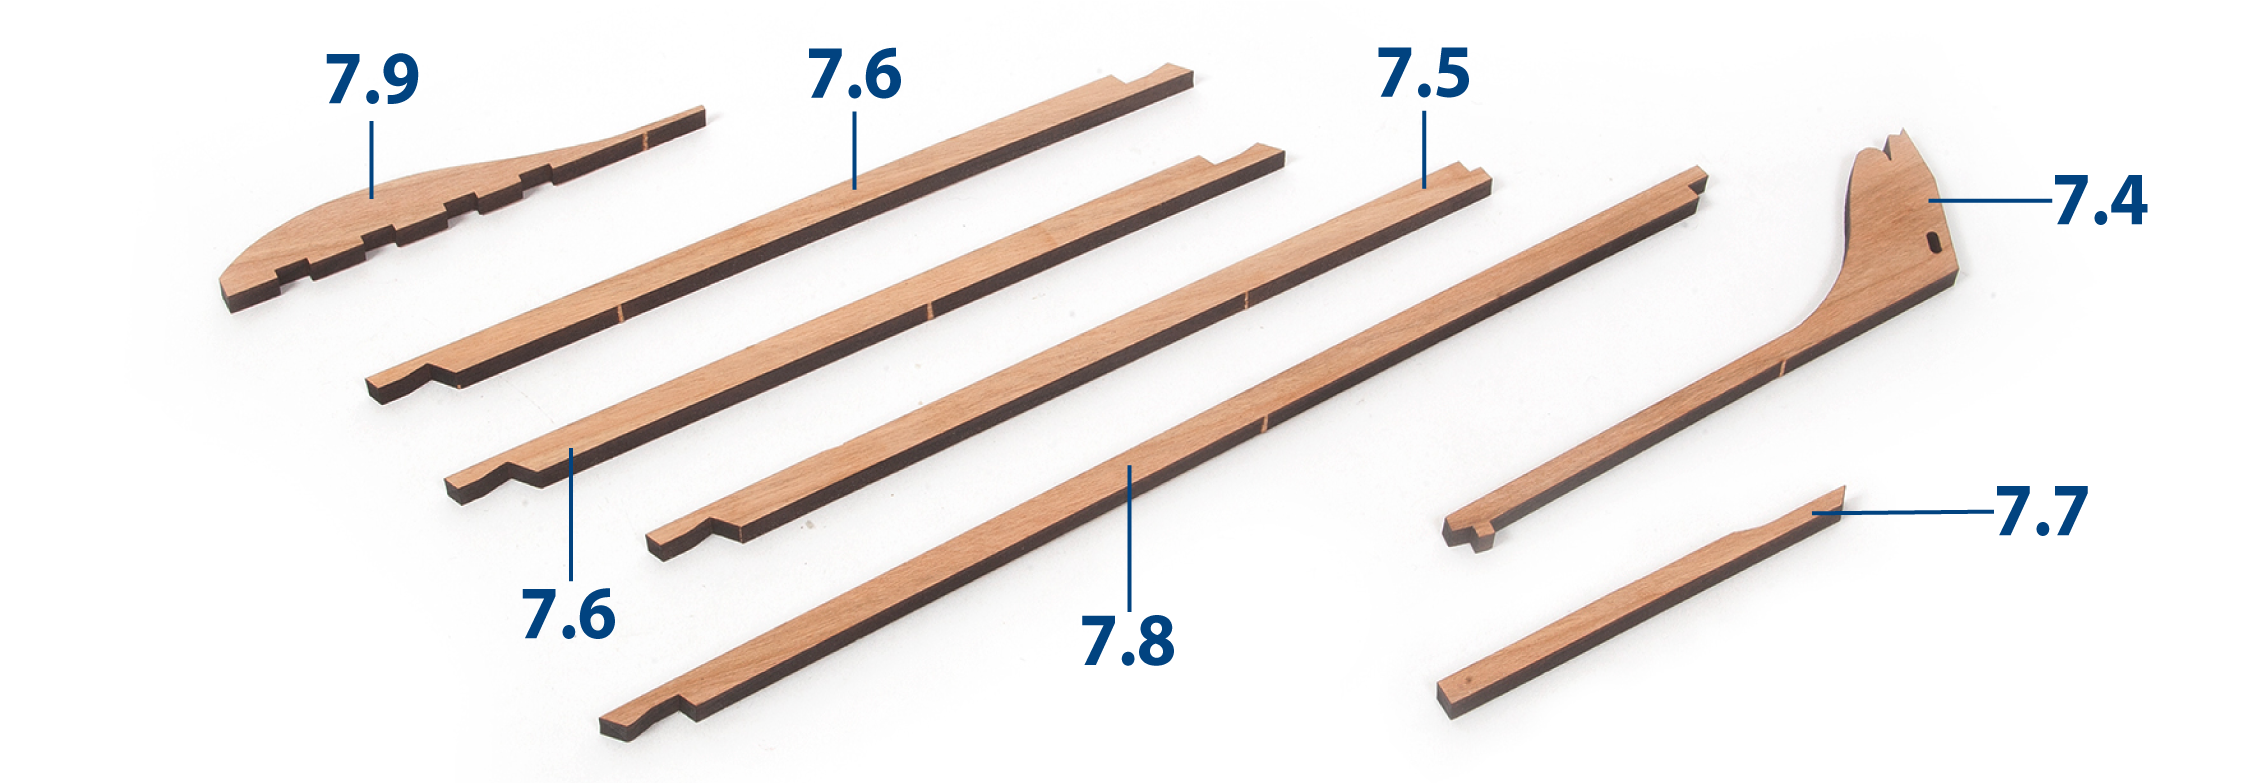
Step 1
Remove the parts shown in the image.
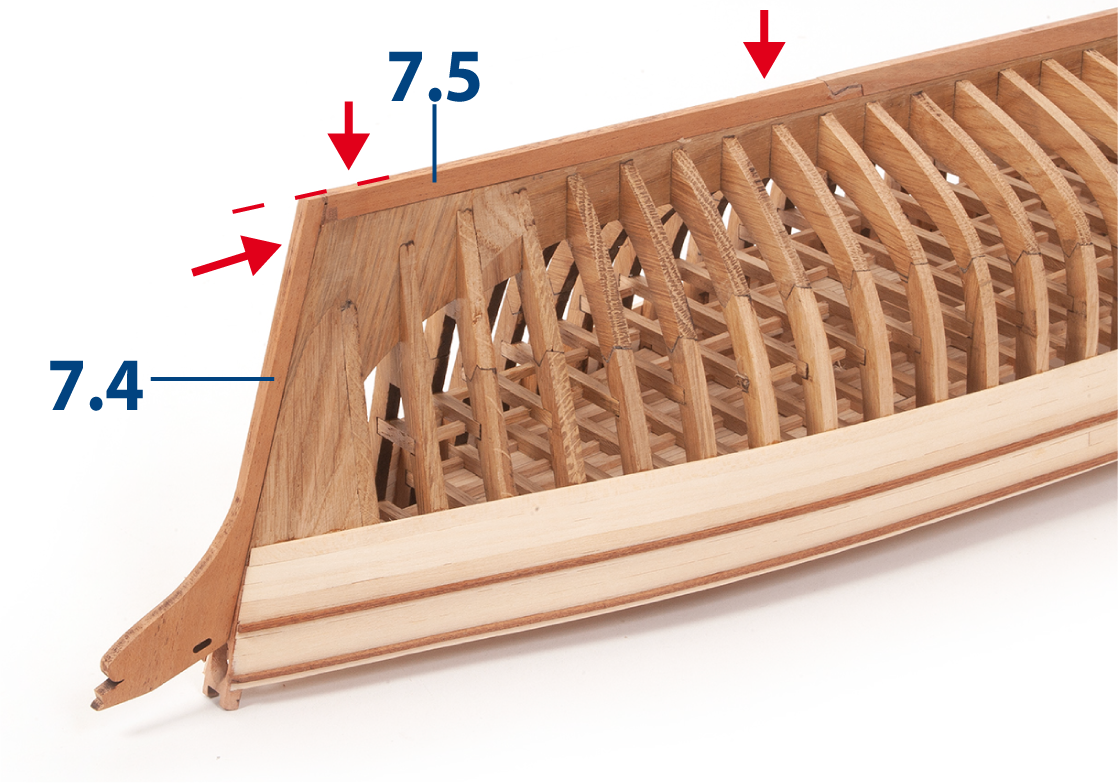
Step 2
Glue parts 7.4 and 7.5 to the front of the hull.
Step 3
Test-fit parts 7.7 and 7.8. You may need to adjust part 7.7 so that it fits correctly.
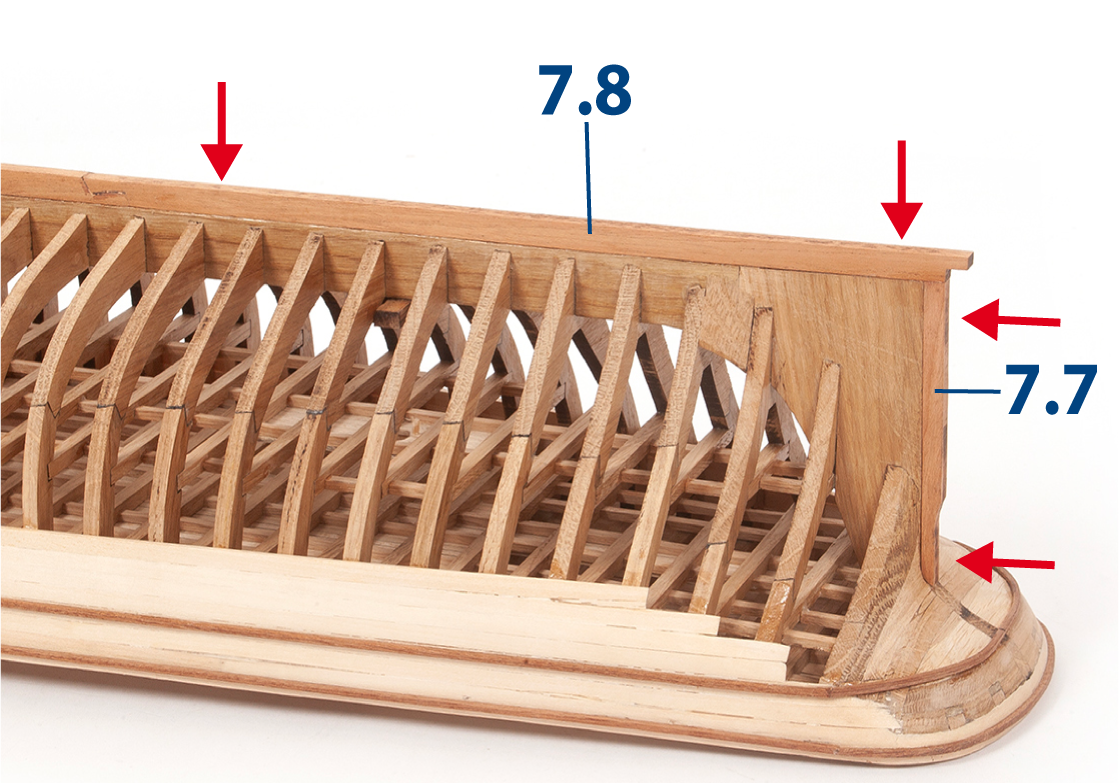
Step 4
Glue parts 7.6 as shown in the image.

Step 5
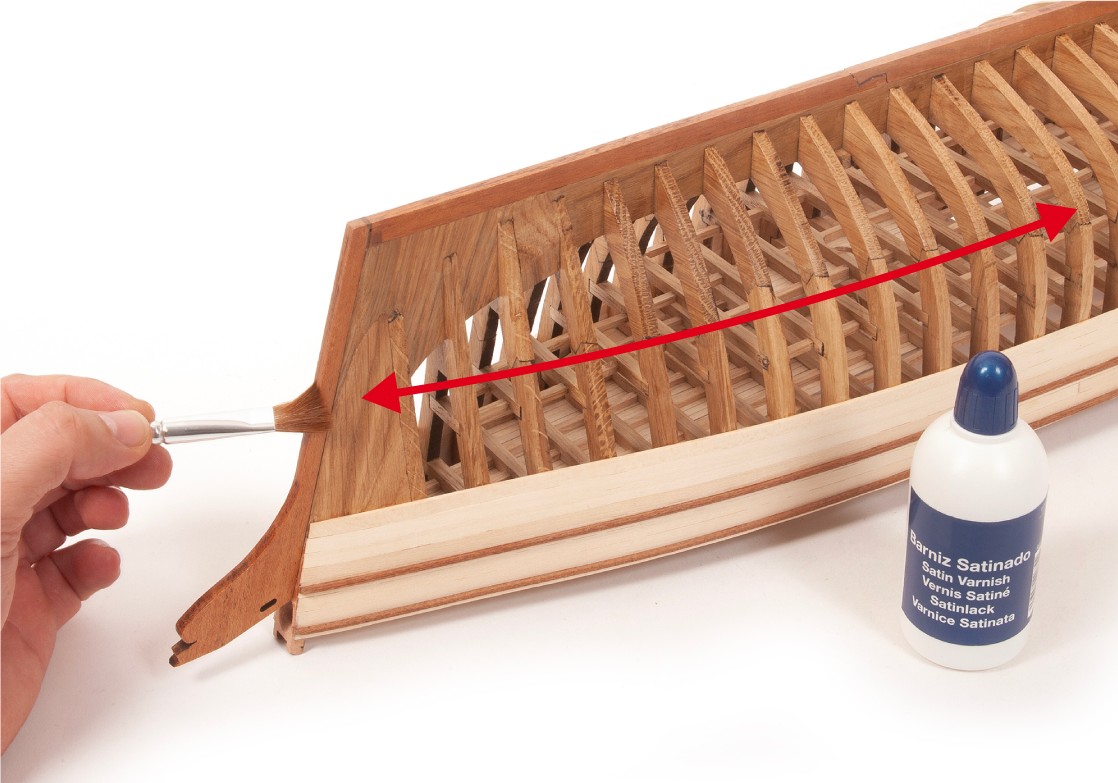
Sand the frames and the keel with fine-grit sandpaper. Then apply varnish to the whole structure, except for the hull planking.
Step 6
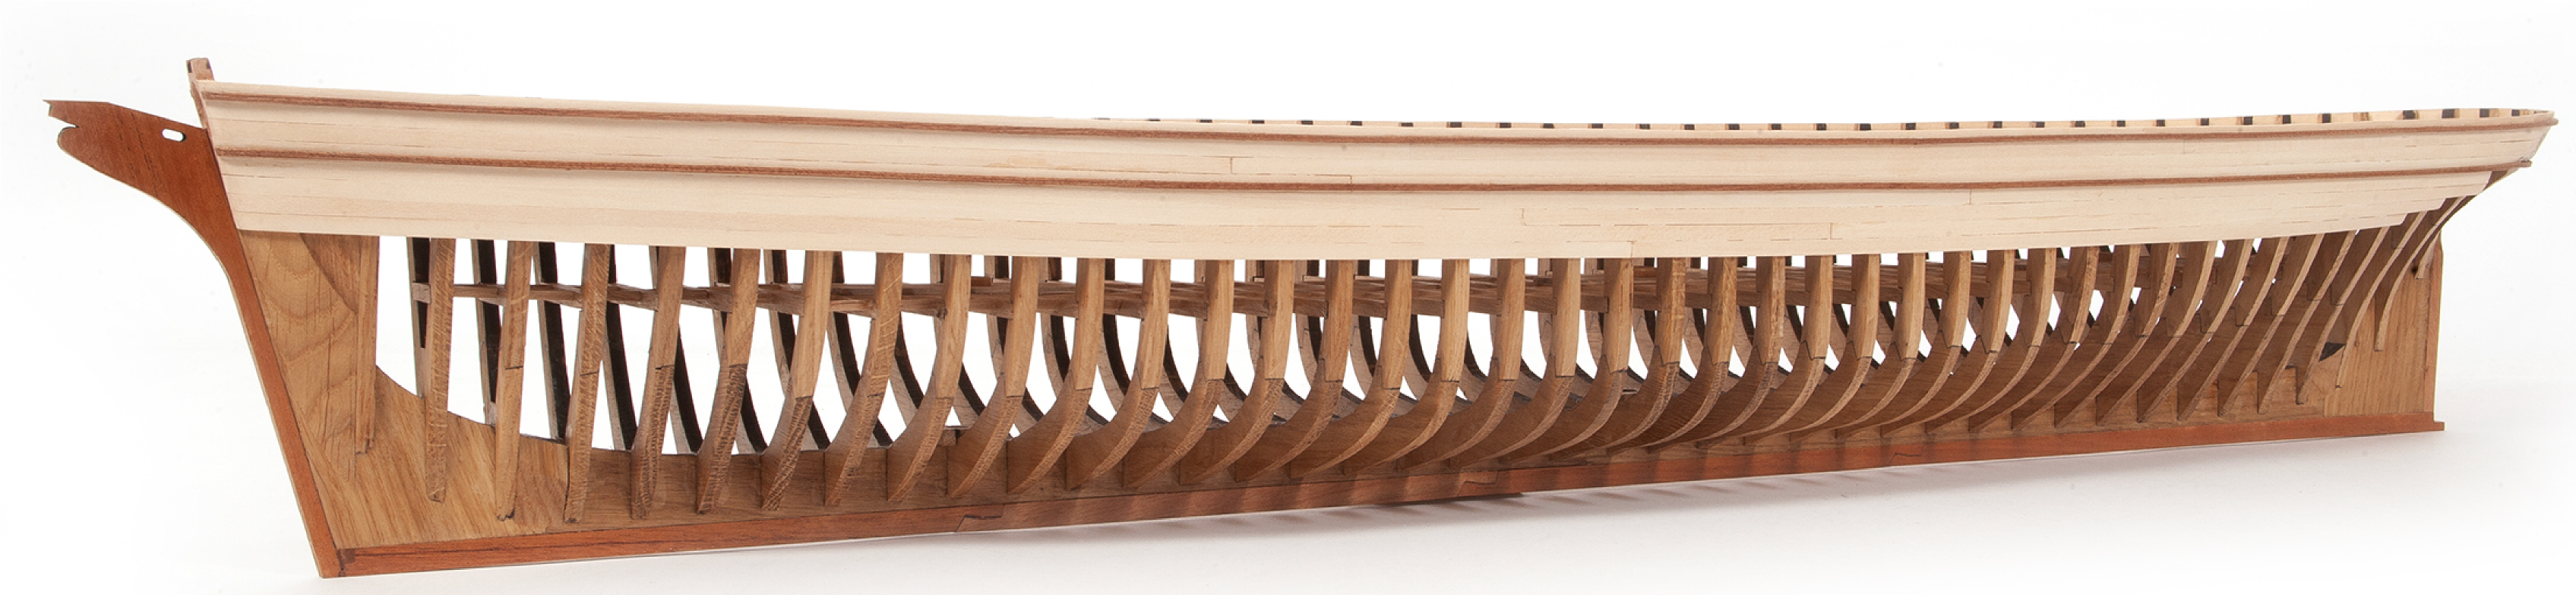
The image shows the hull once varnished.
Step 8
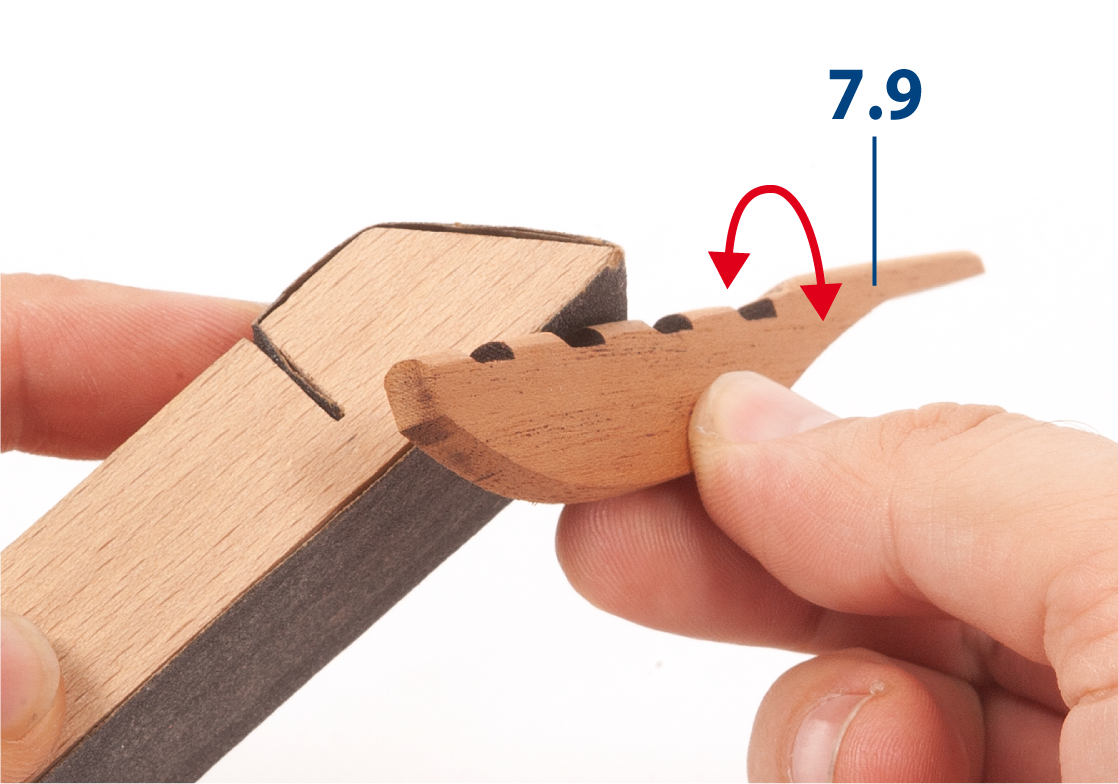
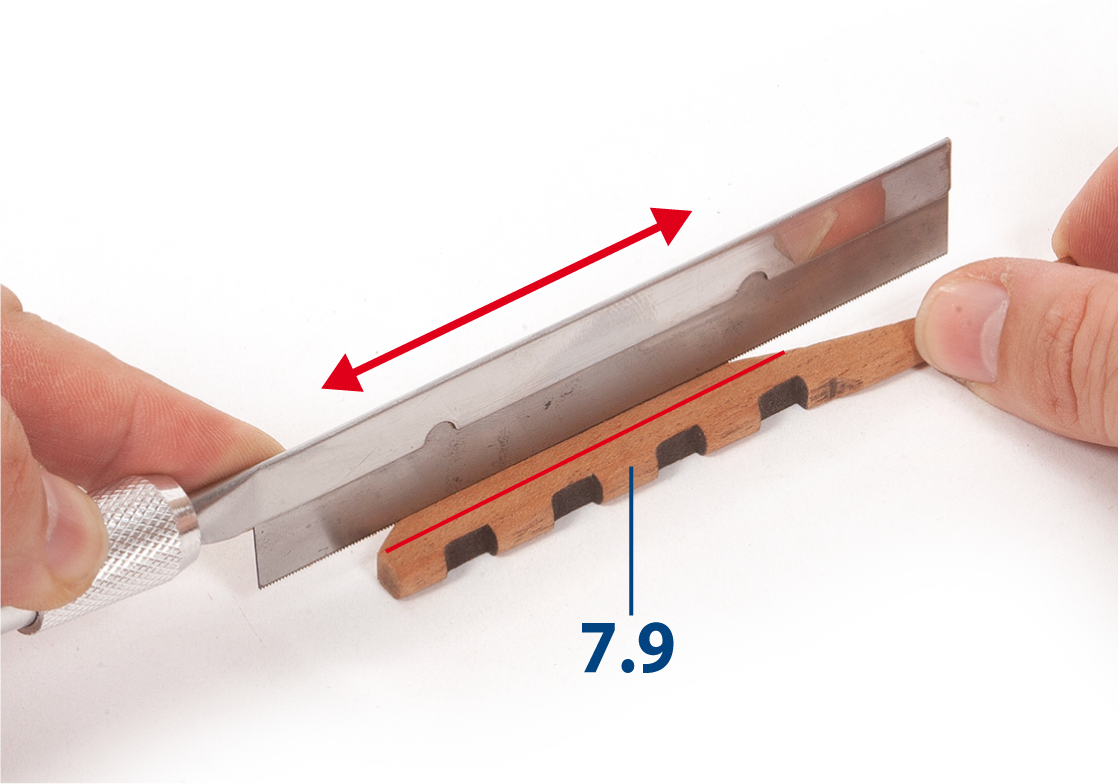
Use a saw or similar tool to create grooves on both sides of part 7.9.
Step 9
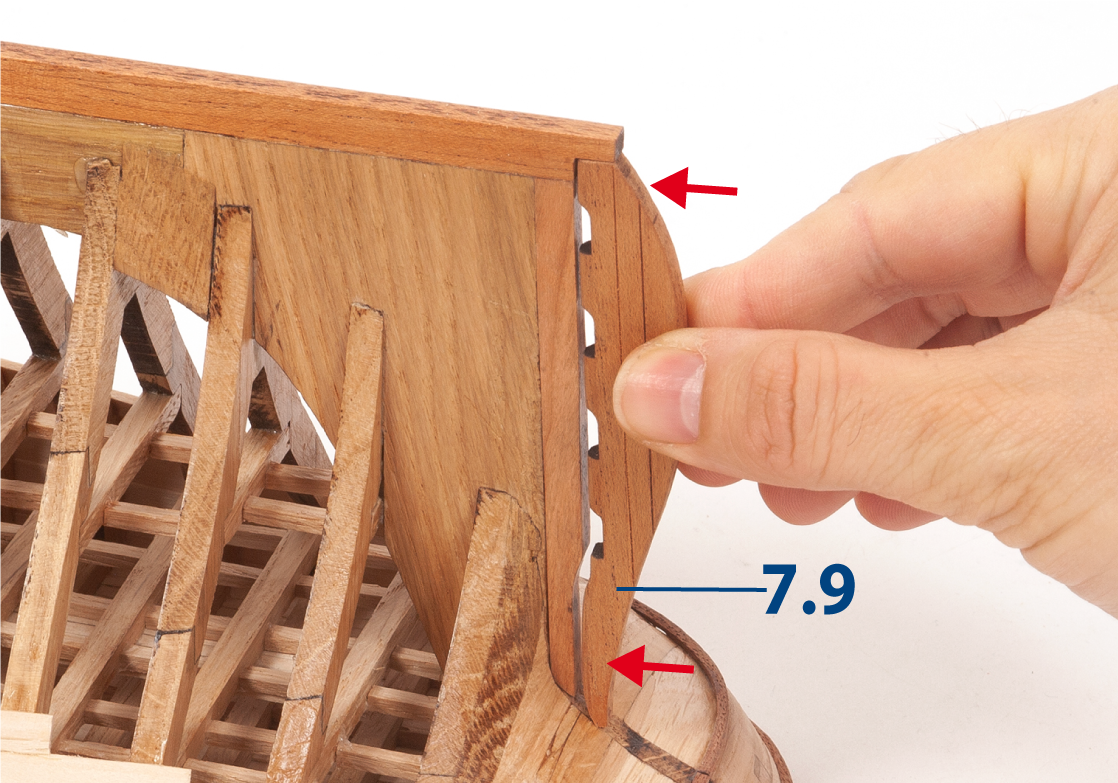
Sand the end of part 7.9 to match the stern of the hull.
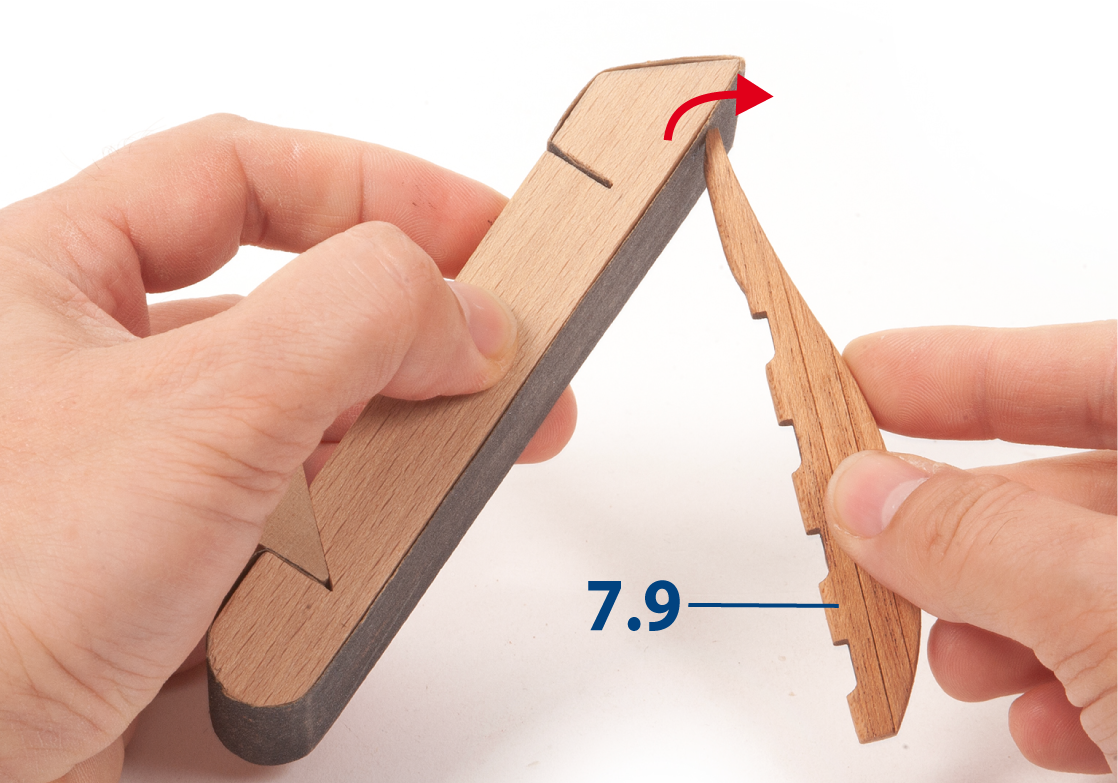
Step 10
Check the fit of part 7.9 at the stern of the hull. Apply varnish to the rudder blade and set it aside.
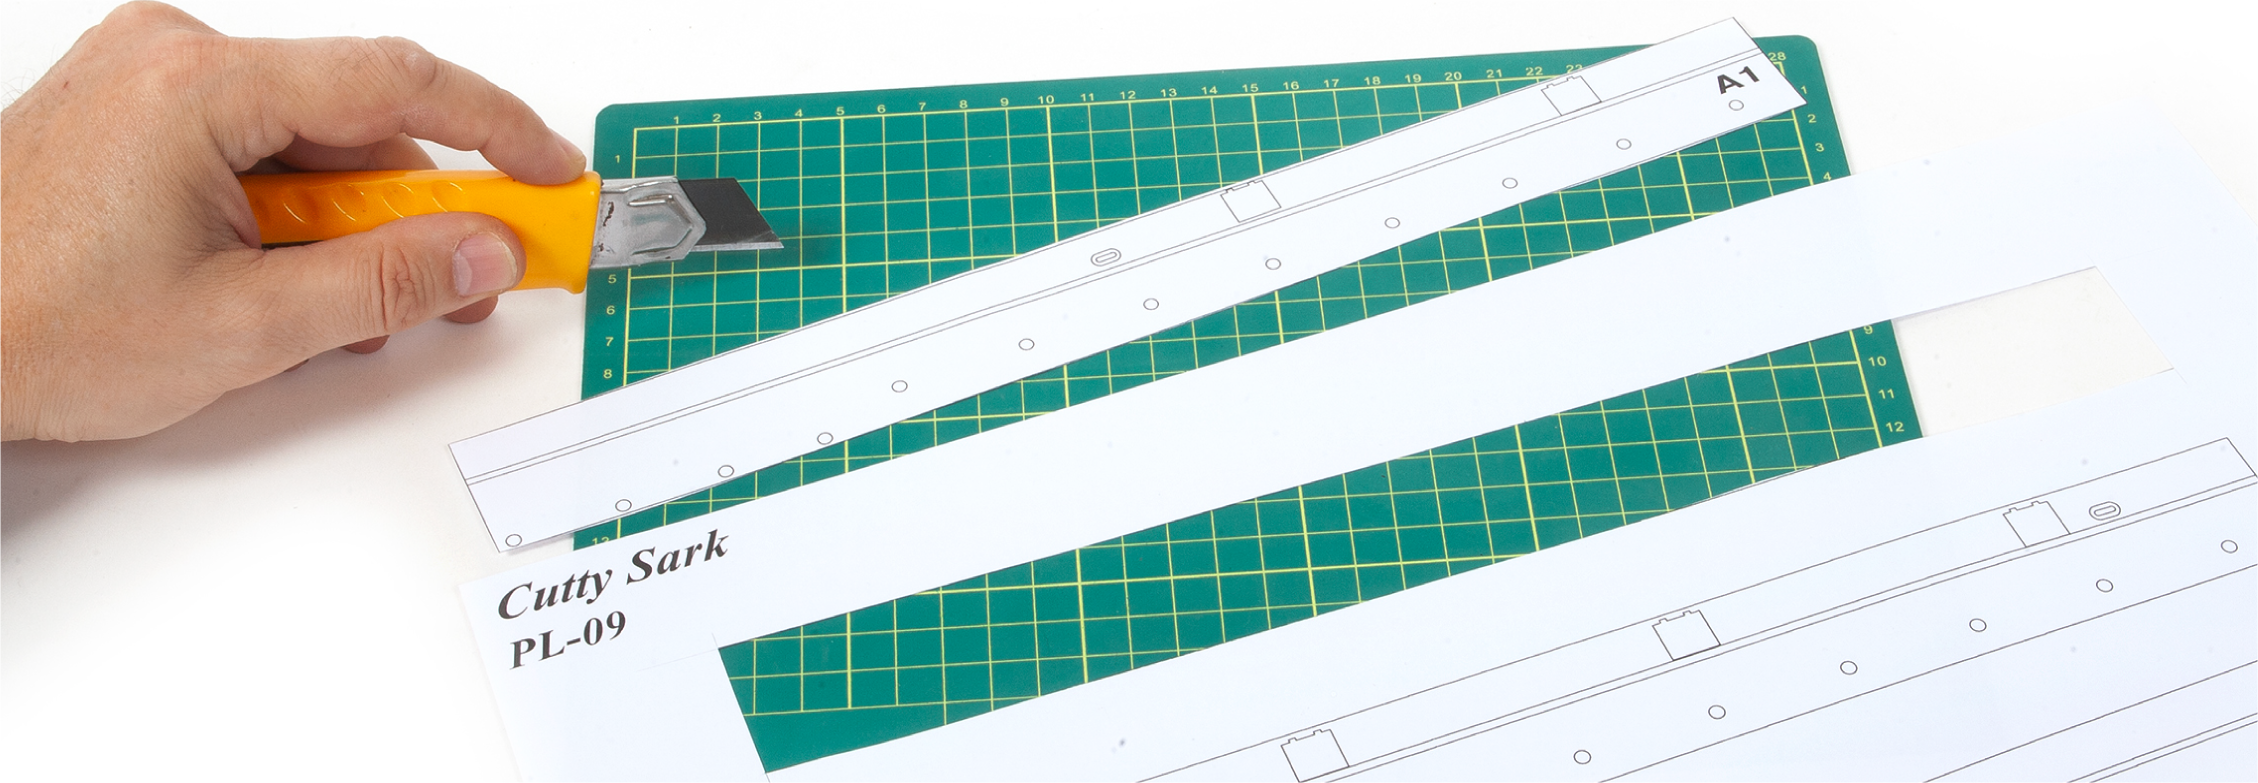
Step 2
This image shows the cut-out templates.
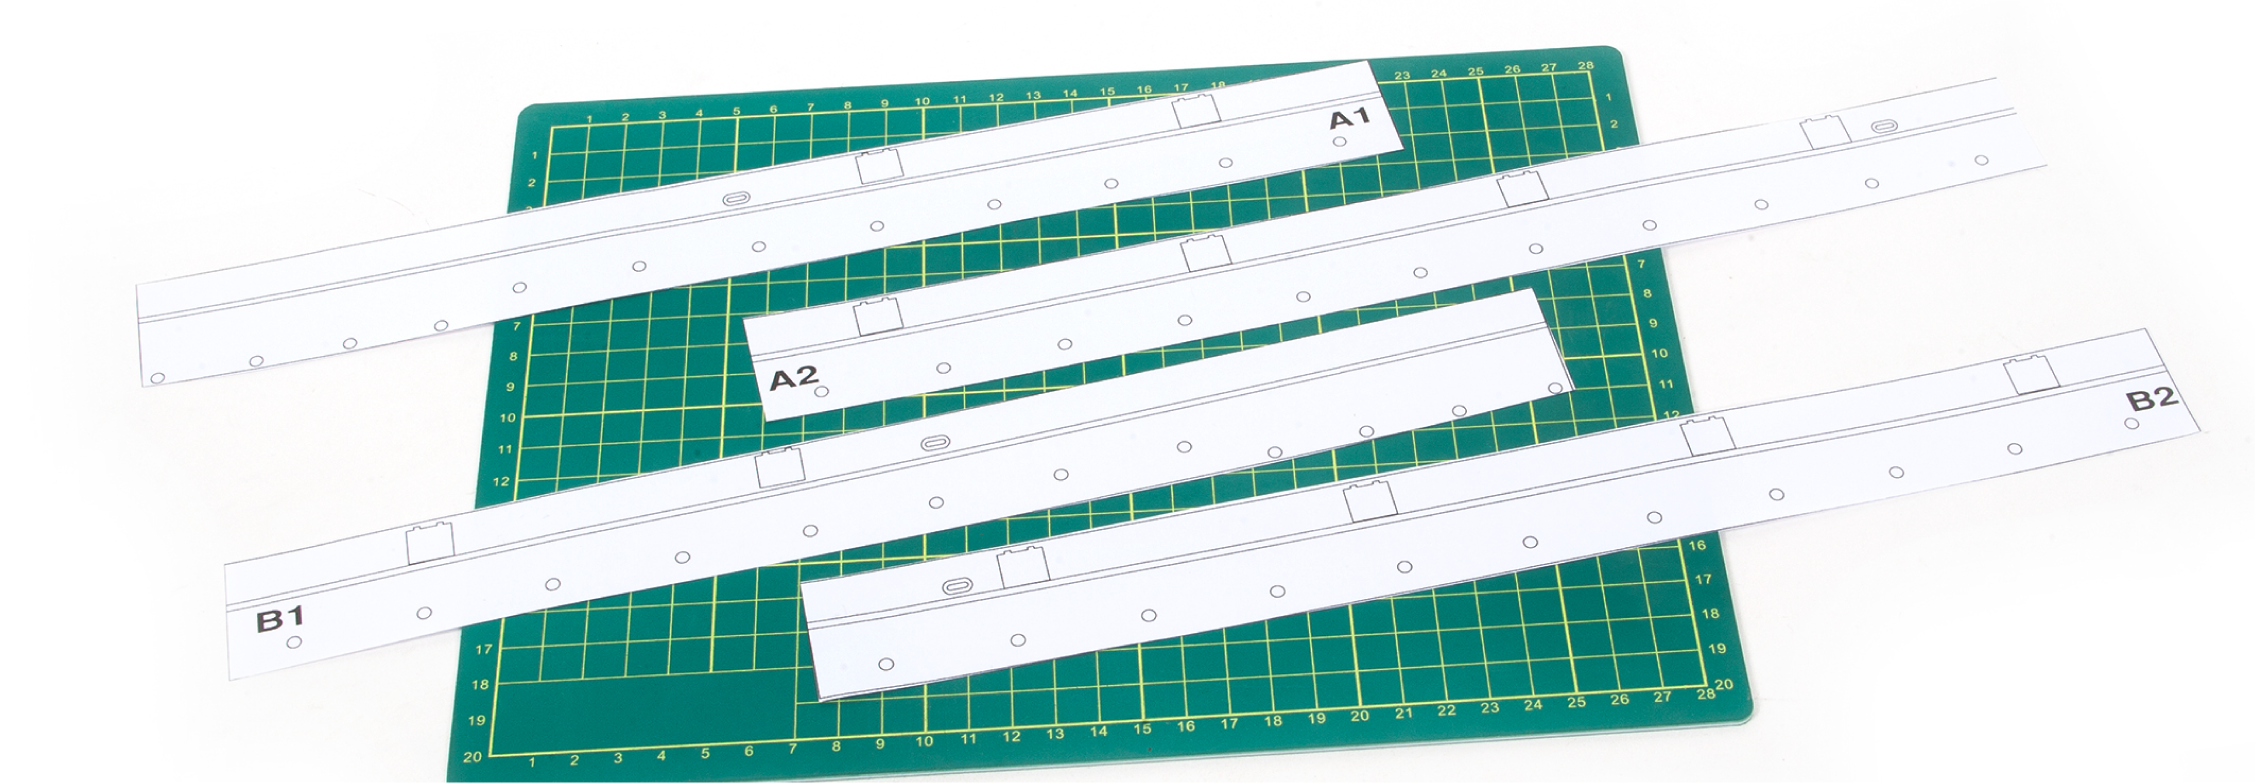
Step 3
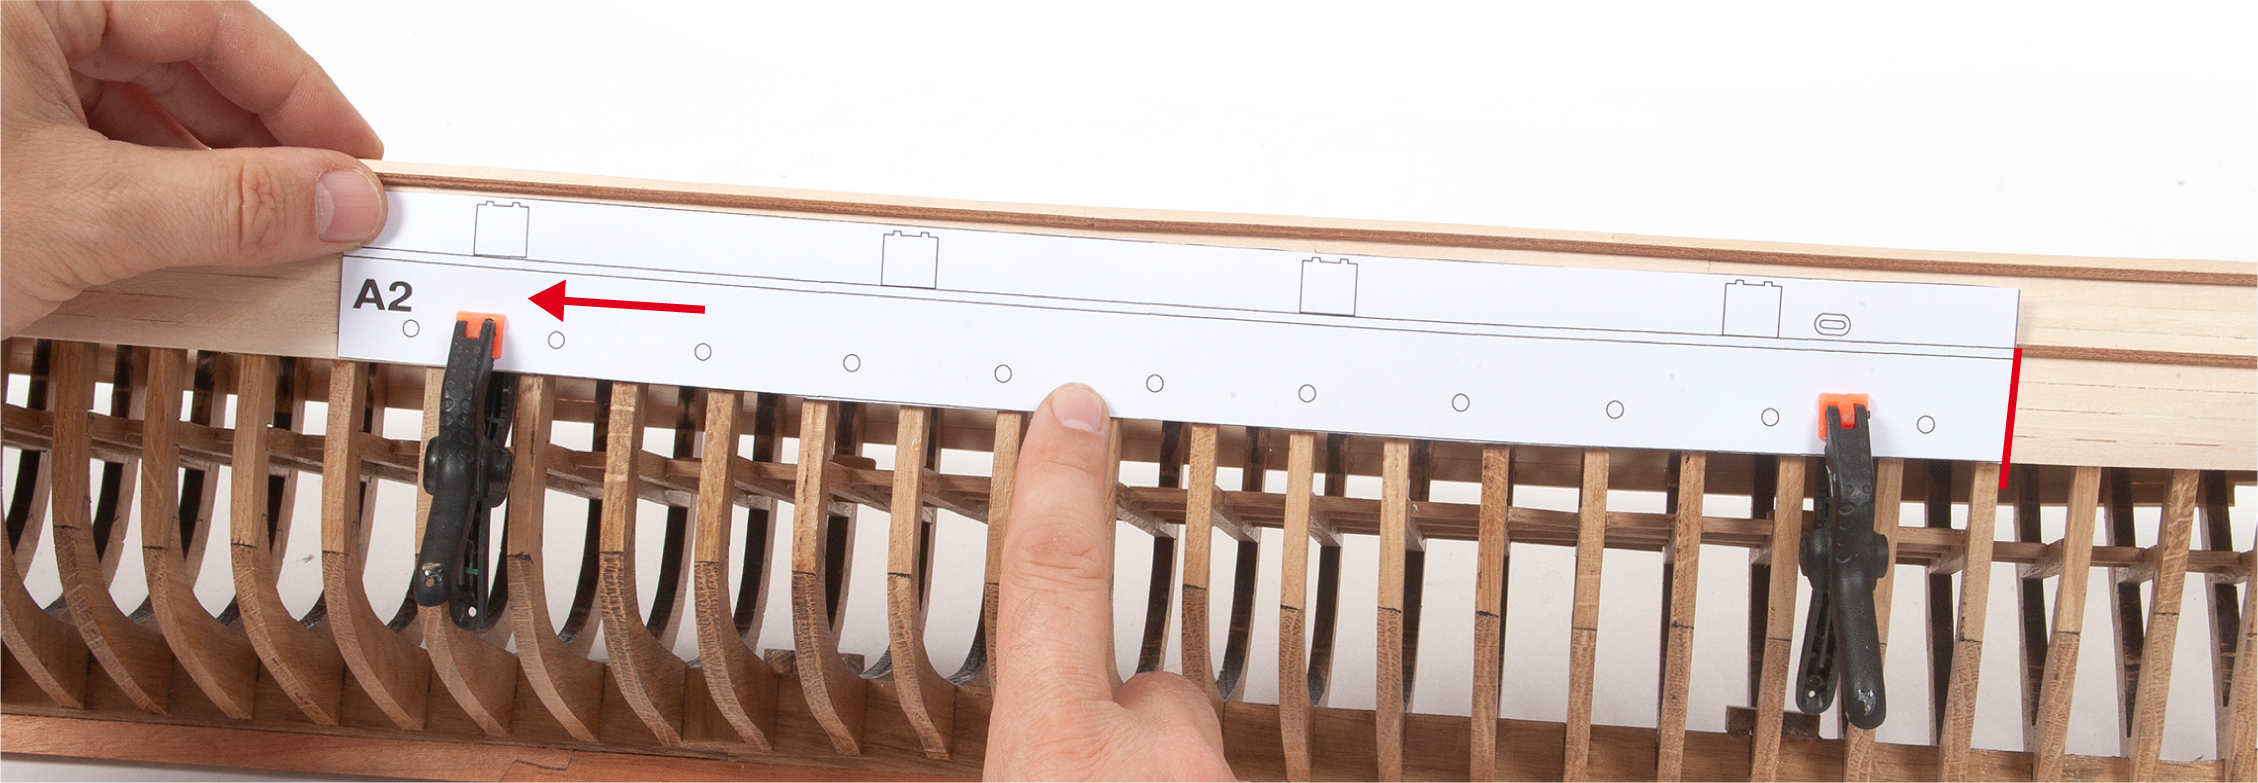
Place template A2 against the hull, from frame 35 towards frame 18, aligning the bottom edge of the template with the last wooden strip of planking. Hold the template in place with clamps or similar.
Step 4
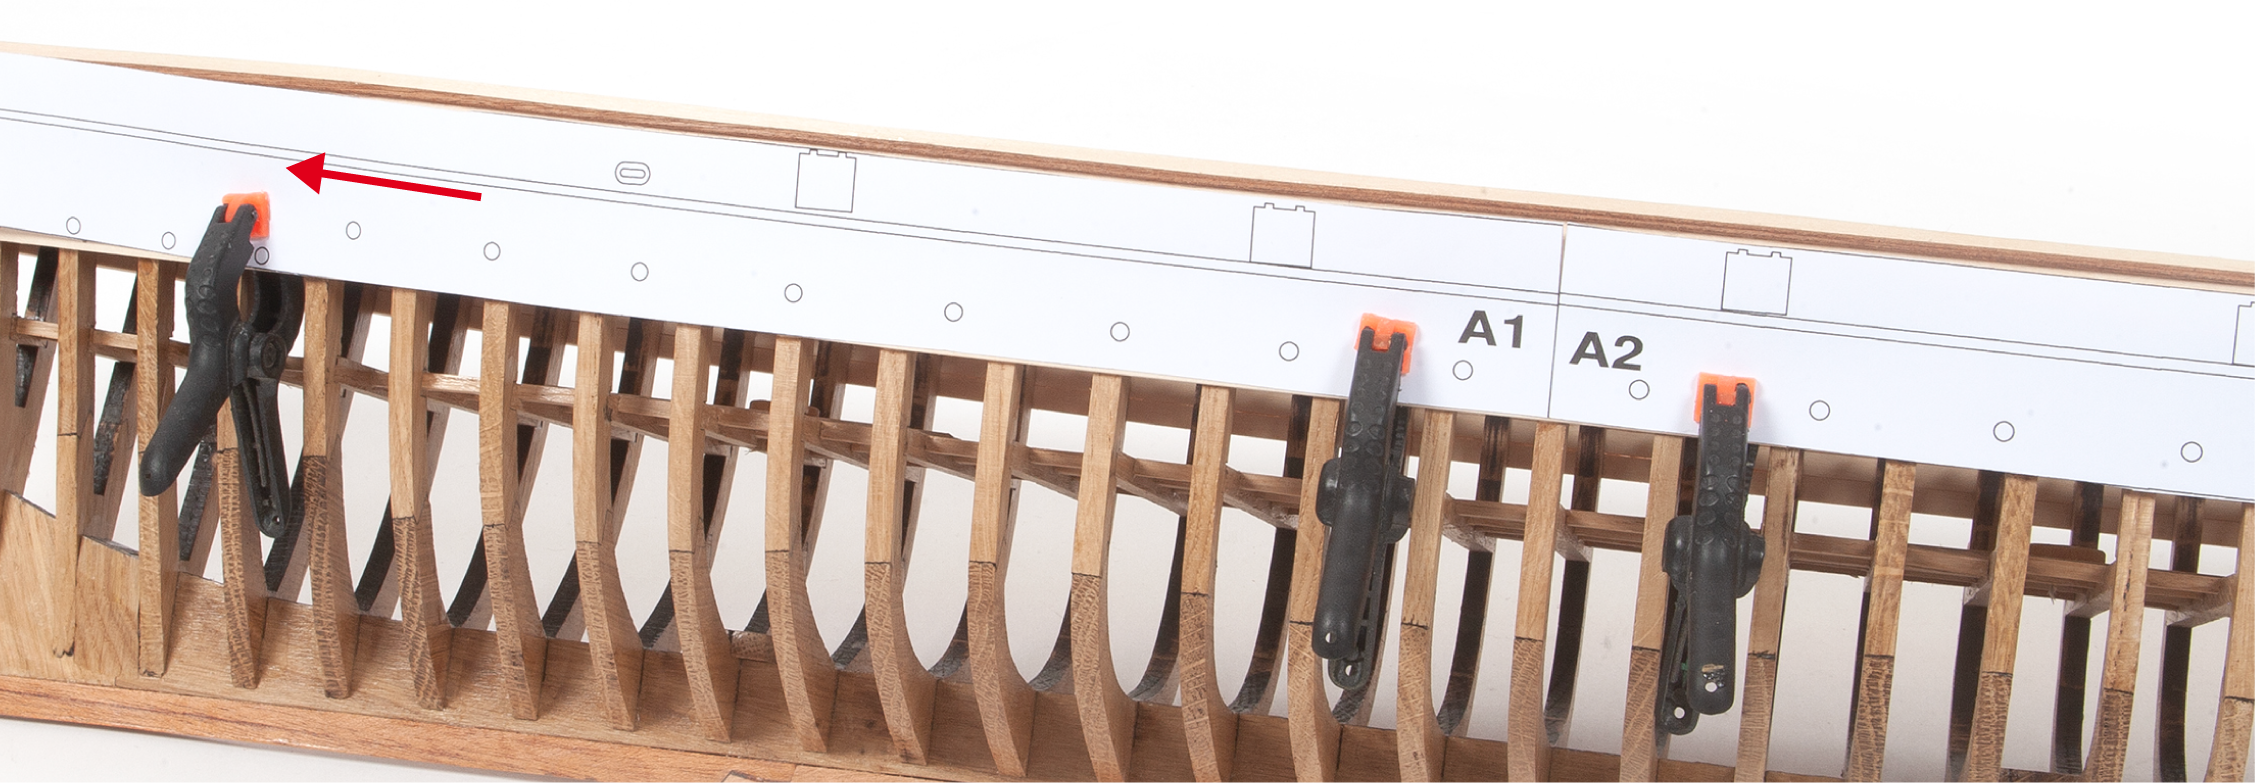
Align template A1 with template A2, starting at frame 18 and continuing towards the bow. Hold it in place with clamps.
Step 5
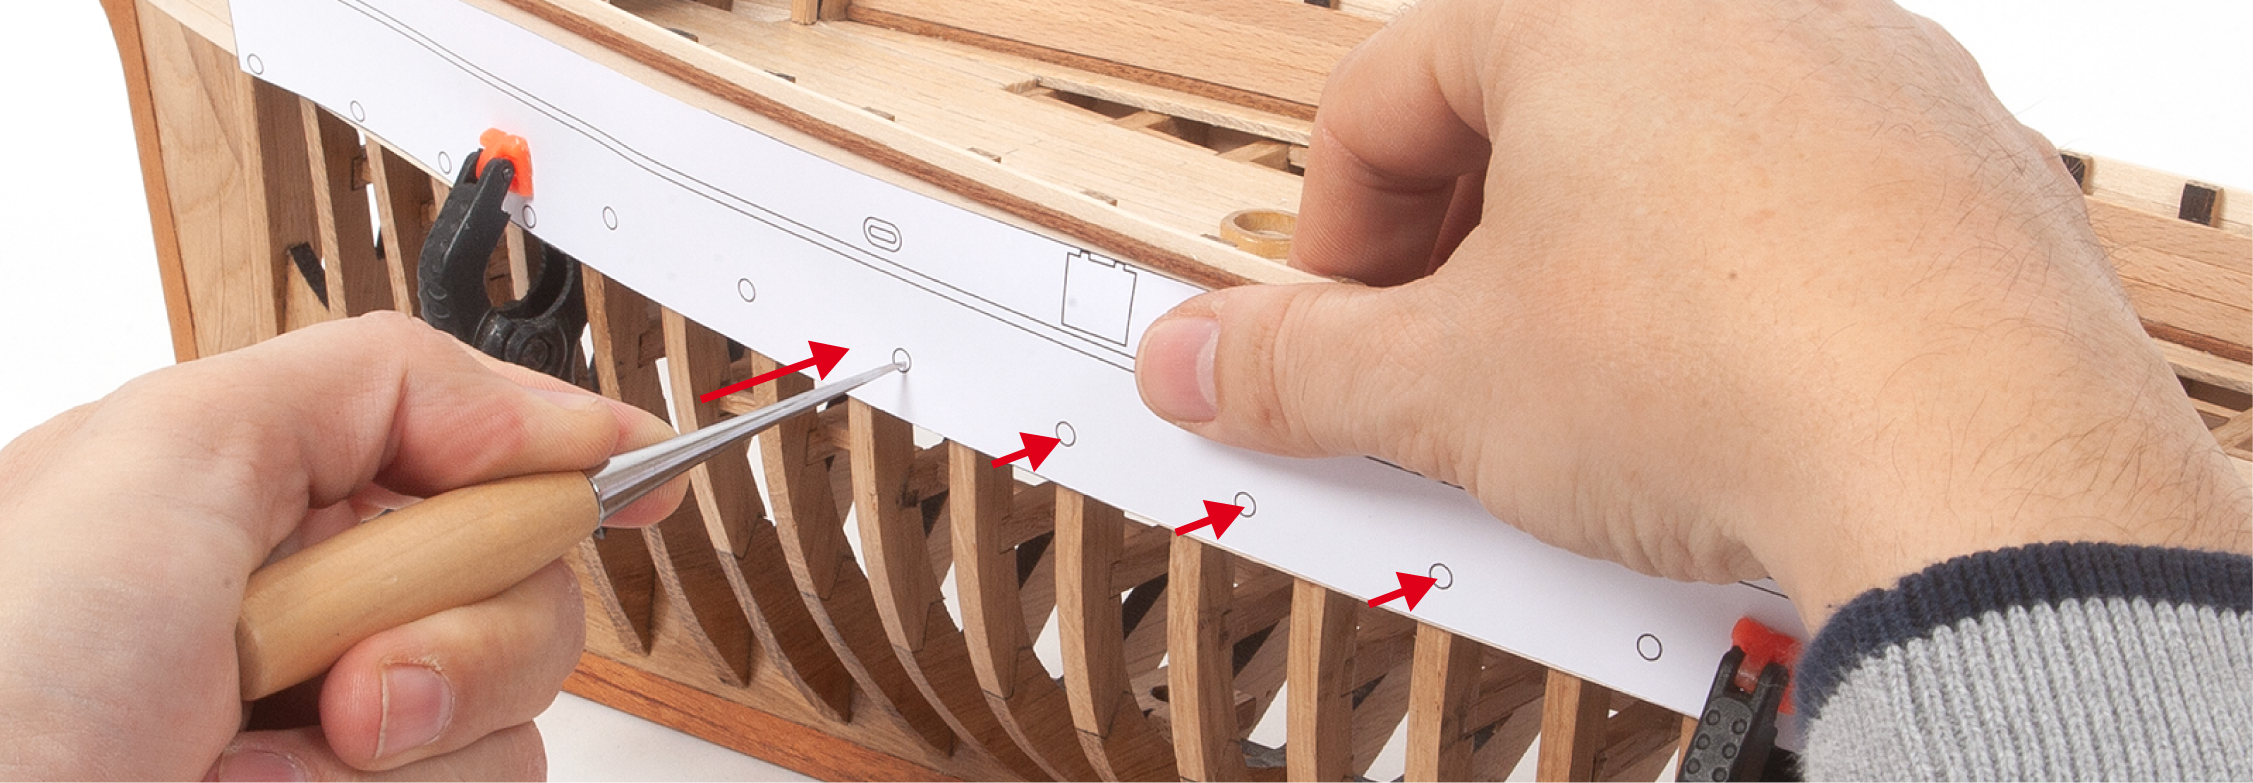
Use an awl to mark the centre of the 19 holes along the upper line on the templates.
Step 6
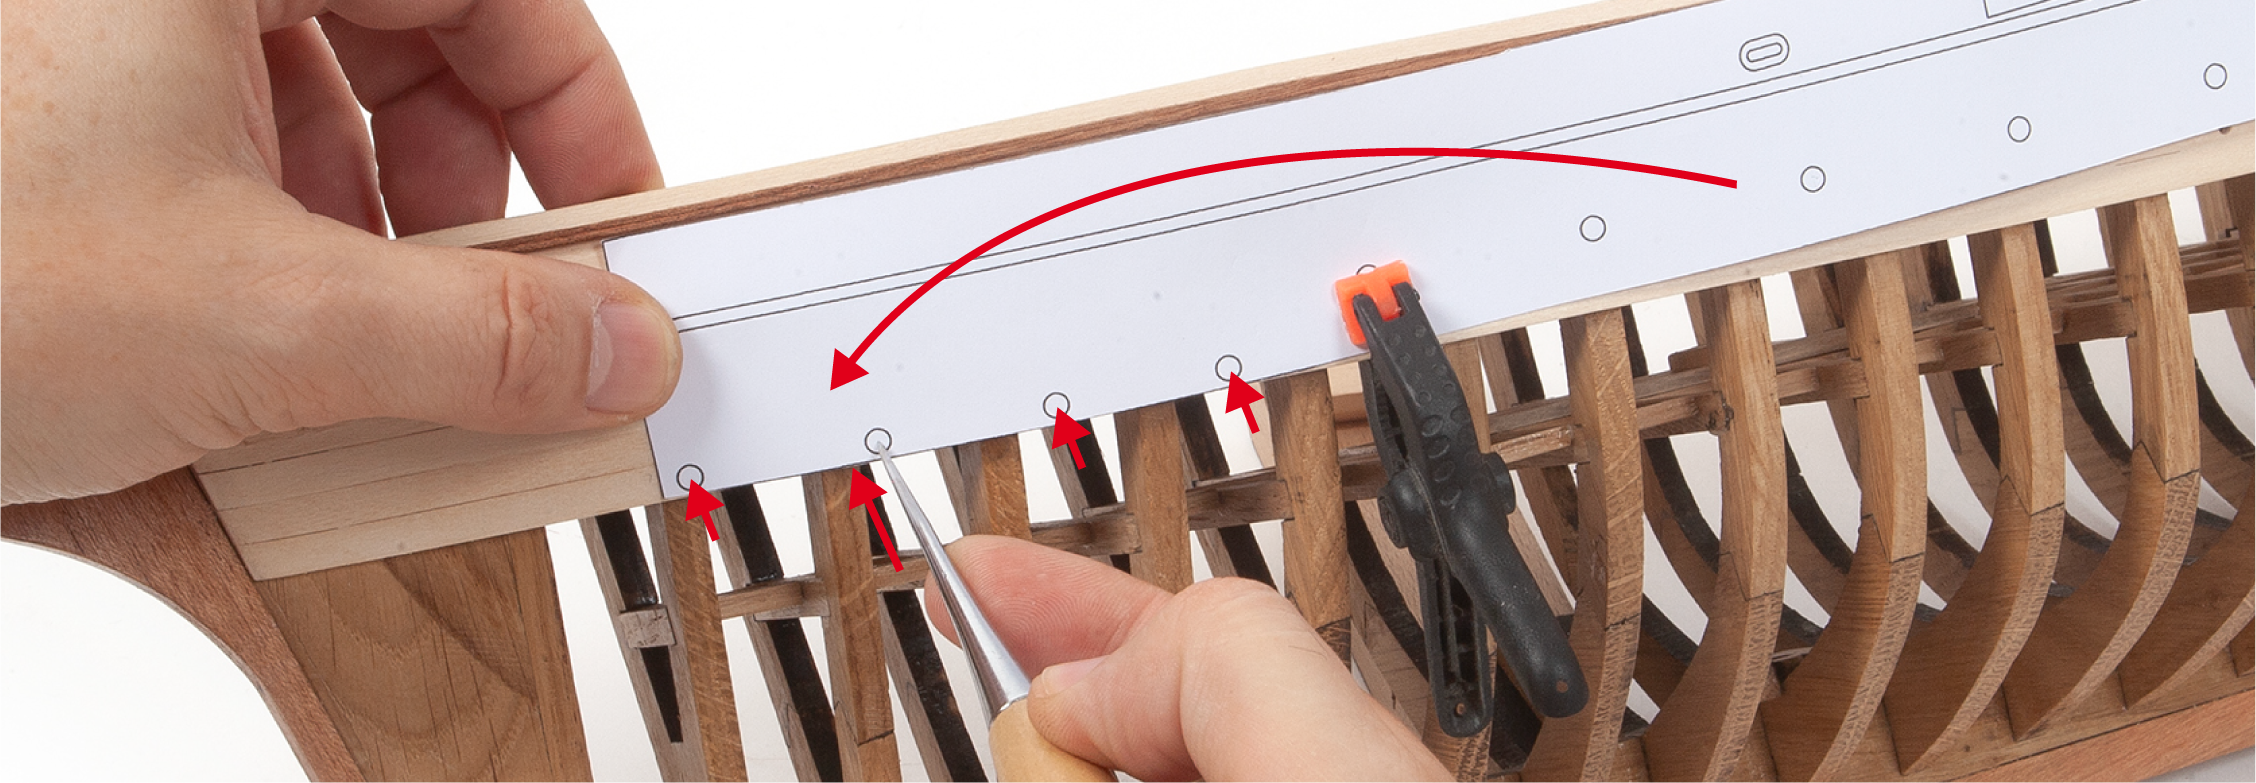
Angle the template A1 to align the bottom edge of the template with the last wooden strip of planking. Hold the template in place and use an awl to mark the centre of the four holes, as shown in the image.
Step 7
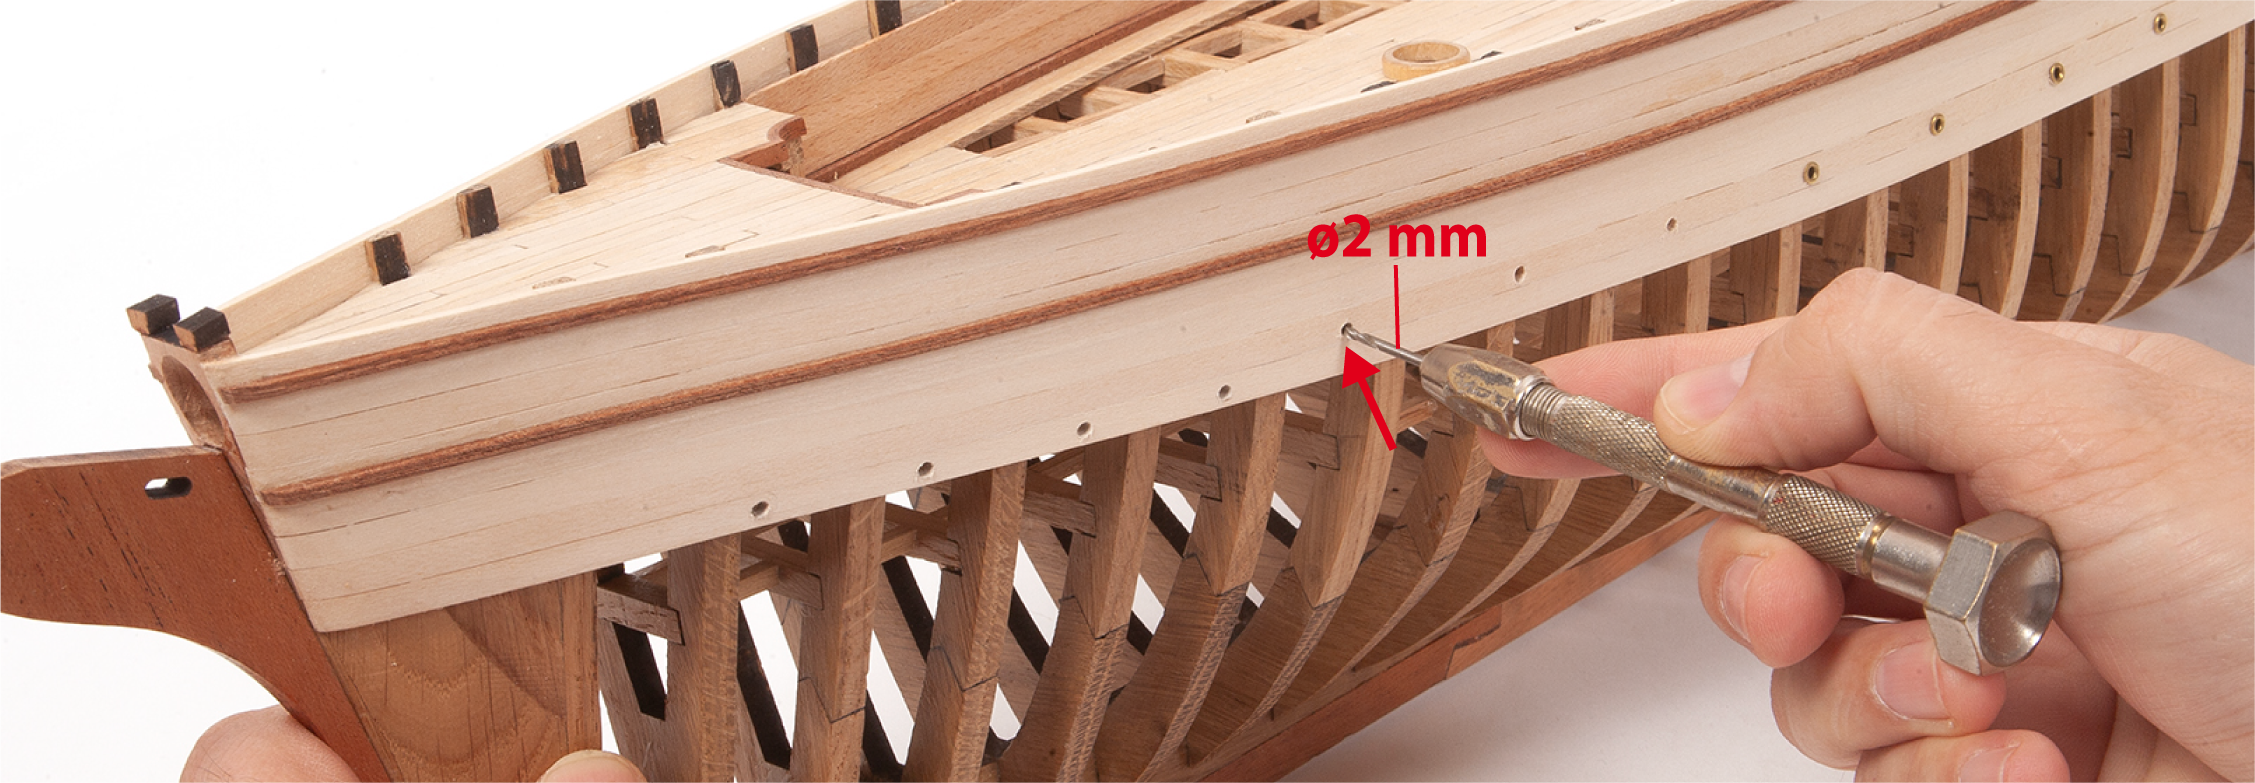
Drill ø2 mm holes where marked.
Step 8
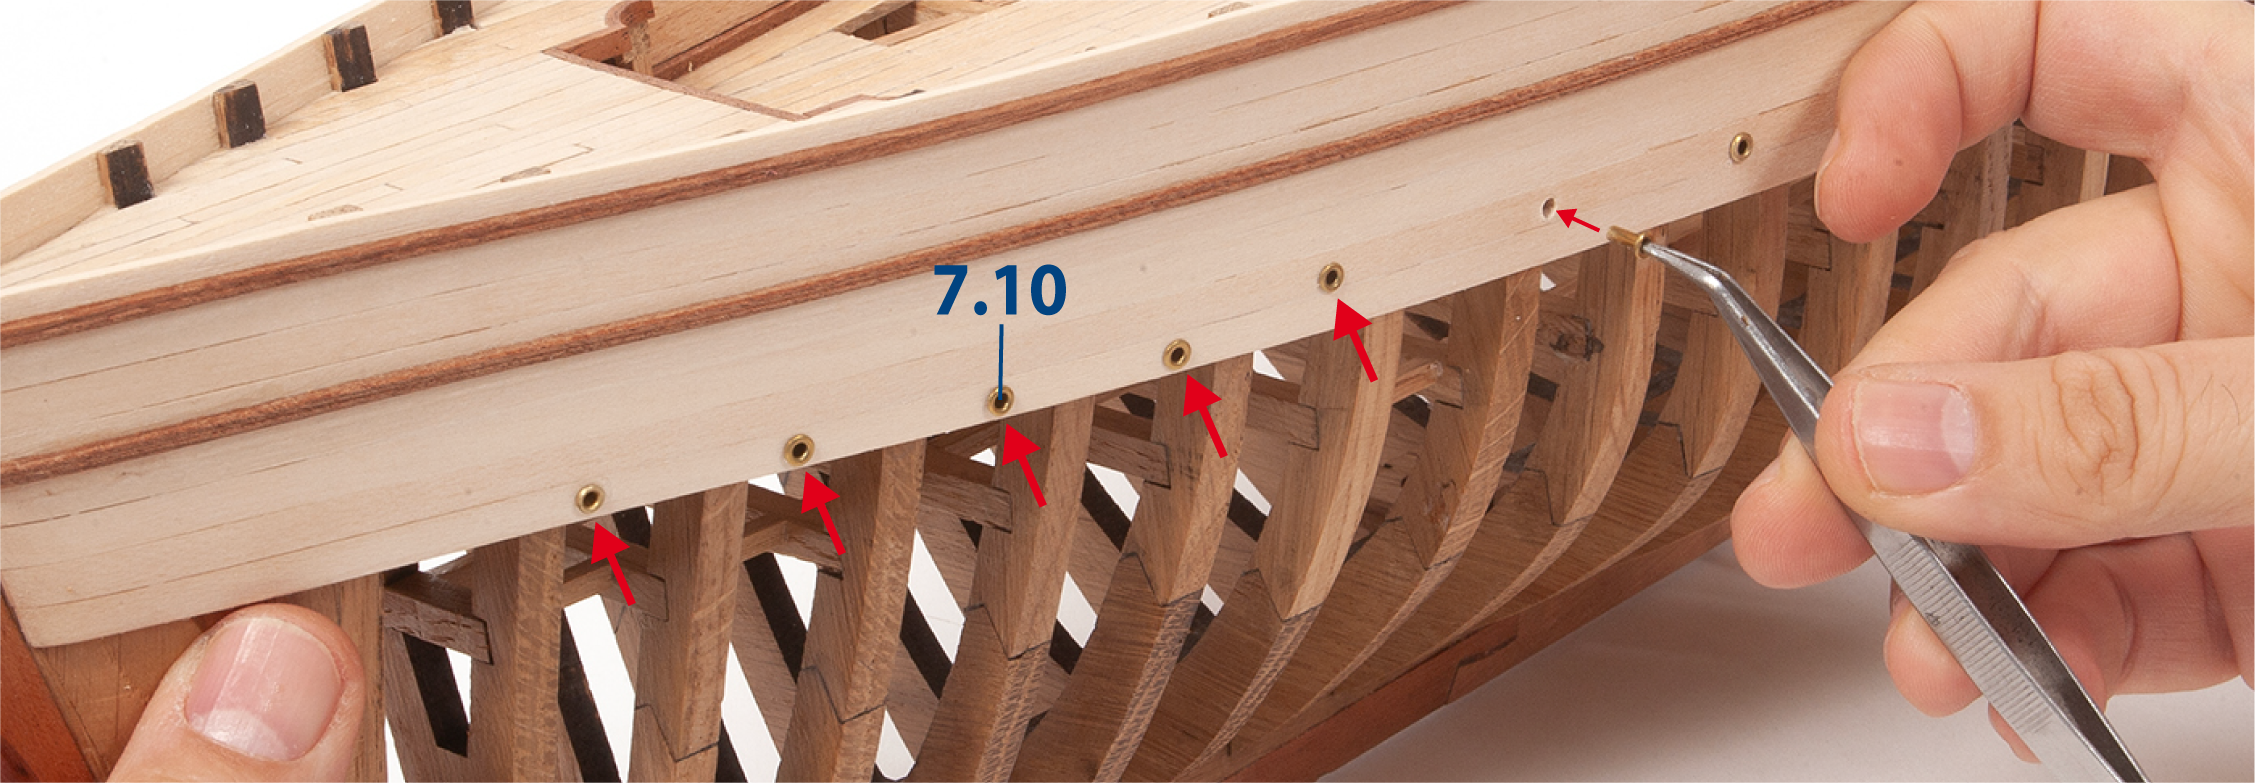
Glue one rivet 7.10 into each hole.
Repeat steps 3–8 using templates B1 and B2 on the other side of the hull.
Step 1
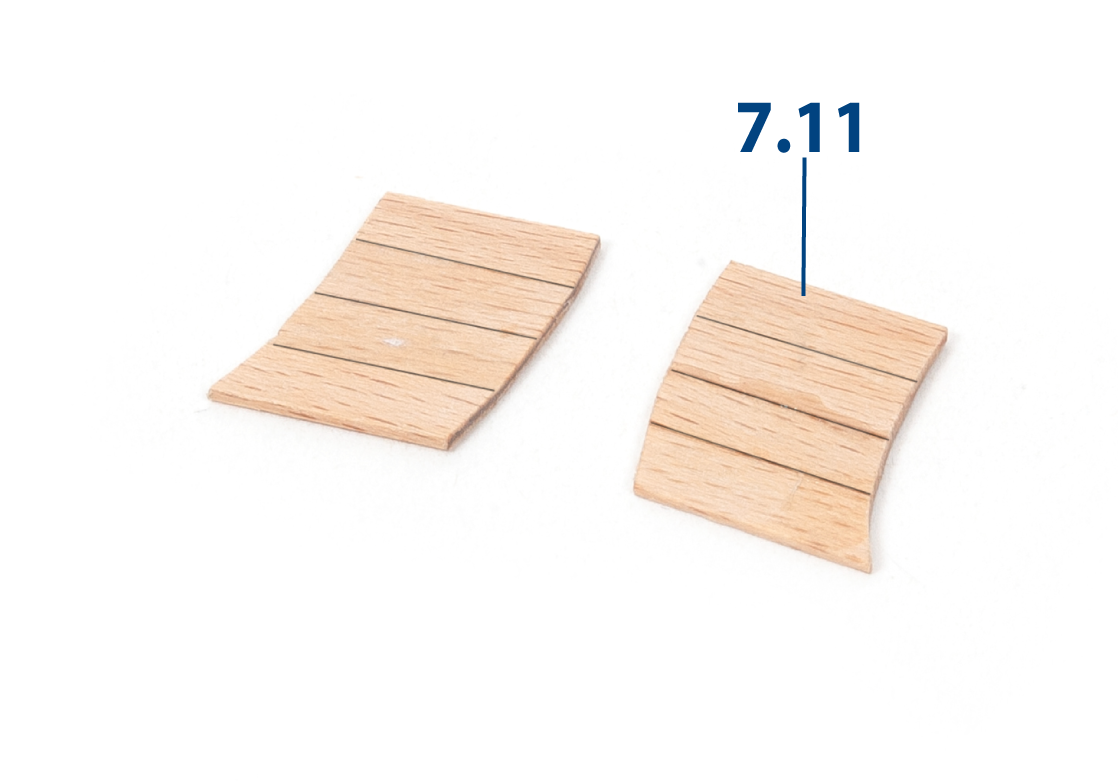
Cut eight 2 x 5 x 15 mm lime wood strips to make two parts, 7.11, as shown in the image. Shape the parts using the elevation drawing as a reference.
Step 2
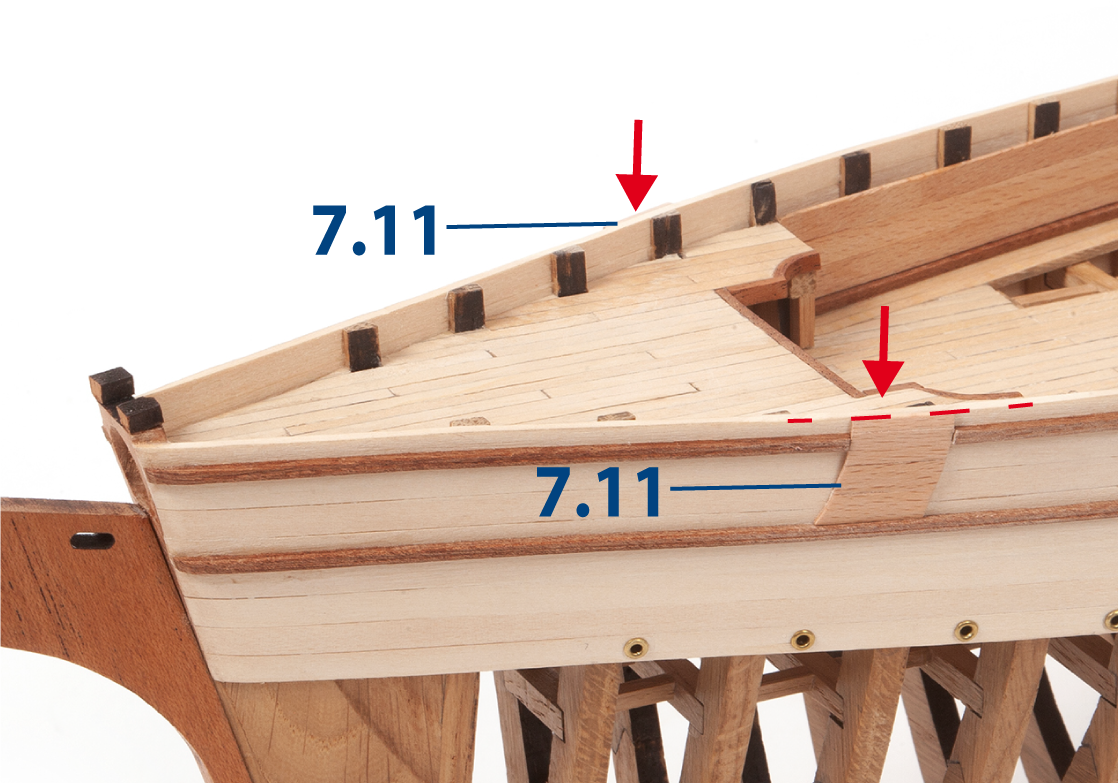
Cut away the mahogany strips where parts 7.11 will be glued. Glue one part 7.11 on each side of the hull.
Step 3
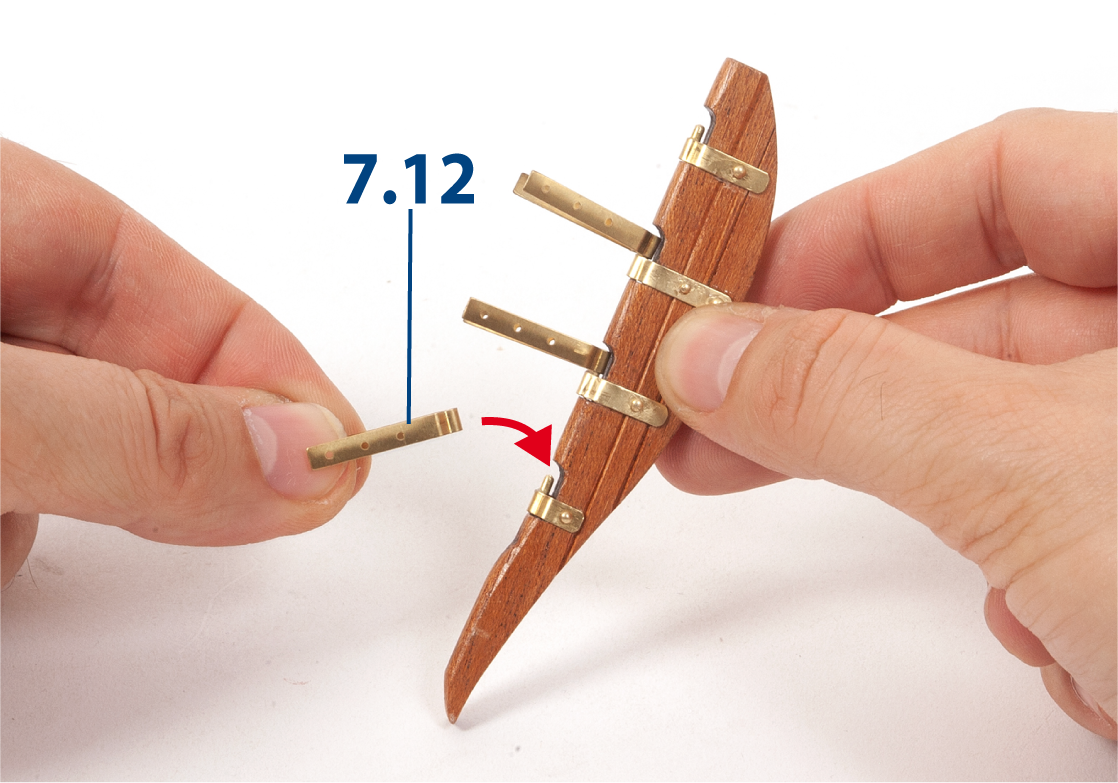
Cut hinges 7.12 to the required length using cutting pliers.
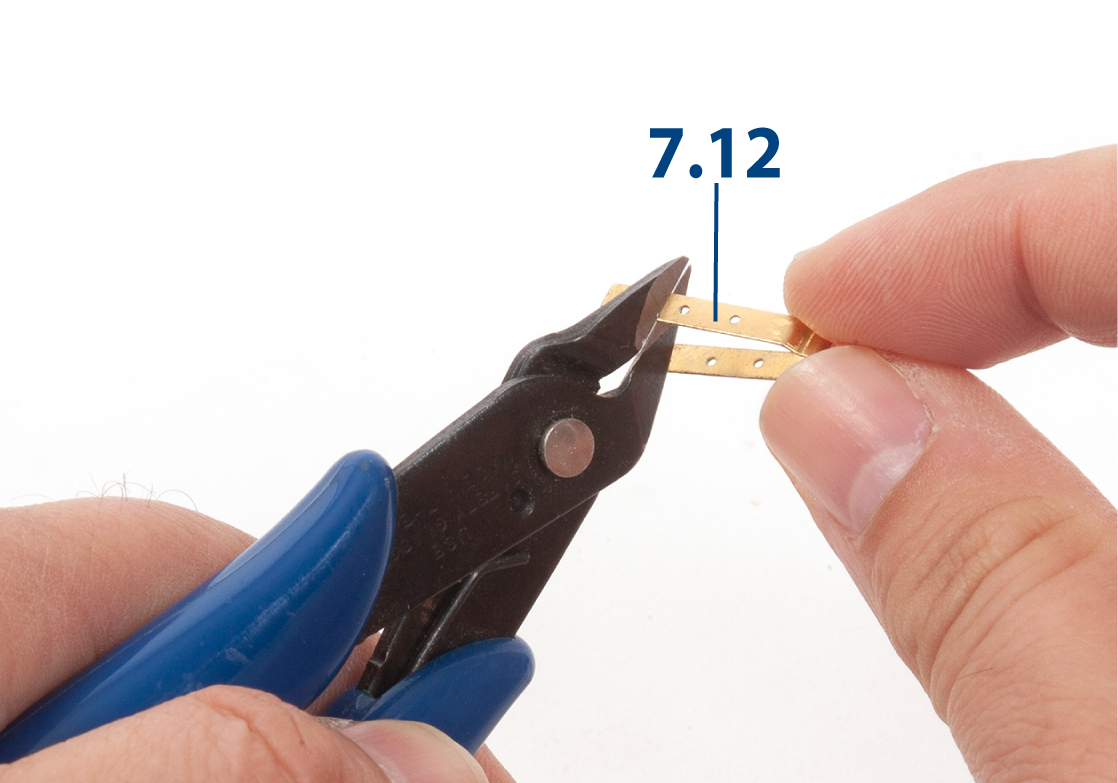
Step 4
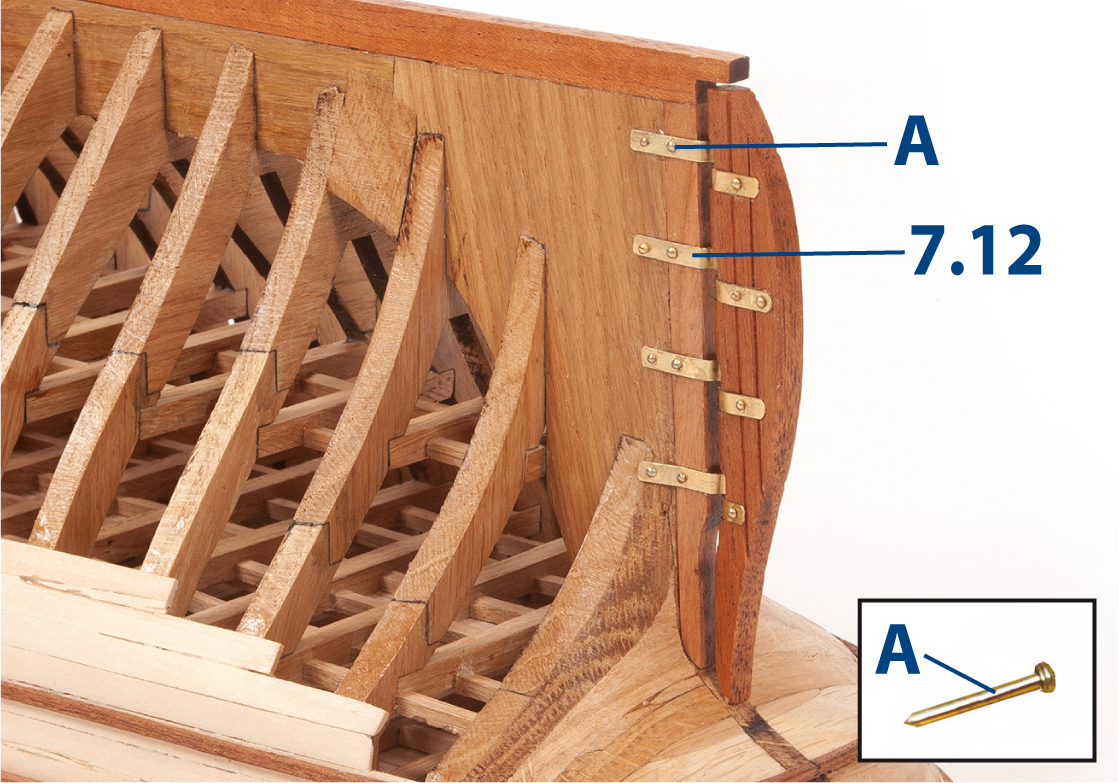
Attach hinges 7.12 to the rudder blade with nails A, as shown in the image.
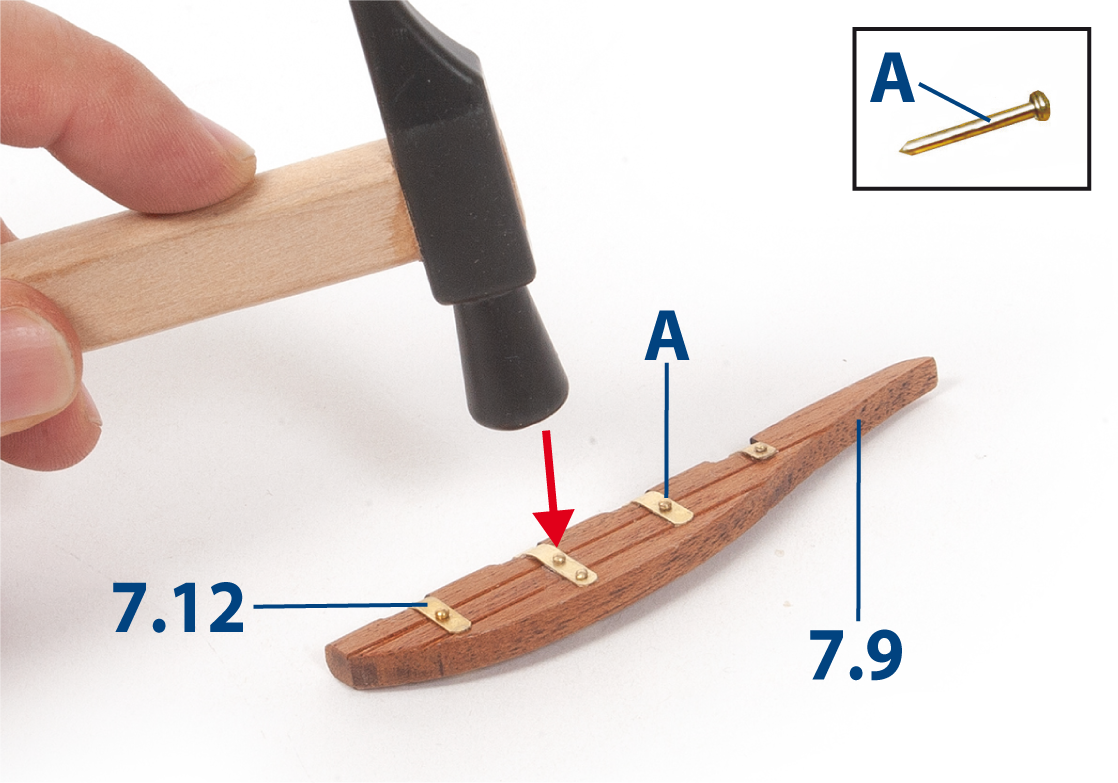
Step 5
Roll the ø1.5 mm brass wire back and forth against a flat sanding block to straighten it.
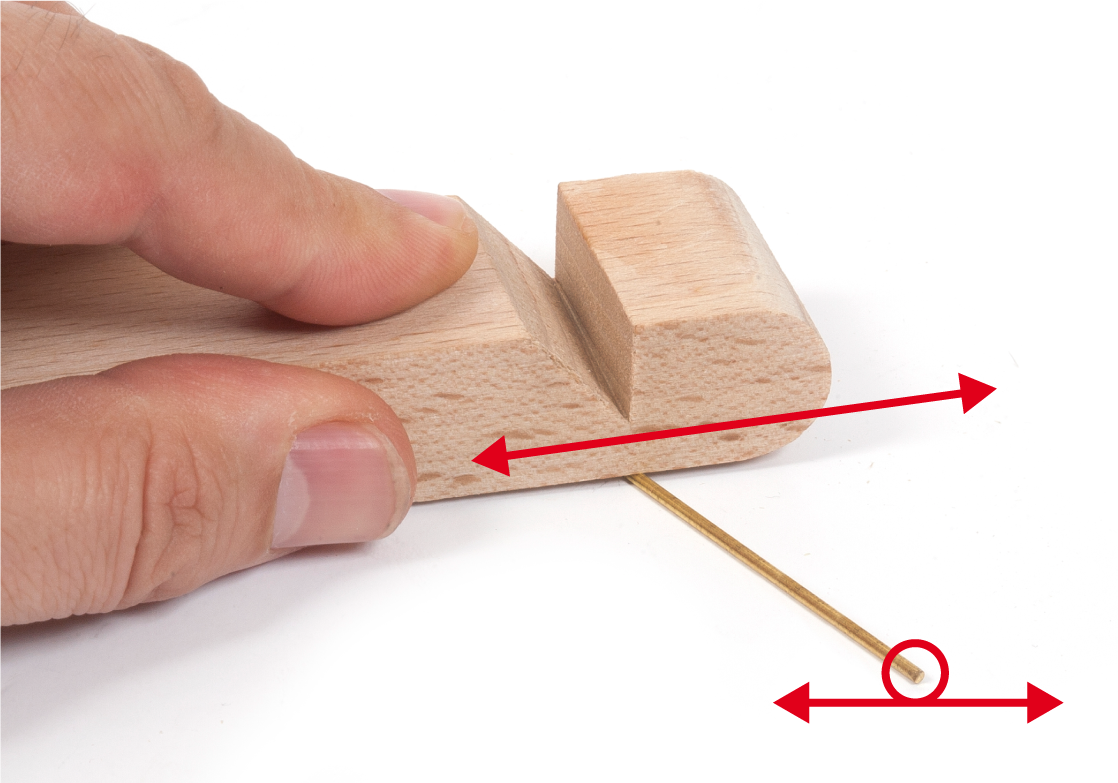
Step 6
Cut the ø1.5 mm brass wire to 5 mm in length, then insert pins 7.13 into the hinges.
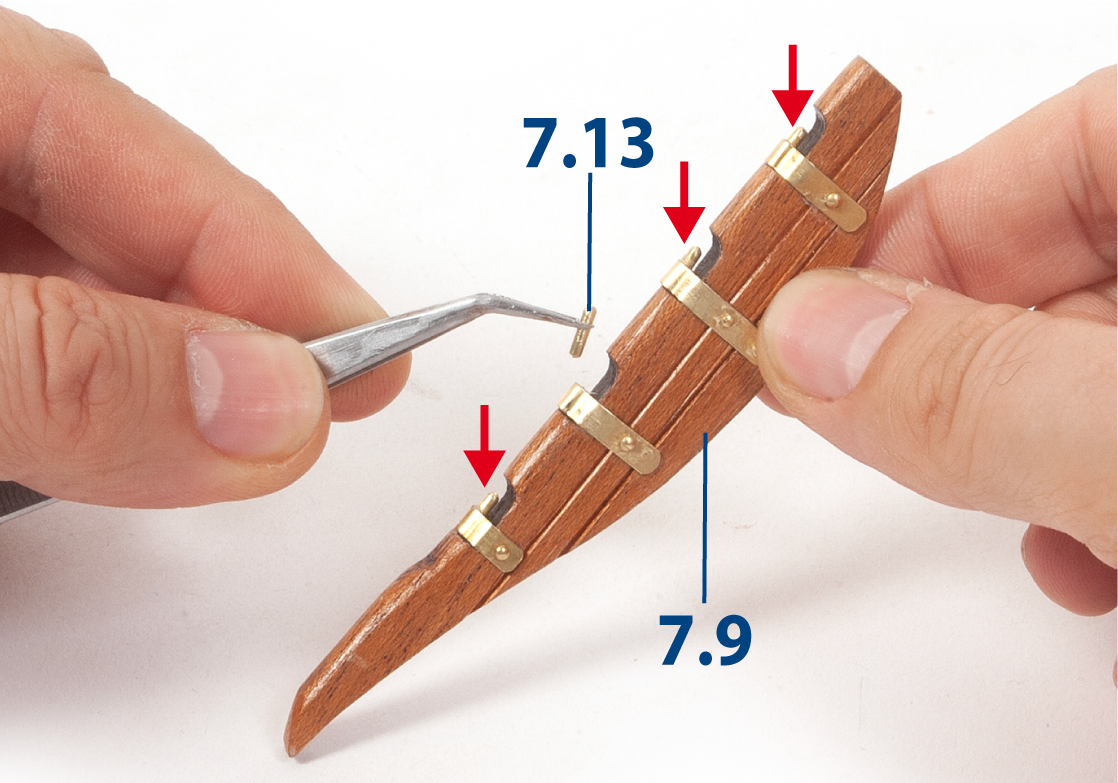
Step 7
Check the fit of the hinges 7.12 with the pins 7.13 on the rudder blade.
Step 8
Cut the hinges 7.12 to the required length and attach the rudder blade to the hull using nails A.
Step 9
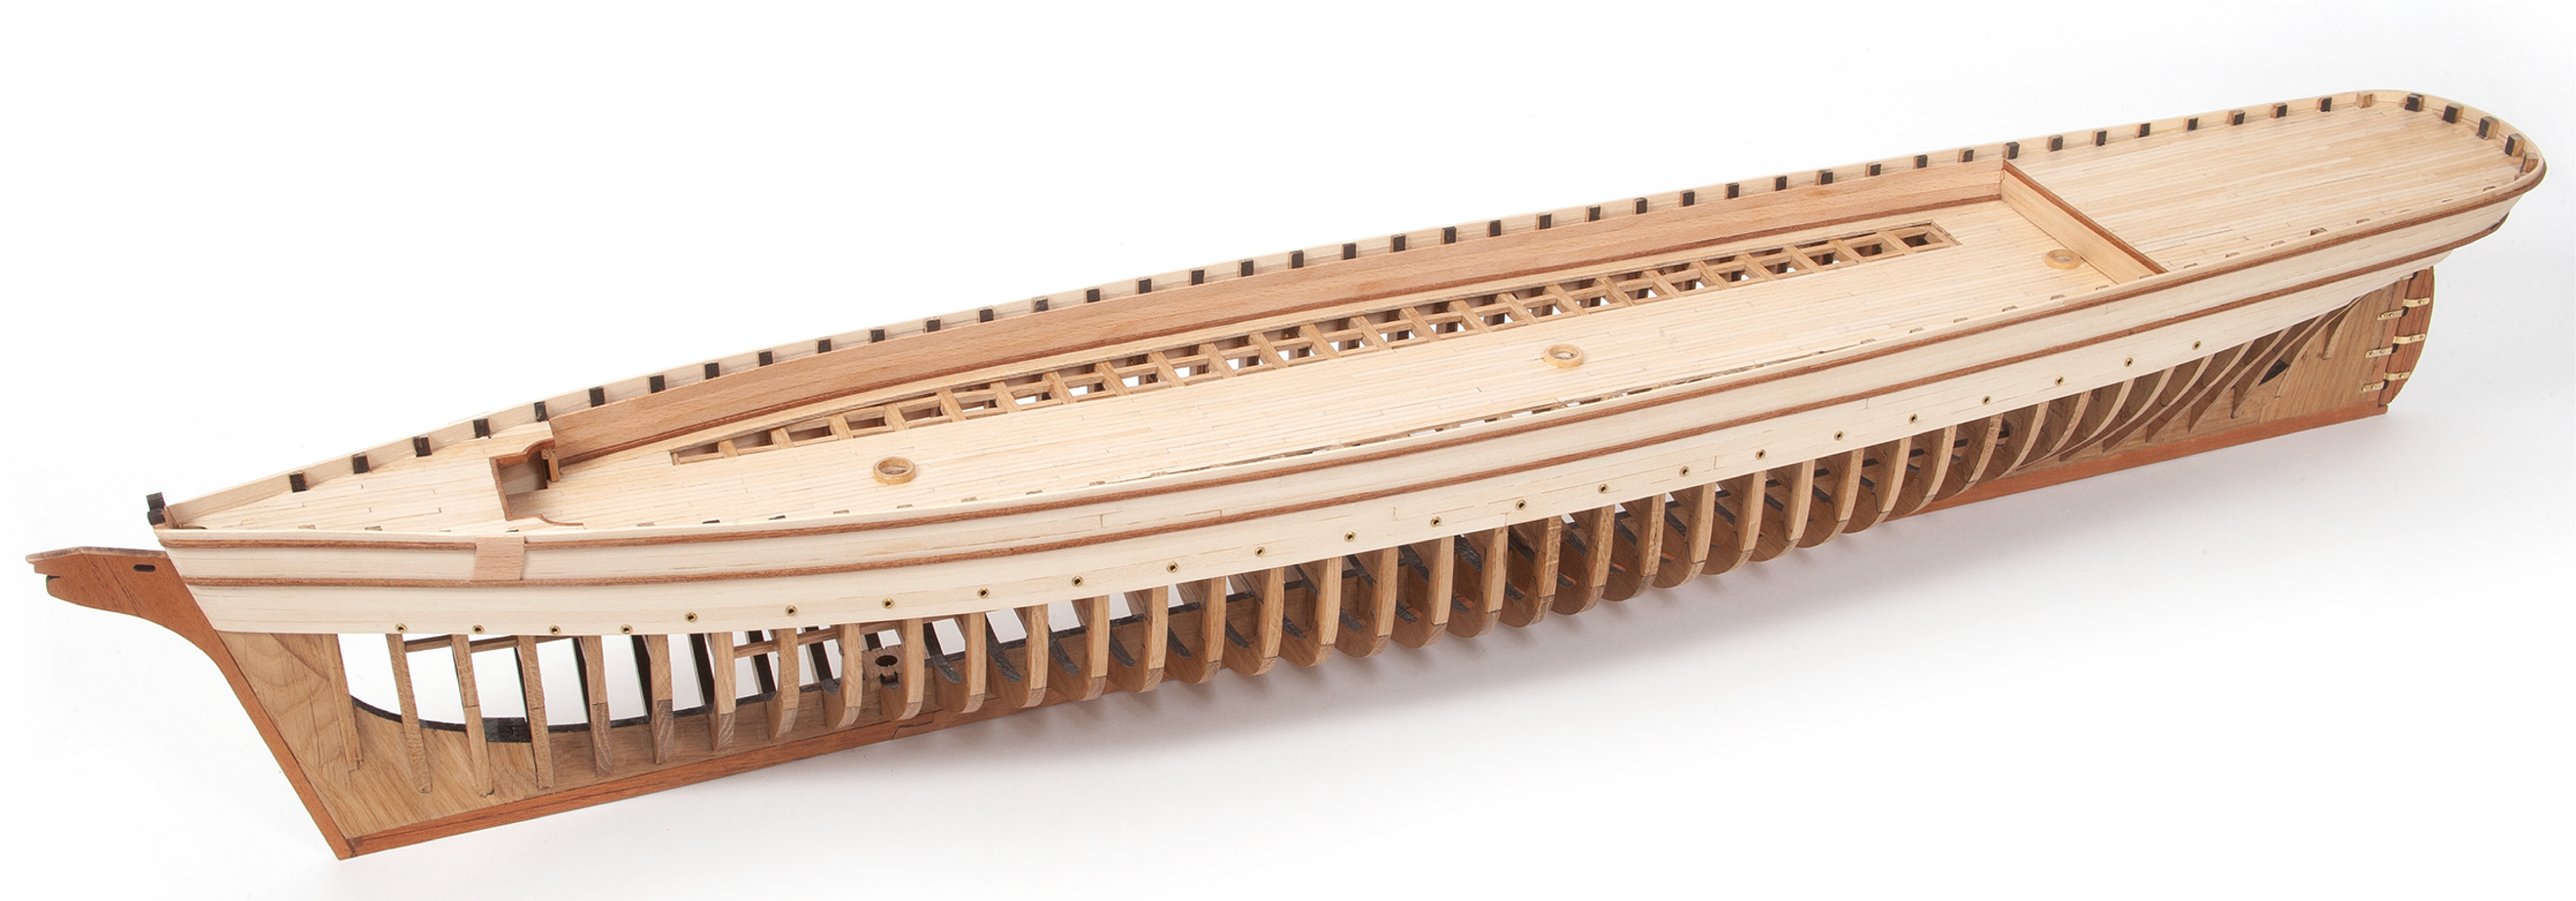
This image shows the hull after completing this stage of the build.
Step 1
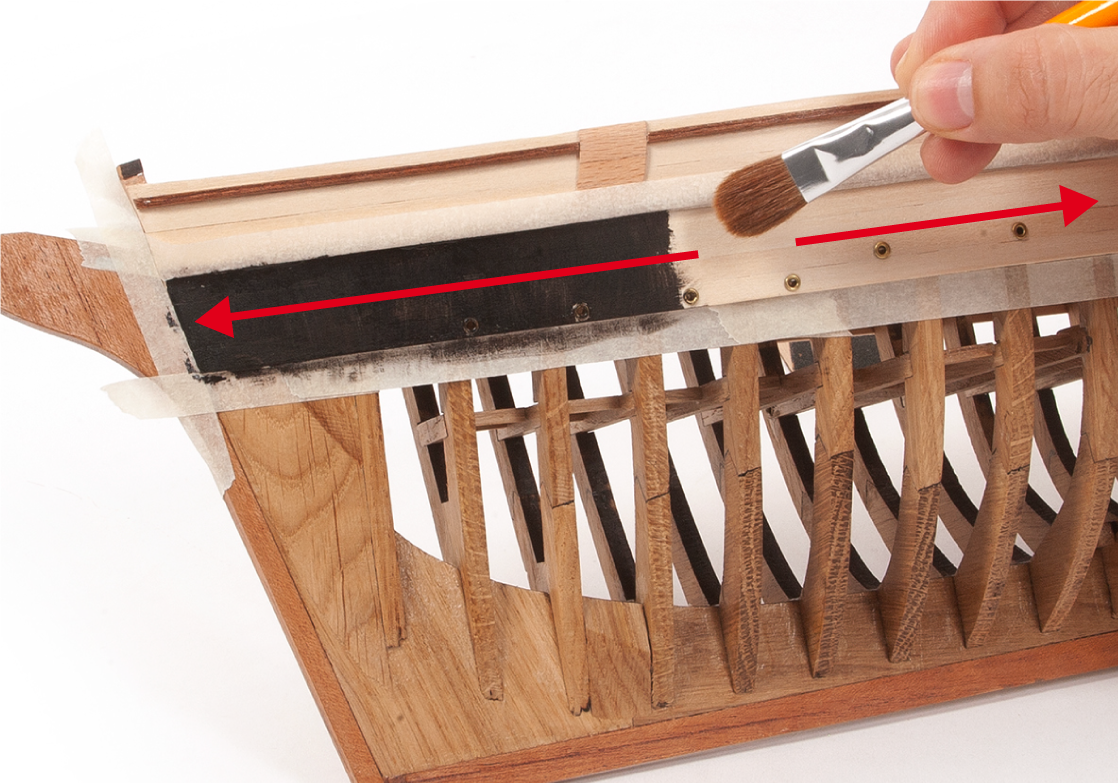
Protect the mahogany strips with masking tape and paint the upper part of the hull black. Take care not to paint the frames.
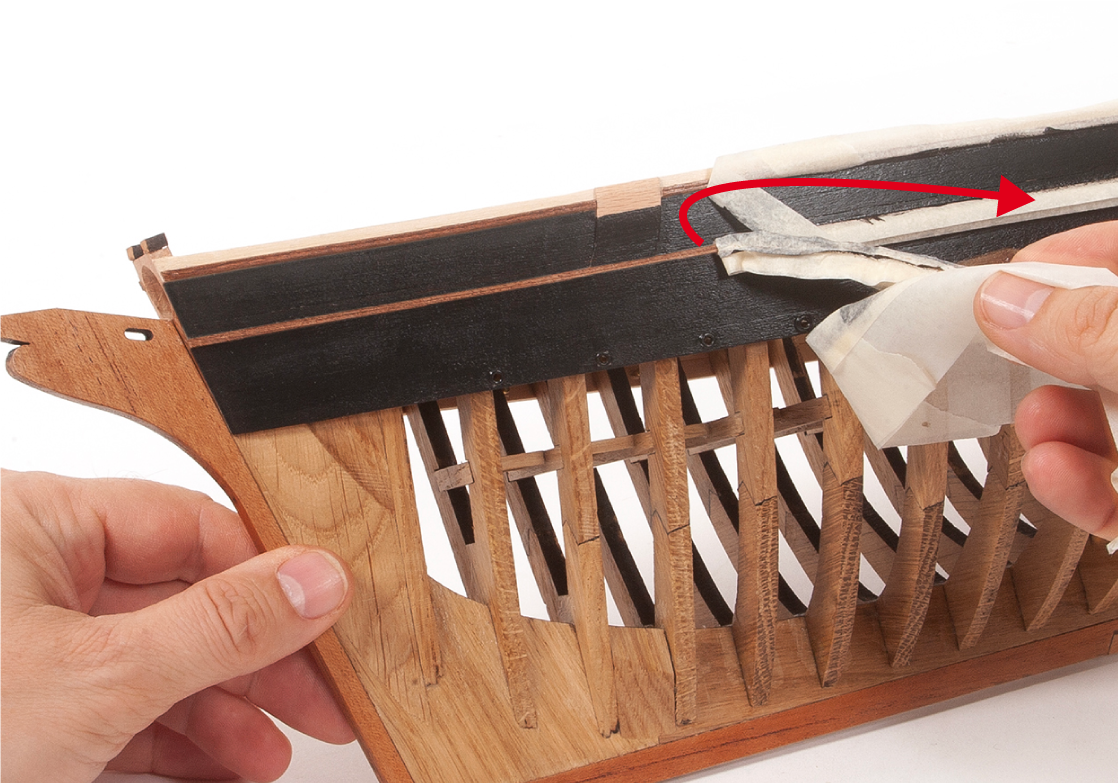
Step 2
Once the paint has dried, remove the masking tape to reveal the finish.
Step 3
You may need to use a fine brush for any necessary touch-ups to achieve a good finish.
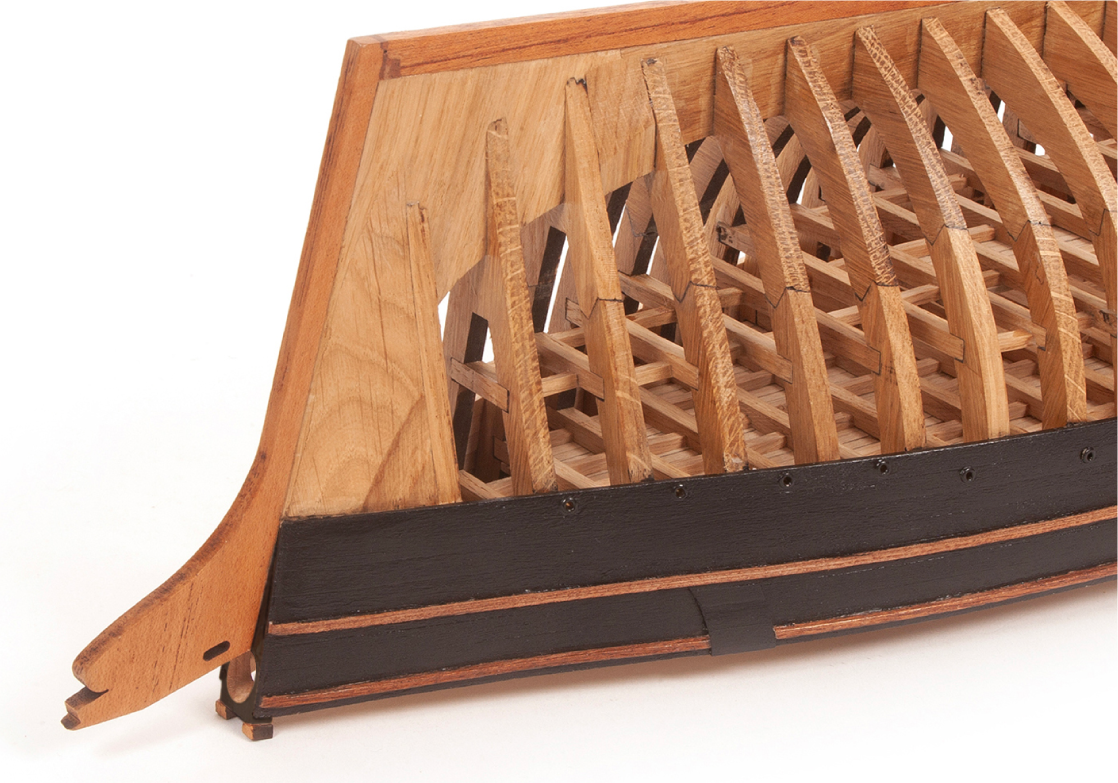
Step 4
This image shows how the stern area of the hull will look once painted.
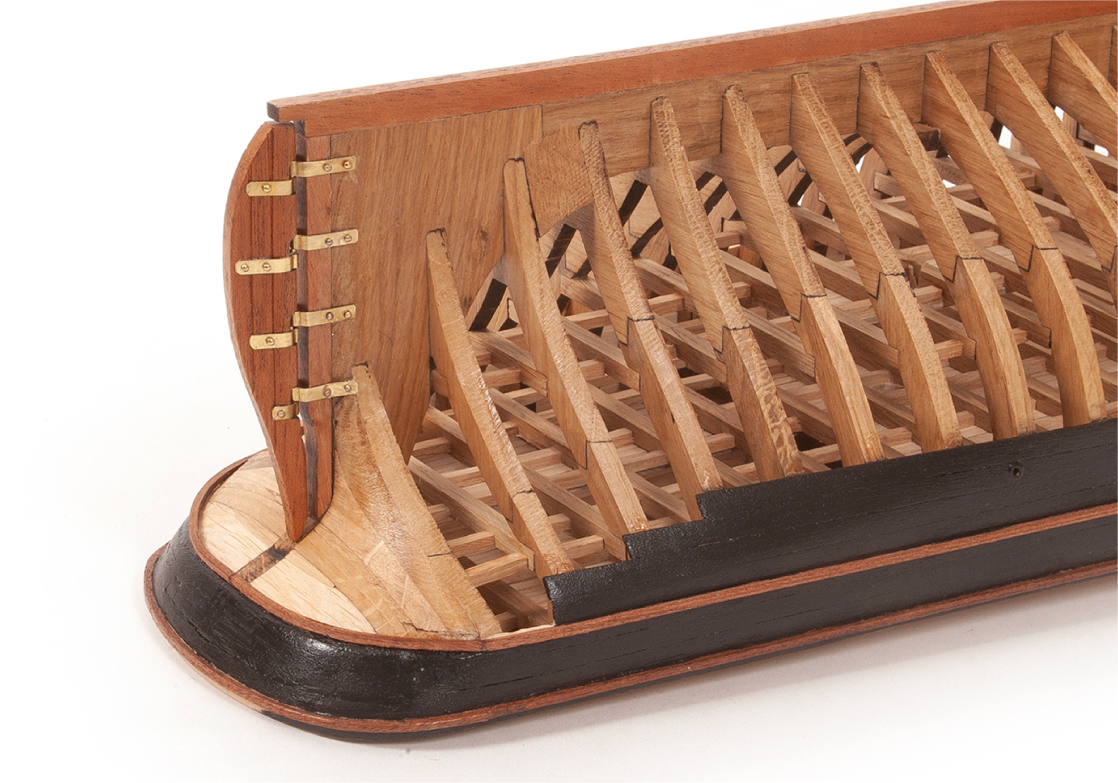
Step 5
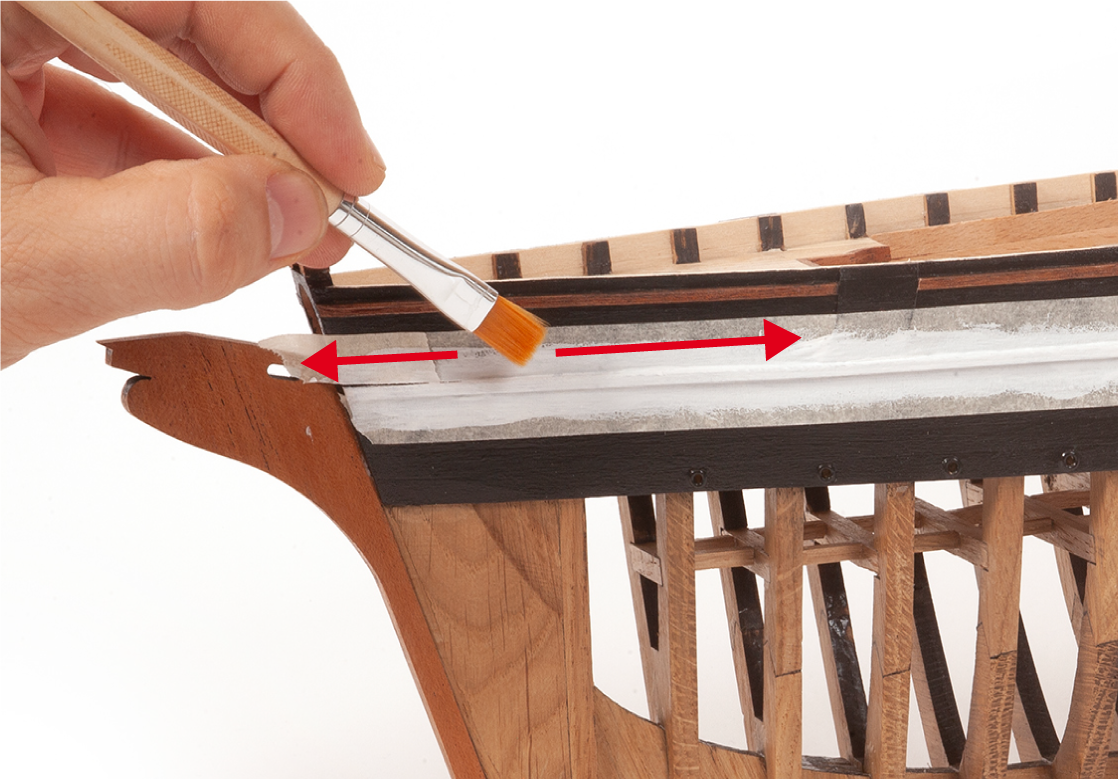
Mask the lower mahogany strip with masking tape. Then paint the mahogany strip white.
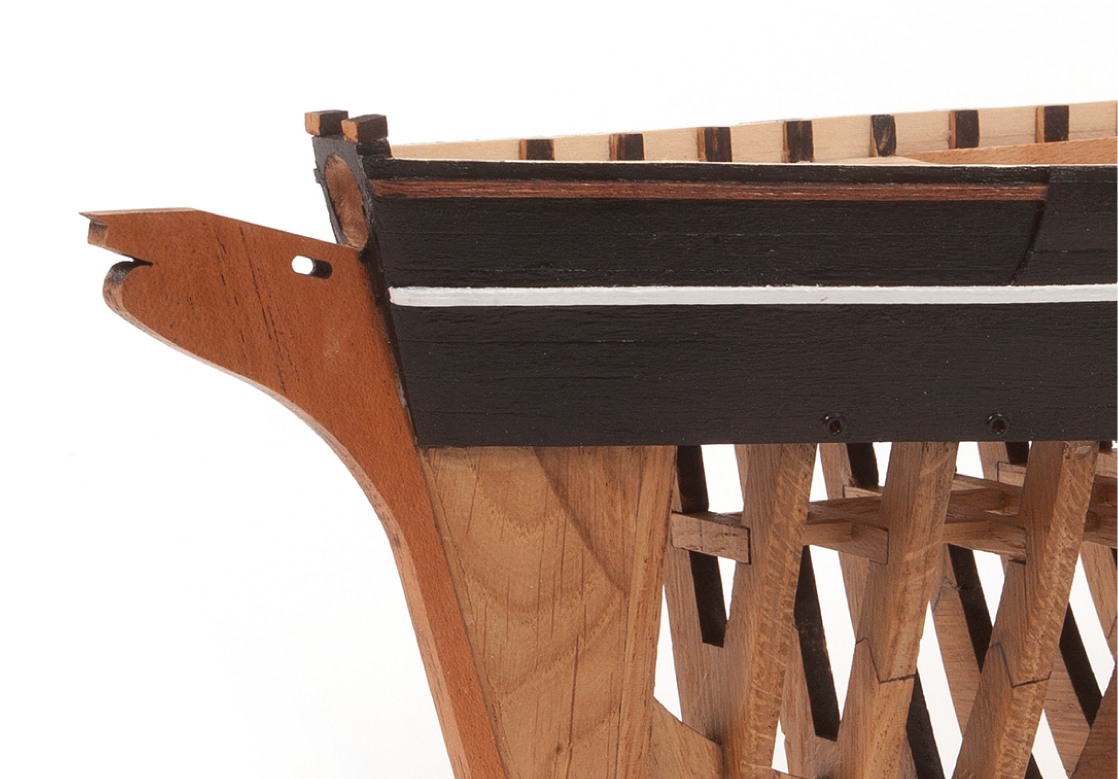
Step 6
This image shows the bow of the hull once painted.
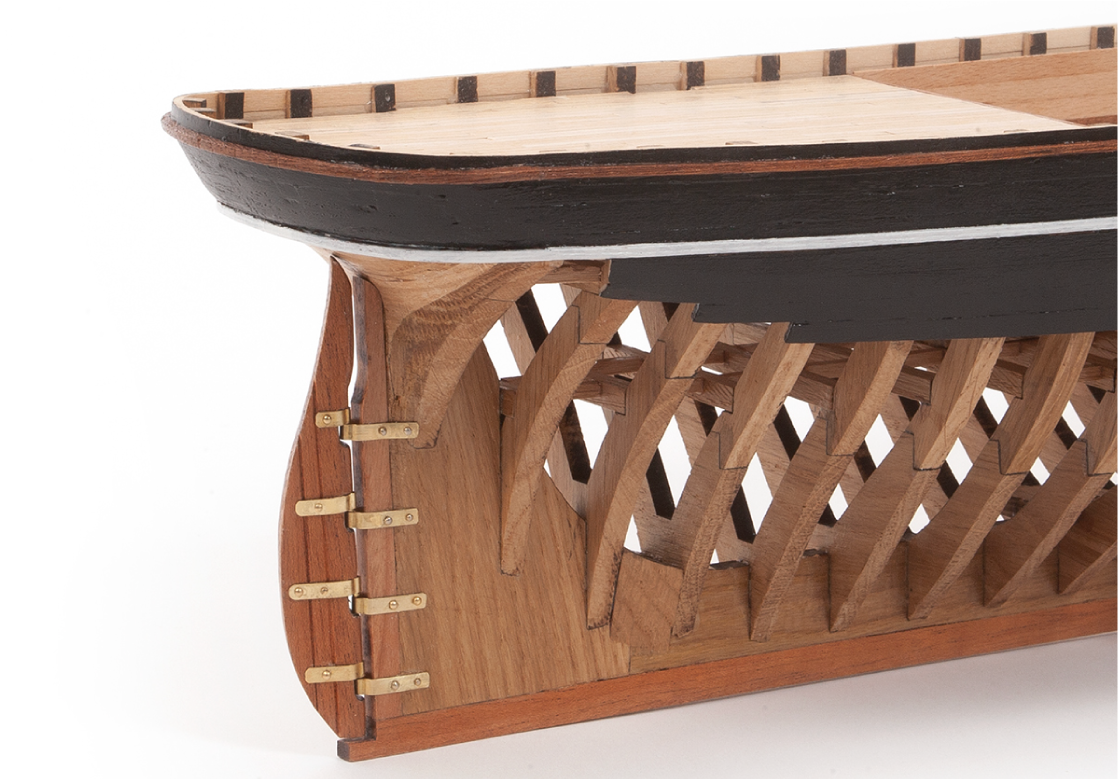
Step 7
This image shows the stern of the hull once painted.
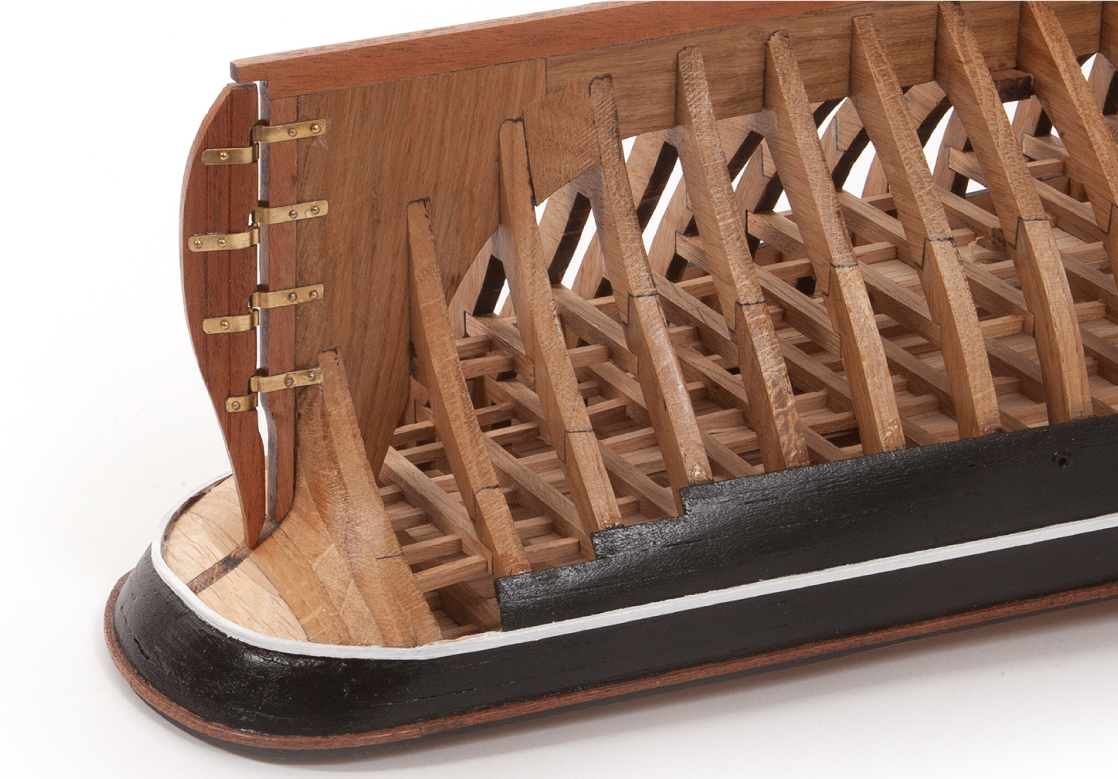
Step 8
The image shows the painted stern area from a different angle.
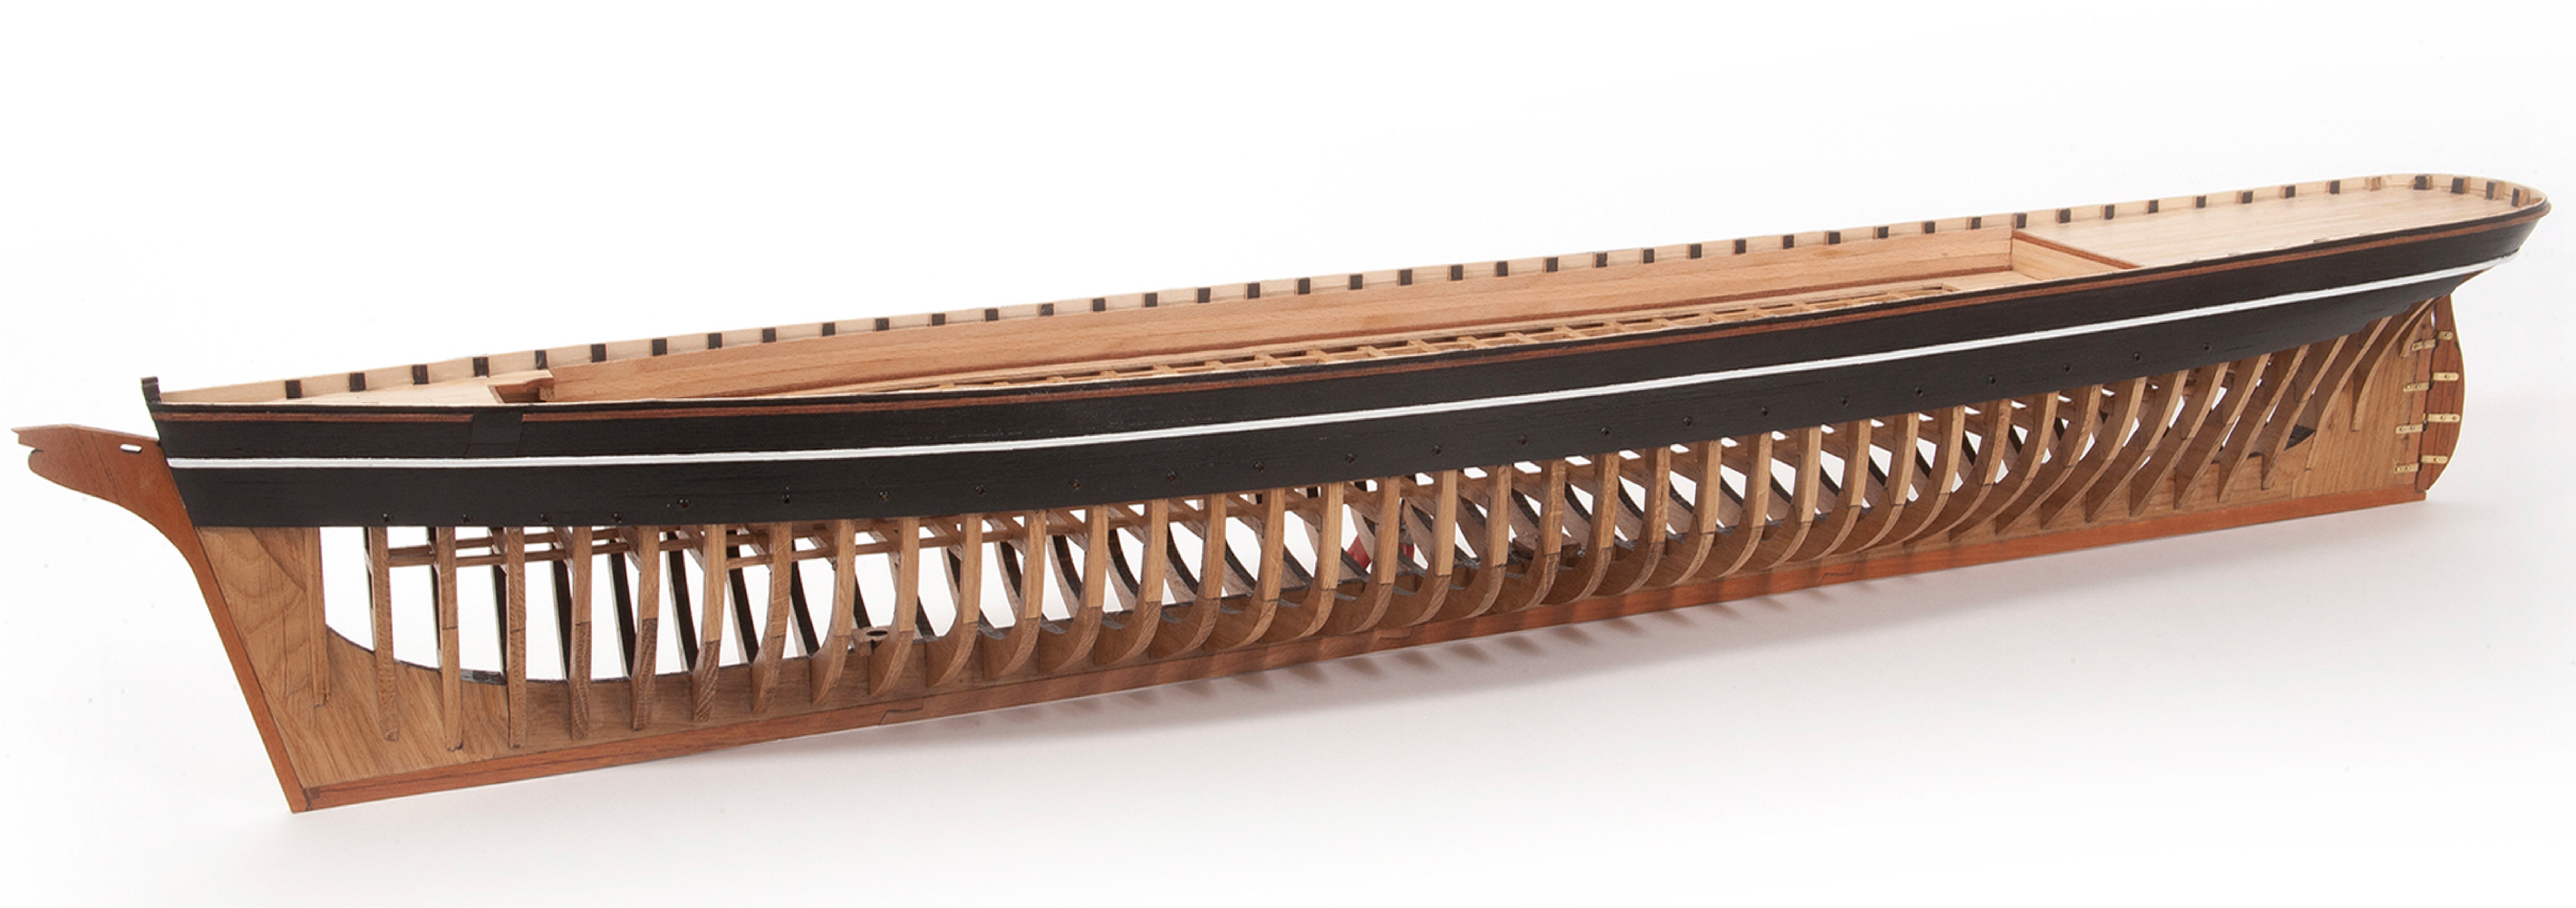
Step 9
This image shows the upper part of the hull in full once painted.
Step 1
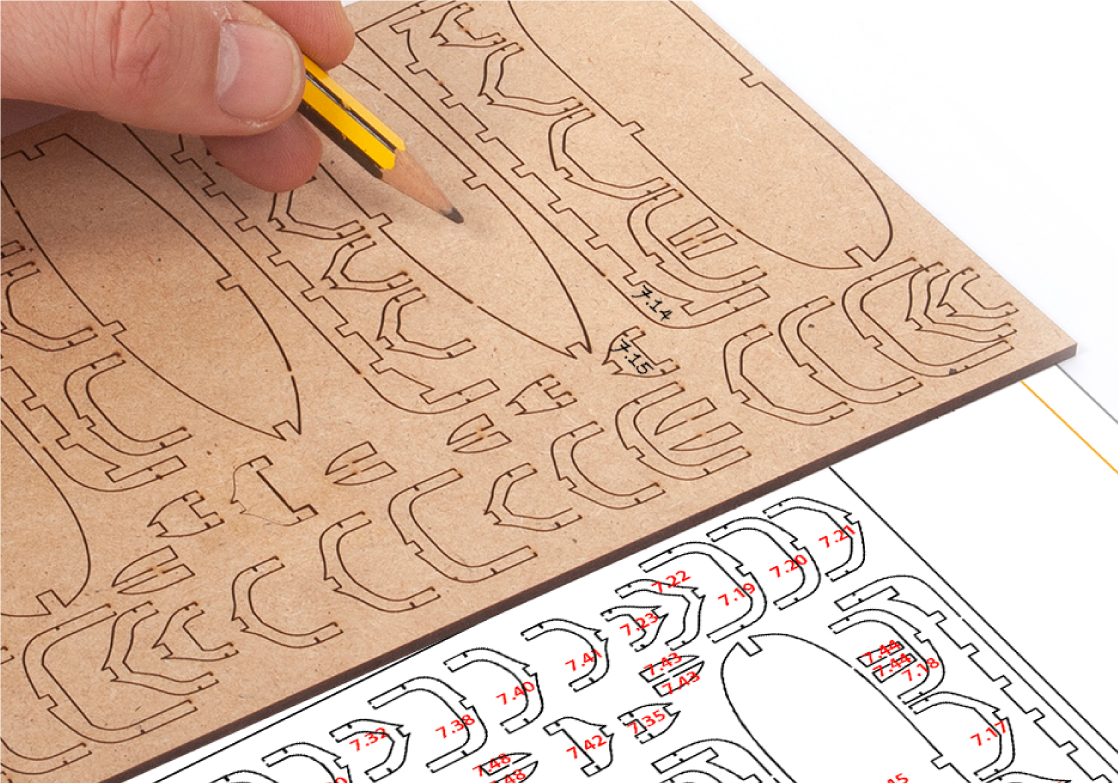
Assembling the Boats
Transfer the corresponding numbers from the identification sheet 2002-24 onto the parts of the laser-cut board.
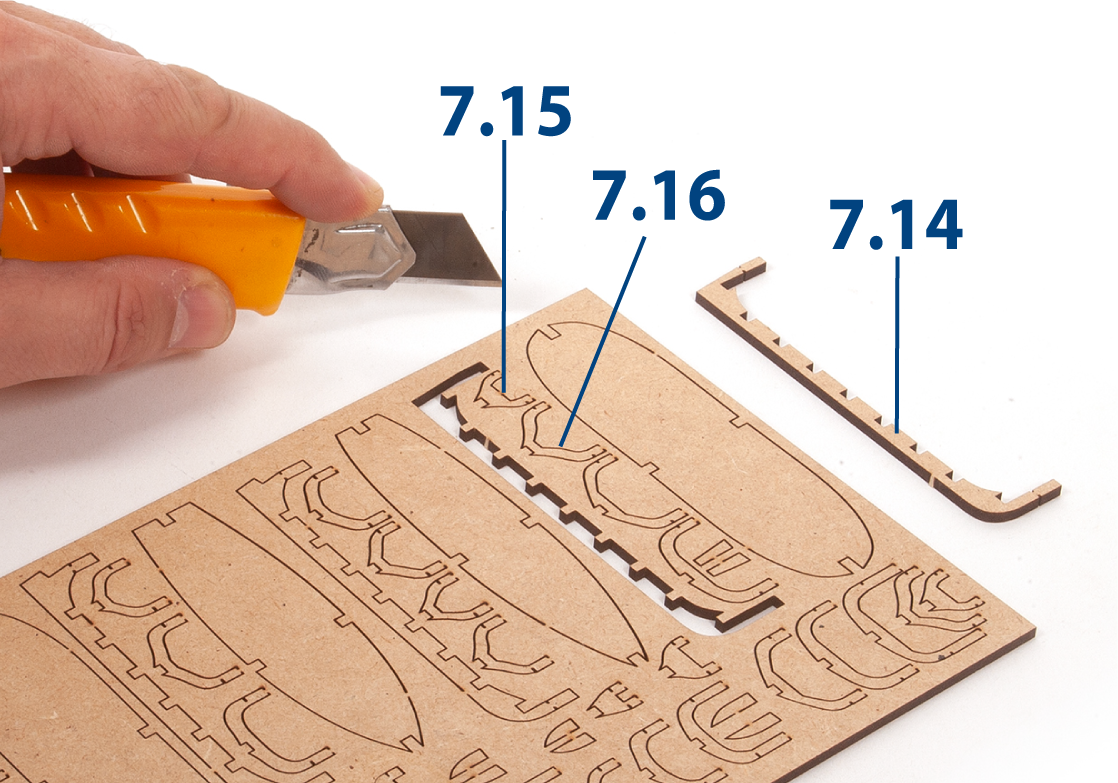
Step 2
Cut out parts 7.14, 7.15 and 7.16.
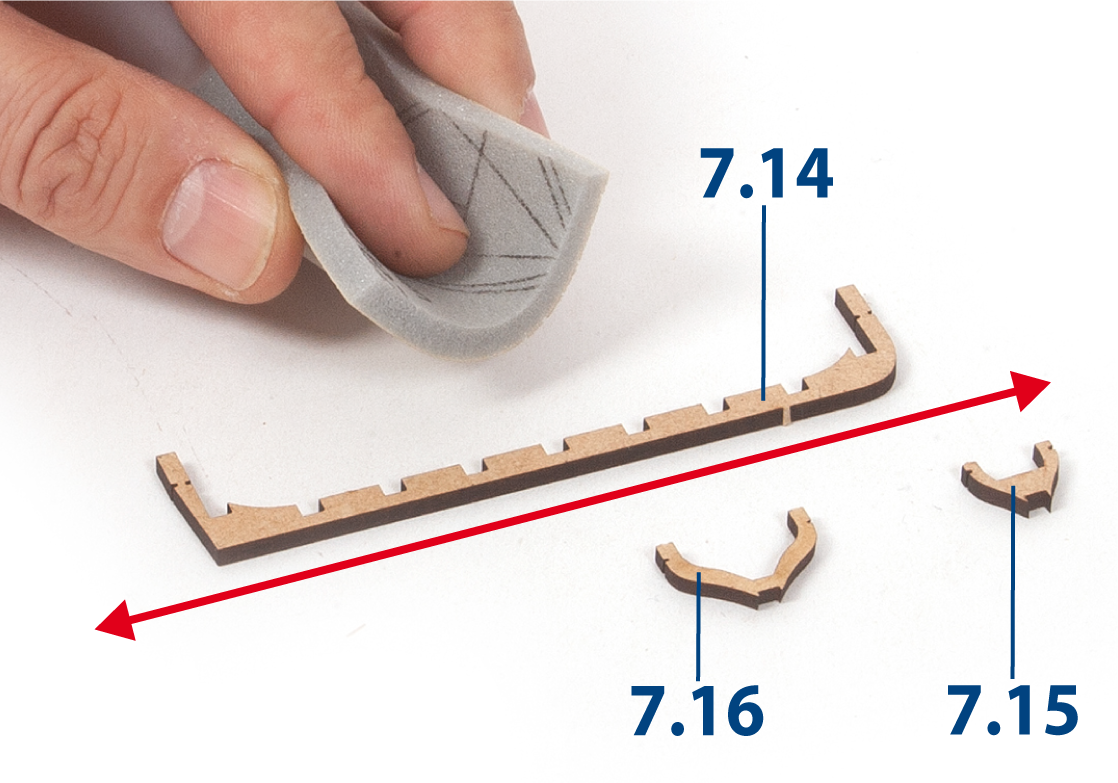
Step 3
Sand the parts lightly.
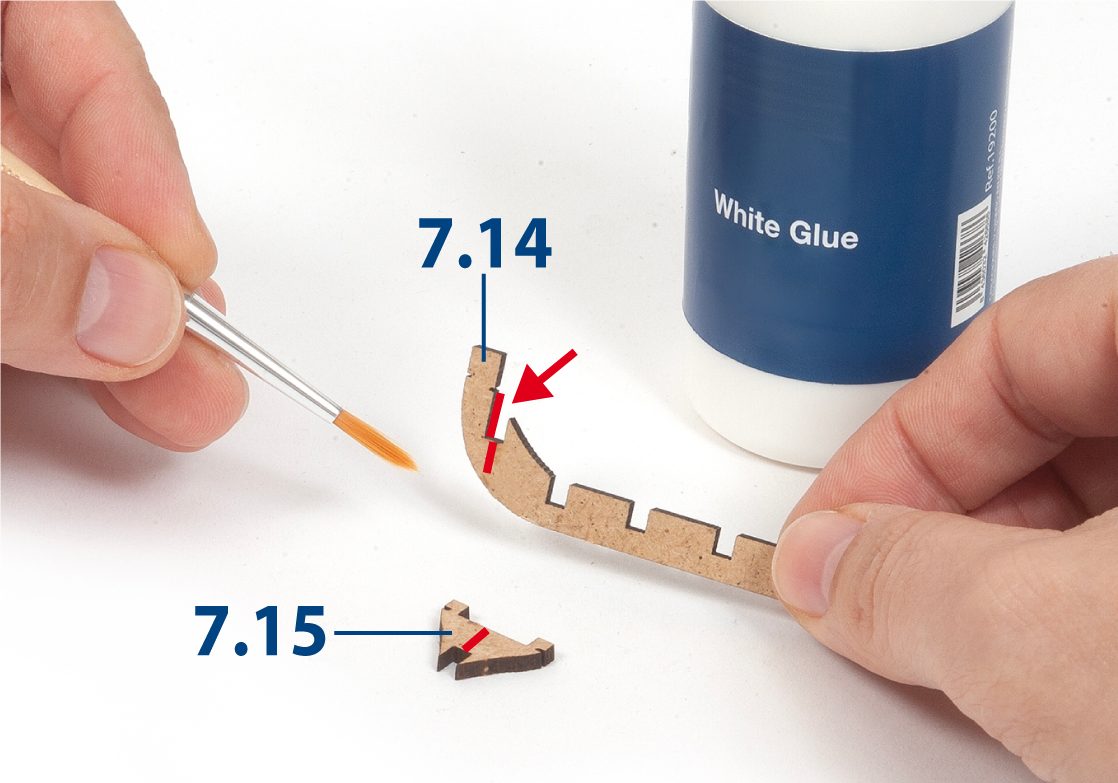
Step 4
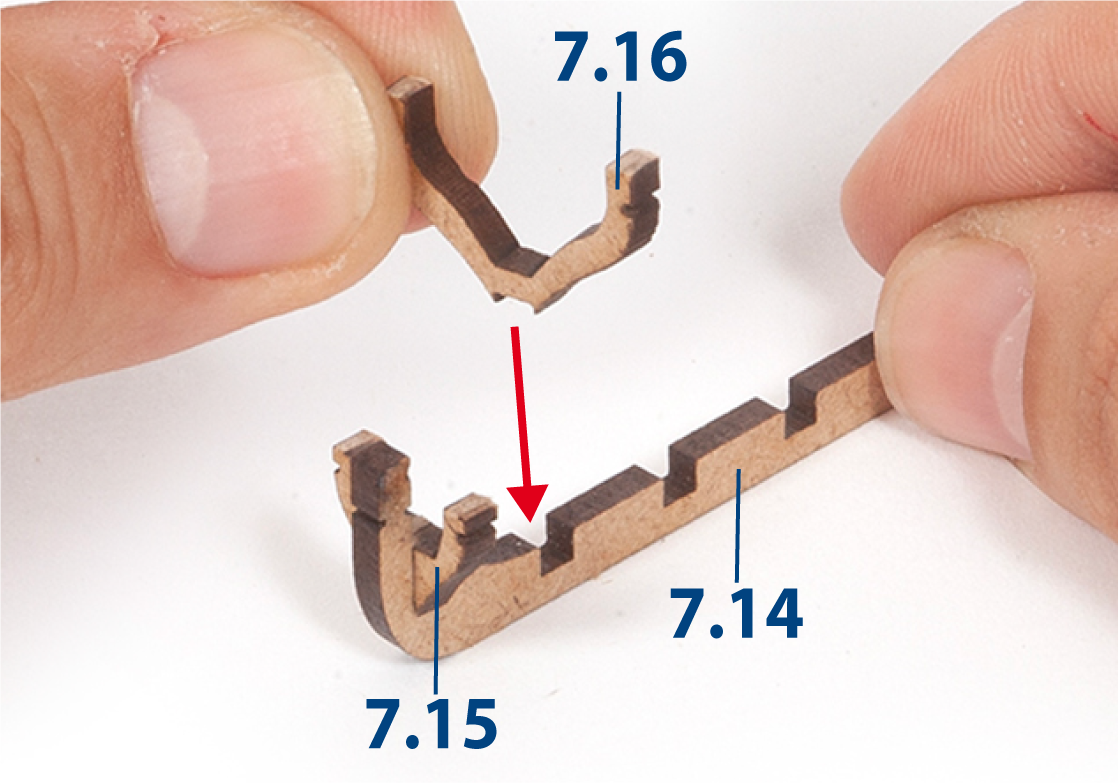
Glue part 7.15 to part 7.14 to start assembling one of the large boats.
Step 5
Glue part 7.16 to part 7.14.
Step 6
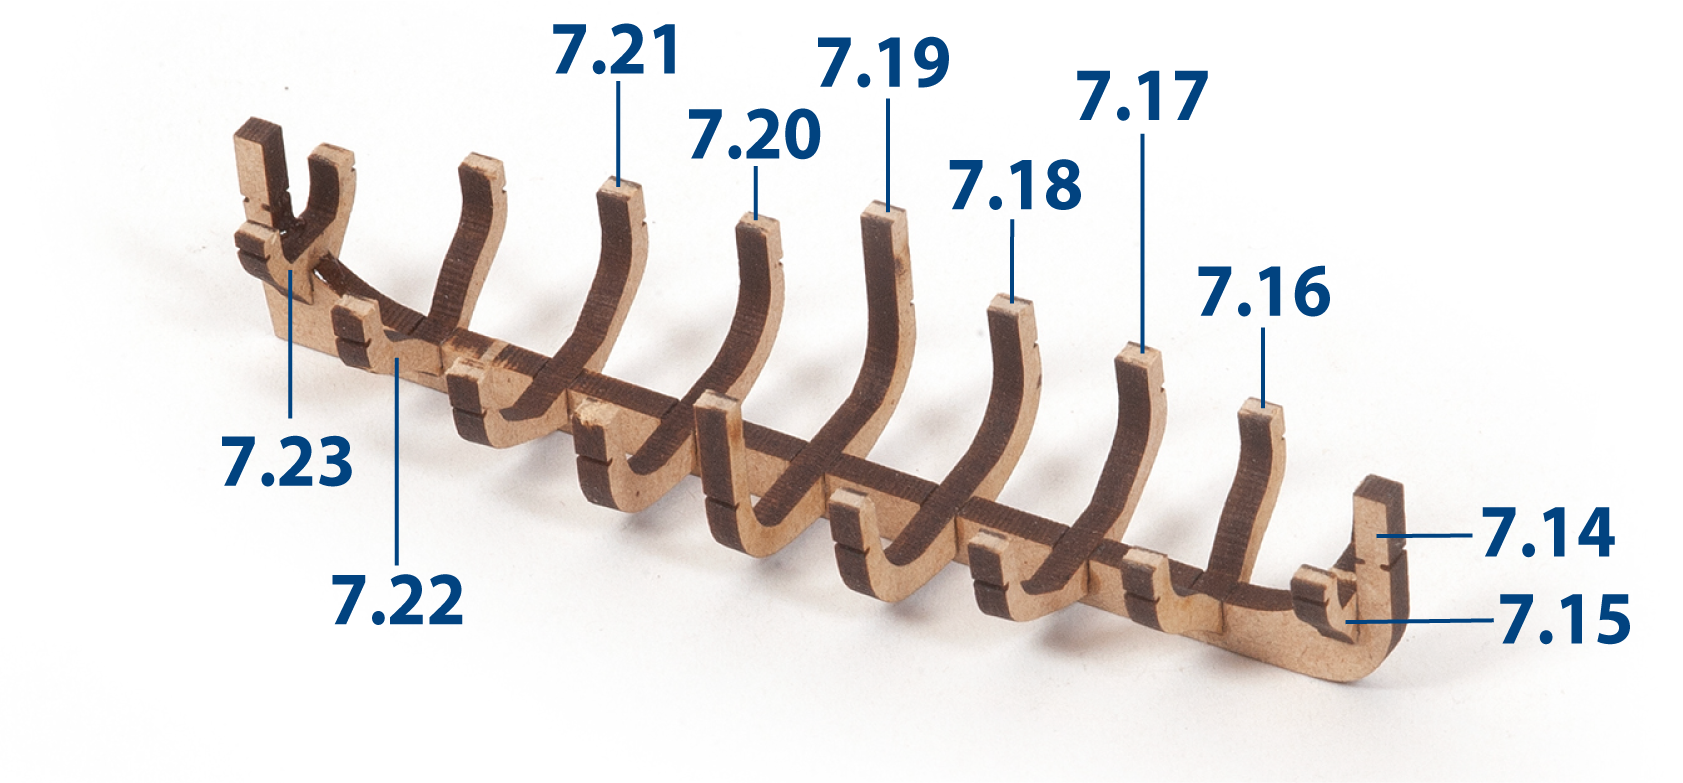
Glue parts 7.17–7.23 to complete the structure of the large boat.
Step 7
Assemble another large boat using the parts shown in the image.
Step 8
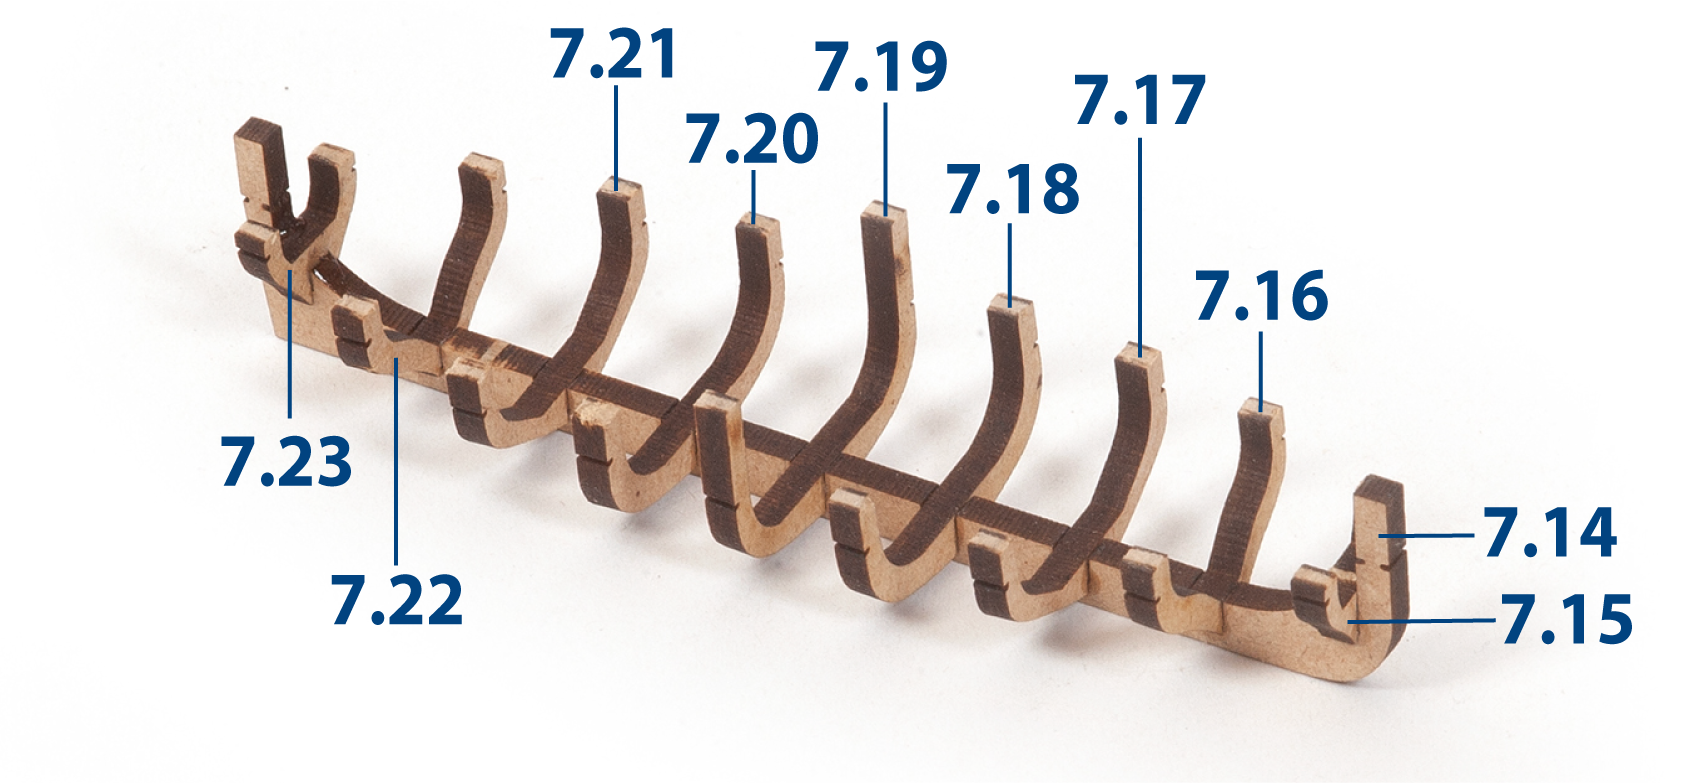
Assemble the medium-sized boat using the parts shown in the image.
Step 9
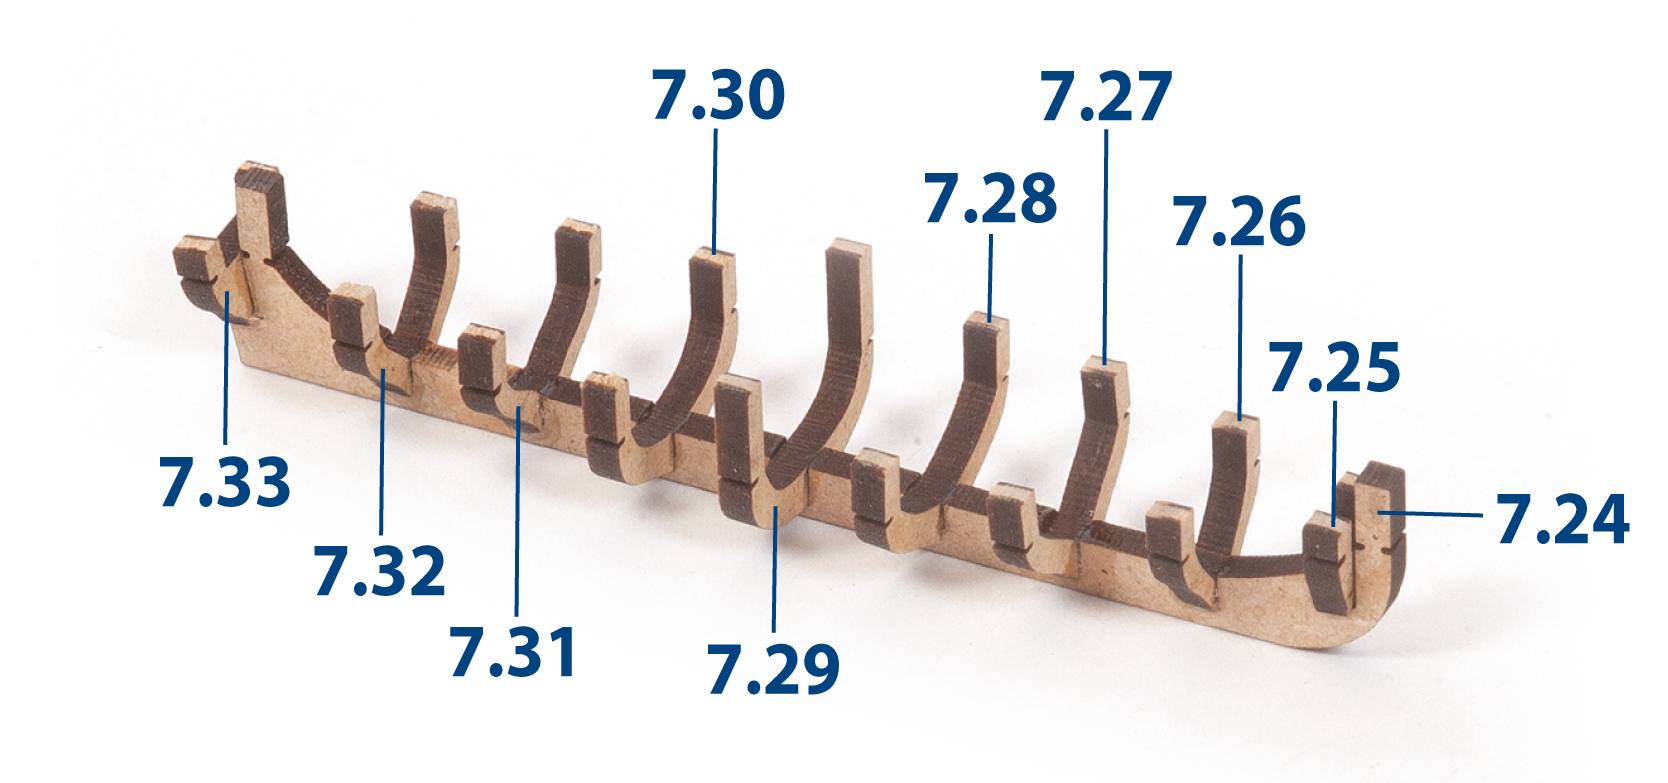
Assemble the small-sized boat using the parts shown in the image.
Step 10
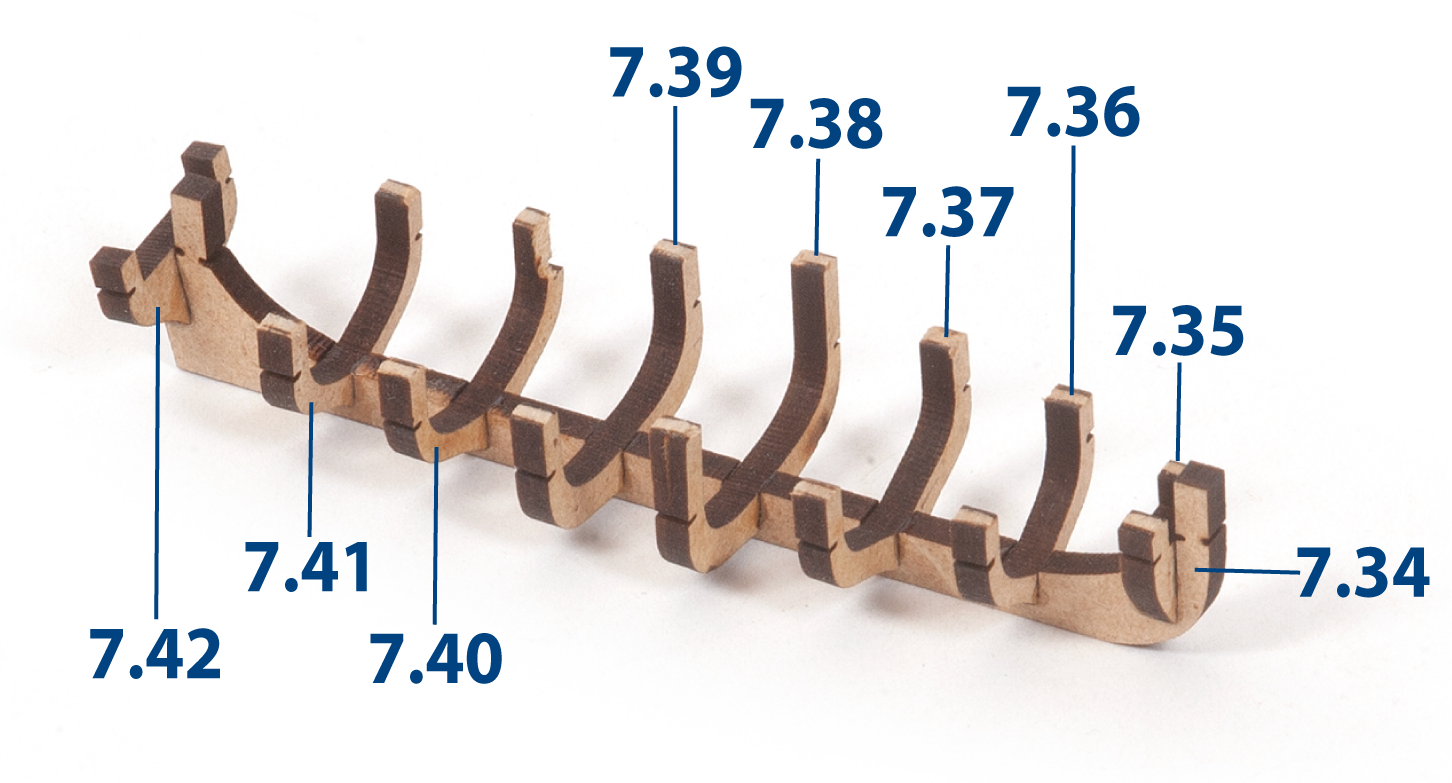
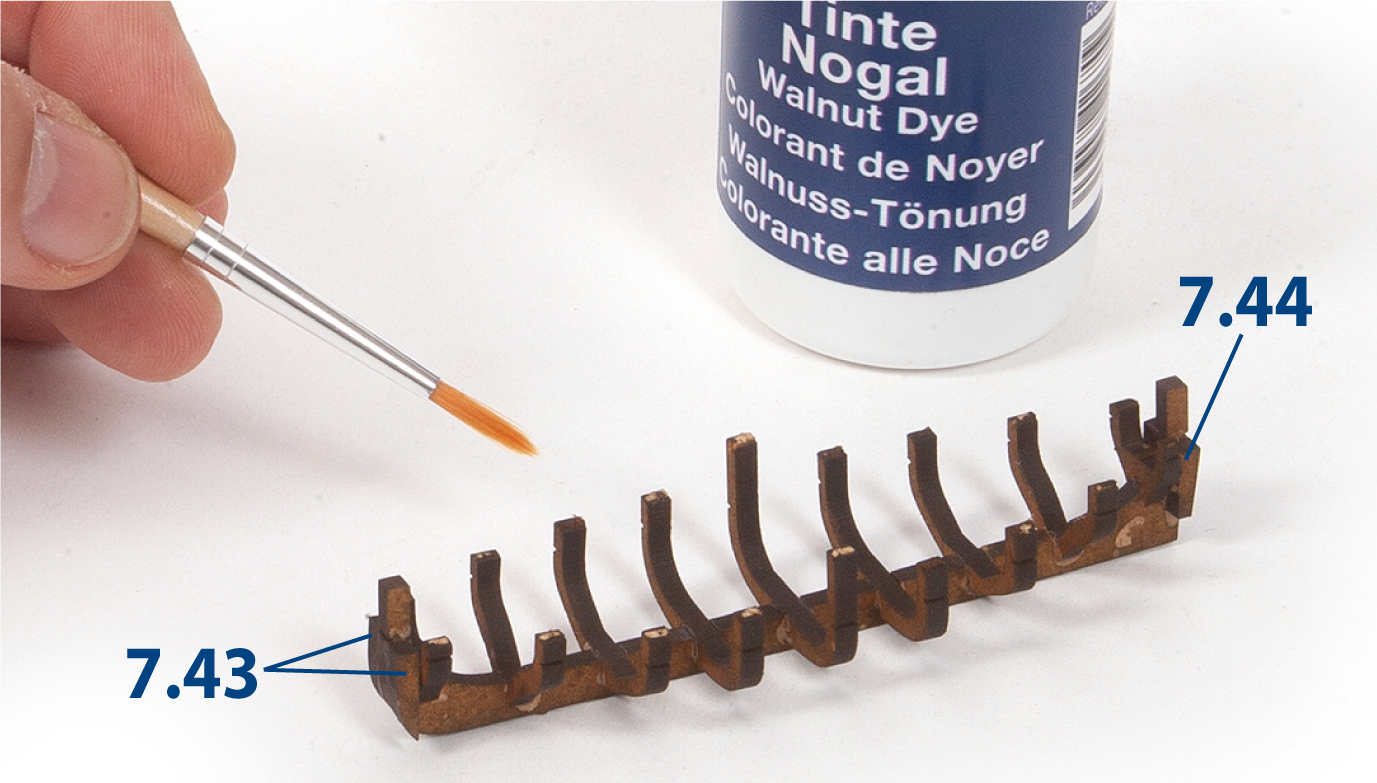
Add parts 7.43 and 7.44 to the large boats. If you wish to darken the boats, you can apply walnut stain.
Step 11
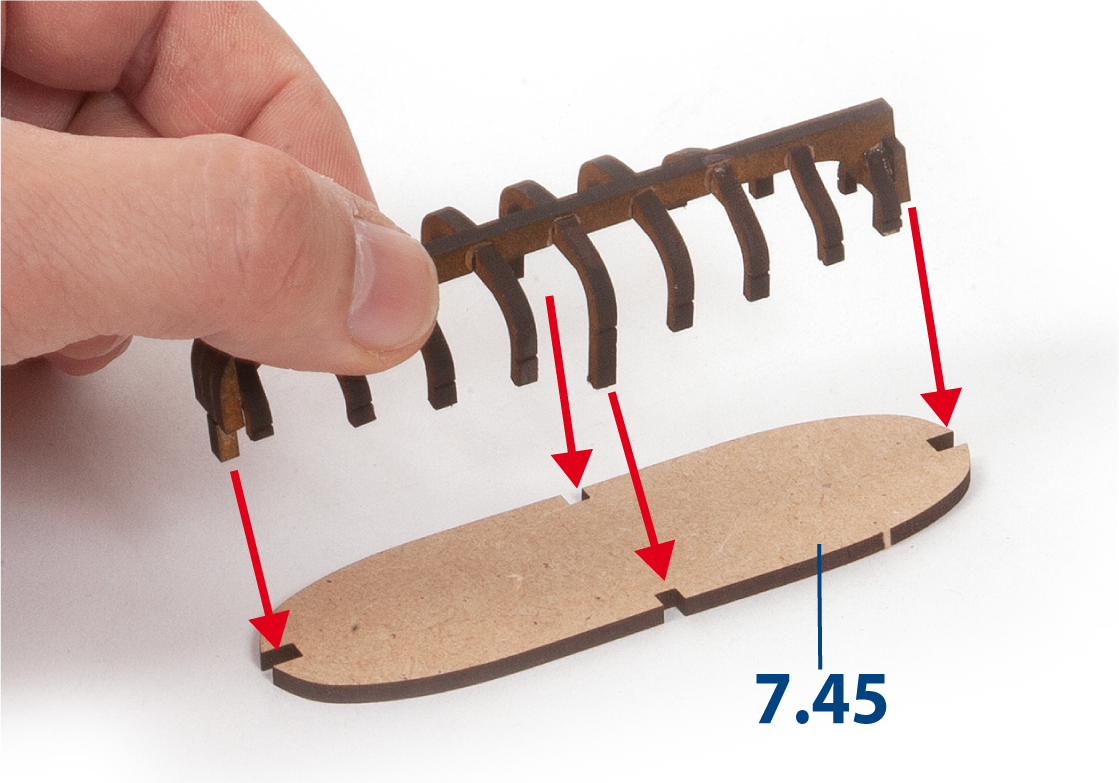
Insert the large boat into the base 7.45 and glue the ends of the frames to the base.
Step 12
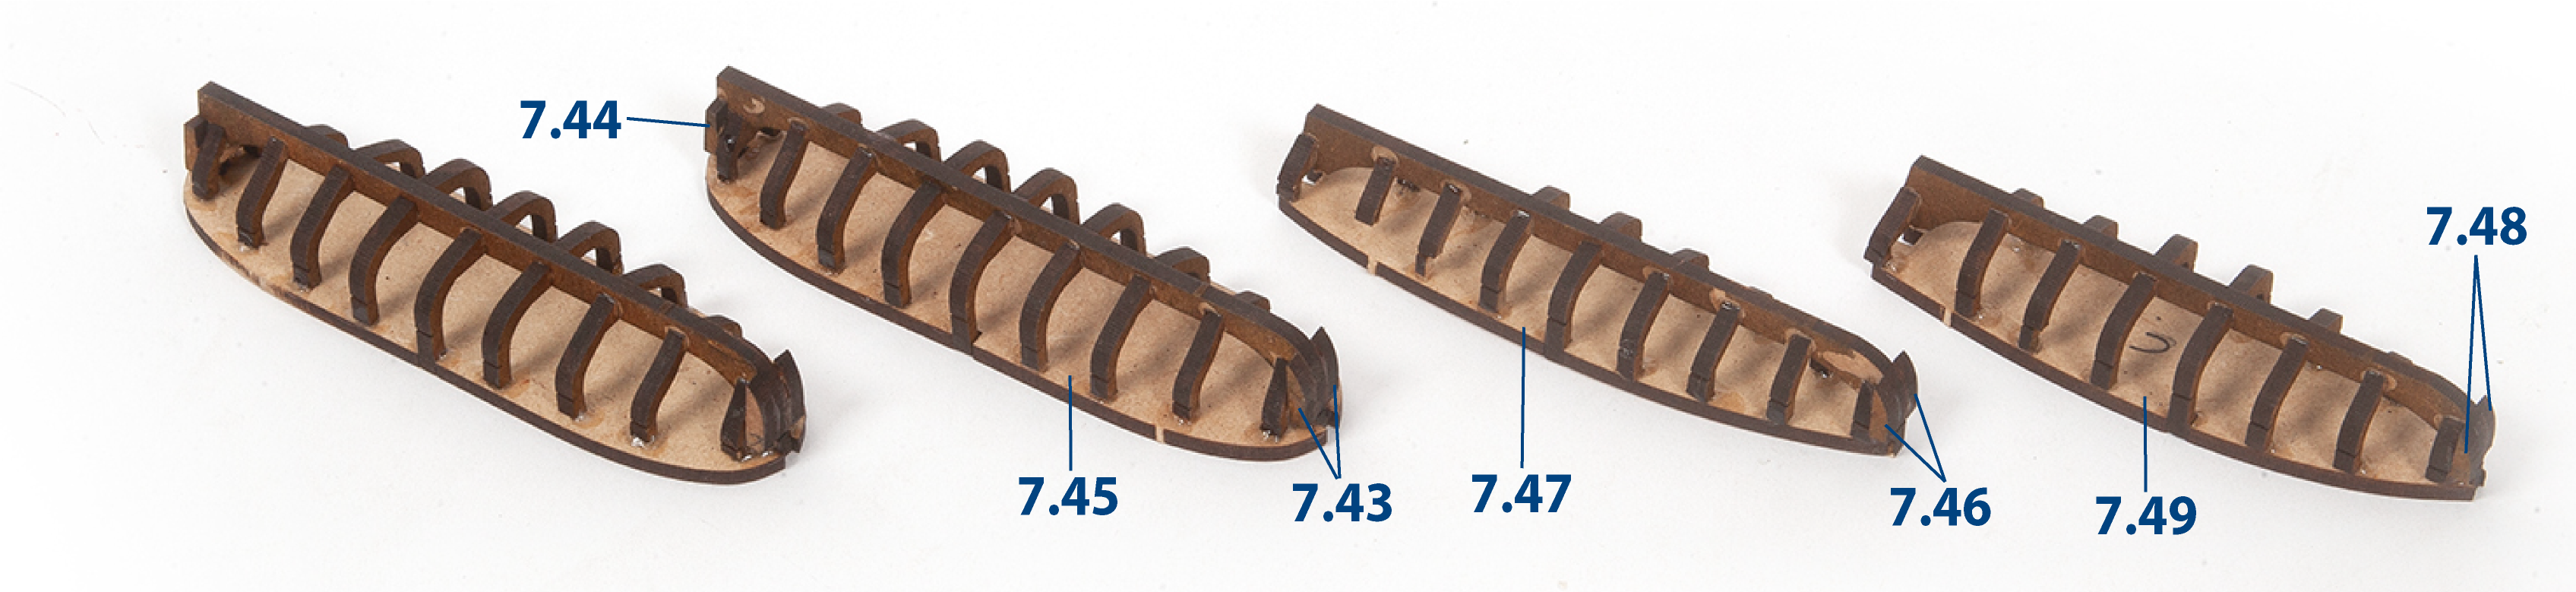
Repeat the same procedure for the other boats.
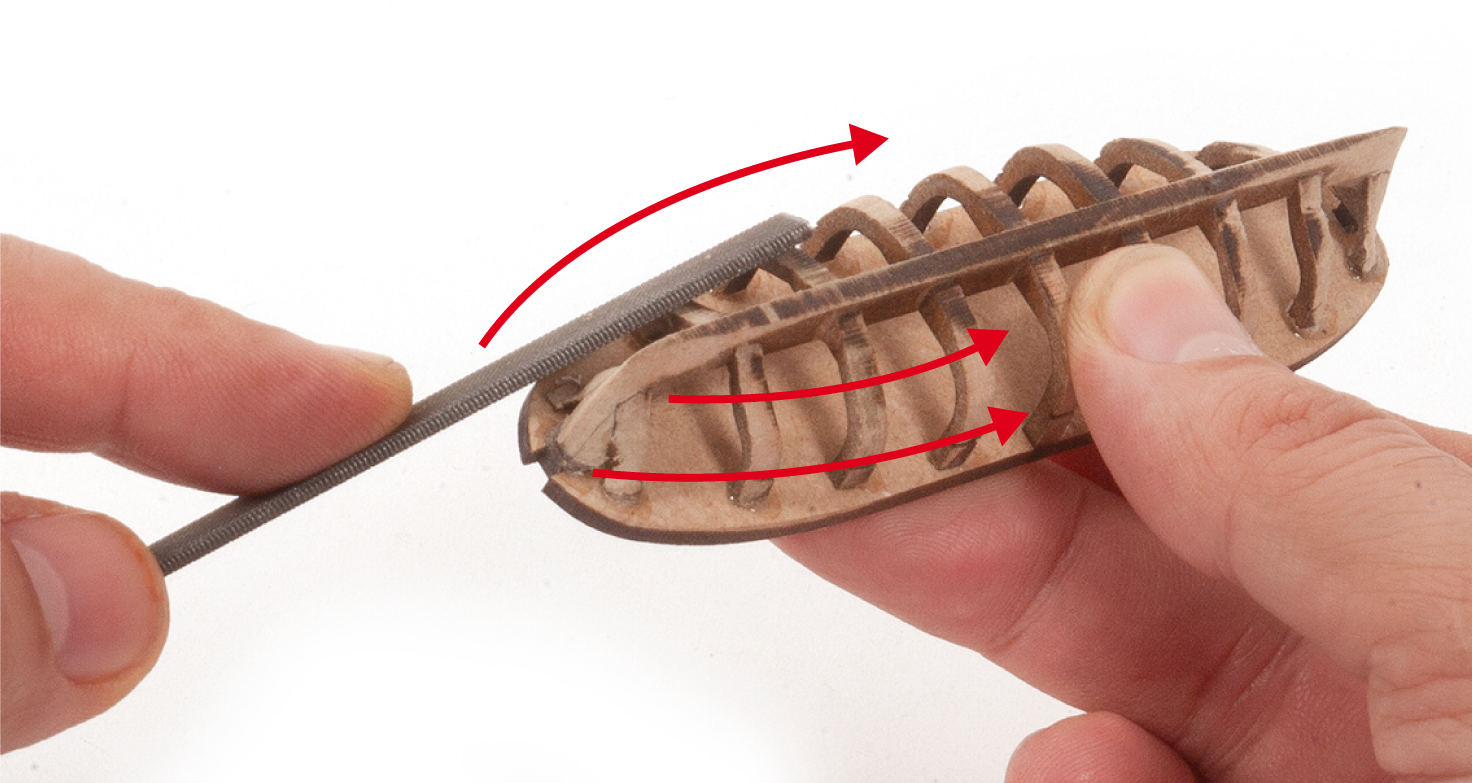
Step 1
File the bow and stern of the boats.
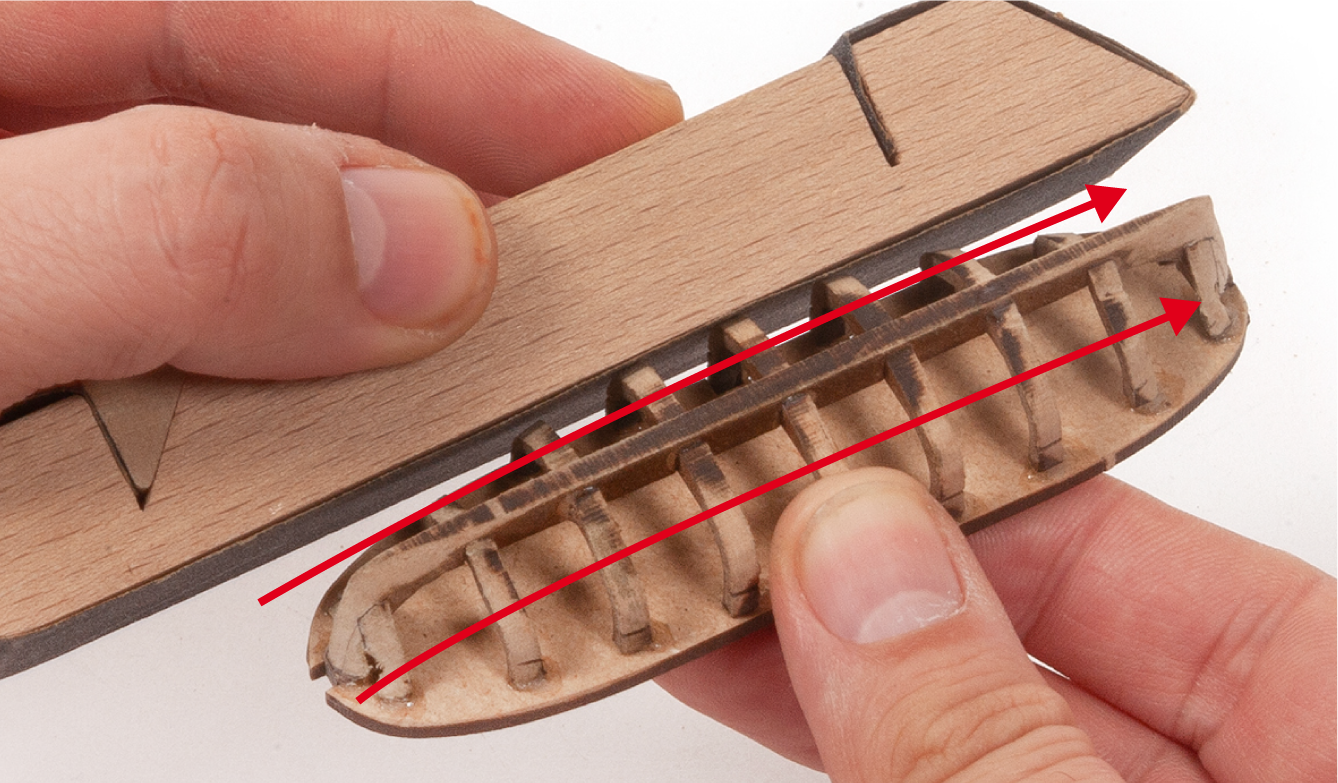
Step 2
Sand the central areas of the boats.
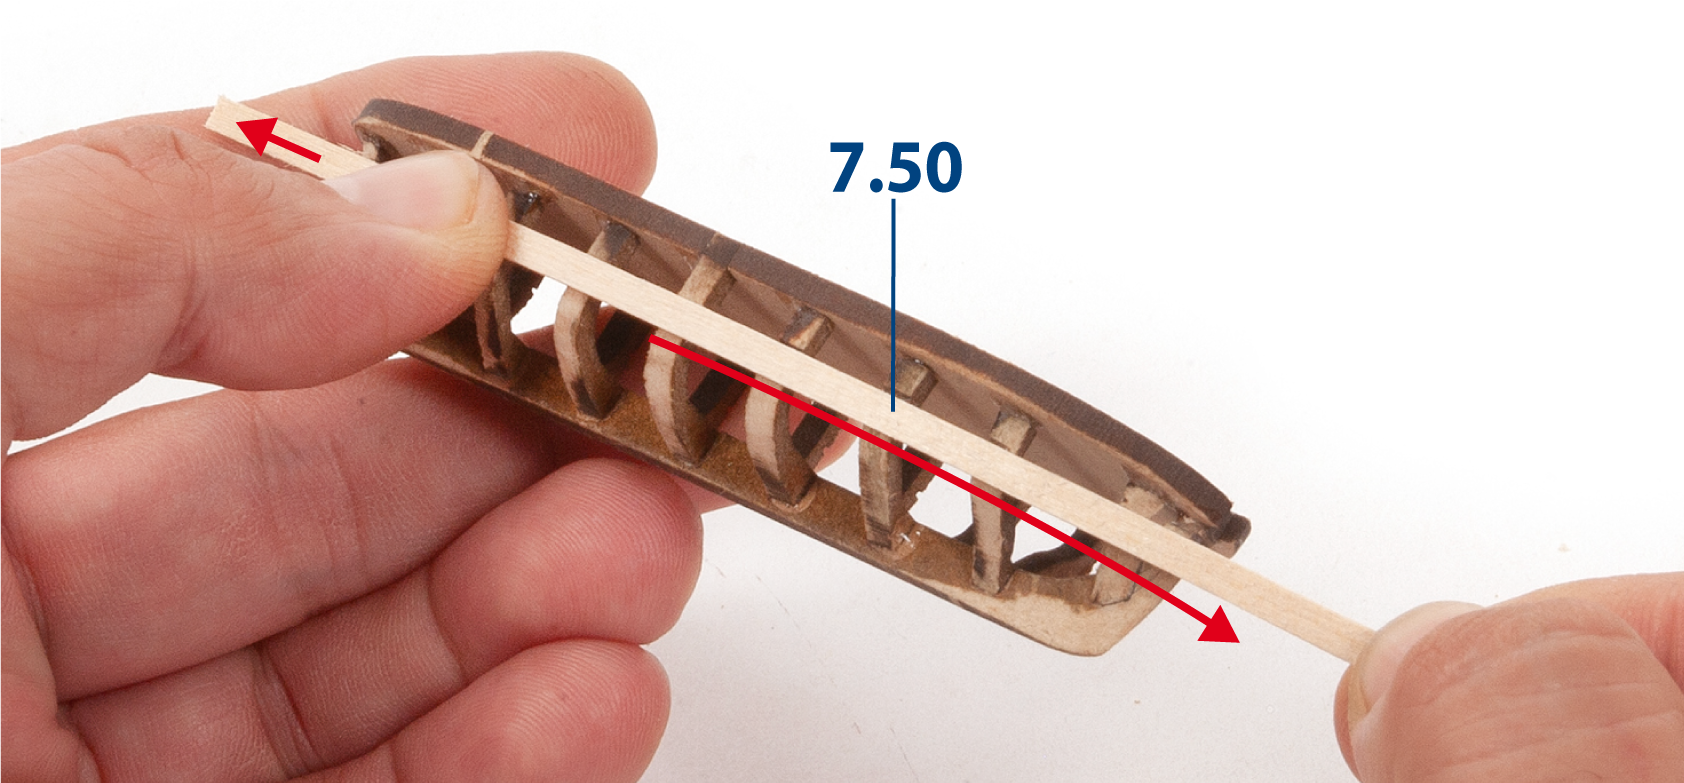
Step 3
Position a wooden strip 7.50 (1 x 3 x 120 mm lime wood) along the notches on the frames to check its fit. This mark indicates the upper limit of the boat planking. Cut the strip to length and glue it in place.
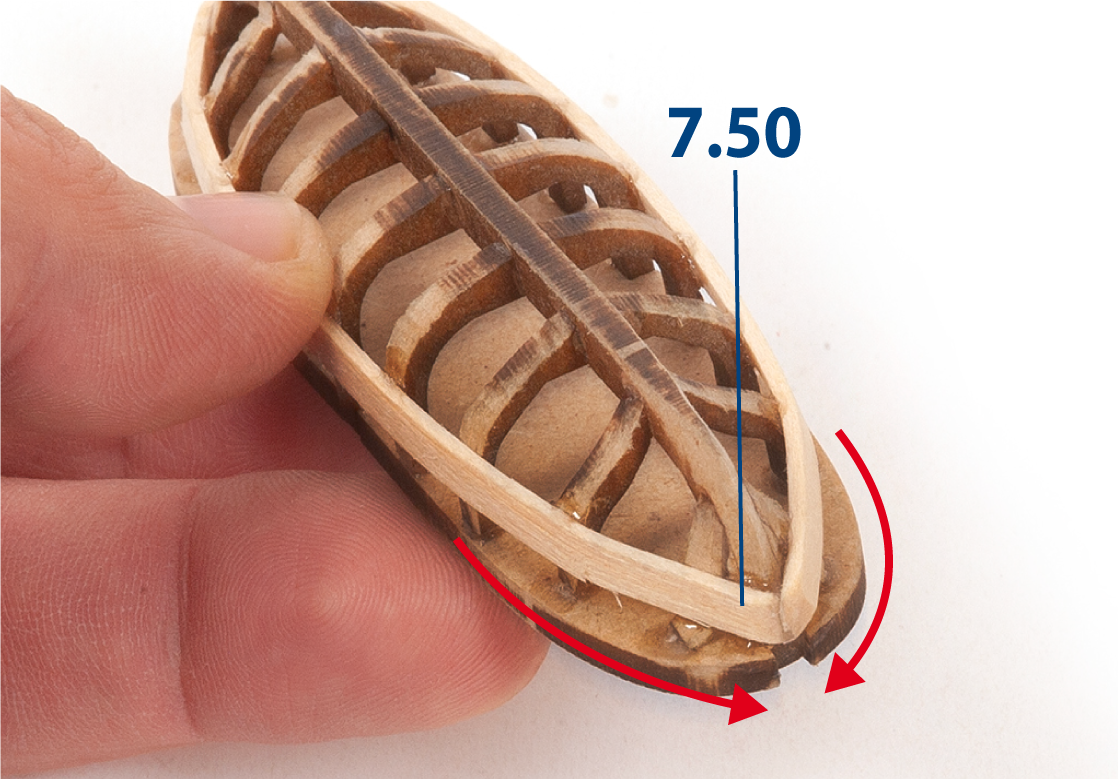
Step 4
Glue the wooden strips in place so that they meet at the bow and stern of the boats.
Step 5
Continue gluing the wooden strips as shown in the image.
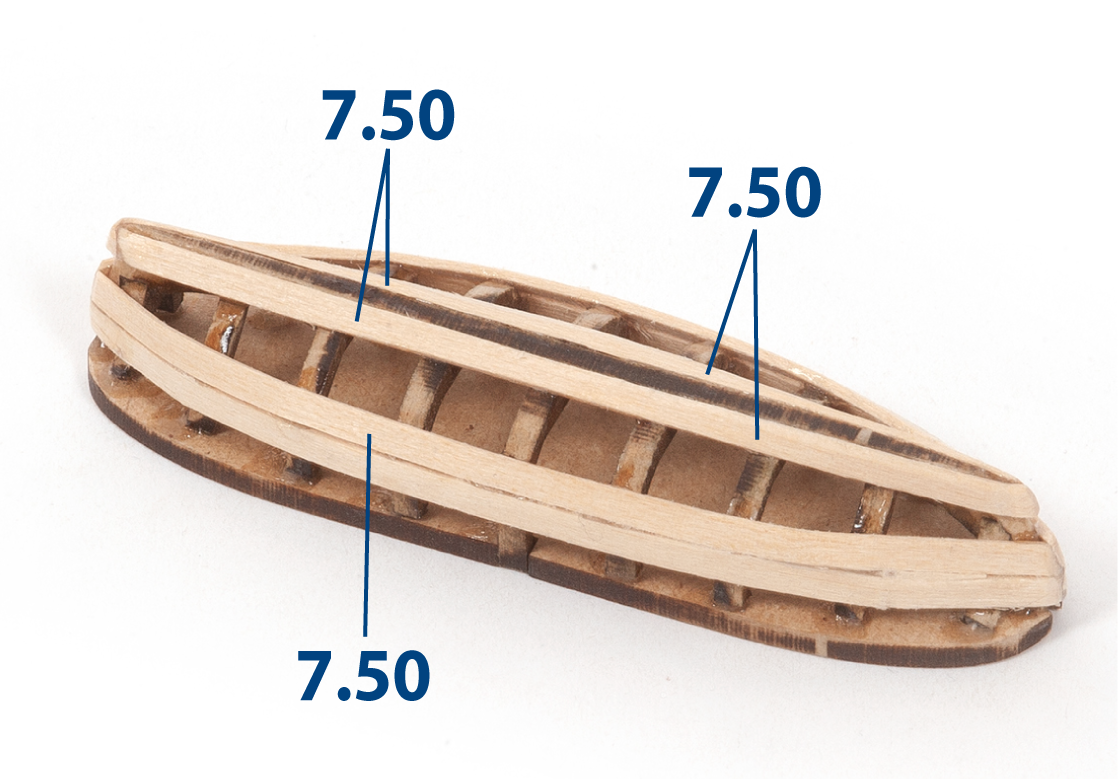
Step 6
Trim the wooden strips to fill the gaps as you progress with the planking.
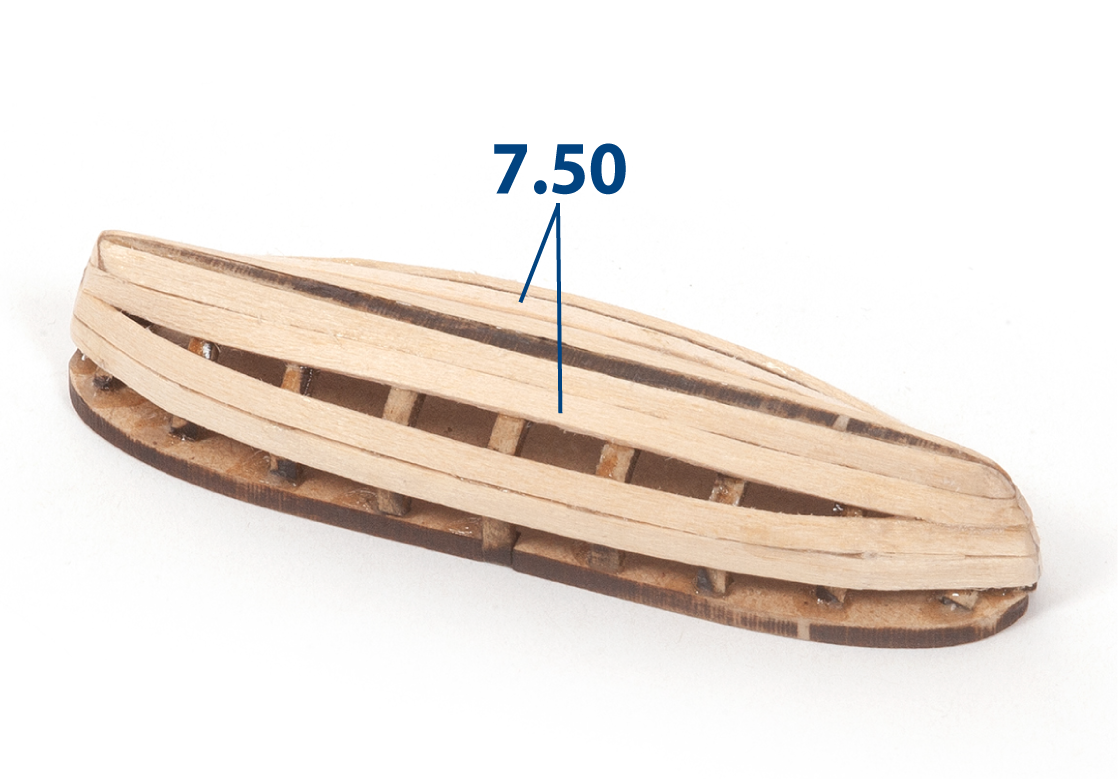
Step 7
Continue planking the boats up to the point shown in the image.
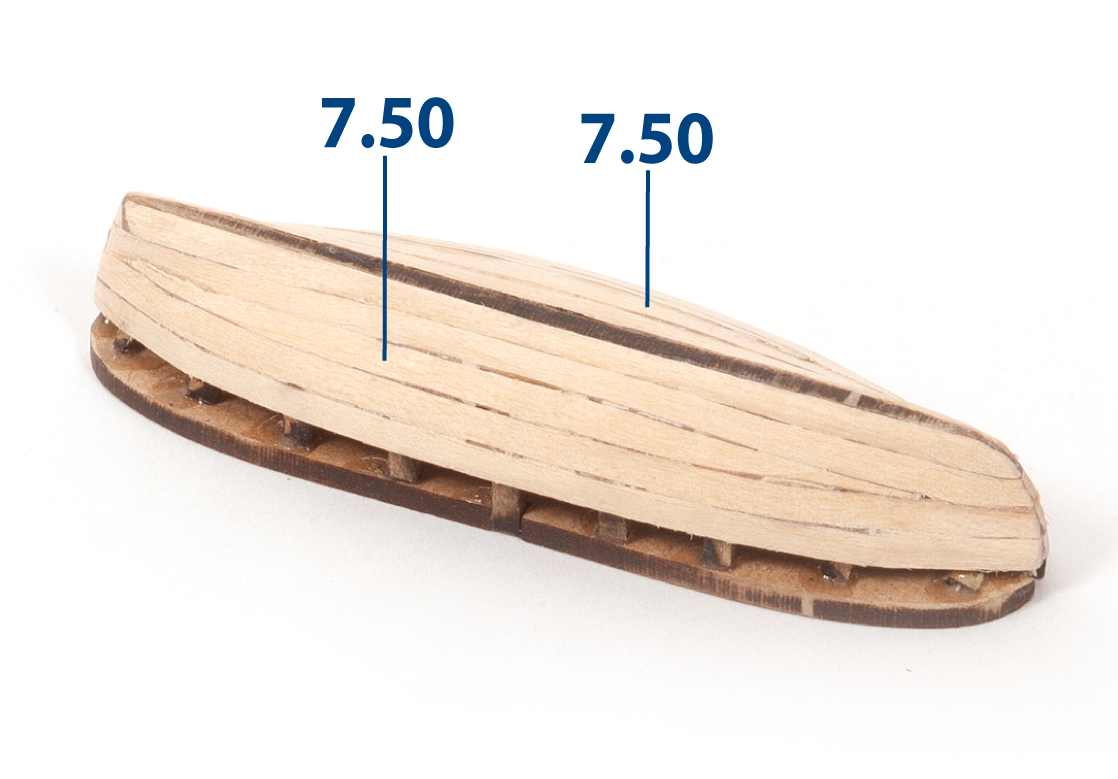
Step 8
The image shows the four boats with the planking in place.
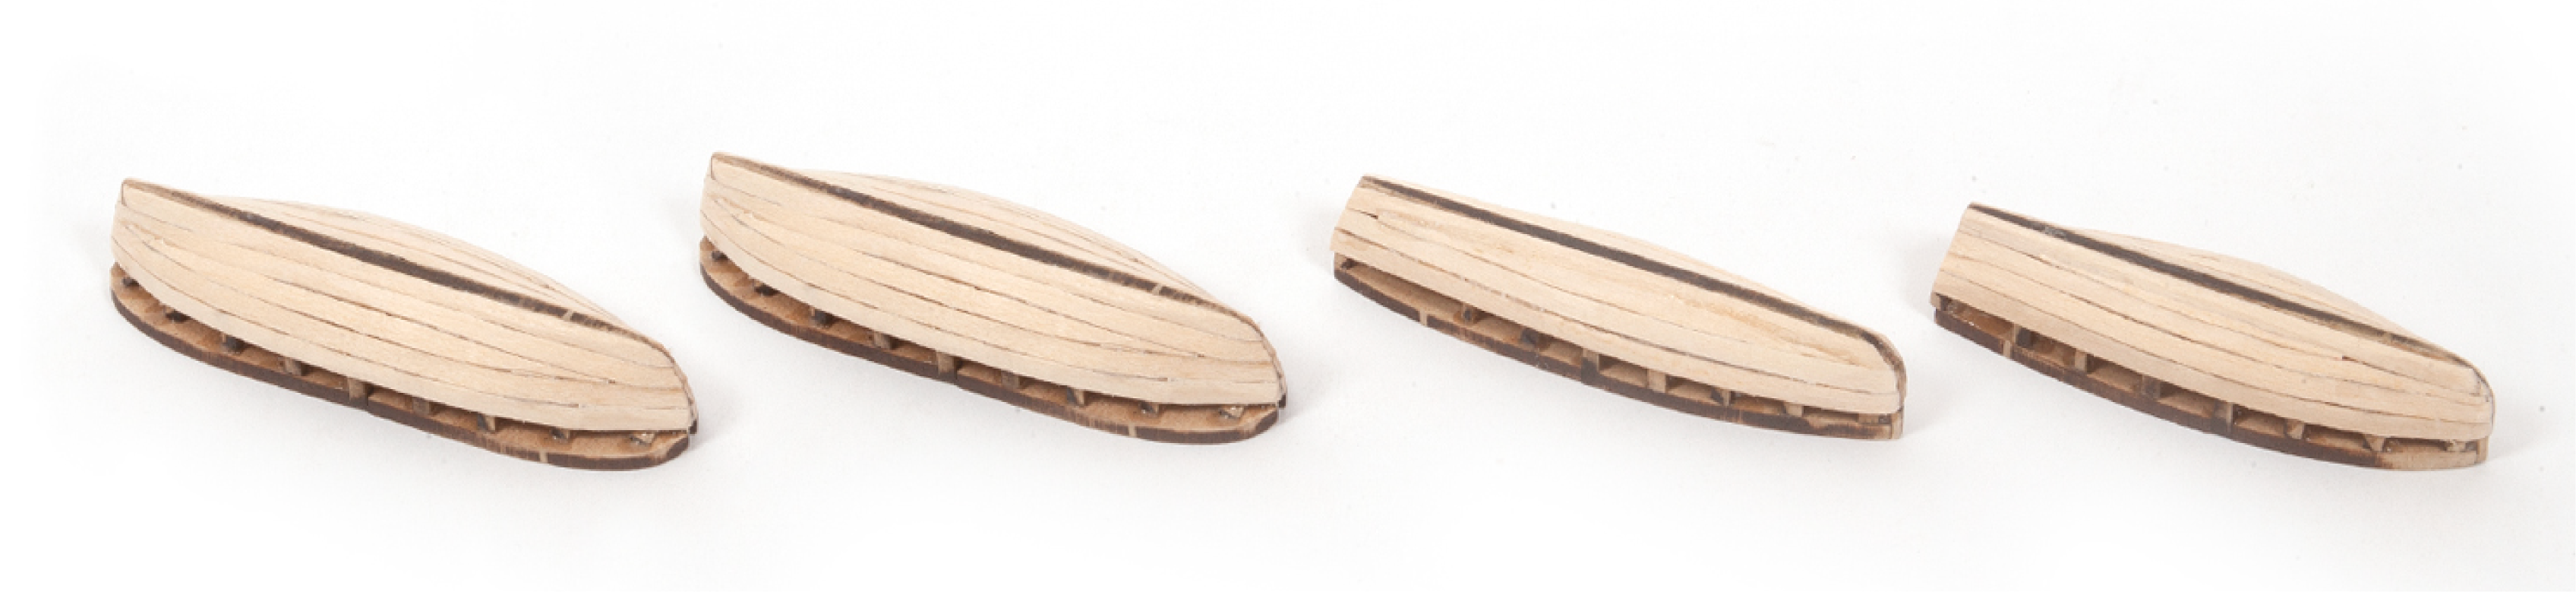
Step 9
Cut the frames along the notches to separate them from their temporary supports.
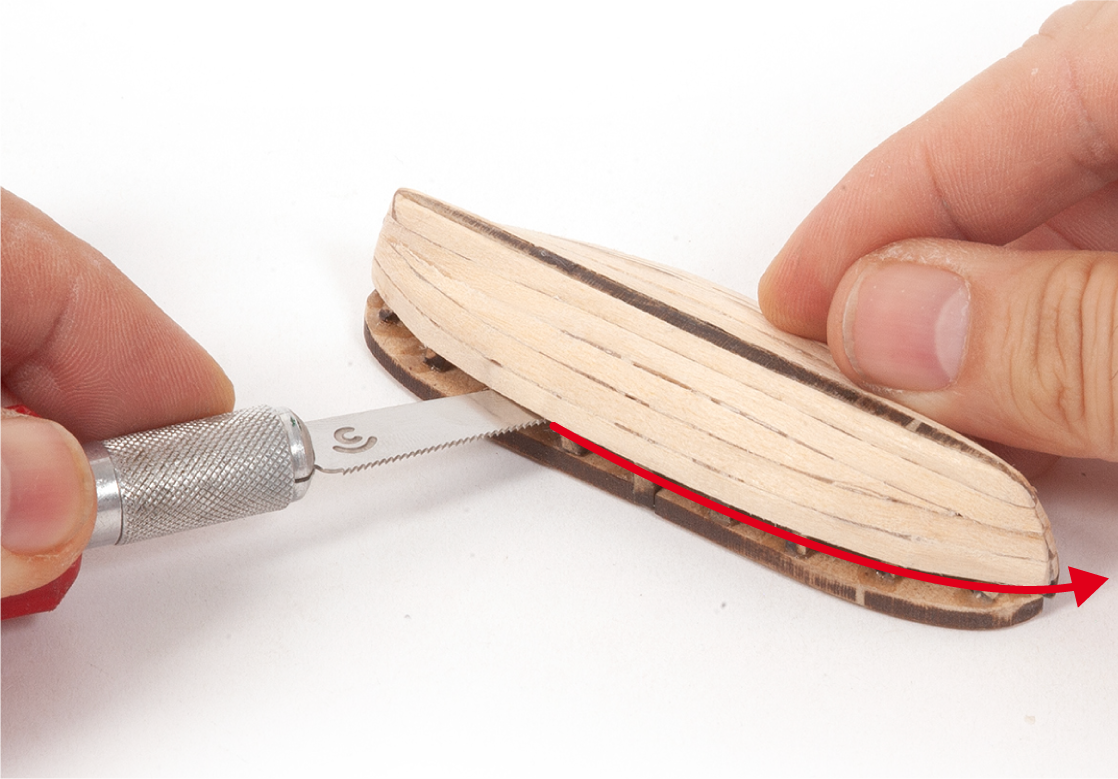
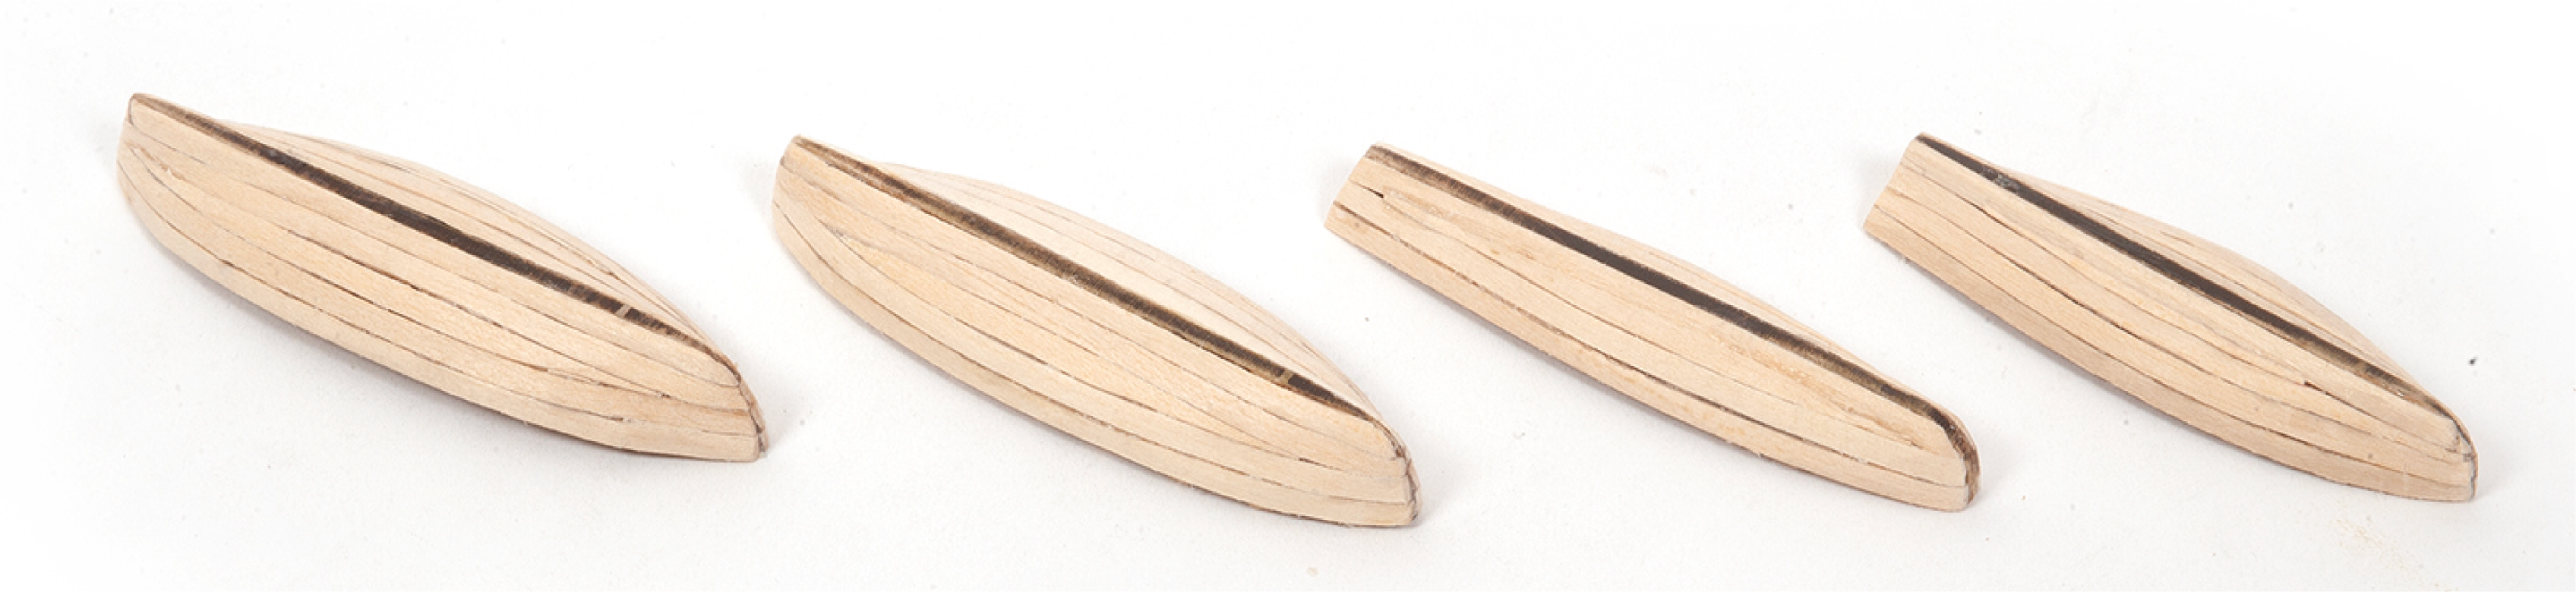
Step 10
The image shows the four boats with their support removed.
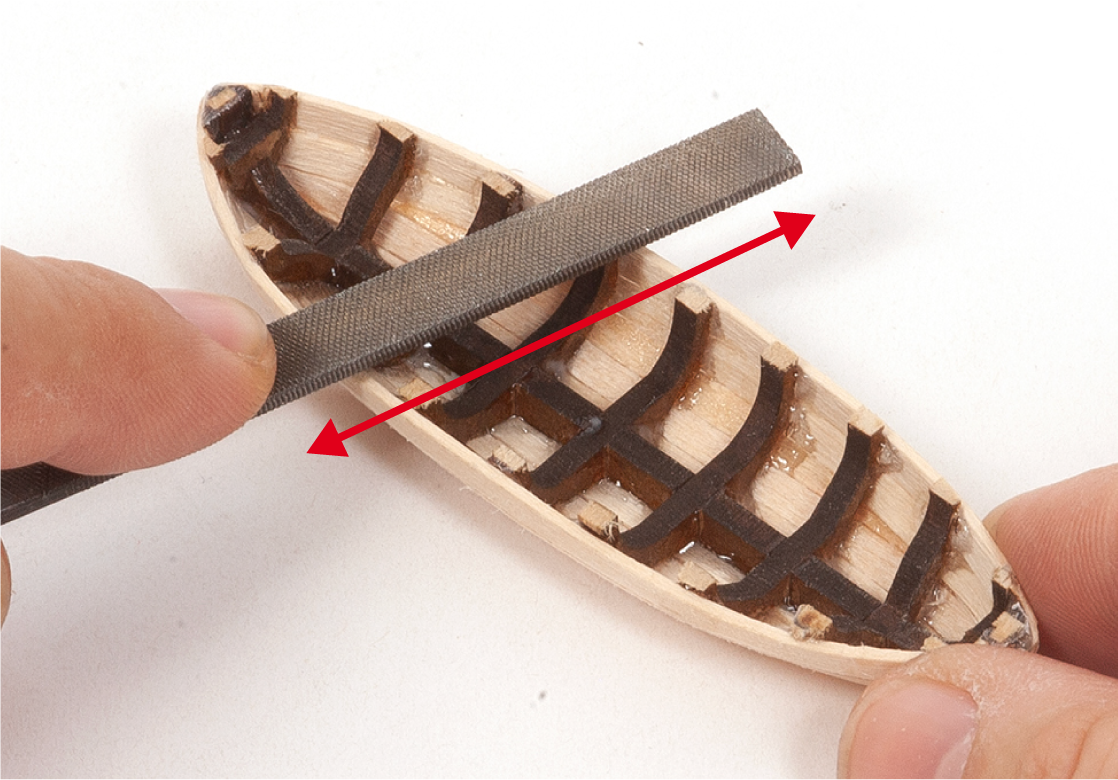
Step 11
File or sand the boats on both sides to make the planking even.
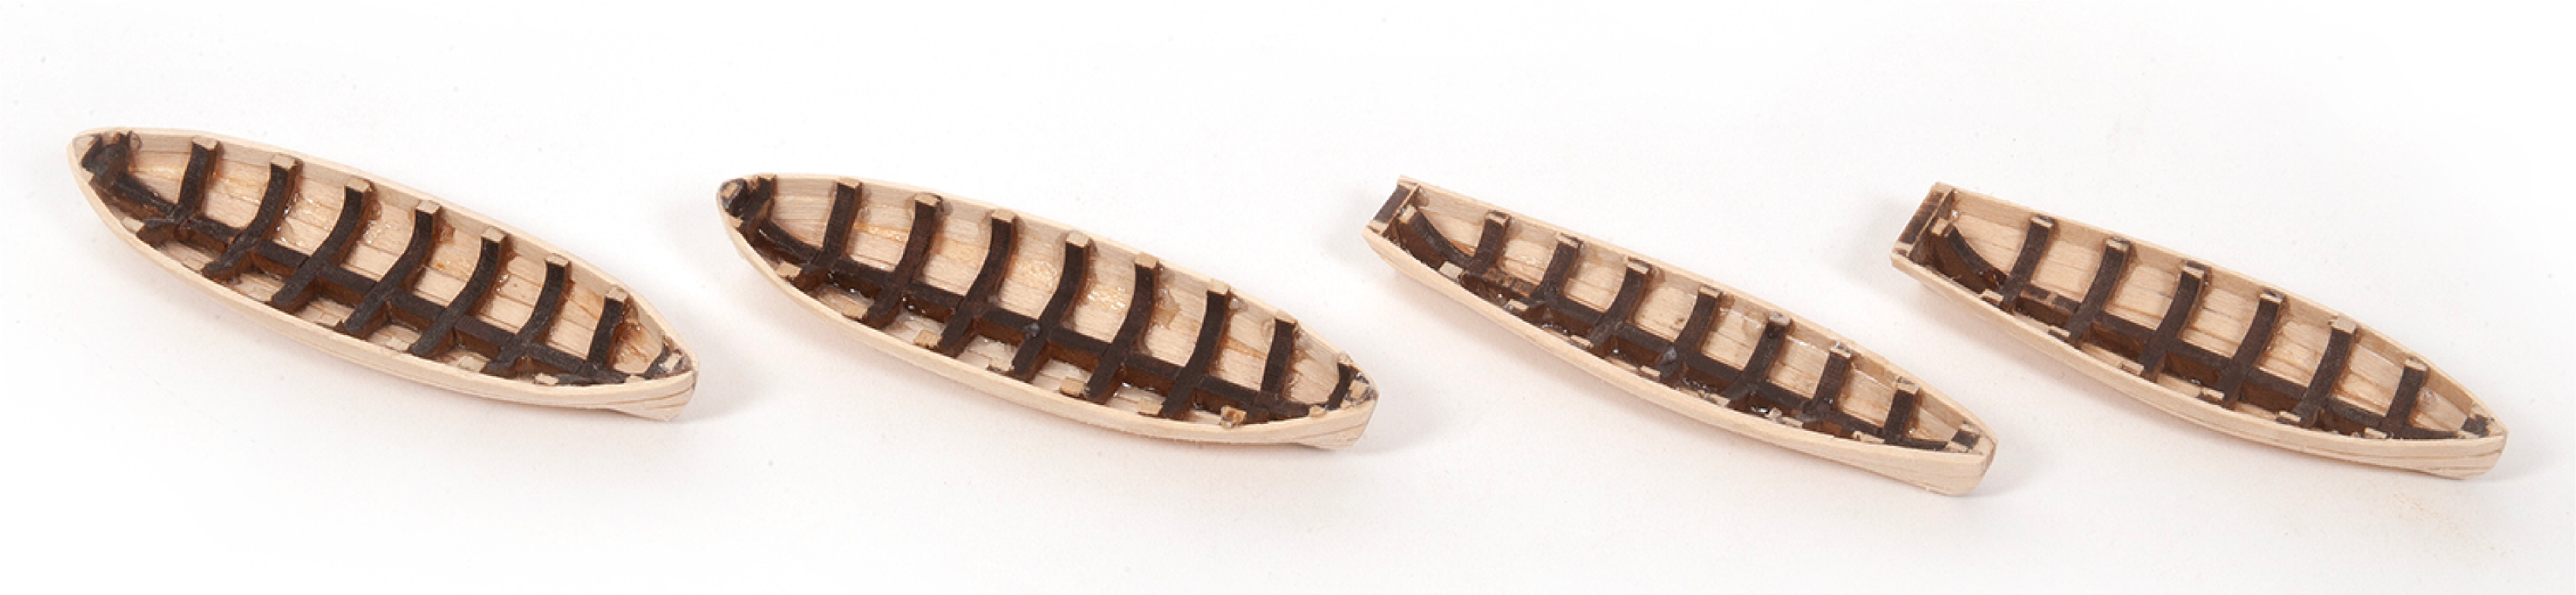
Step 12
This image shows all four boats with the planking finished.
Step 1
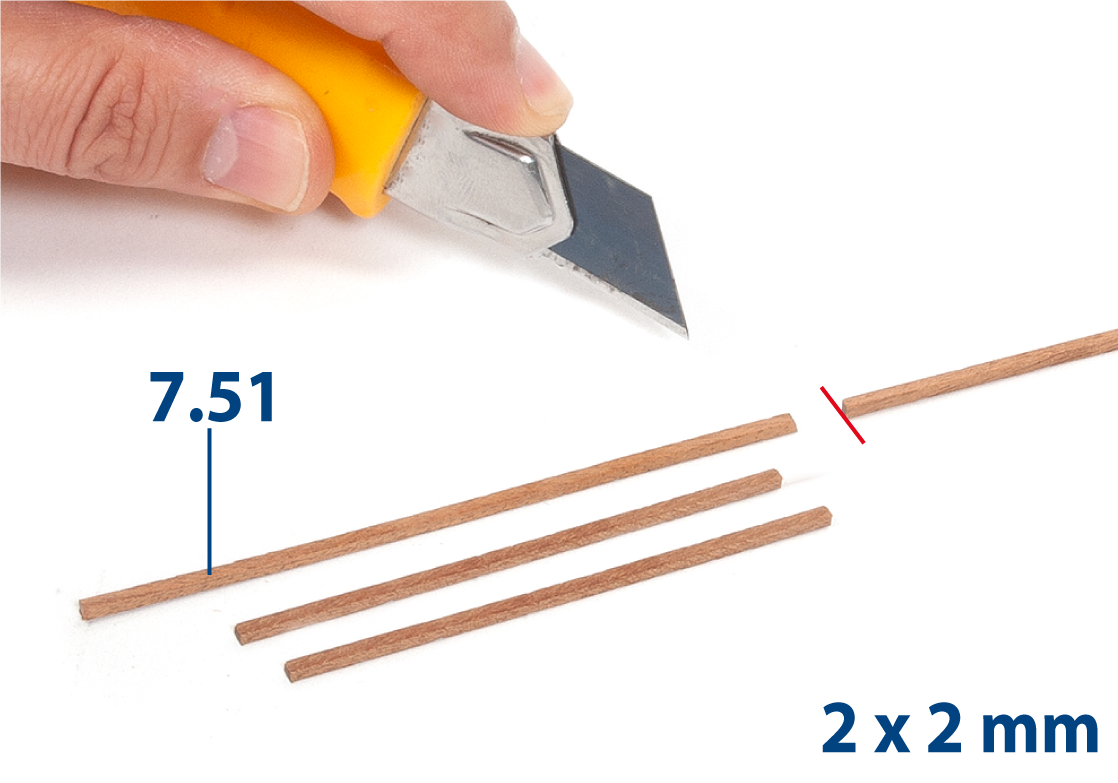
Cut parts 7.51 to size (2 x 2 mm mahogany).
Step 2
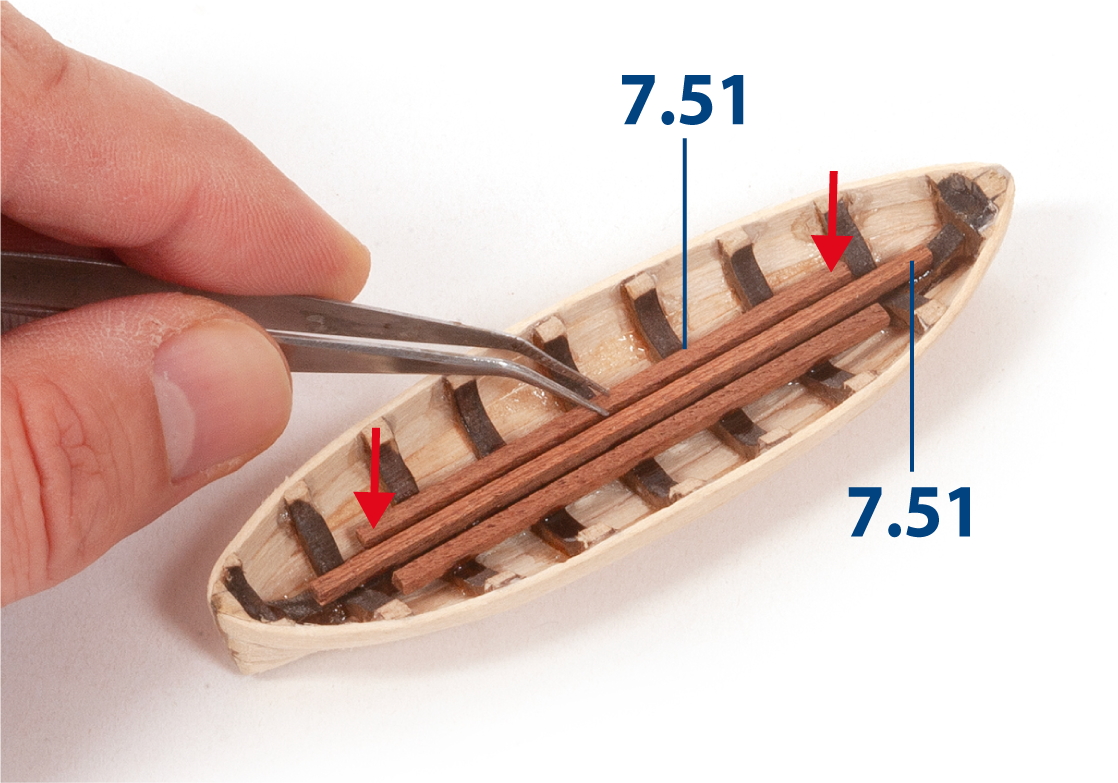
Glue parts 7.51 to the bottom of the large boat.
Step 3
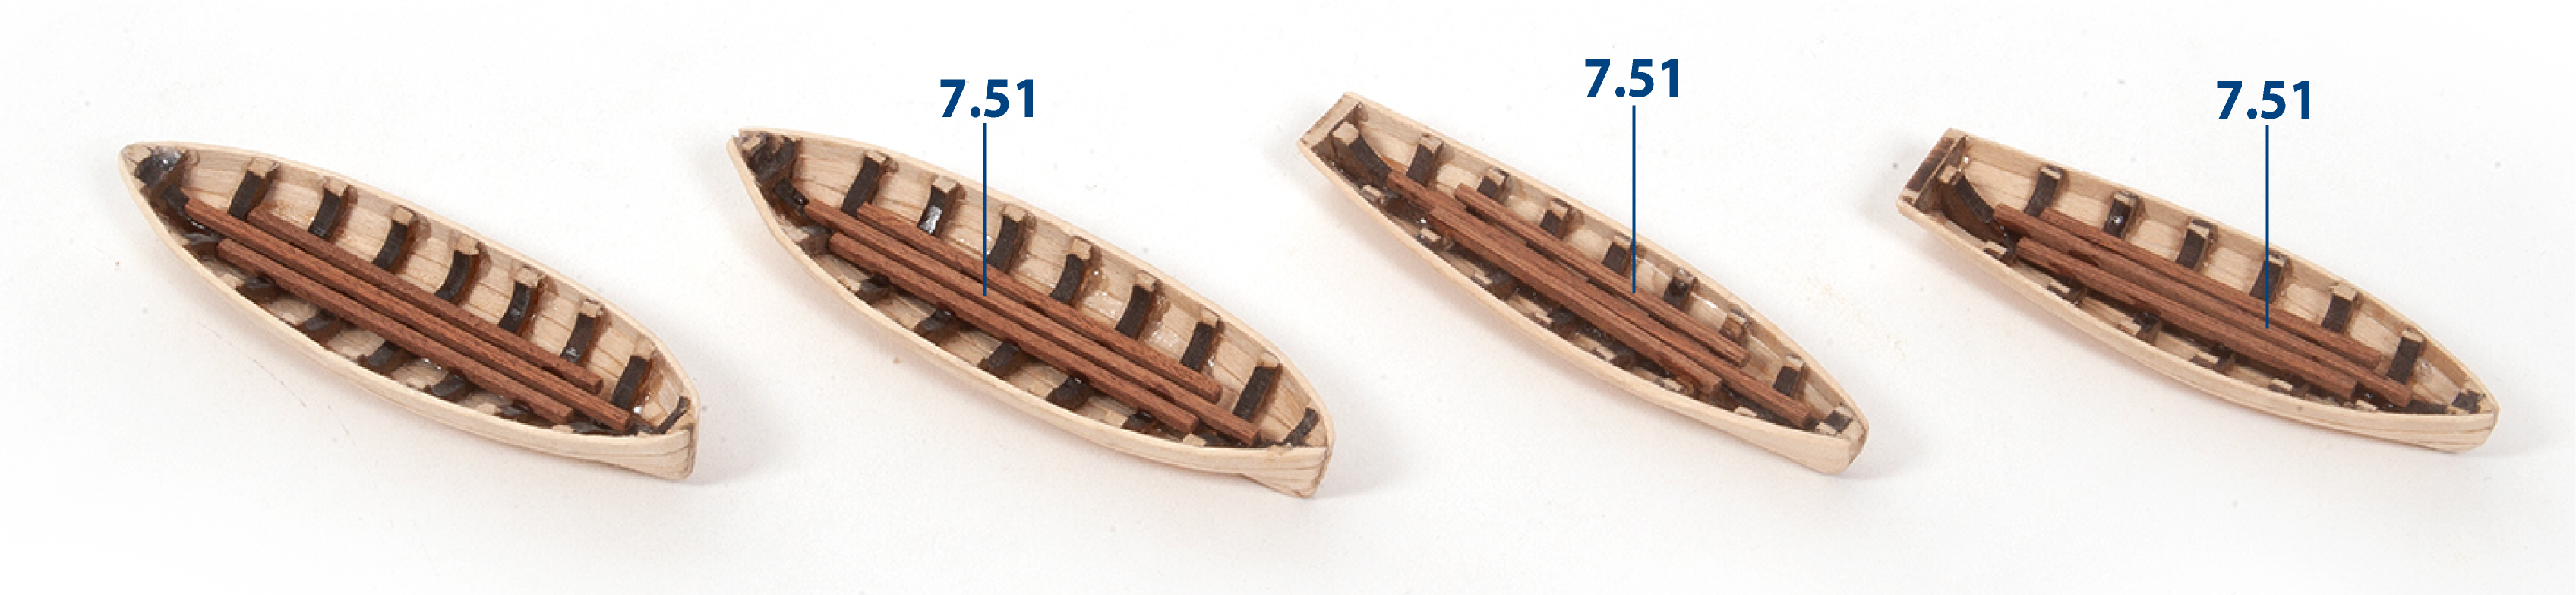
Repeat the process to trim and glue parts 7.51 to the other boats.
Step 4
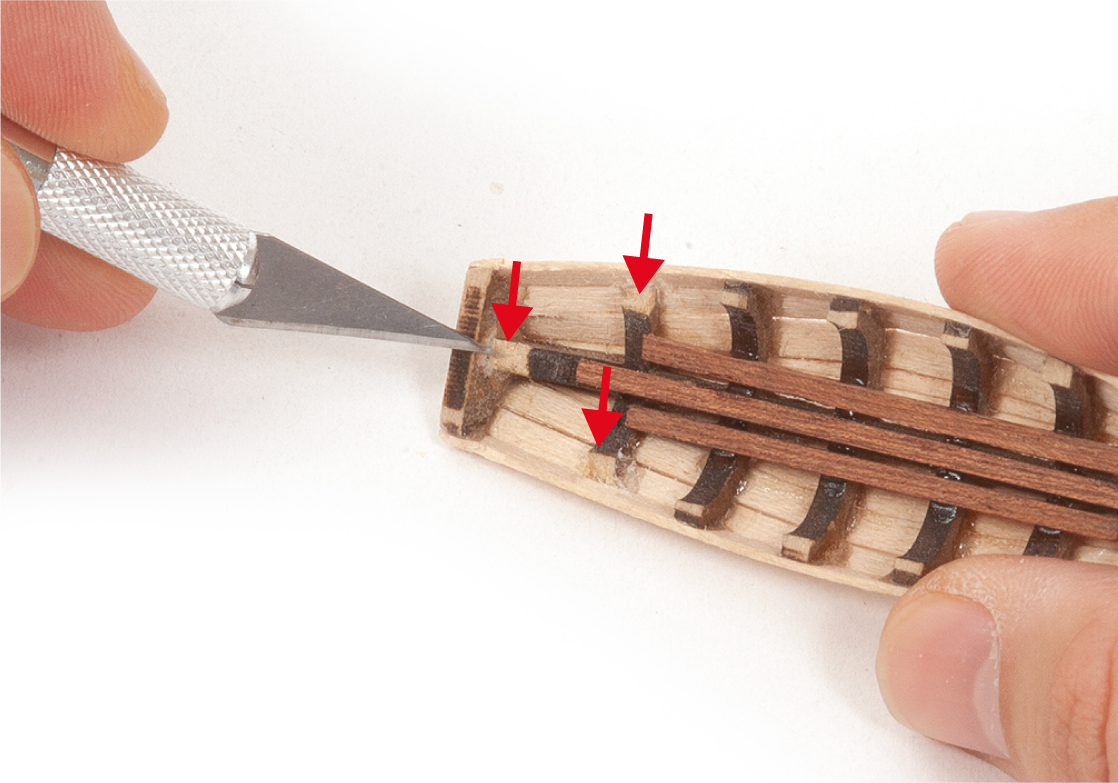
Use a craft knife to reduce the height of the protruding ends of the frames on the two small boats. Refer to the following images before proceeding.
Step 5
Bevel parts 7.52 and 7.53.
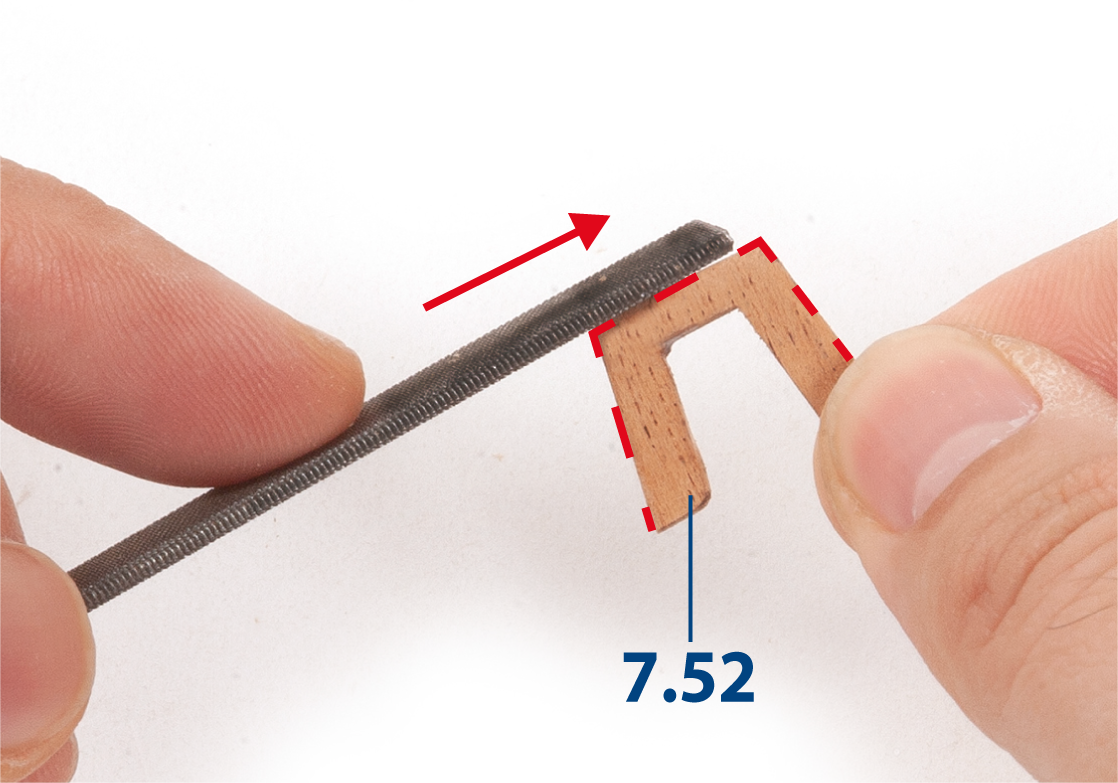
Step 6
This image shows the two bevelled parts.
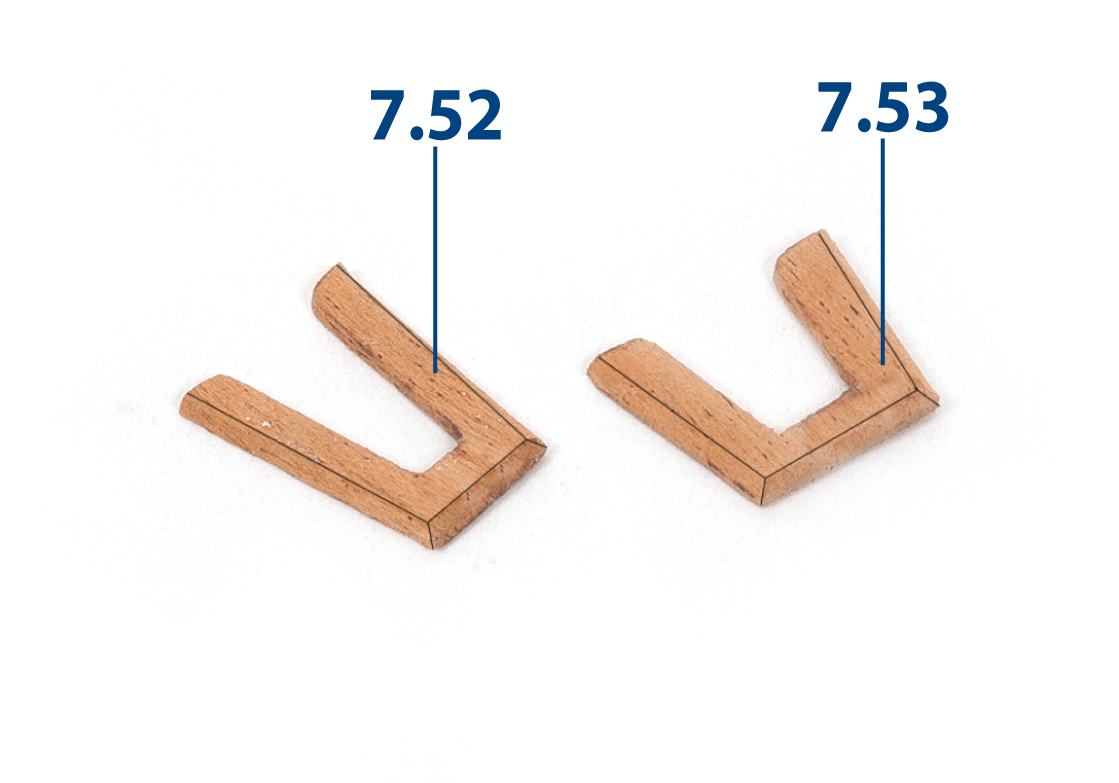
Step 7
Glue parts 7.52 and 7.53 to the corresponding boats.
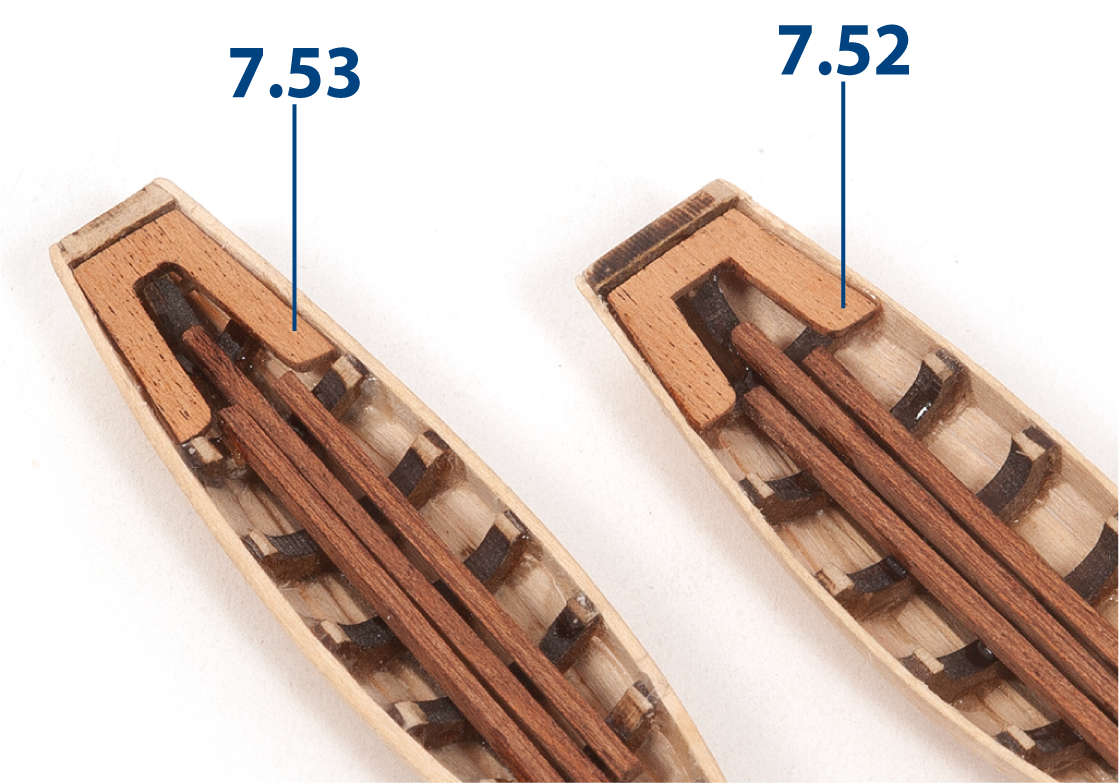
Step 8
Cut parts 7.54 (1 x 3 mm lime wood) to size and glue them in place.
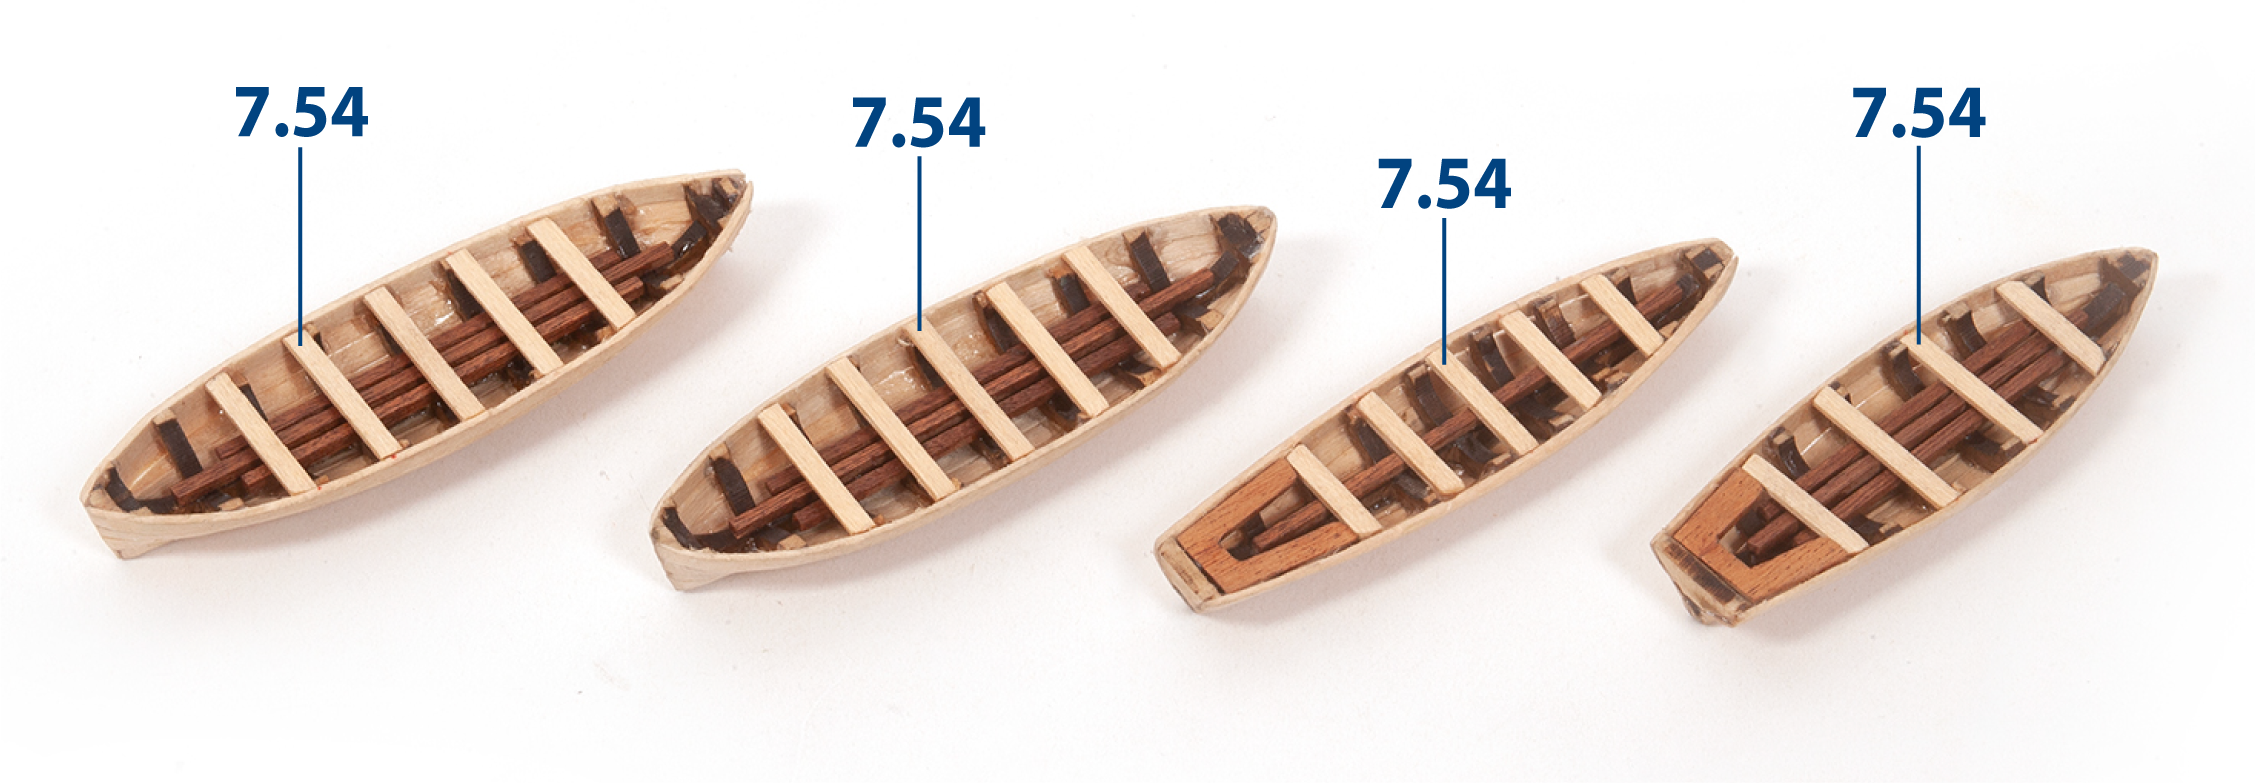
Step 9
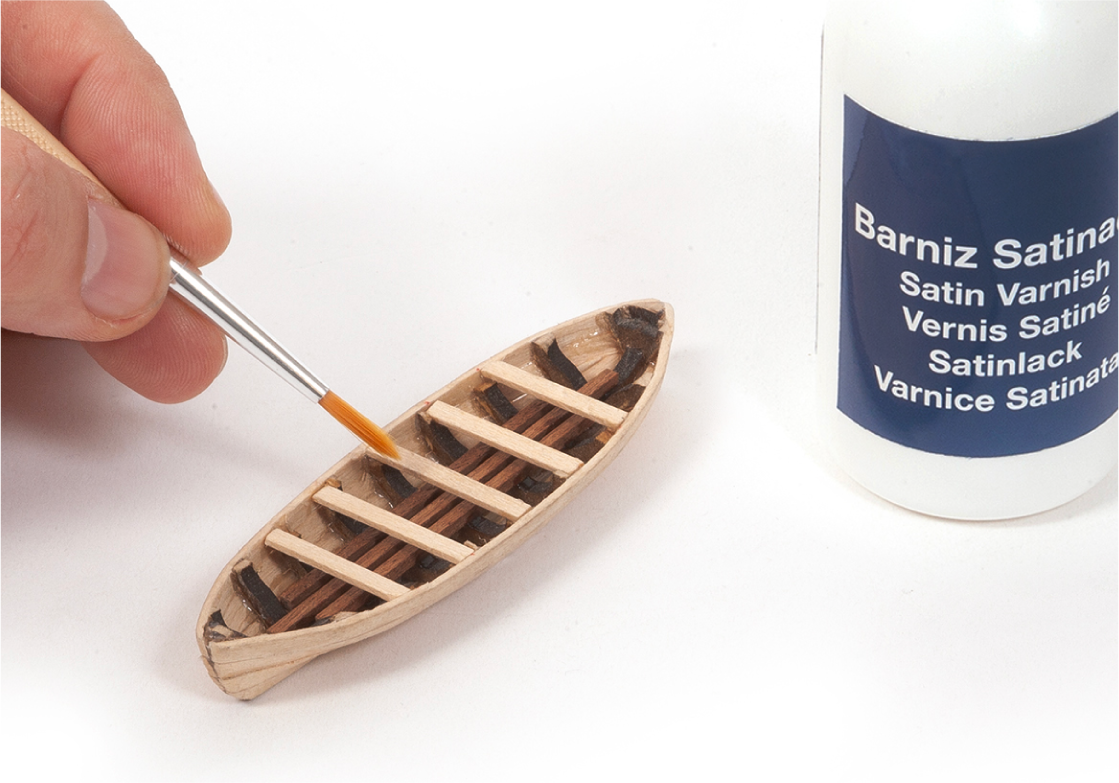
Apply varnish to the added parts inside the boats.
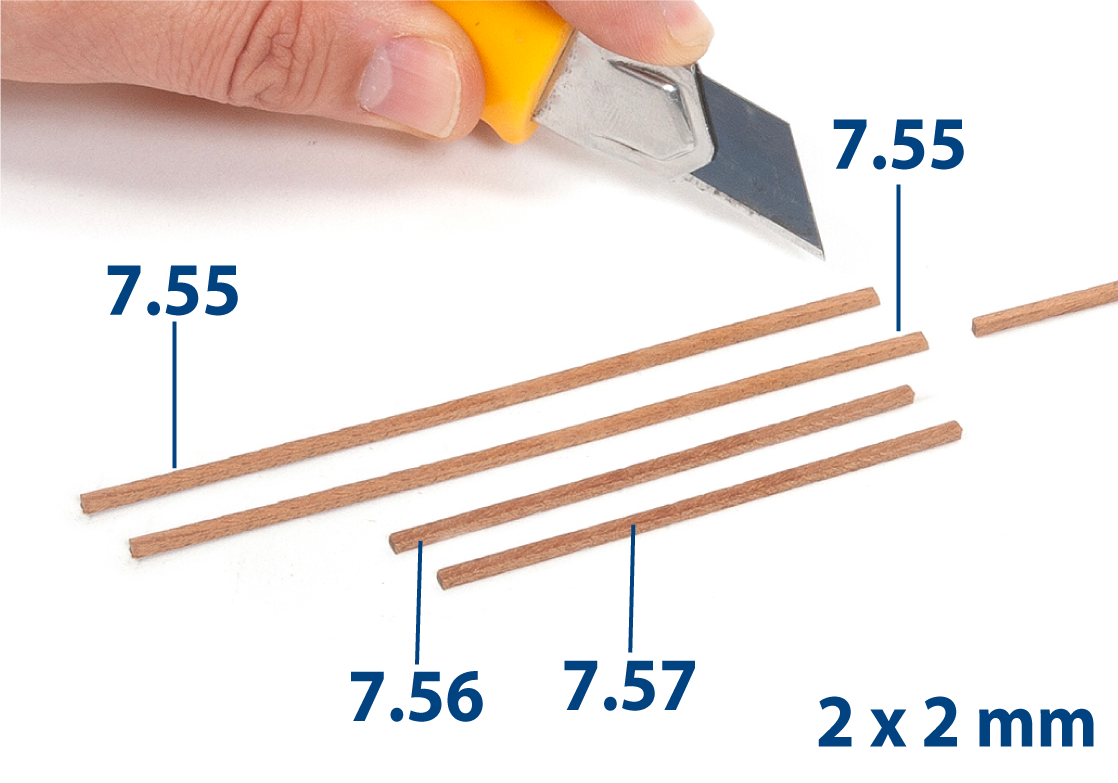
Step 1
Cut parts 7.55 to 7.57 to size.
| 7.55 | 2 x 2 x 82 mm, mahogany |
| 7.56 | 2 x 2 x 77 mm, mahogany |
| 7.57 | 2 x 2 x 72 mm, mahogany |
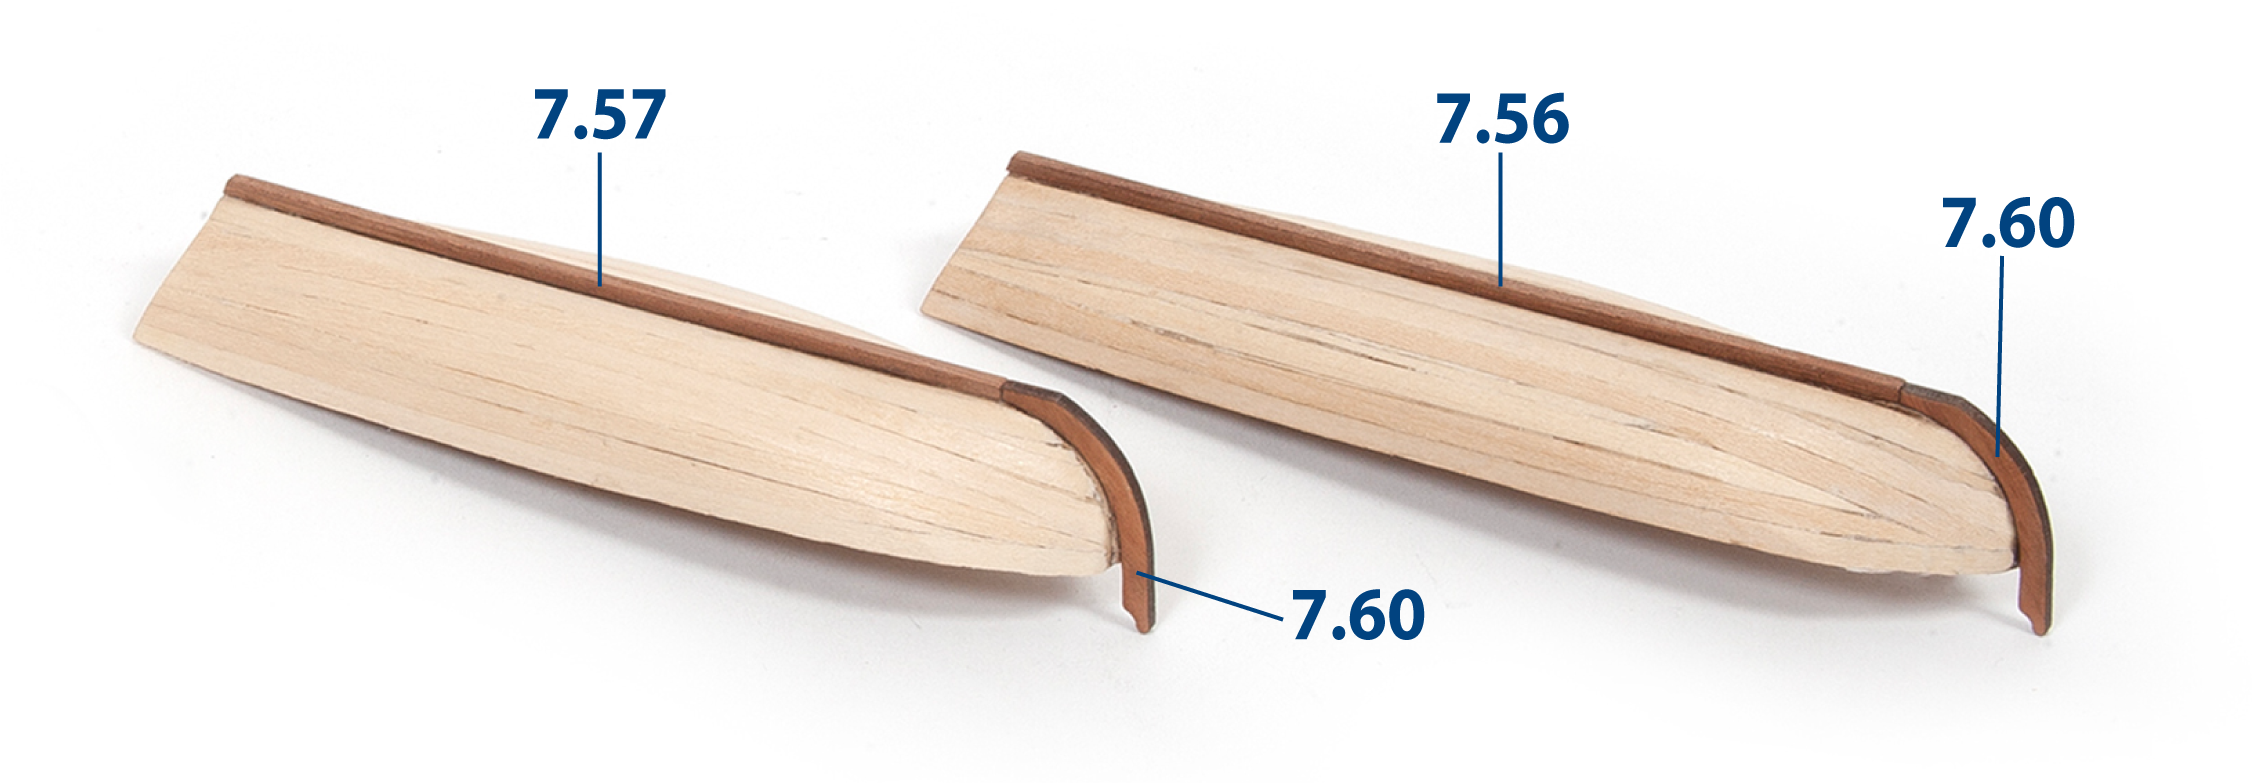
Step 2
Glue parts 7.56, 7.57 and 7.60 to the small and medium boats, as shown.
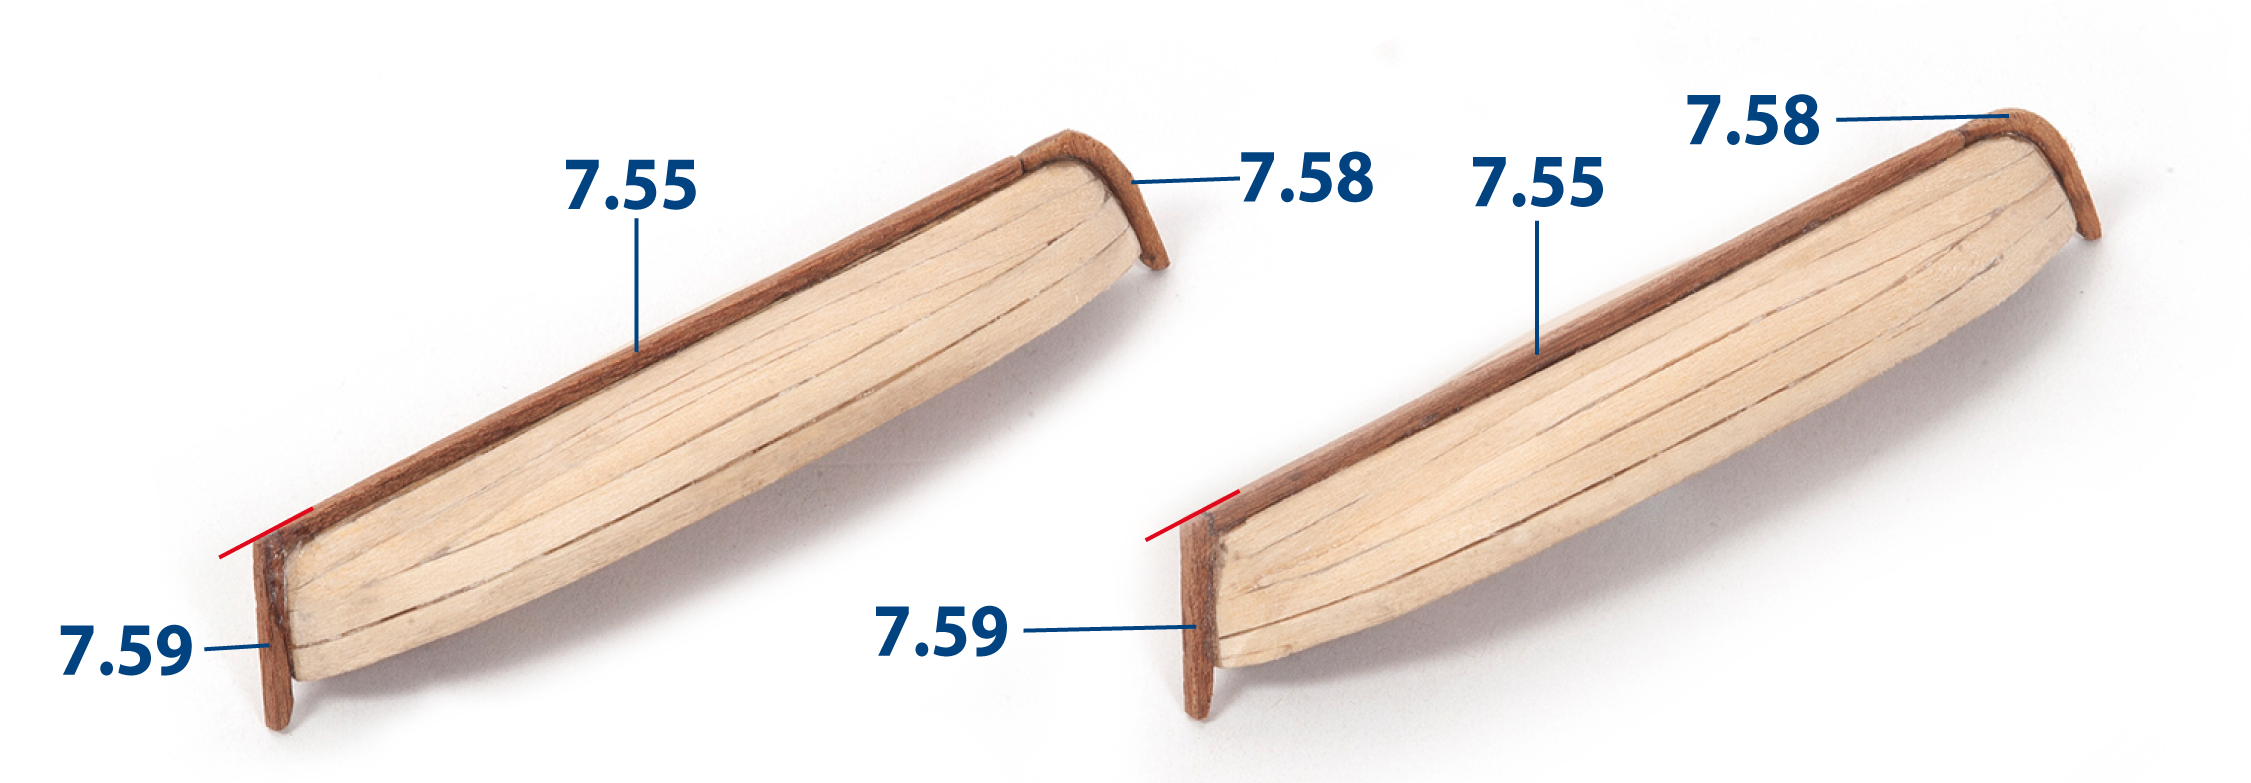
Step 3
Glue parts 7.55, 7.58 and 7.59 (2 x 2 x 19 mm, mahogany) to the large boats, as shown.
Step 4
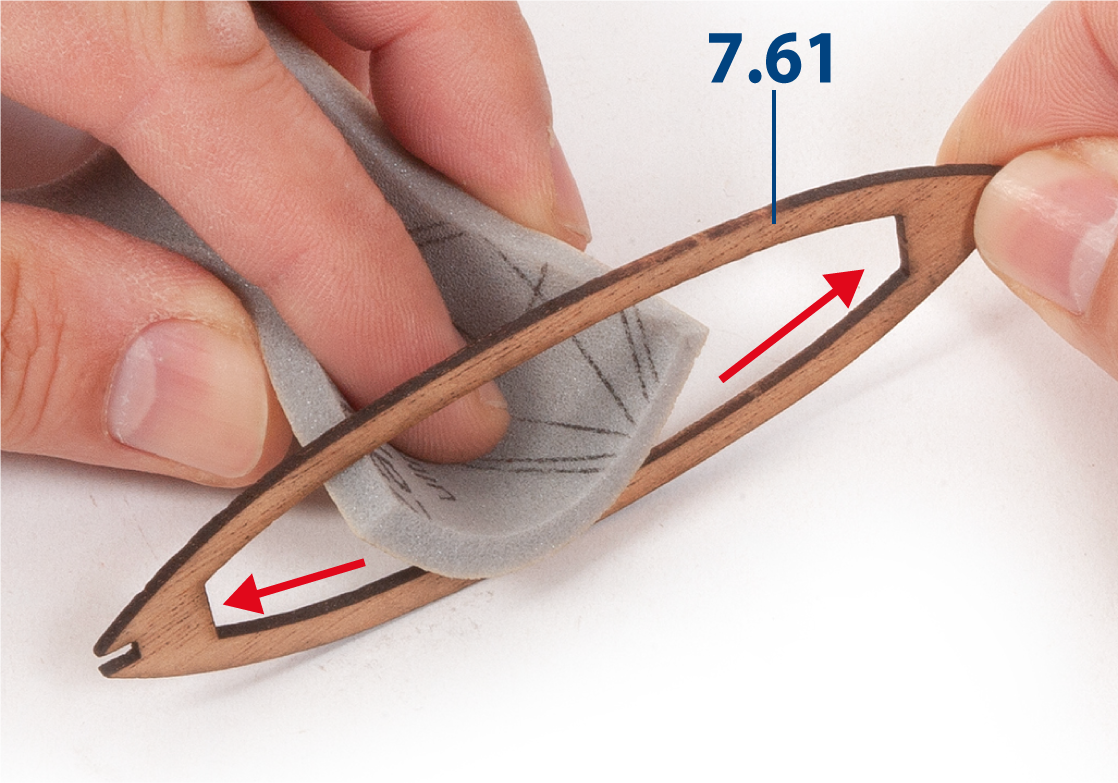
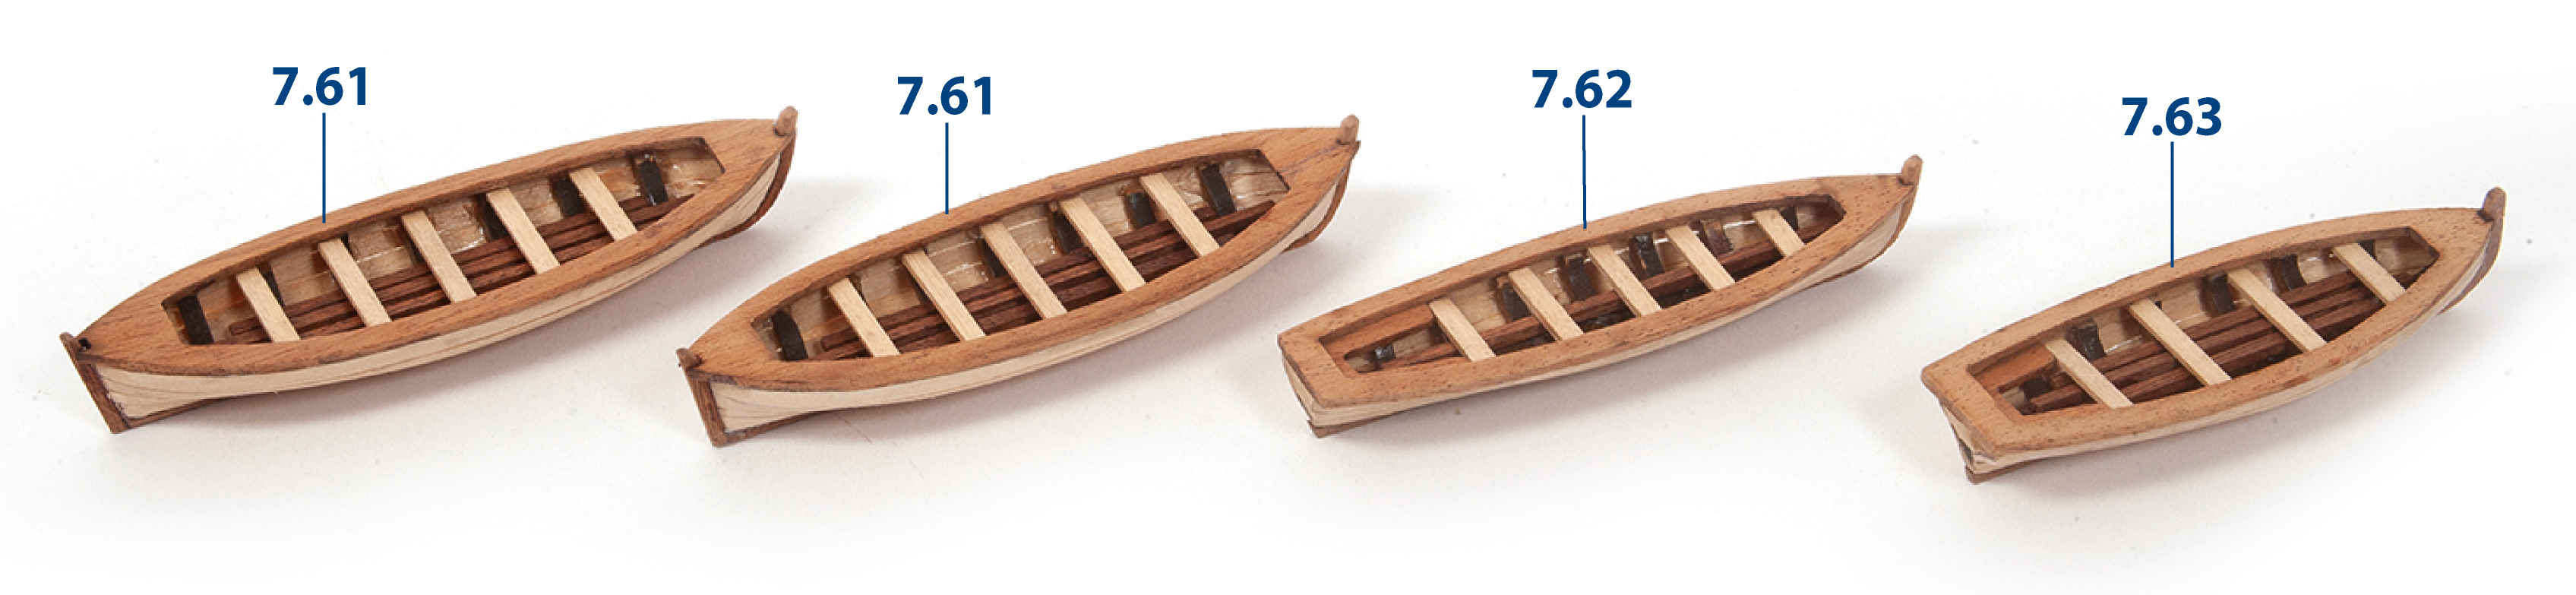
Sand parts 7.61 with a fine-grit sanding sponge.
Step 5
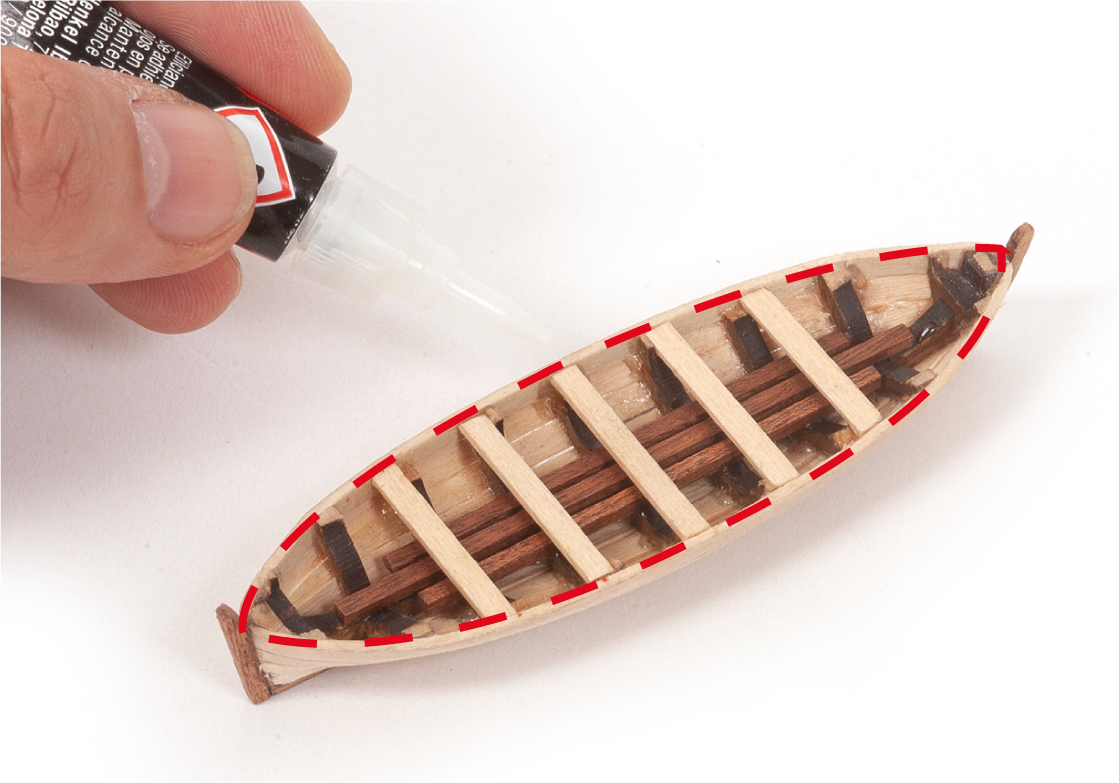
Check the fit of parts 7.61 on the large boats, then apply glue to the contact areas, as shown.
Step 6
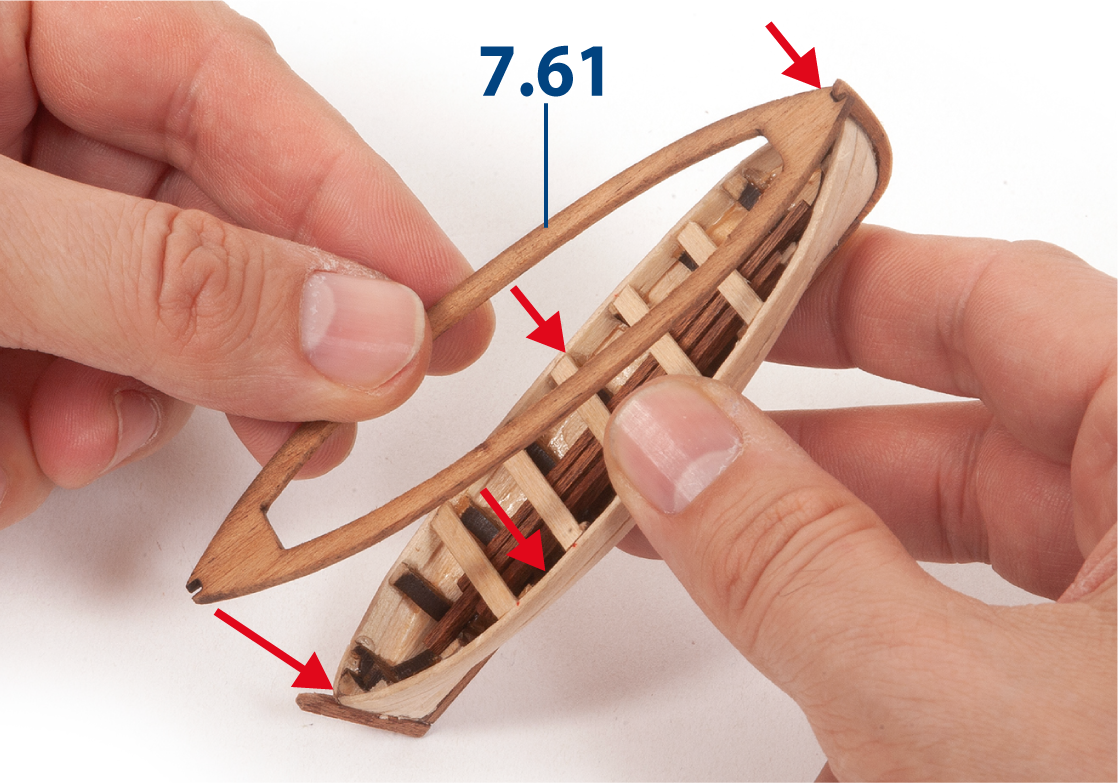
Glue parts 7.61 on the large boats.
Step 7
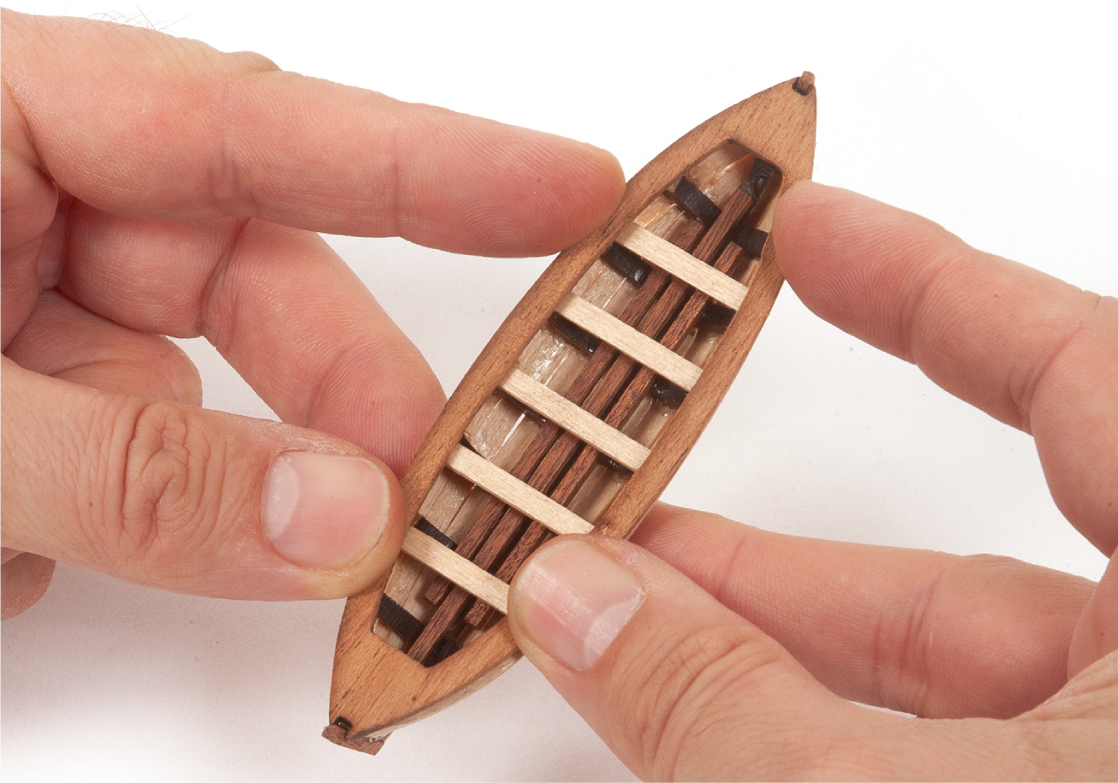
Hold part 7.61 in place until the glue dries.
Step 8
Repeat the same process to glue parts 7.62 and 7.63 to the other boats.
Step 9
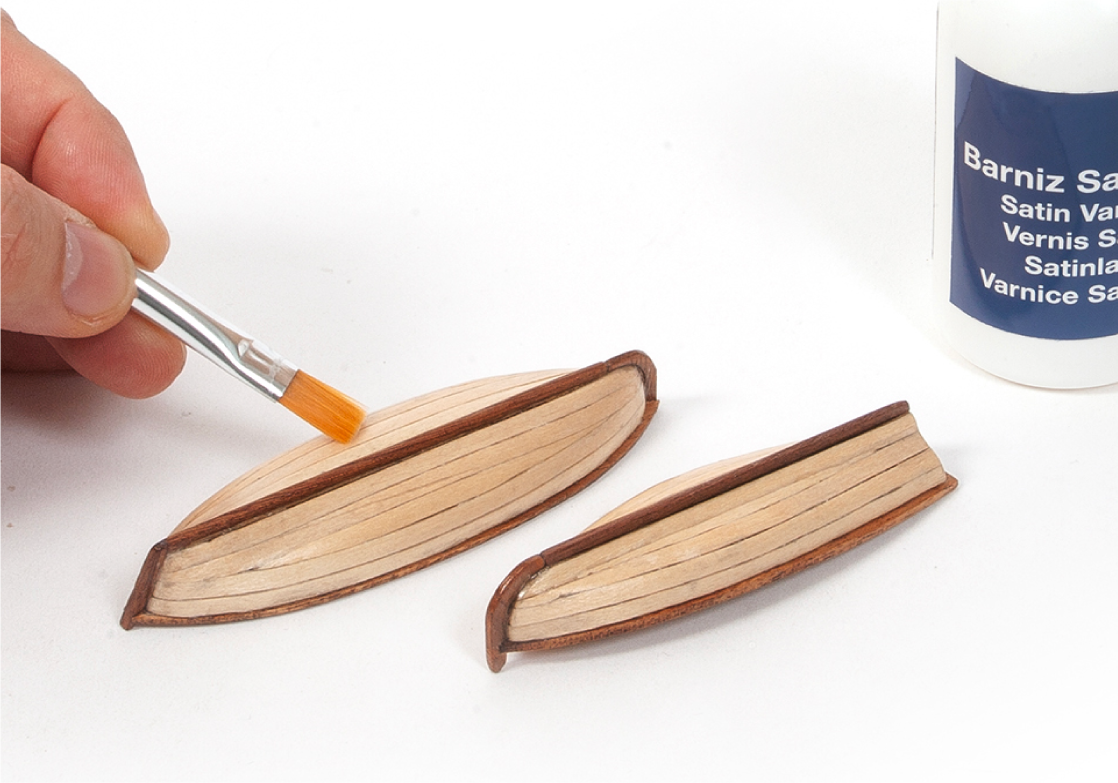
If you wish to leave the boats in their natural wood colour, apply varnish to all the added parts.
Step 10
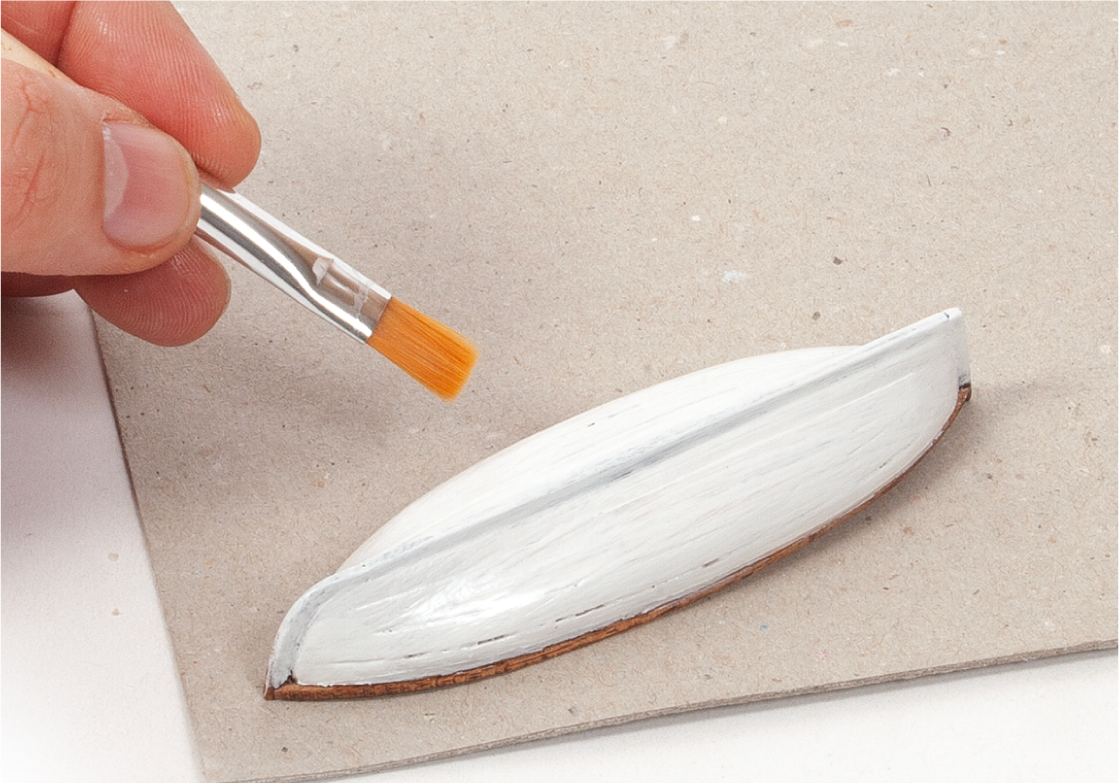
Alternatively, you can paint the outside of the hulls white.
Step 11
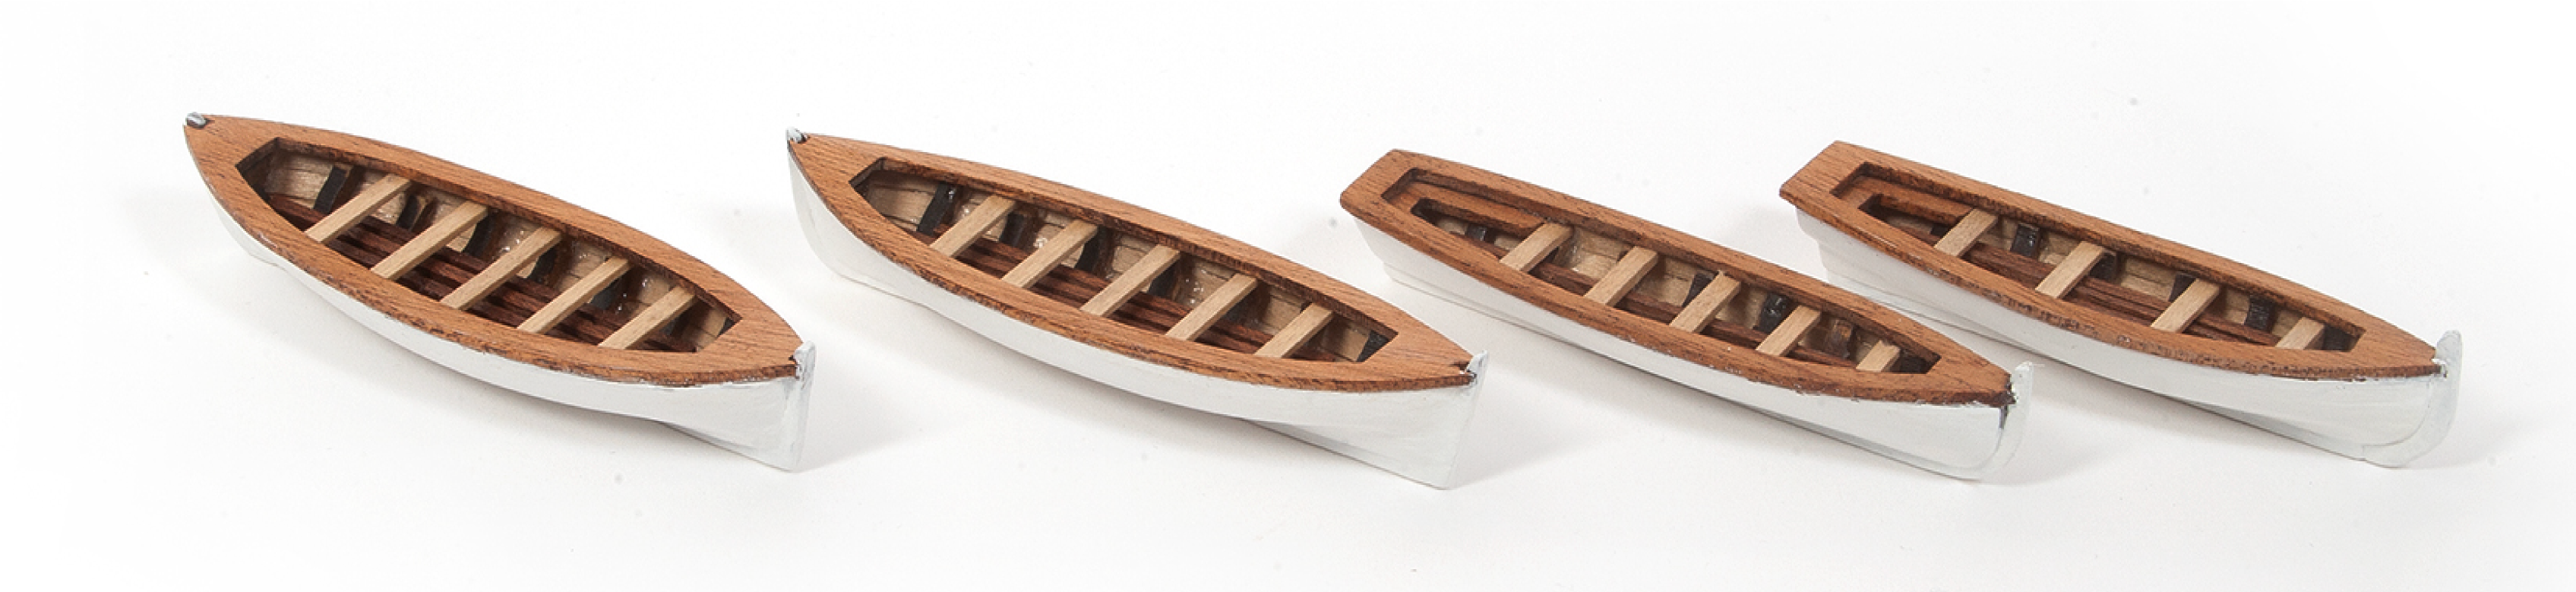
This image shows the boats once painted.
Step 1
If you wish to plank the lower part of the hull, follow the instructions below.
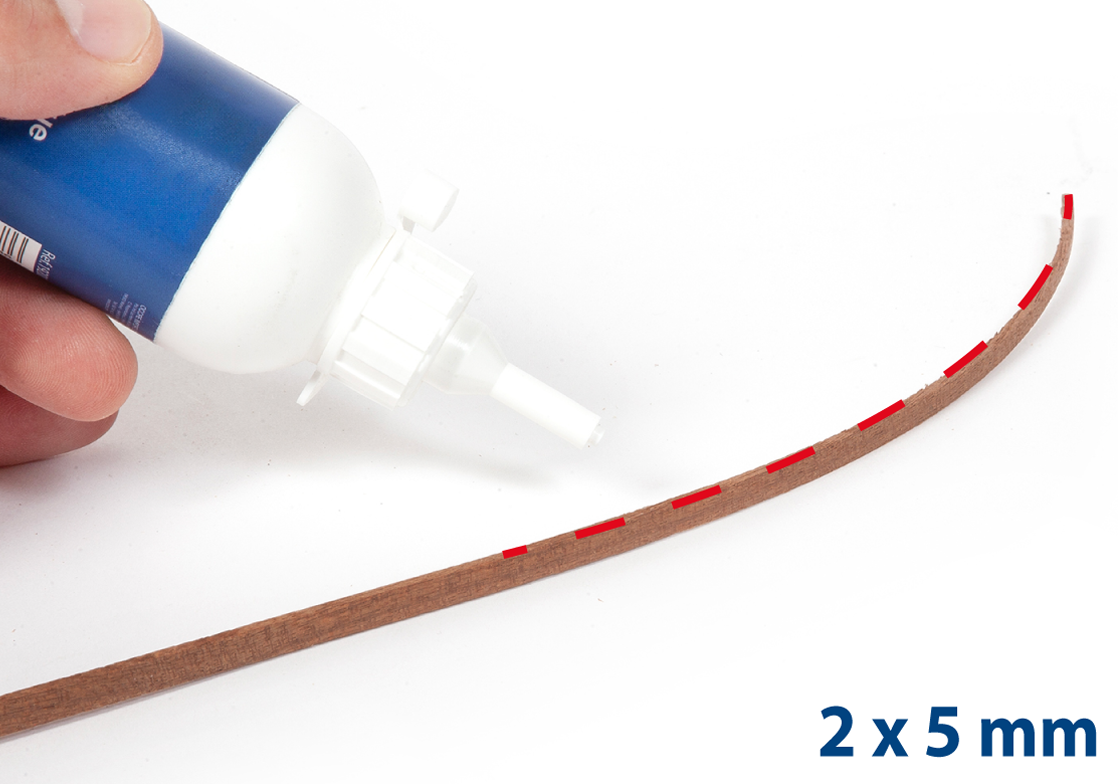
Dampen and bend the mahogany strips (2 x 5 mm, supplied in pack 06) to match the curve of the hull.
Step 2
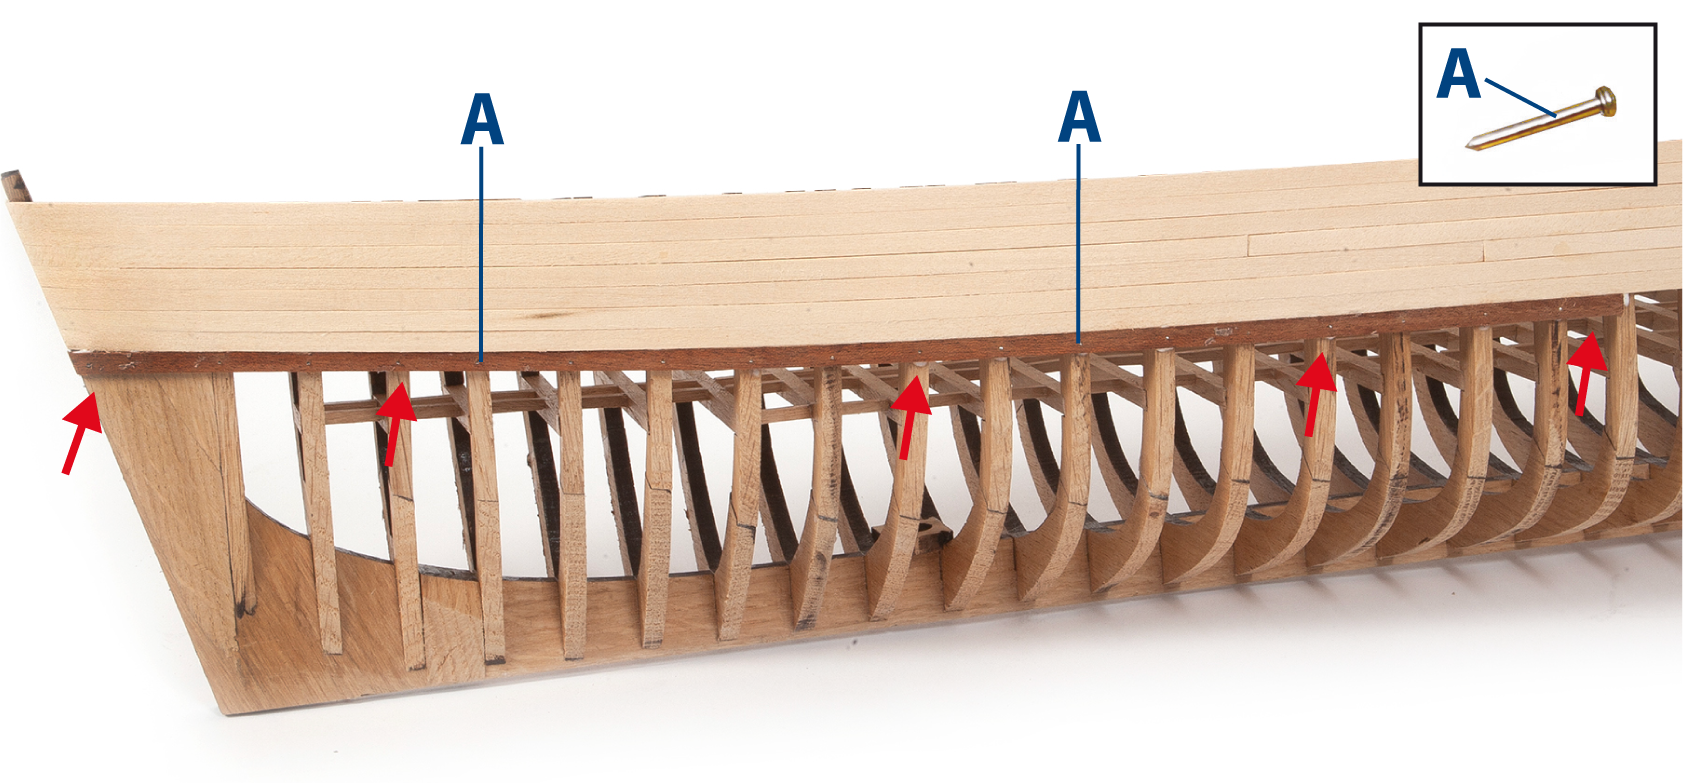
Glue one mahogany strip onto the hull. At each point where the mahogany strip crosses a frame, drill a ø0.8 mm hole through the mahogany strip and into the frame. Insert the nail A halfway to hold the mahogany strip in place while the glue dries. Once the glue has dried, cut off the excess nail flush with the mahogany strip.
The nails are optional; if you prefer not to use them, simply glue the strips to each other and to the frames.
Step 3
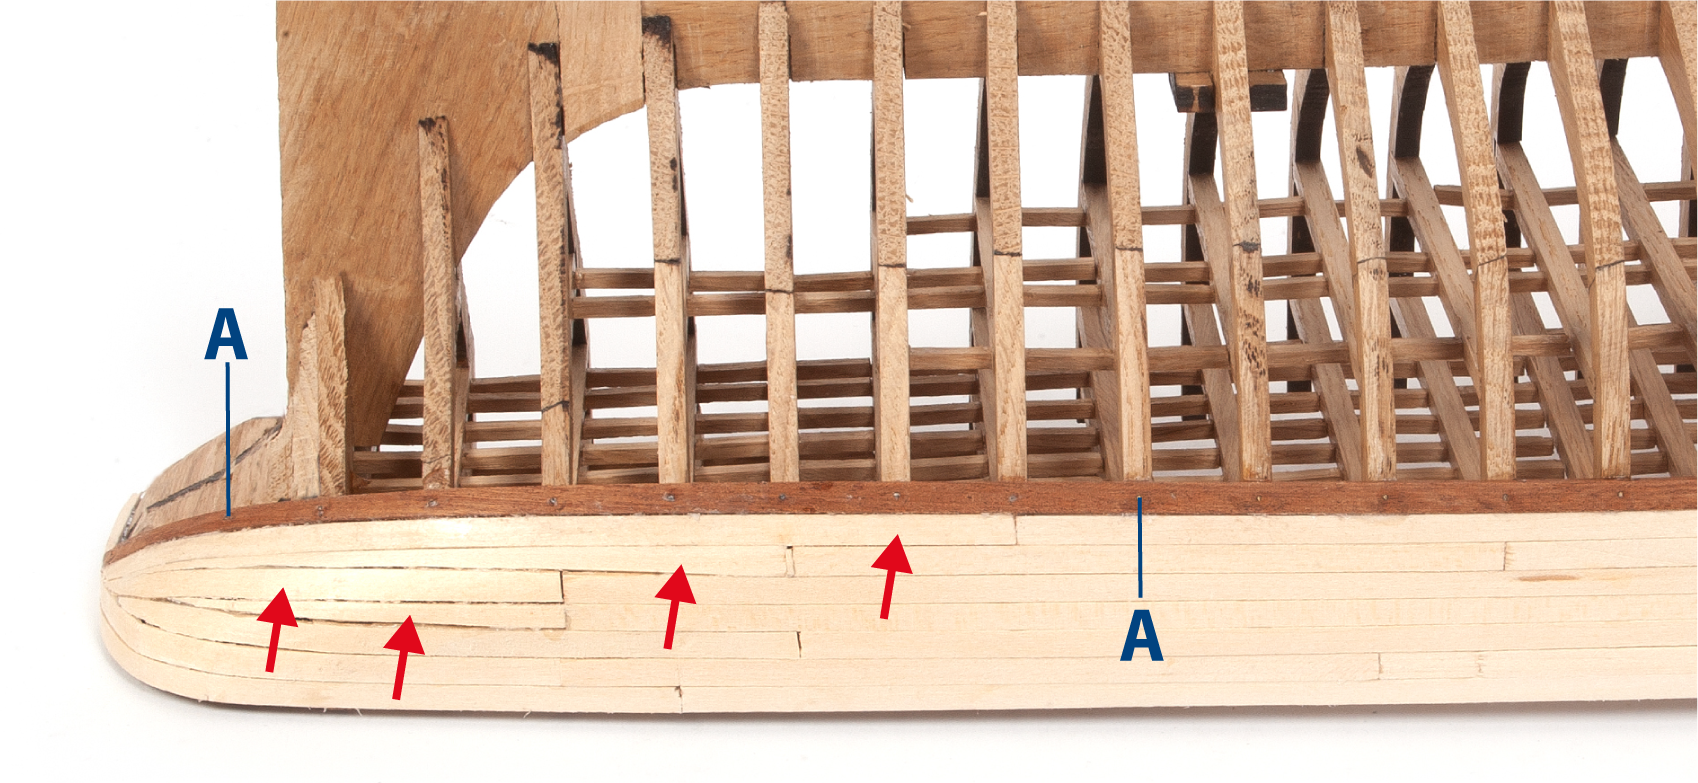
Place the mahogany strips end to end along the entire length of the hull.
Step 4
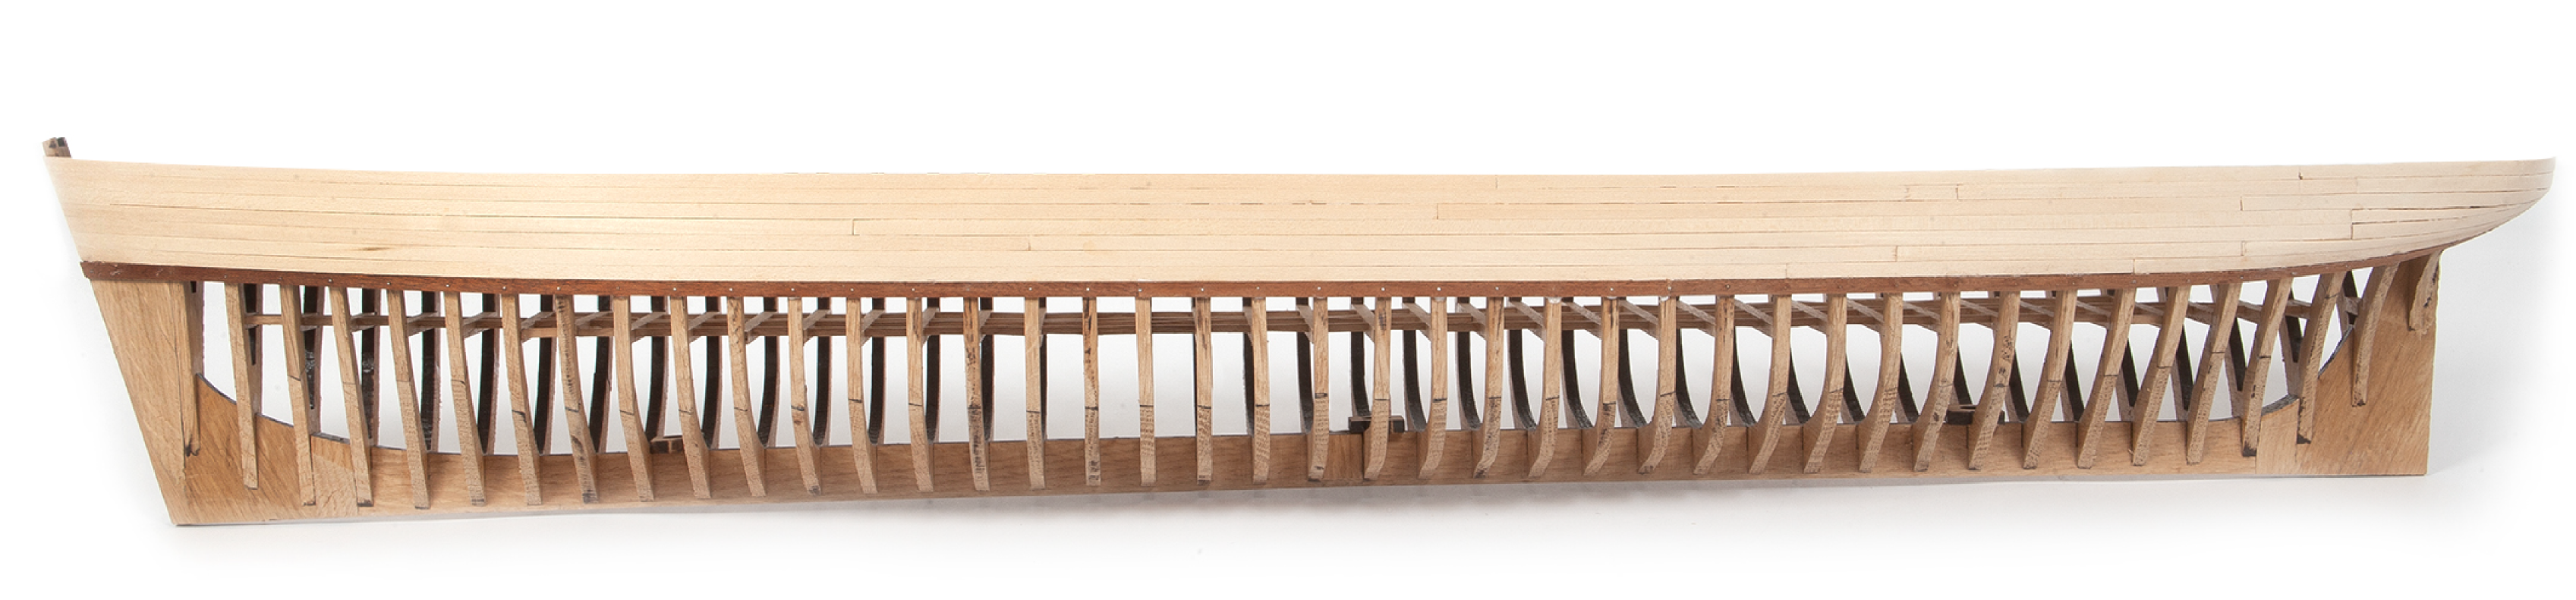
This image shows the first row of mahogany strips in place. Cut off the nail heads once the mahogany strips are firmly secured.
Step 5
As you add the mahogany strips, trim their ends to match the angle of the bow, as shown in the image.
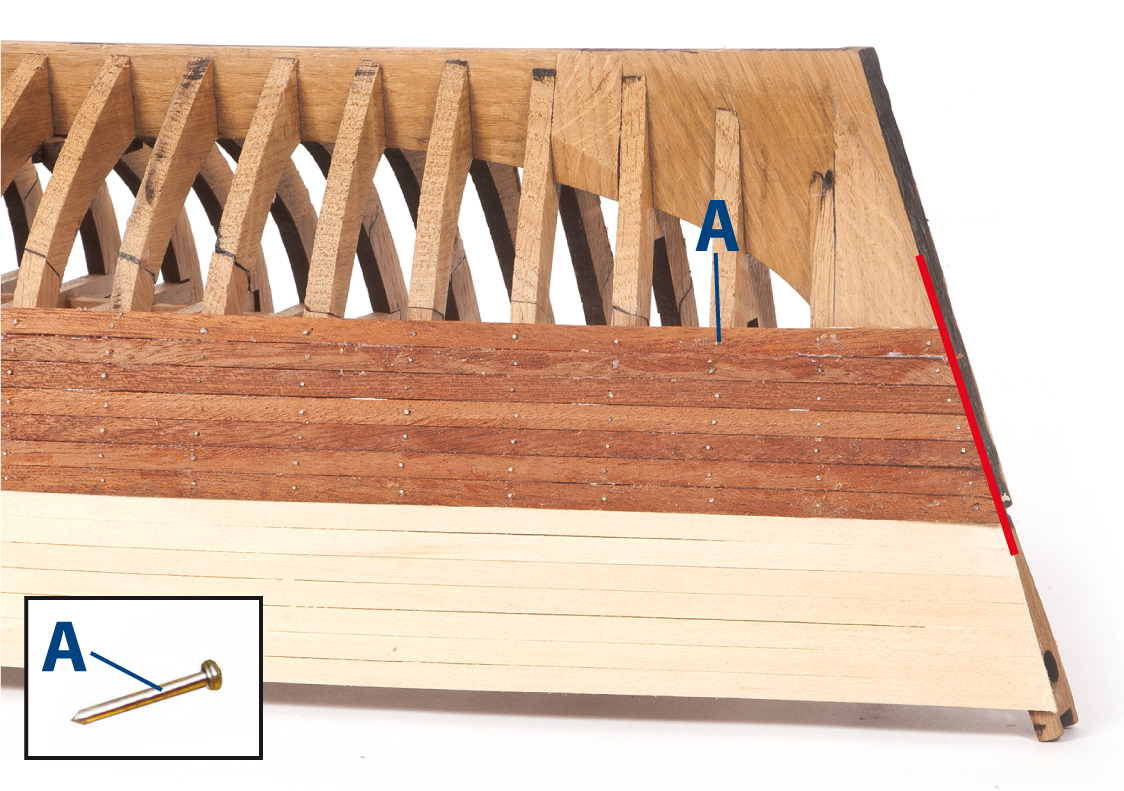
Step 6
This image shows how the mahogany strips are positioned in the stern area.
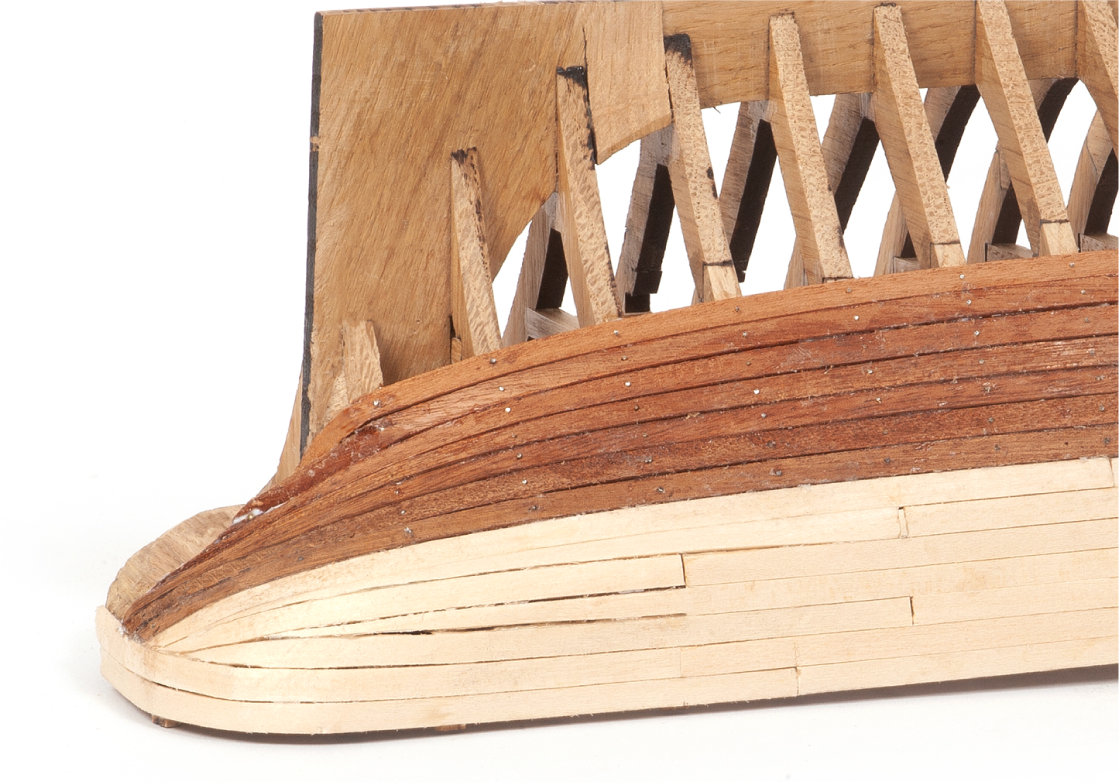
Step 7
This image shows the hull as the planking progresses.
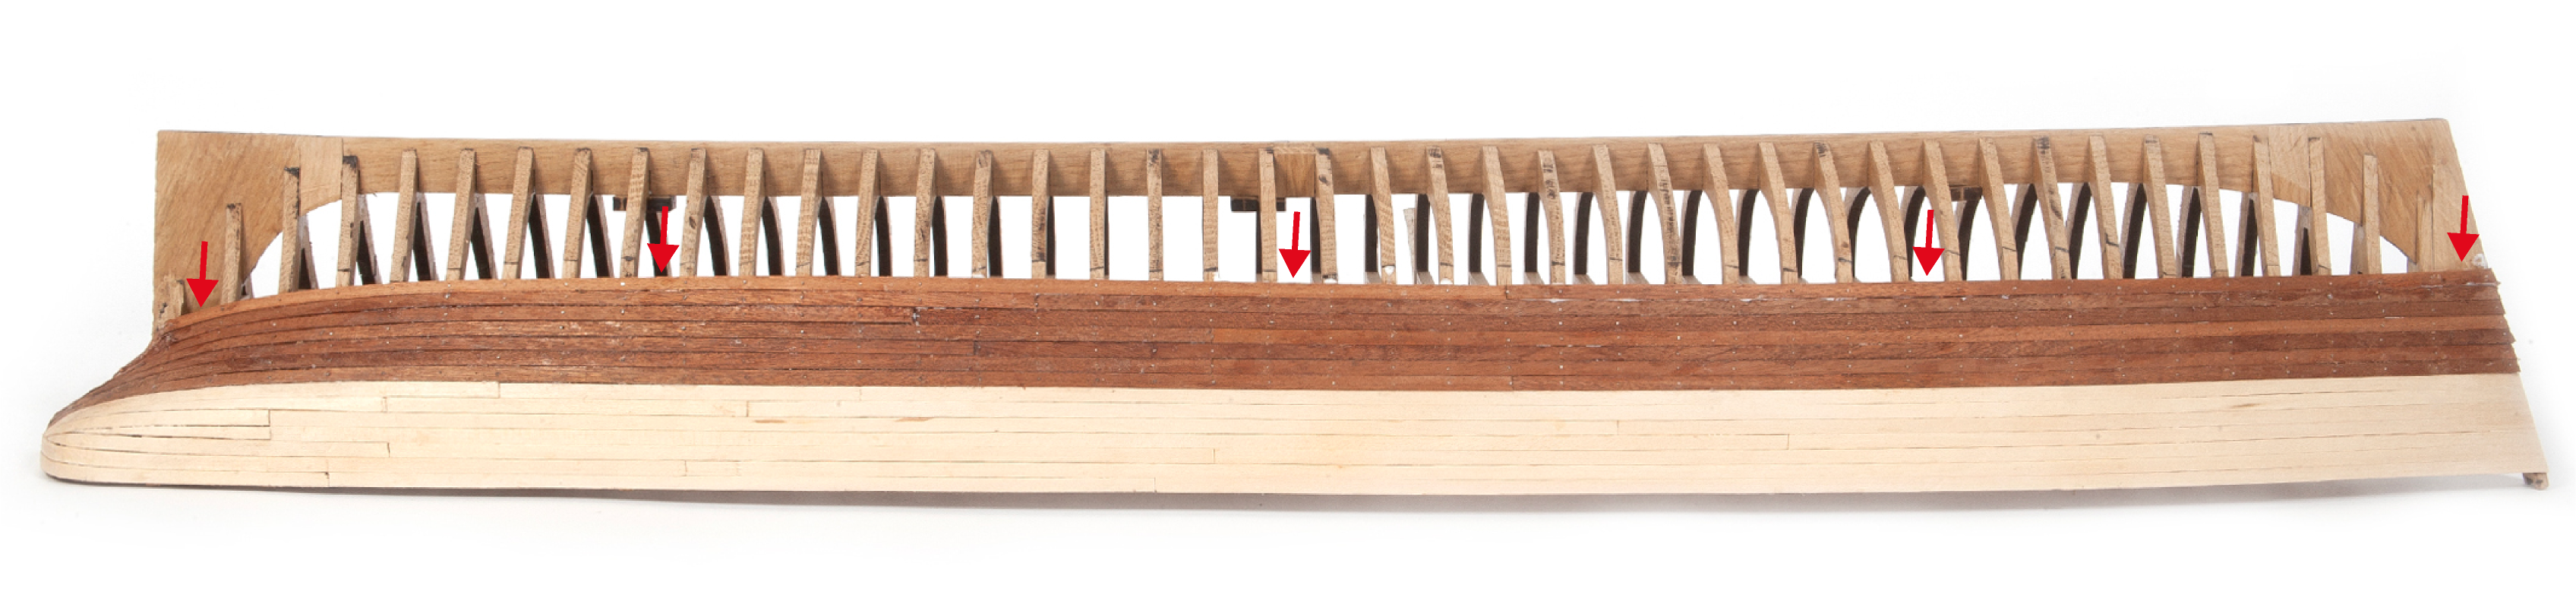
Step 8
Continue planking the hull from the bottom upwards and from the top downwards, as shown in the image.

Step 9
Cut the mahogany strips to fill the narrower gaps, then glue them. Do not use nails.
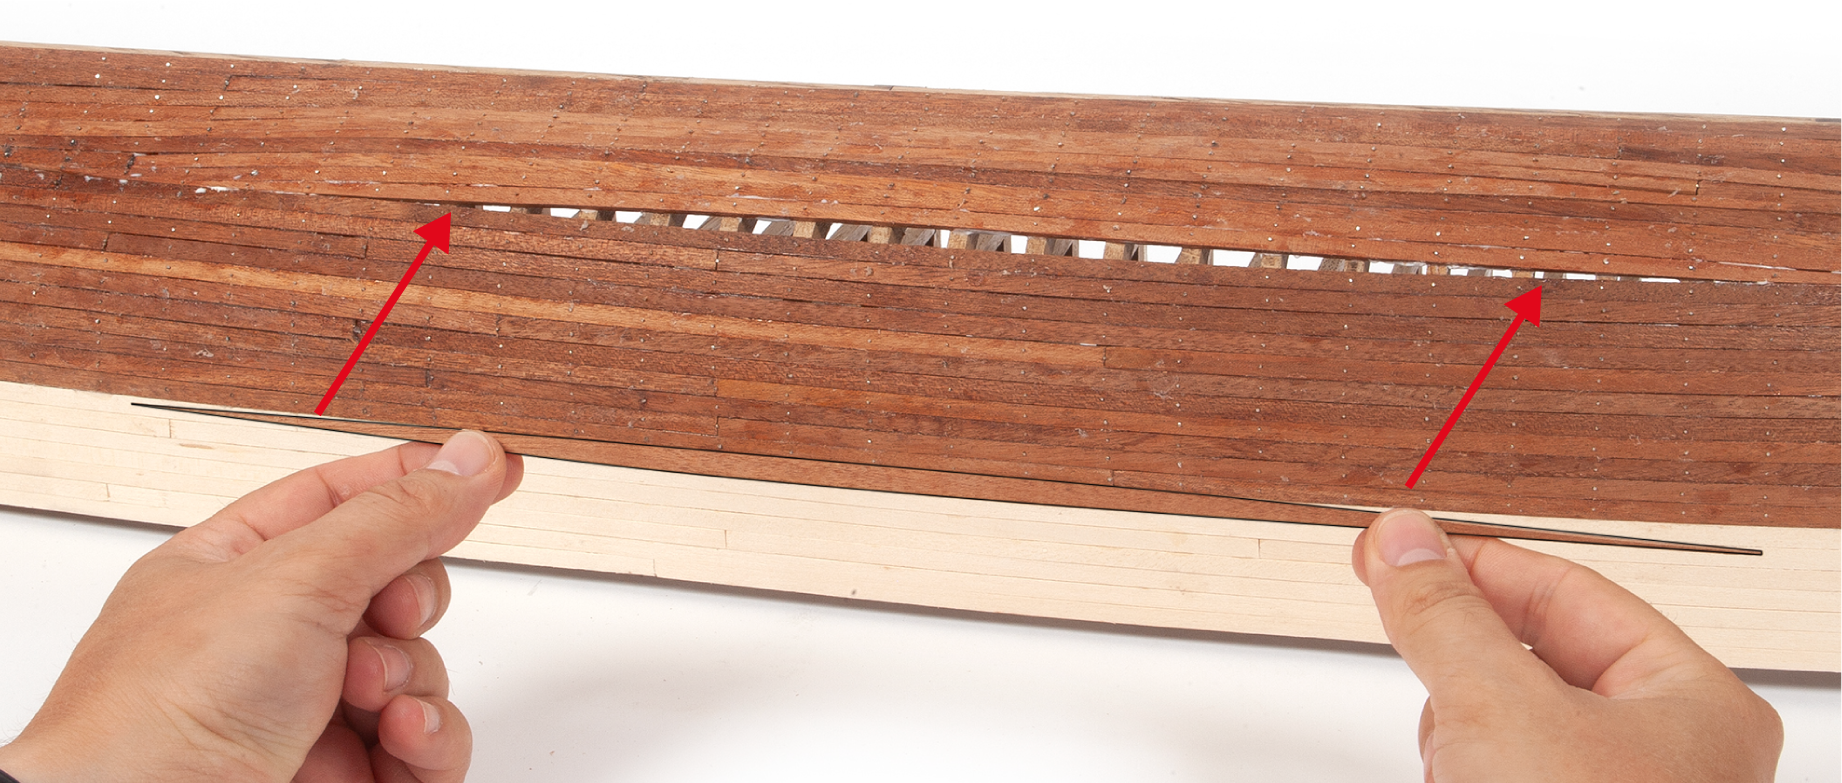
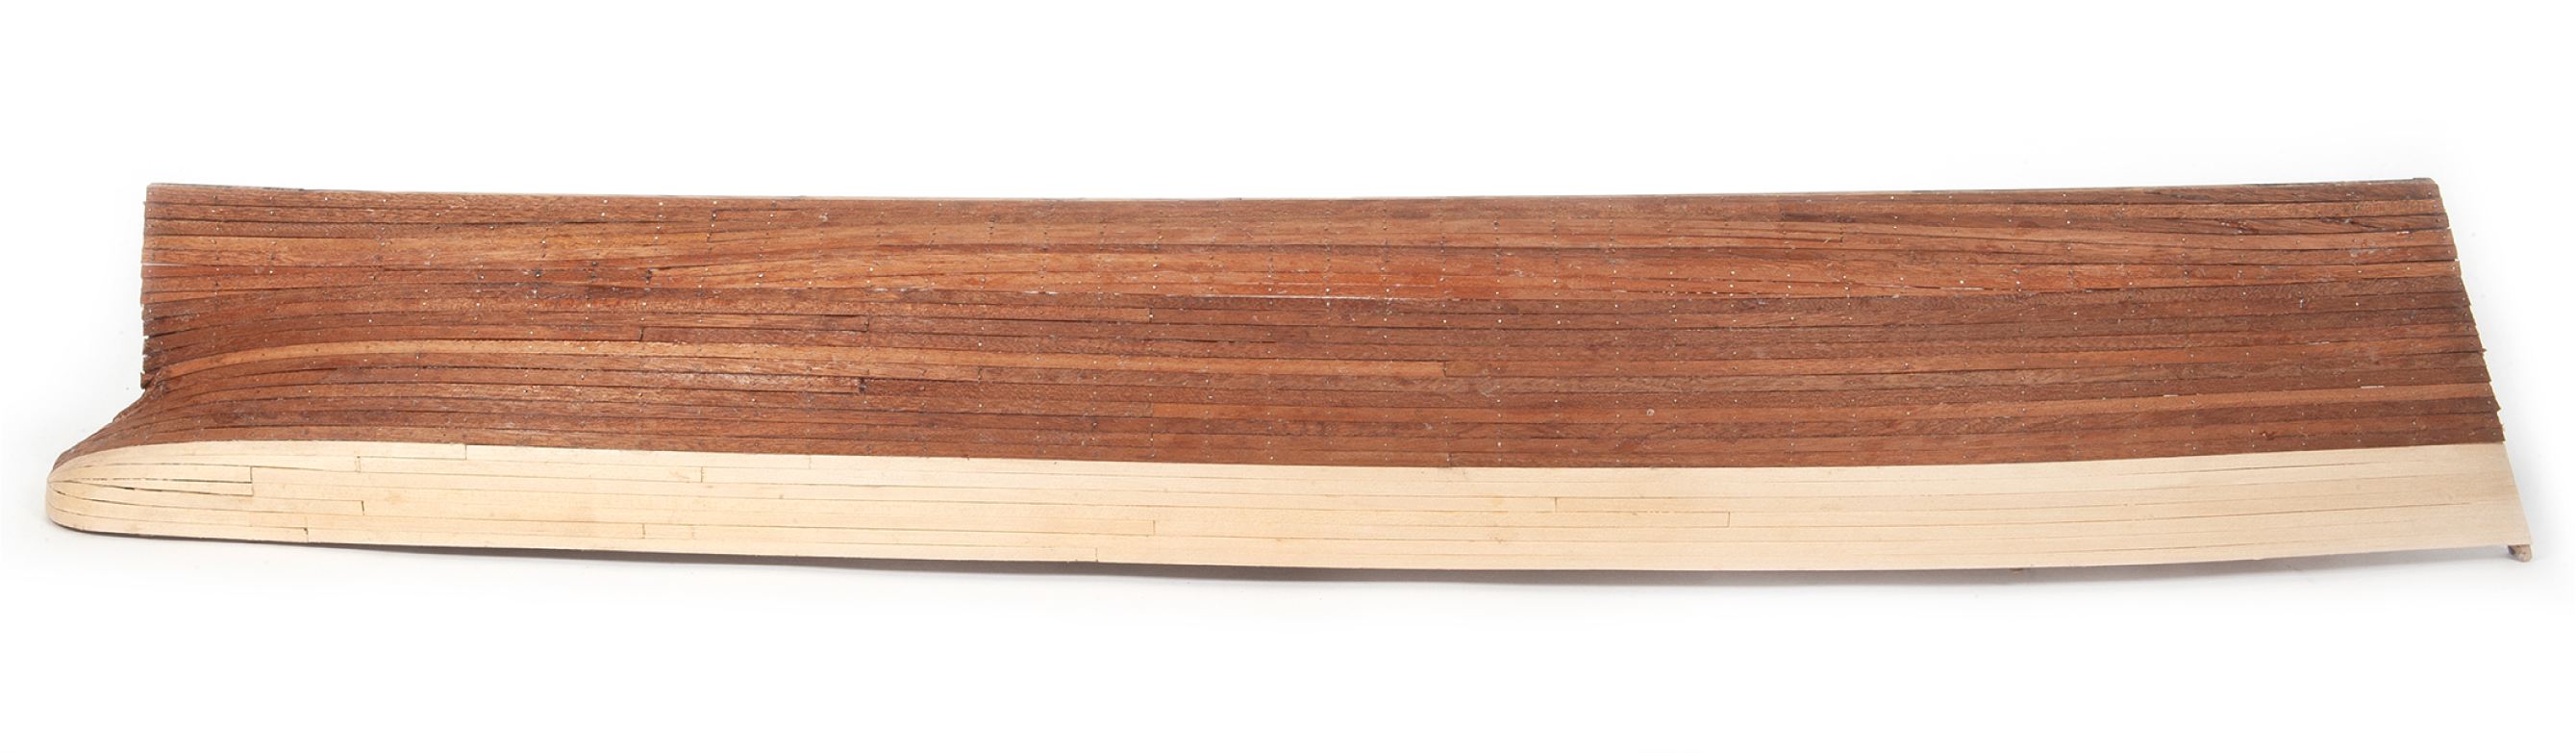
Step 10
This image shows the hull once it has been planked.
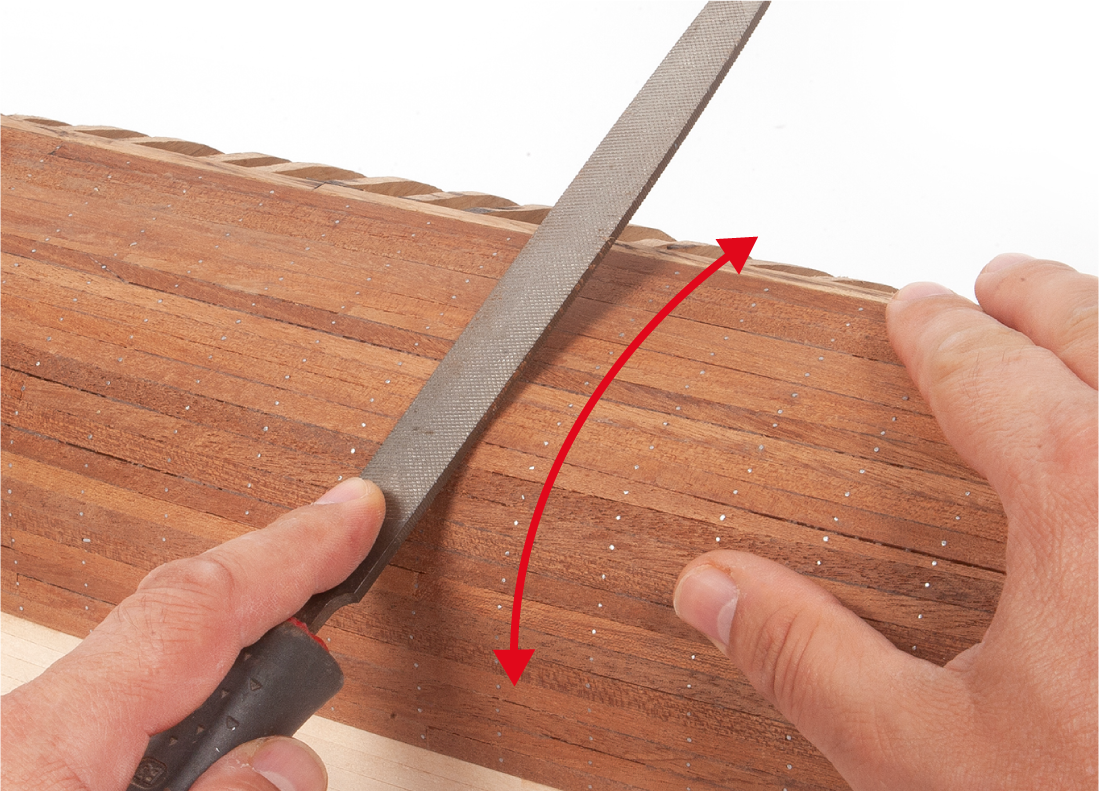
Step 11
File the nail heads until they are level with the surface of the planking.
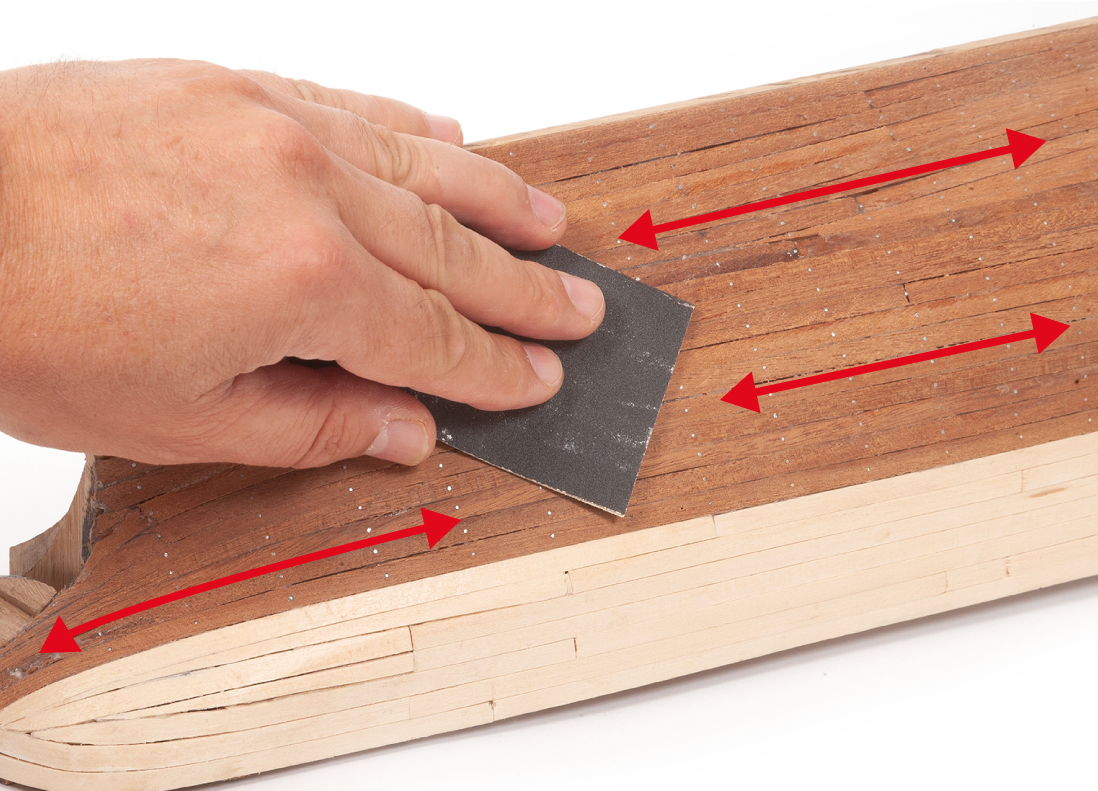
Step 12
Sand the entire planking to create a smooth, even surface.
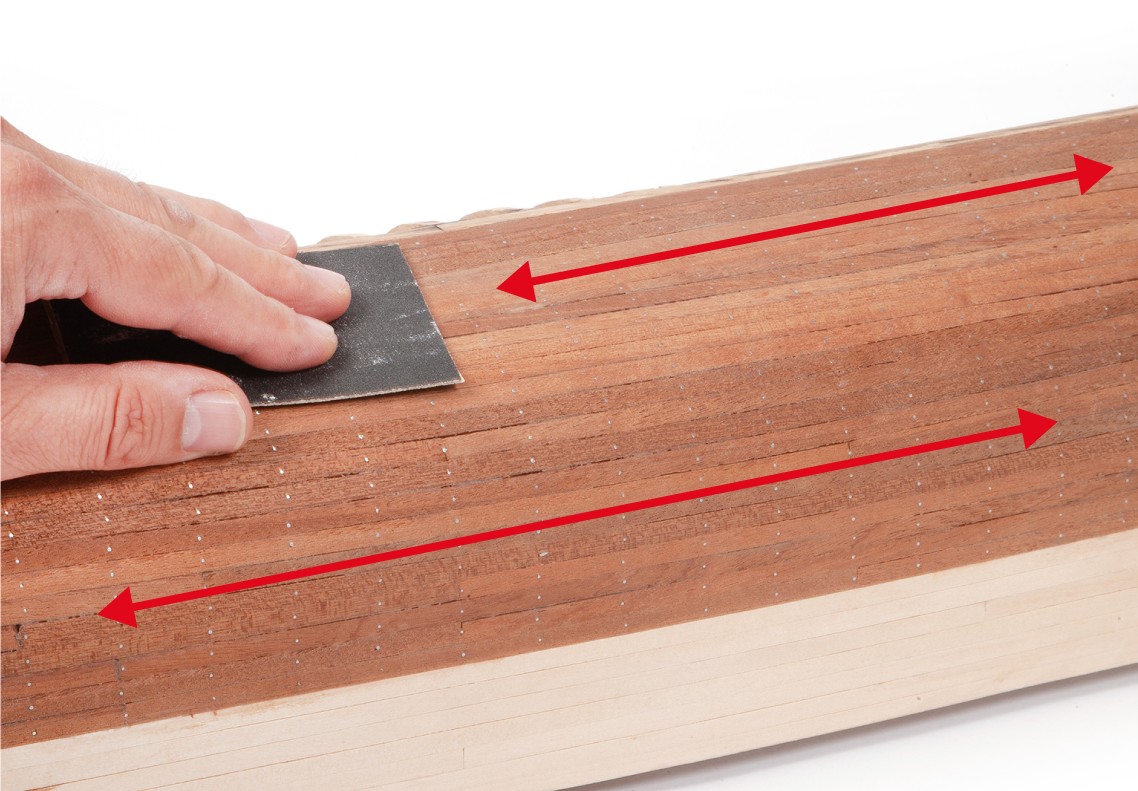
Step 13
Use different grades of sandpaper to achieve a smooth finish.
Step 14
A sanding block will help you even out the surface in straighter areas.
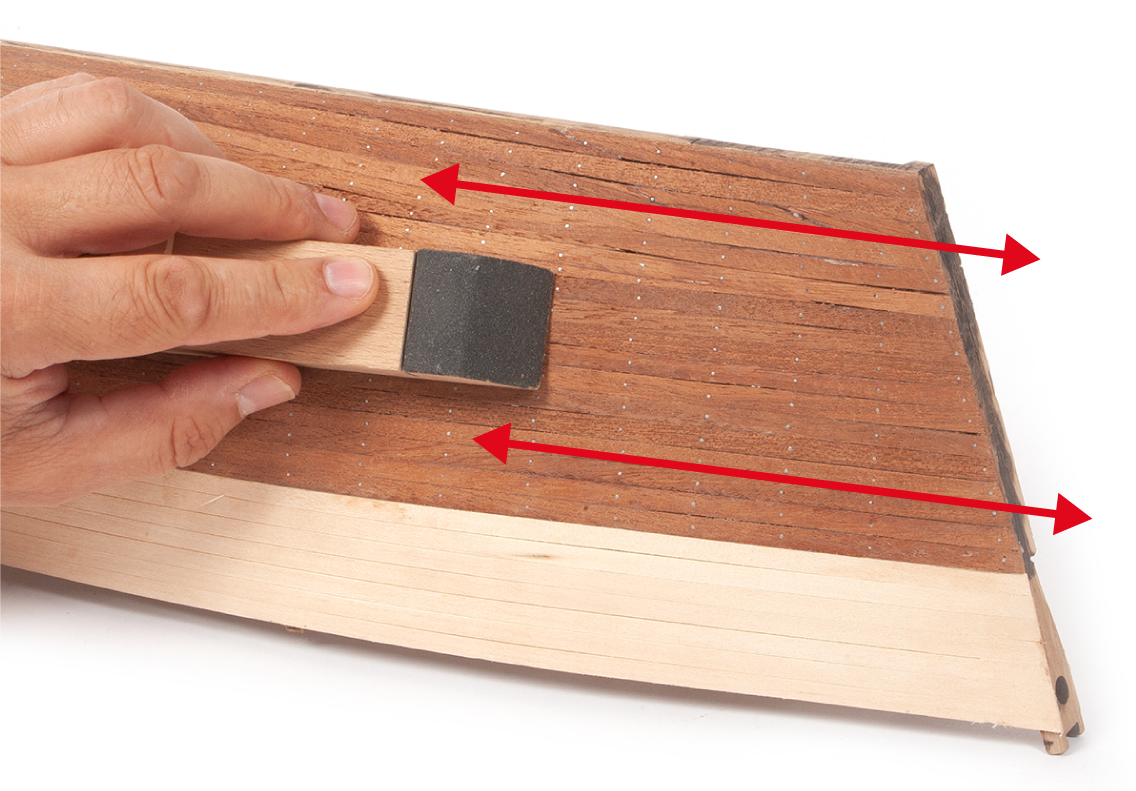
Step 15
This image shows the planking in the stern area.
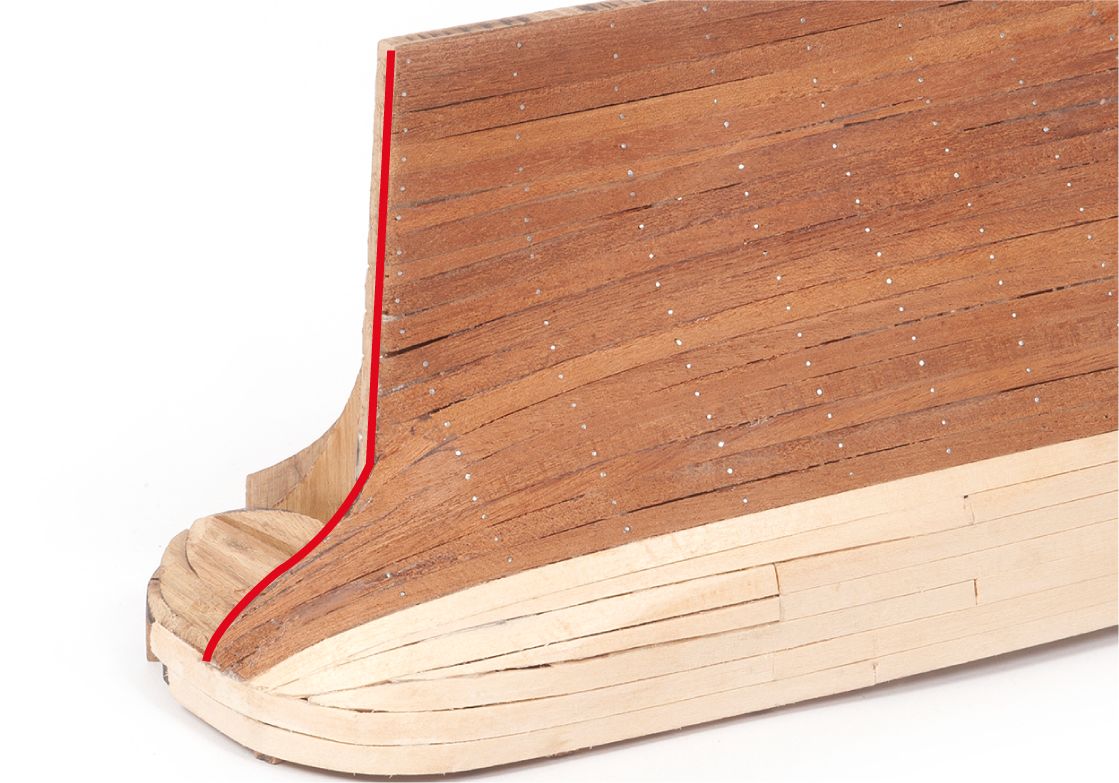
Step 16
This image shows the planking once it has been completed and sanded.
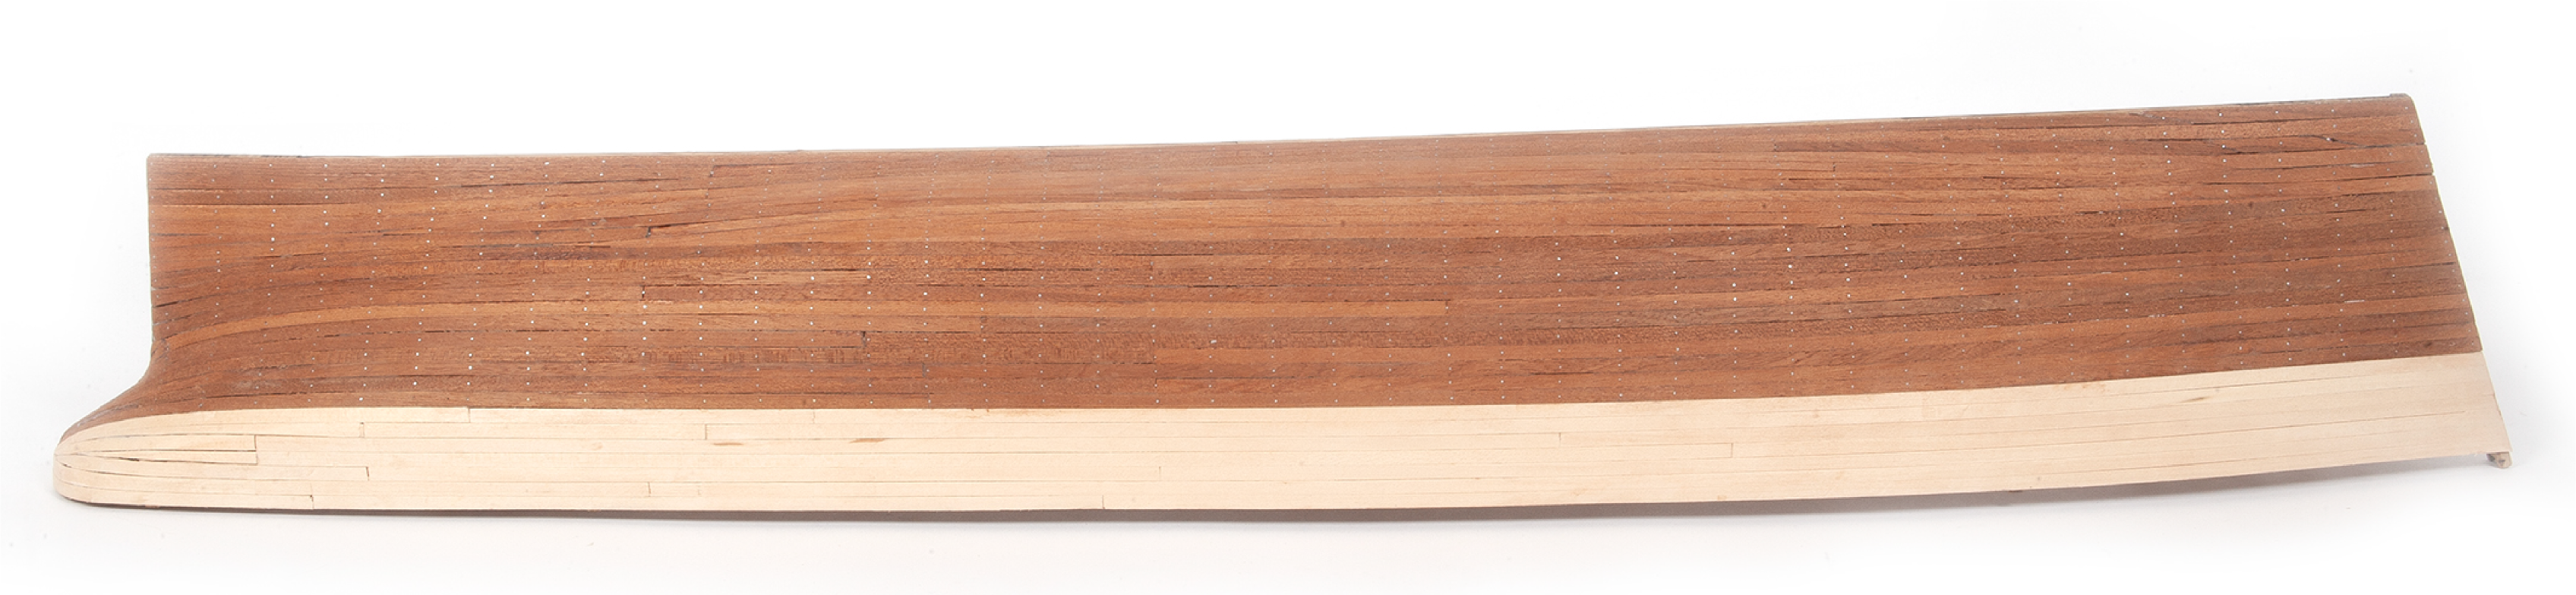
Step 17
Apply clear varnish to the entire planking if you wish to keep the natural wood colour. Otherwise, apply clear varnish only to the mahogany planking before painting the upper part of the hull.
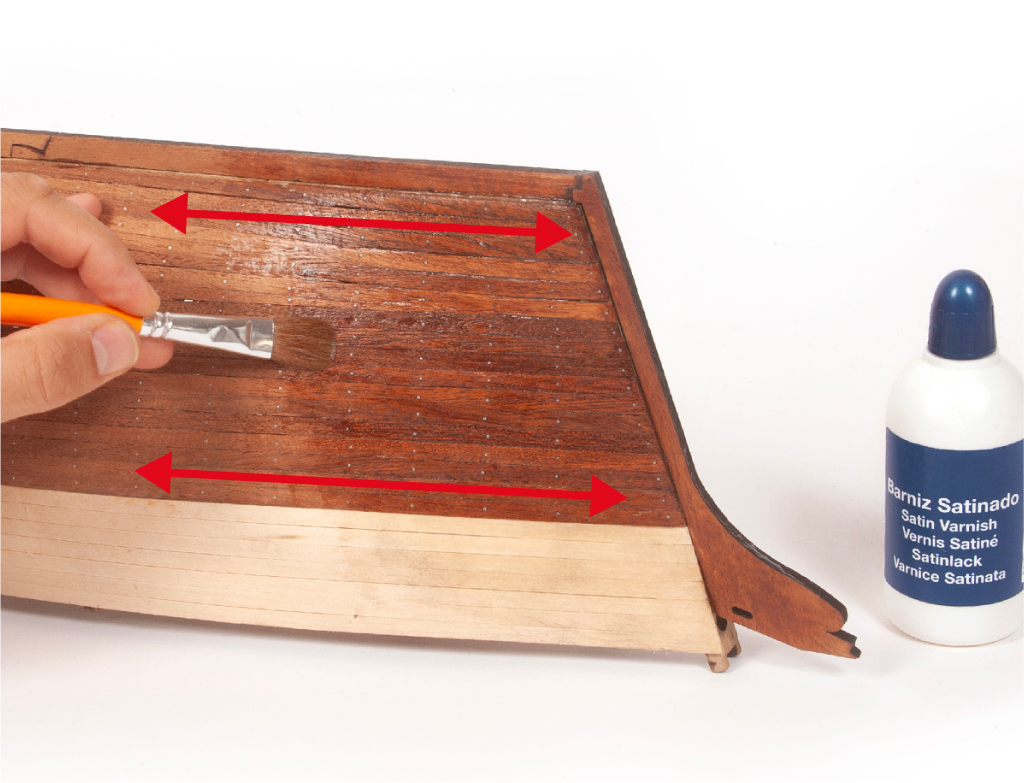
Step 18
This image shows the hull once the planking is complete.