
Pack 12
BUILD INSTRUCTIONS
Instructions for building your USS Constitution model ship
Your model of the USS Constitution is divided into 12 packs.
You will need to follow the step-by-step assembly photos, the plans and the explanatory texts below.
Please save the leftover materials from each pack for use when instructed to do so at a later stage of the assembly instructions.
The IP sheets displayed below are drawings of laser-cut parts and photo-etched brass parts and will serve as a guide for identification of some parts.
Use the PARTS REFERENCE table to help locate the parts.
The PL-00 templates (printed at 1/1 scale) included in each pack will serve as a guide for building the model.
Please check the list below to ensure you have all the tools required for building your wooden ship.
When removing a part, cut the ribs that join the part to the wooden plate with a cutter.
Remove the parts carefully so as not to break them.
Keep and store the parts in their frames. Only remove the parts you are working on in each step.
Extra support can be found on our forum or from the Expert Directory page of our website.
PARTS LIST
| Material | Quantity | |
| Set of flags | 1 | |
| Sails | 31 | |
| U.S.S. Constitution nameplate | 1 |
Tools you will need: cutting mat, pencil, cutting knife, fine-grit sandpaper or sponge sandpaper, file, white wood glue, super glue (cyanoacrylate glue), masking tape, set square, hacksaw, sanding block, 30 cm steel ruler, clamps, drill, moulding scriber tool
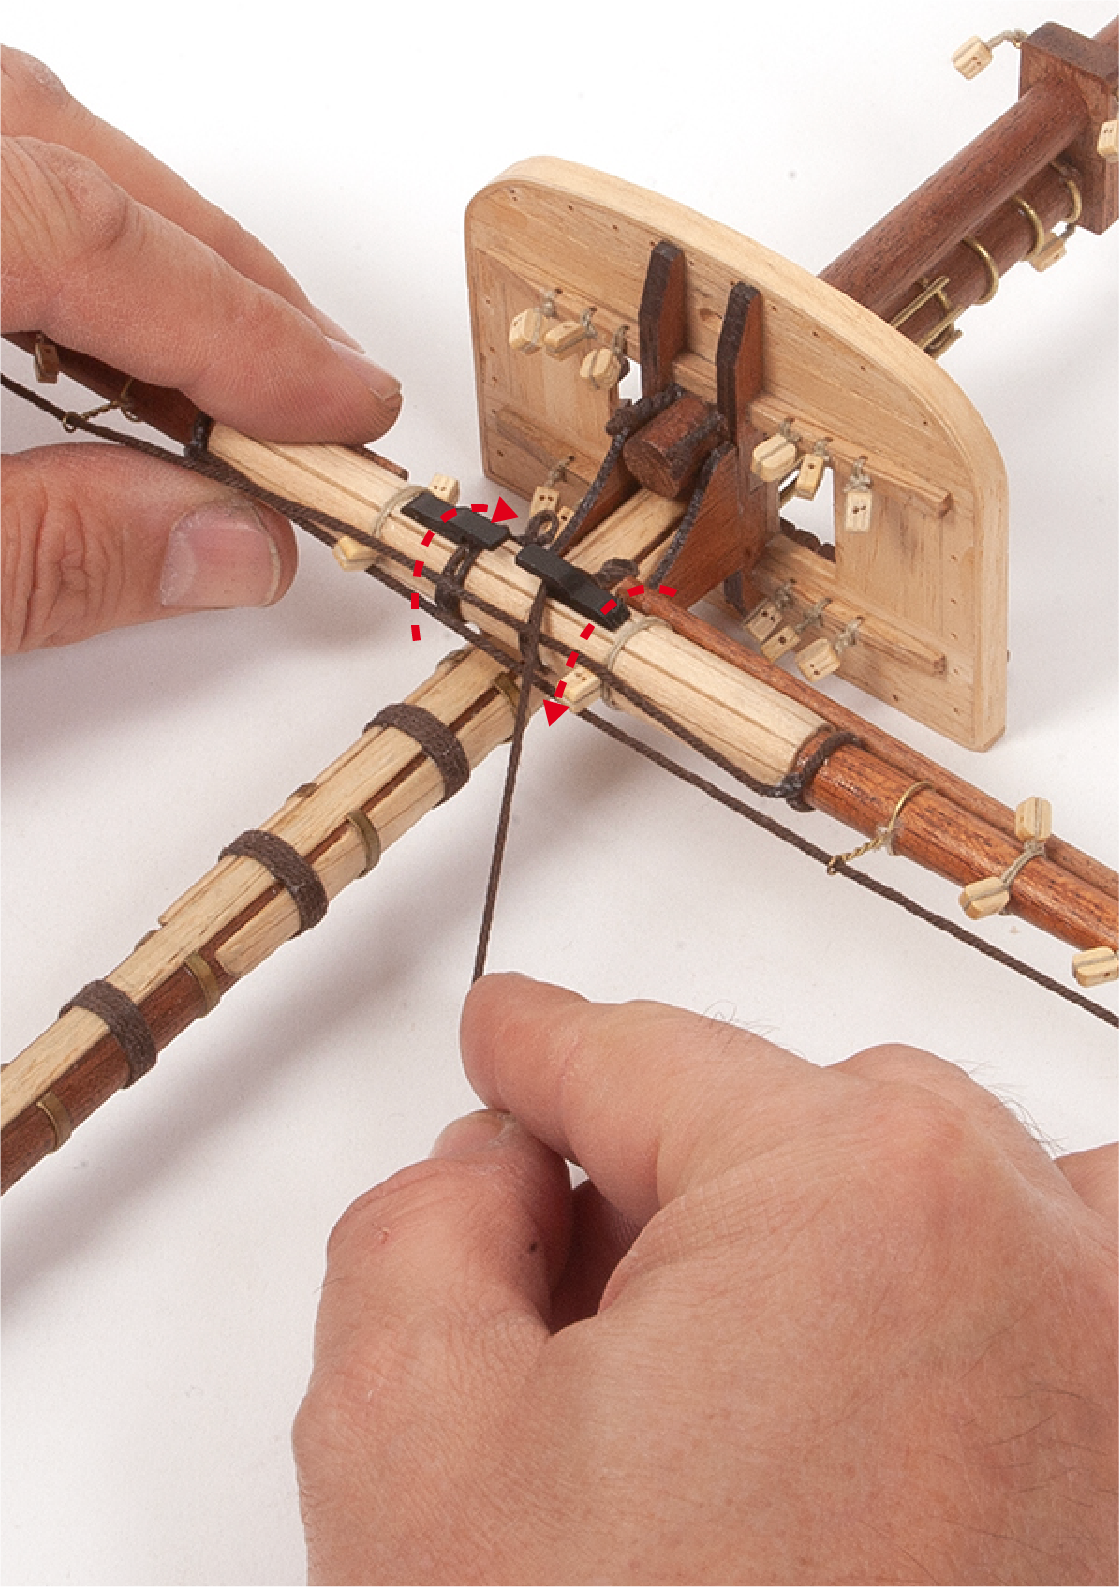
Step 1
Follow the rigging reference codes shown on the plans.
The plans use colour coding:
– Red indicates spar rigging.
– Blue indicates sail rigging.
If you do not intend to fit the sails, do not install the rigging shown in blue.
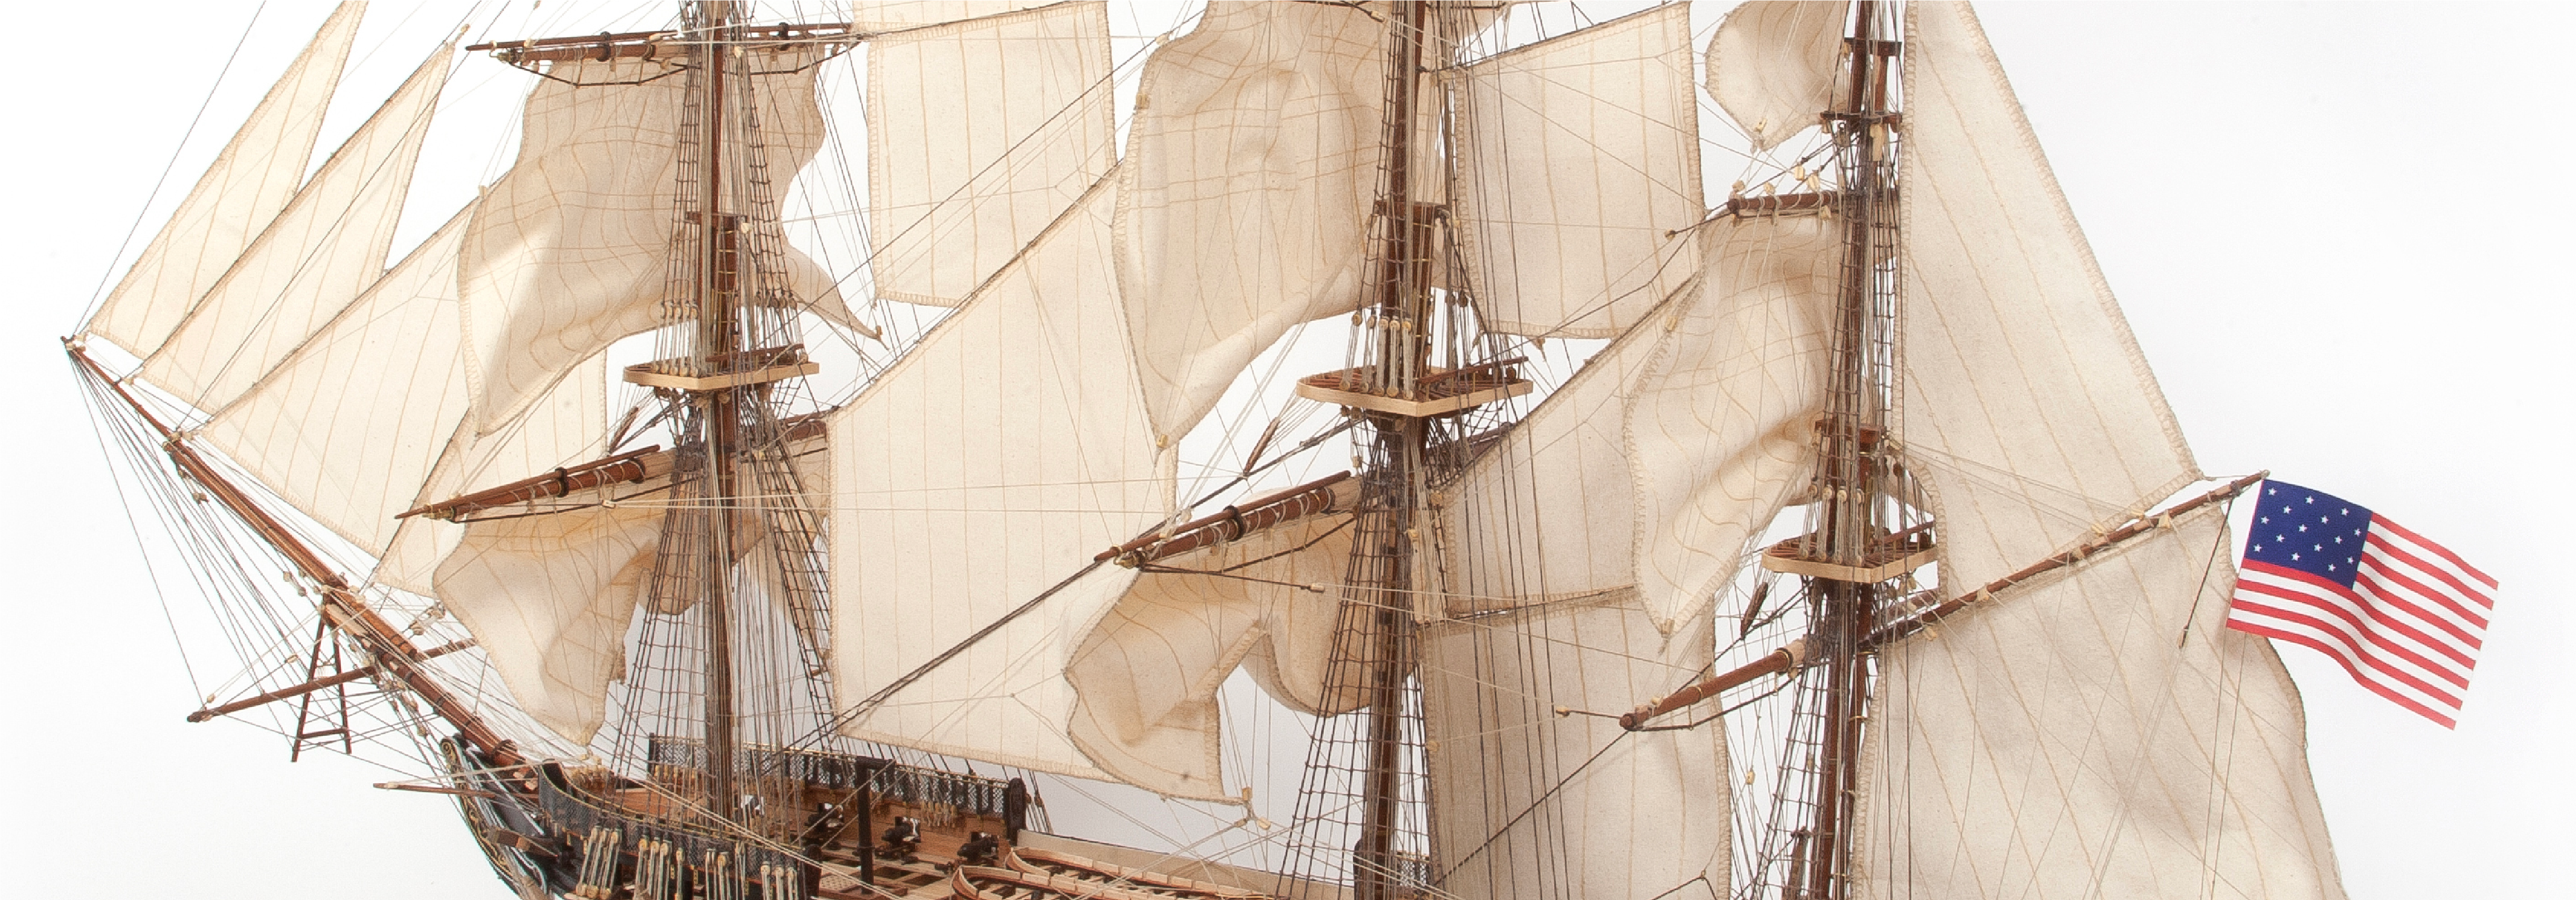
The image shows how the yards are attached to the masts.
The following steps explain the basic techniques required to complete the rigging. Click the link below to watch our video.
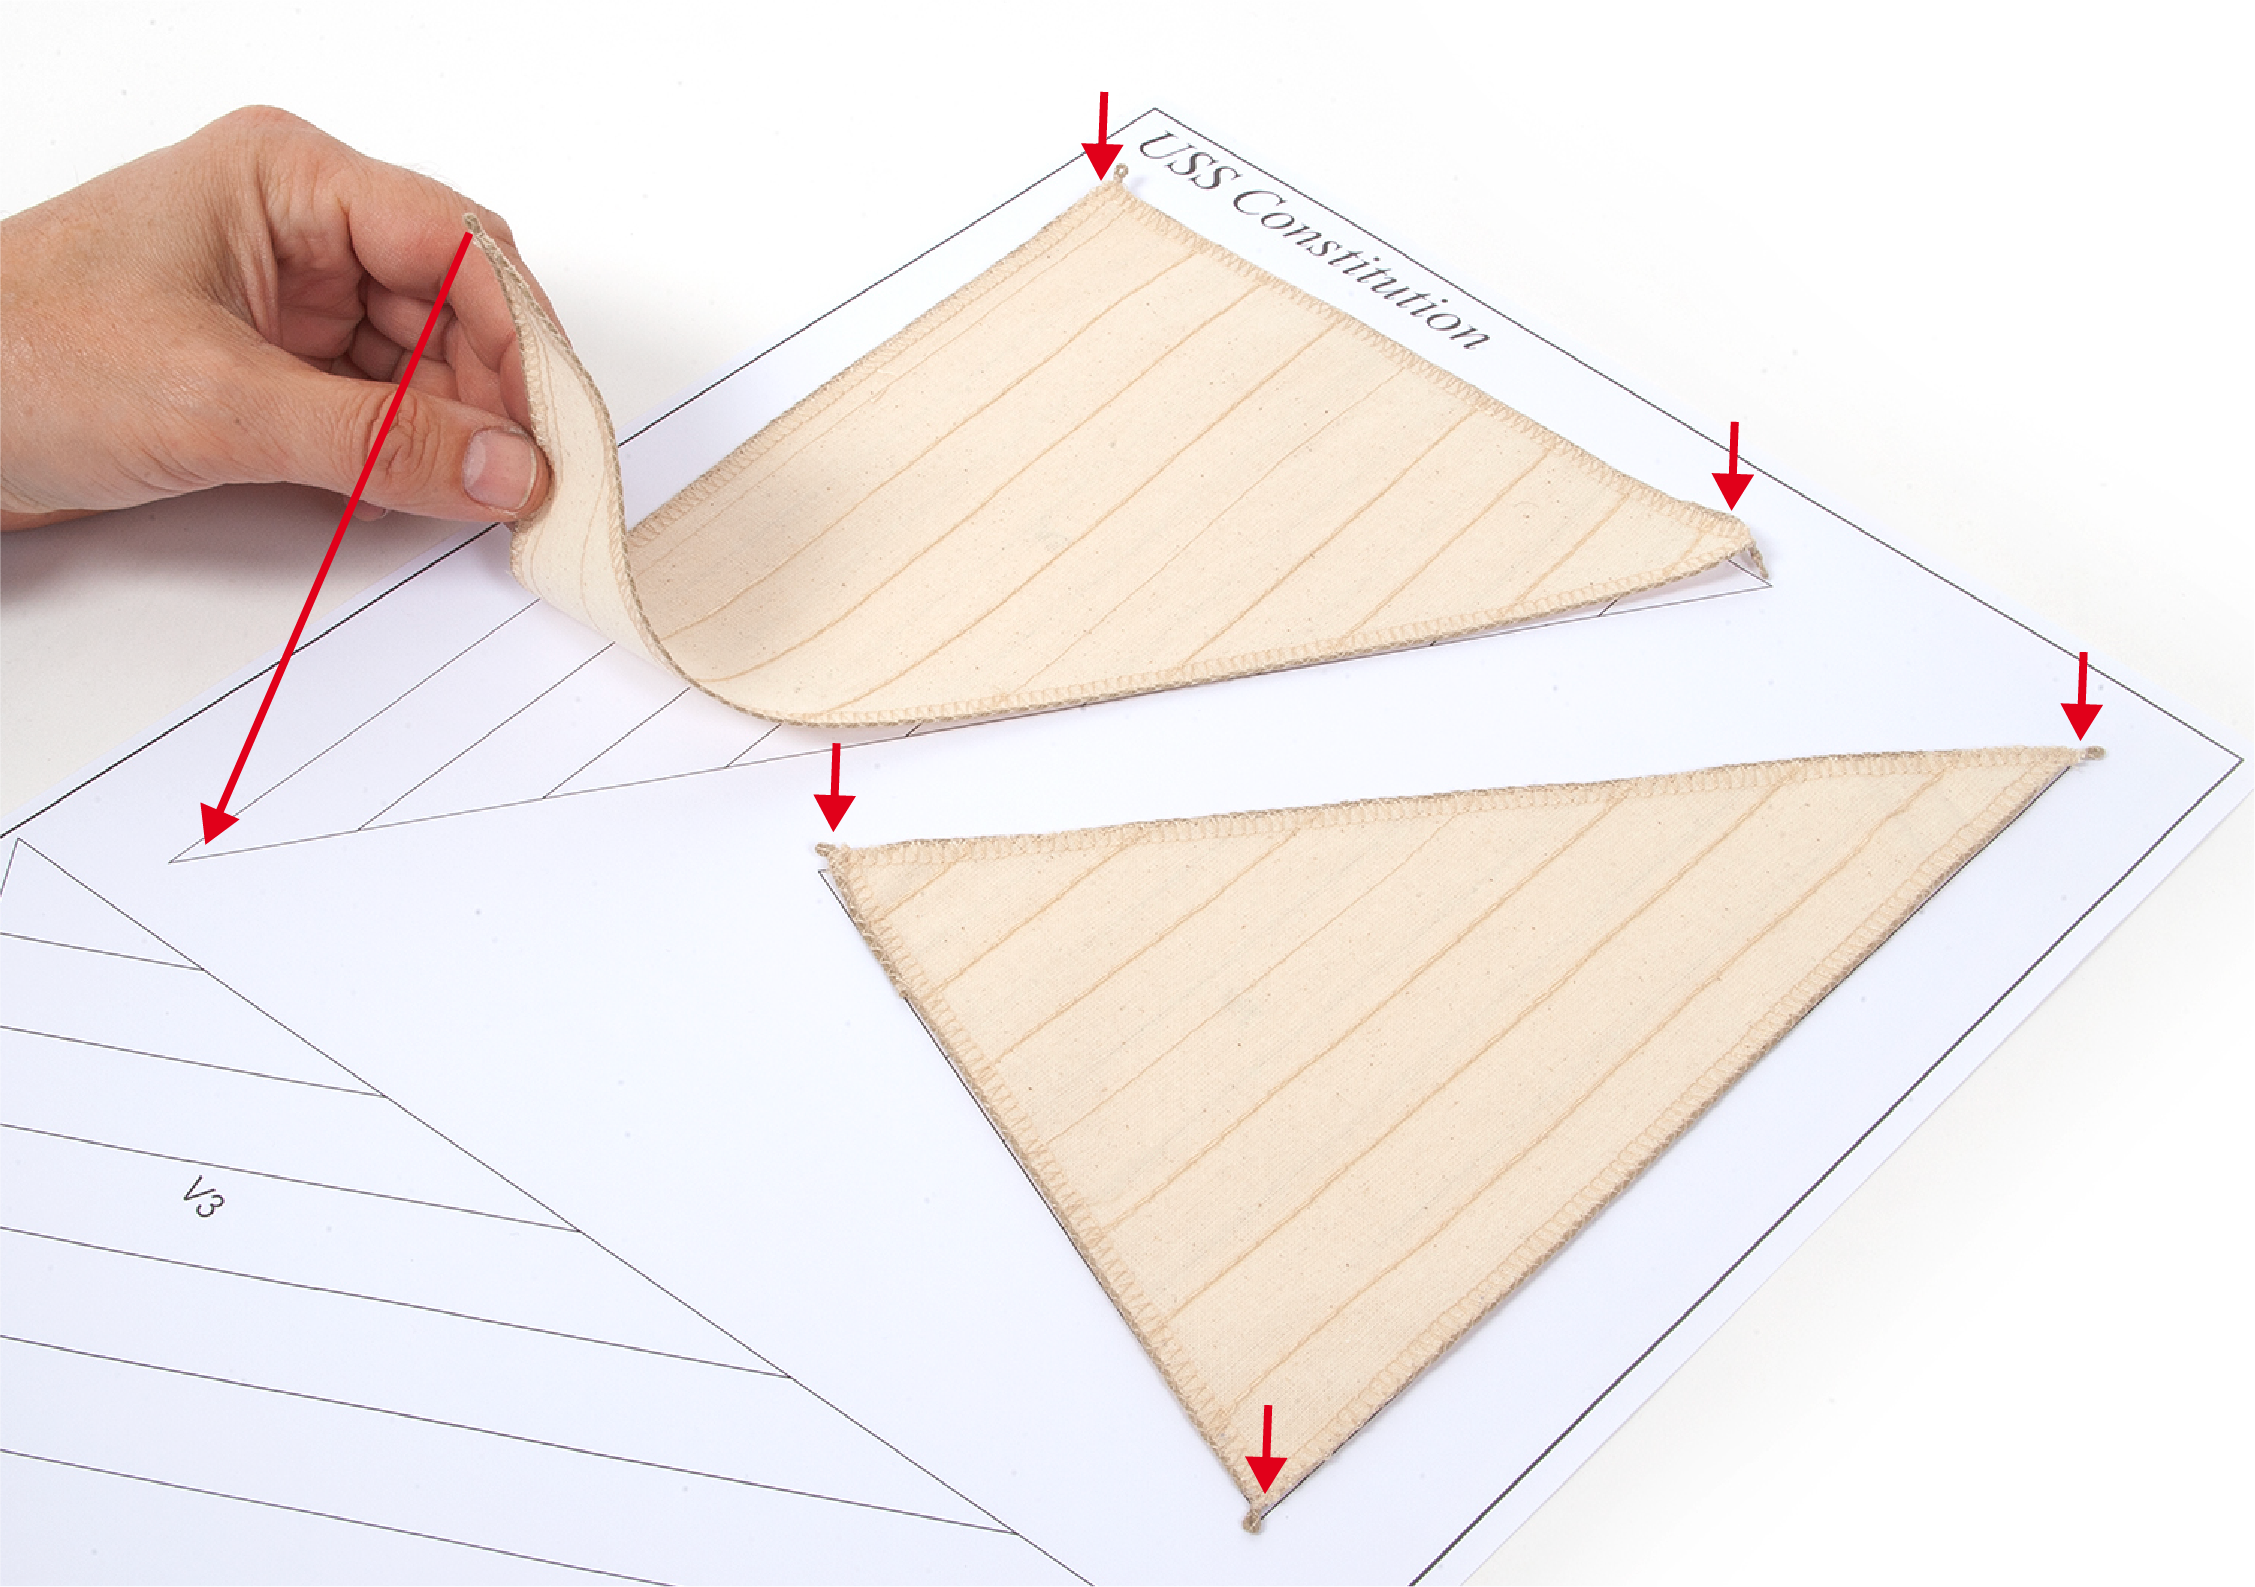
Step 2
Match each sail to its corresponding drawing on the sail plans.
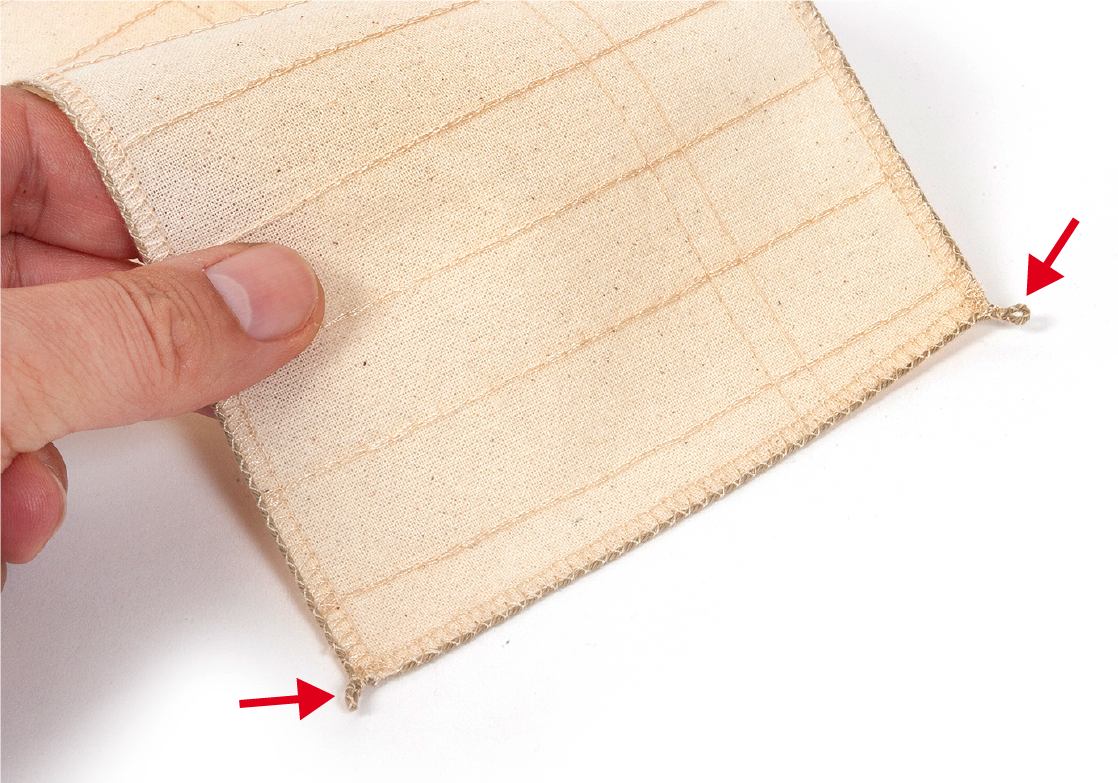
Step 3
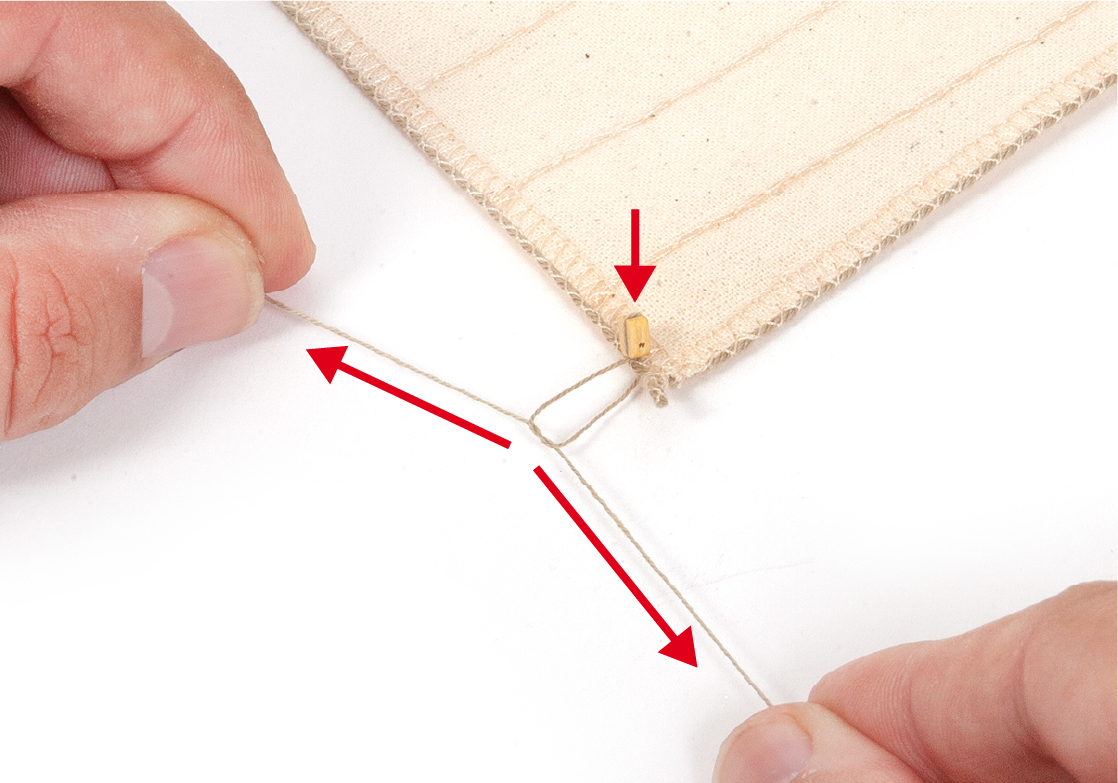
Each sail is fitted with small sewn loops for rigging. If you want to give the sails an aged look, dye them using cold tea.
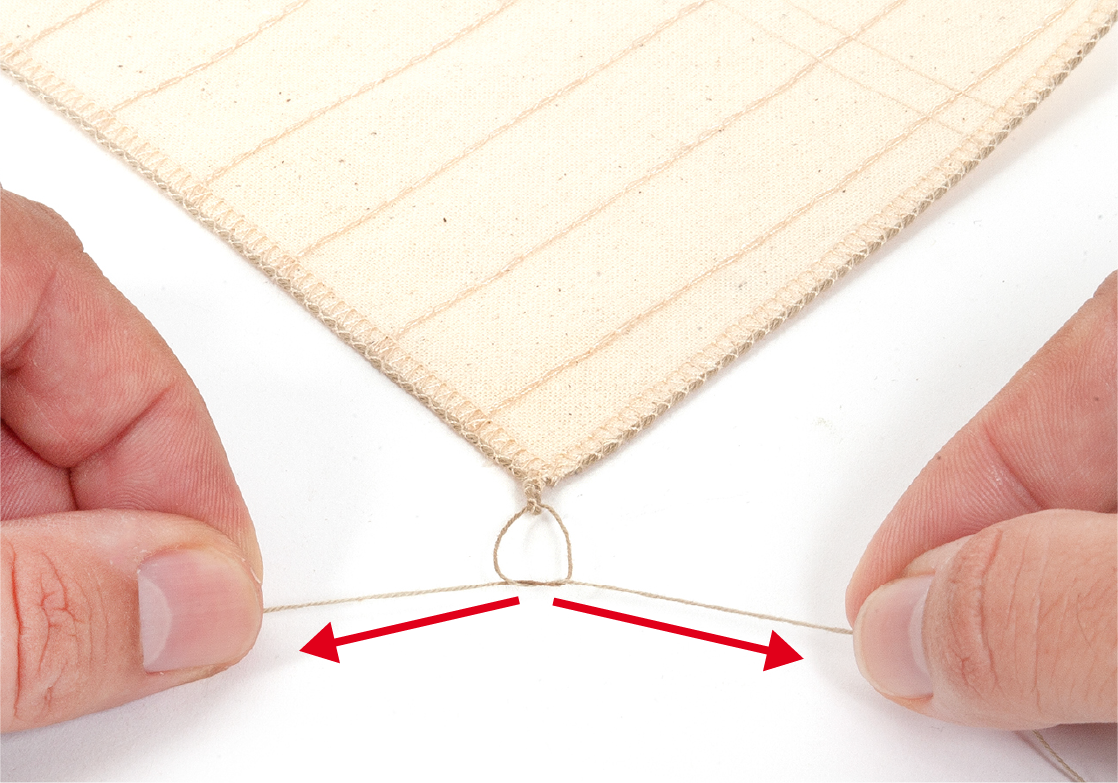
Step 4
Use the loops to tie the rigging threads indicated on the plans.
Step 5
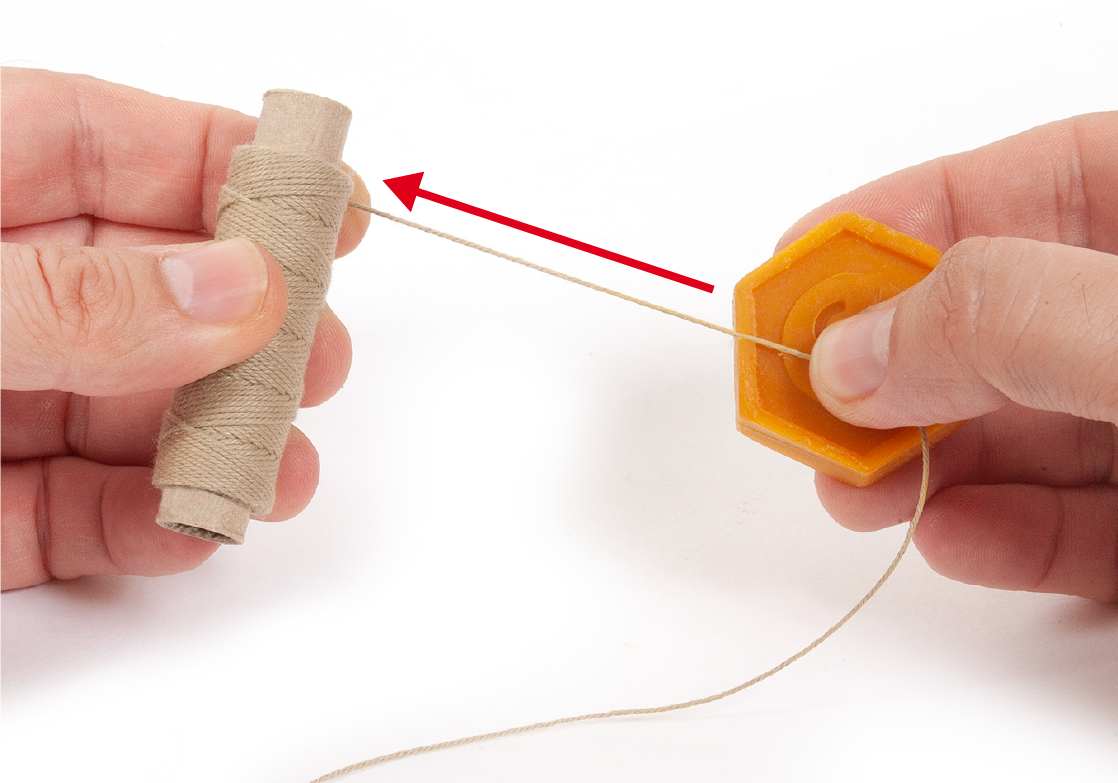
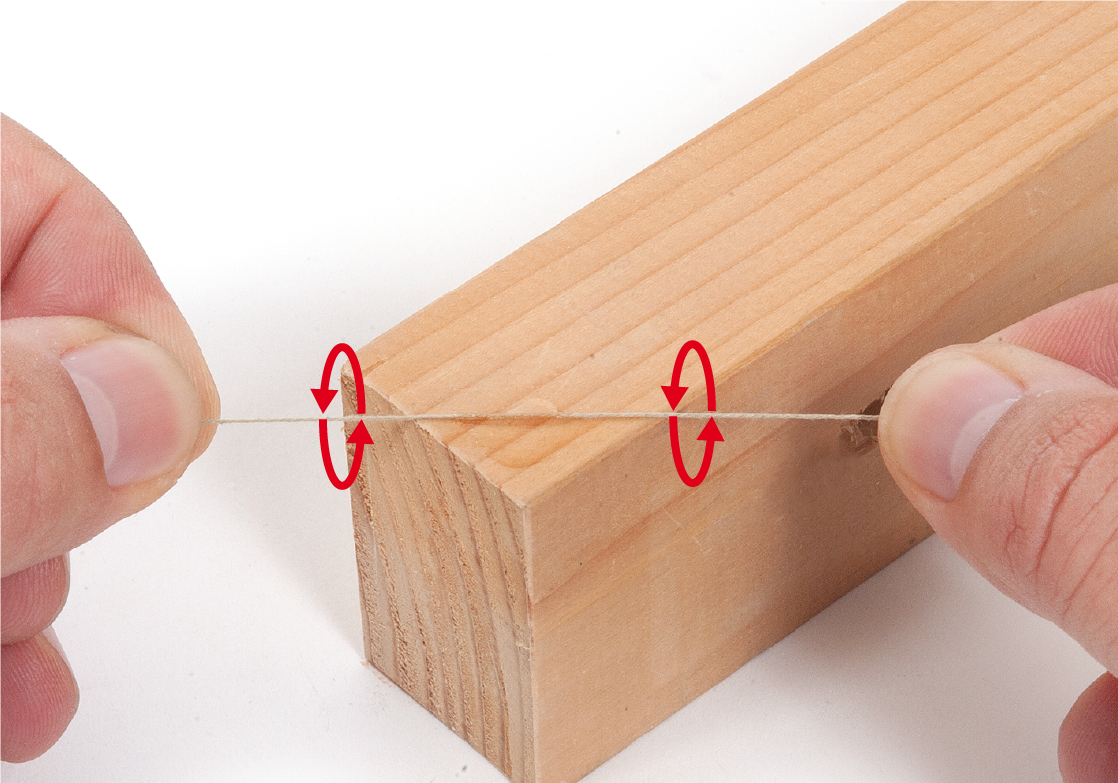
It is recommended to wax the threads before rigging the masts.
Step 6
Some sails require blocks or various threads to be sewn on.
Step 7
Use a needle to make it easier to thread the rigging.
Step 8
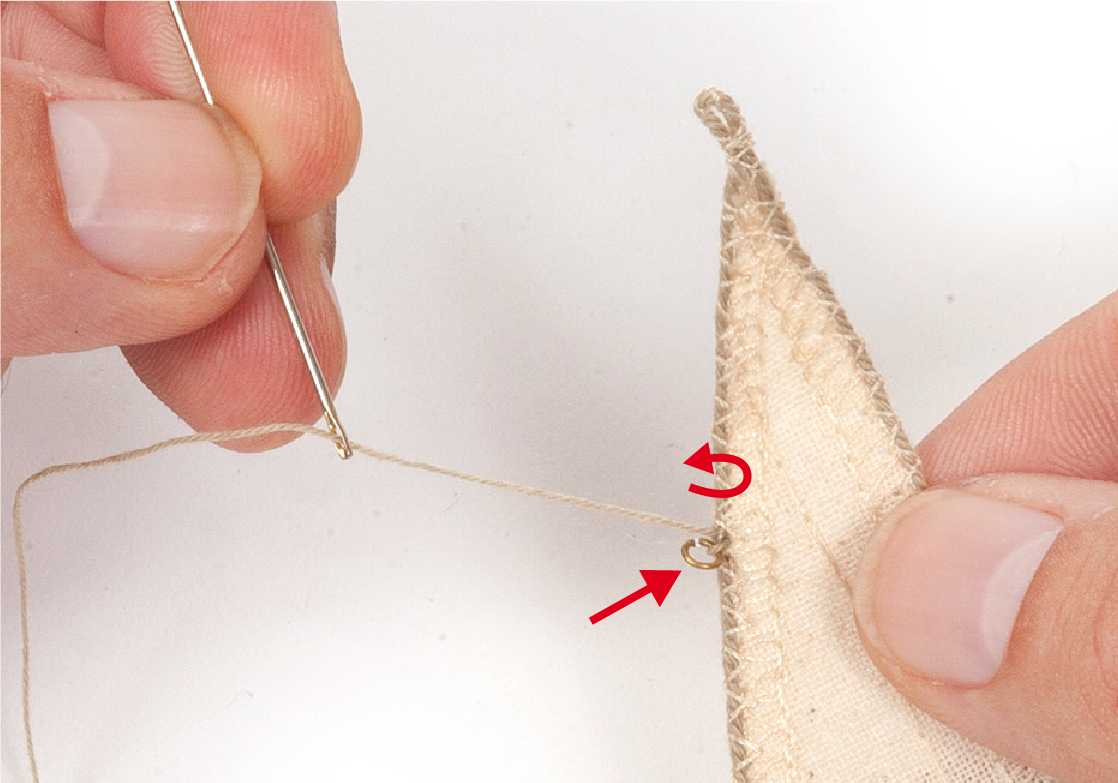
In some cases, you will also need to sew rings to the sails, as shown in the rigging plans.
Step 9
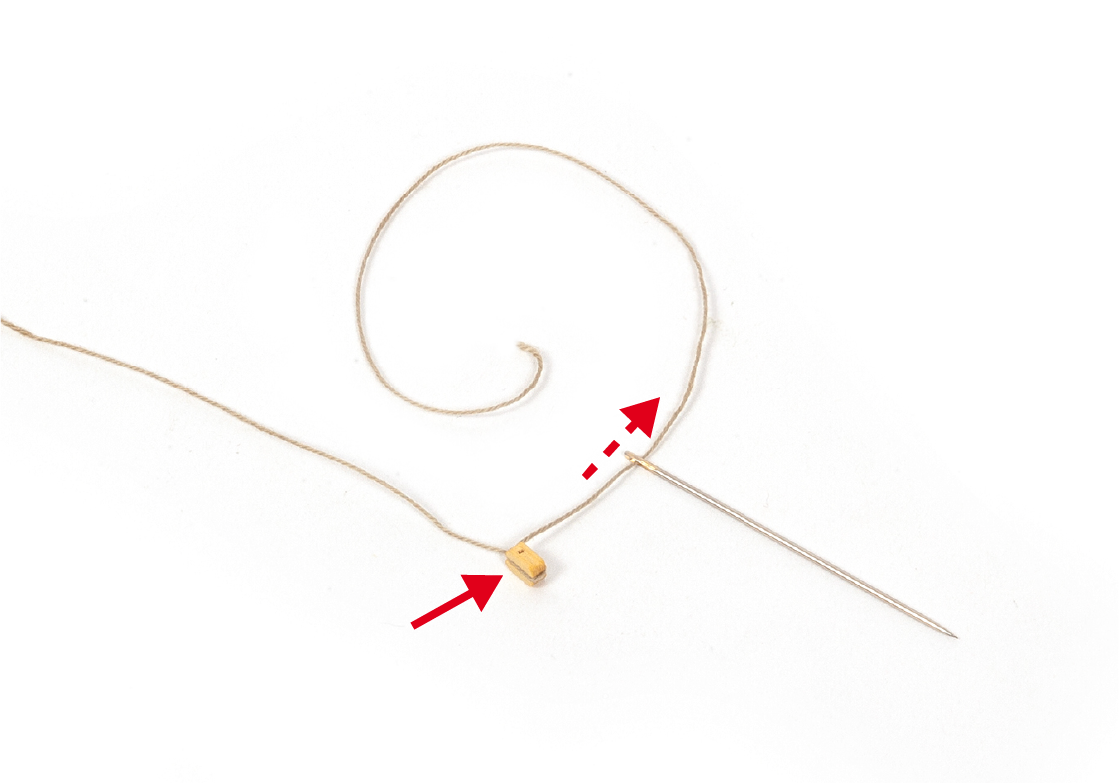
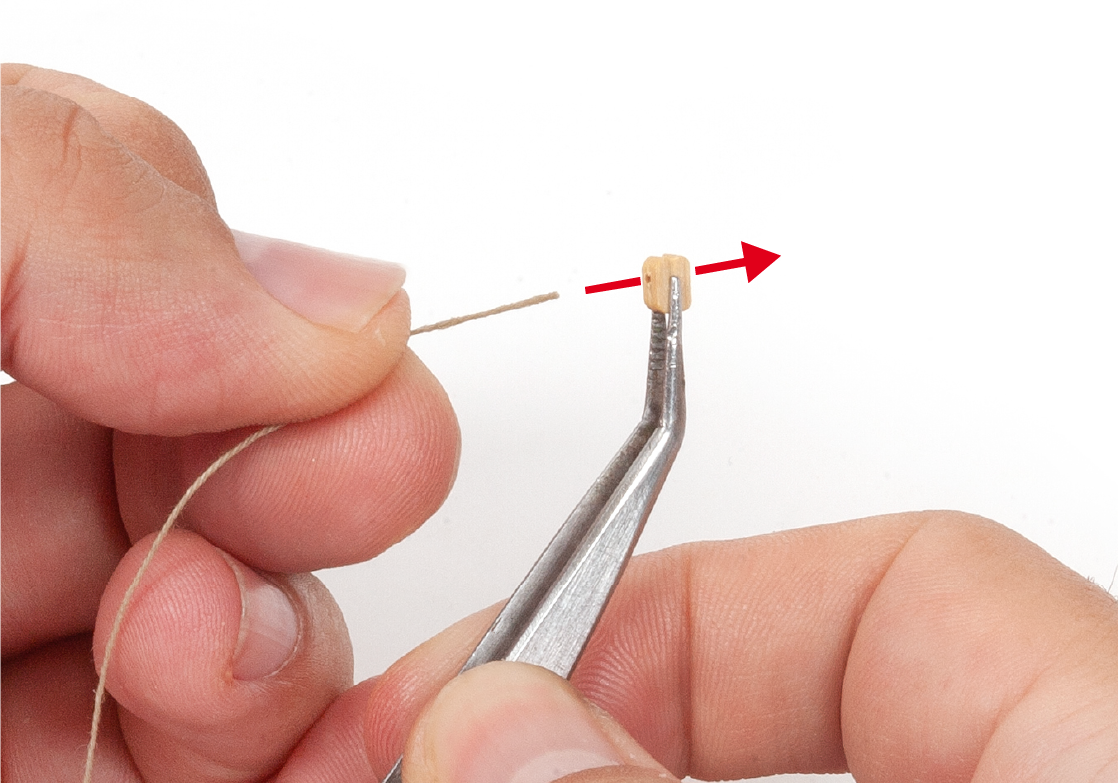
To pass the threads through small holes, apply some glue to a wooden surface or similar then roll the taut thread over the glue. Once the glue has dried, cut the glued thread to create a stiff, needle-like tip. This makes it easier to thread through the blocks and deadeyes.
Step 10
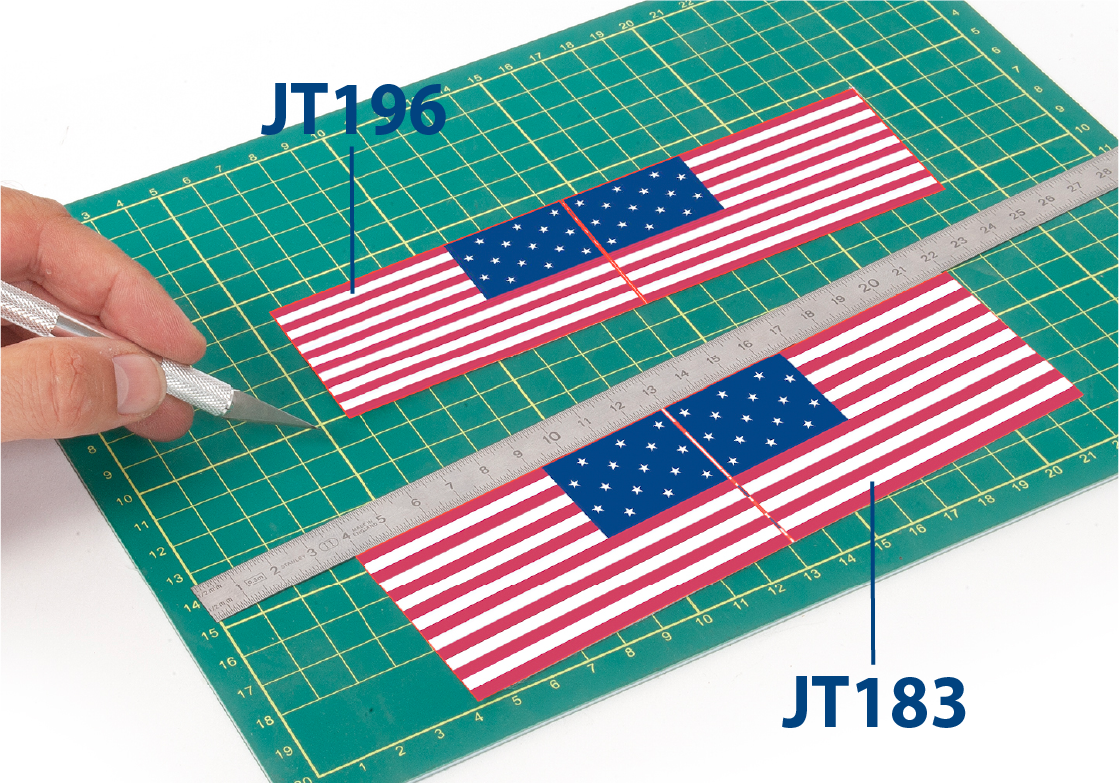
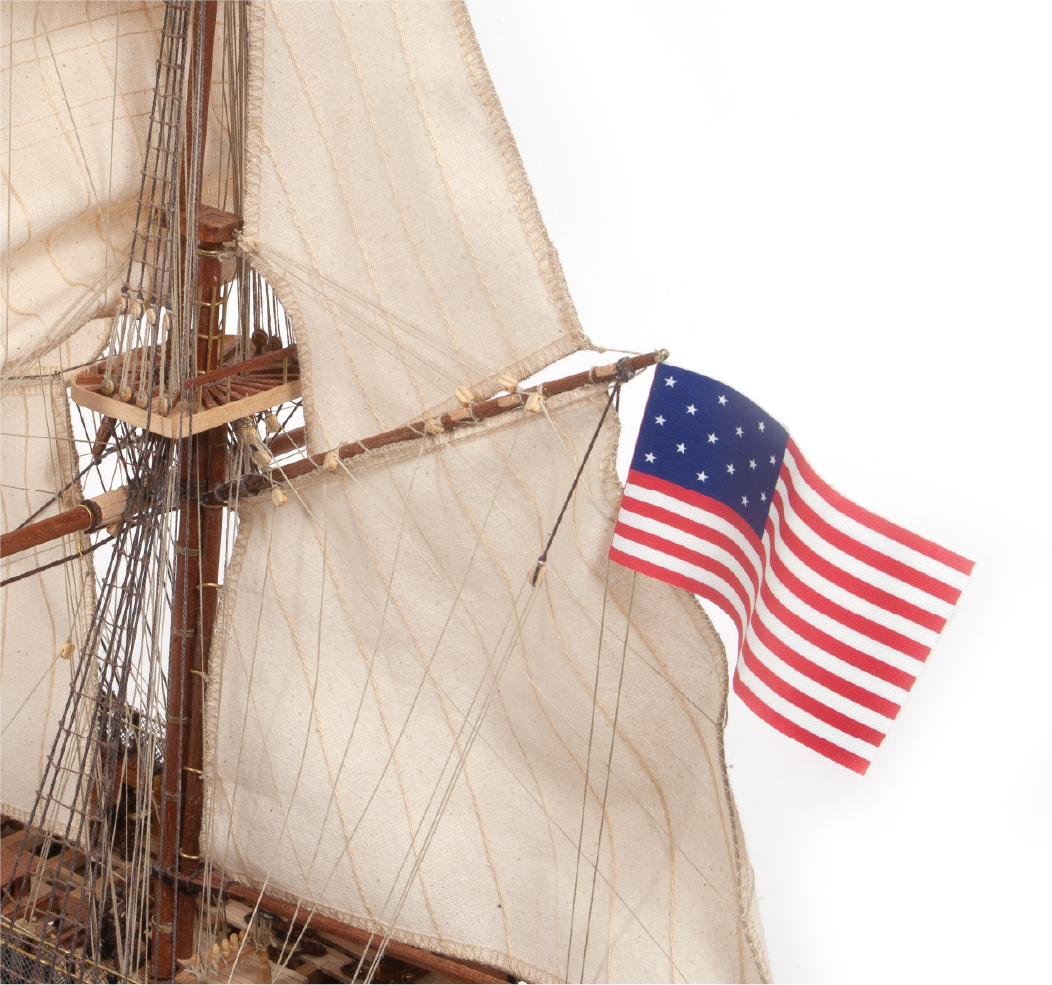
Cut out parts JT183 and JT196 (flags) then fold them in half.
![]() Watch our video for extra guidance.
Watch our video for extra guidance.
Note: The video shows how to shape the flags so they appear to be moving in the wind.
Step 11
Place thread JT184 and JT197 along the fold of each flag as shown, then glue the two flag halves together.
| JT184 | ø0.15 x 600 mm thread |
| JT197 | ø0.15 x 400 mm thread |

Step 1
Using the rigging plans
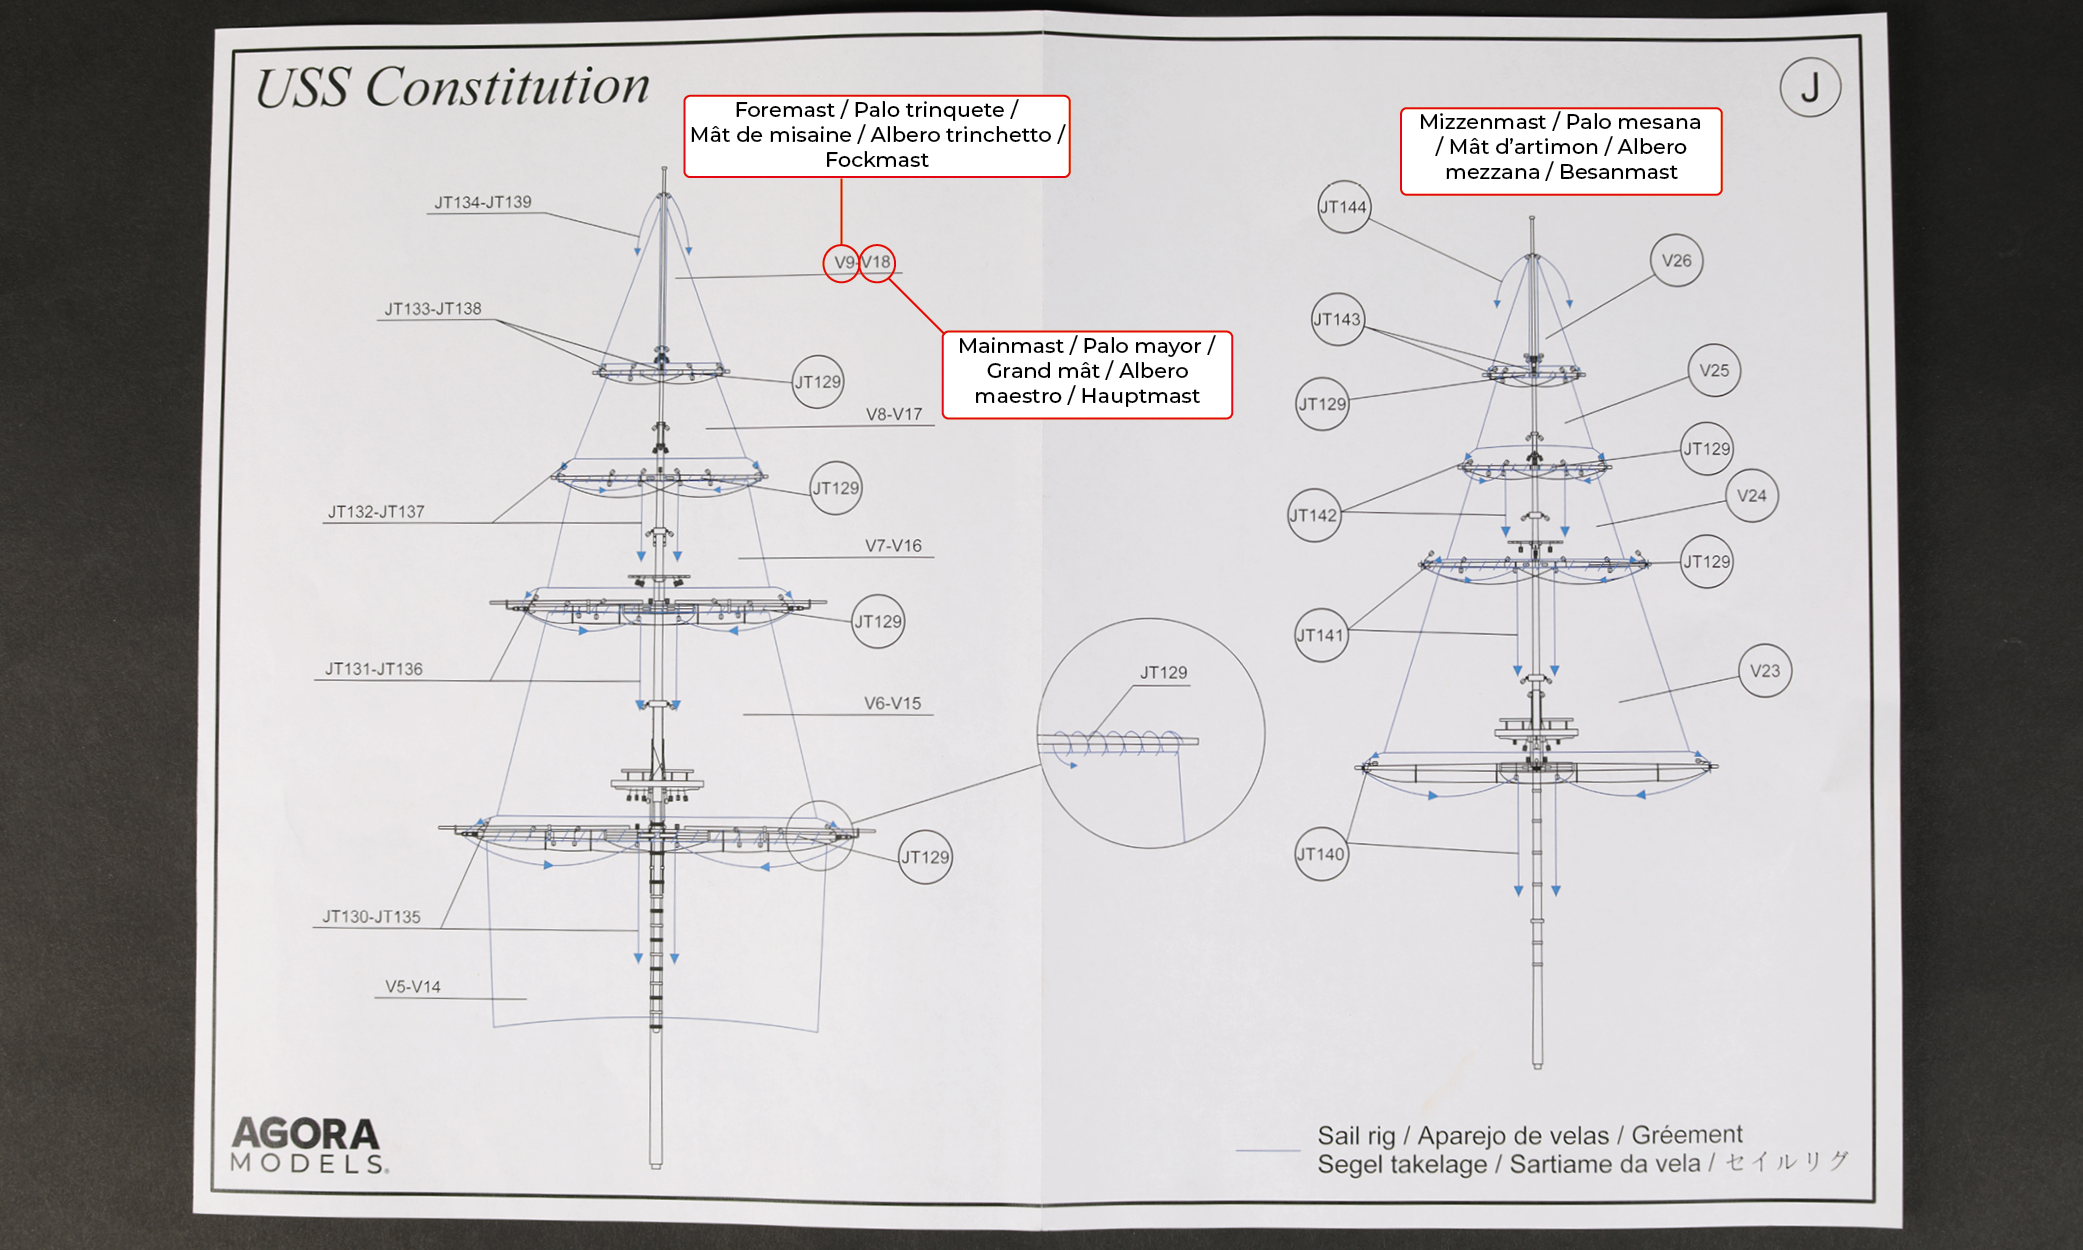
You will need to follow the rigging plans and parts list in order, starting with part JT1 on plan A. Continue with parts JT2, JT3 etc, following the sequence, and identifying the parts, as indicated on the parts list here.
On plans J, L, M and N, two part references are sometimes shown side by side; the first number refers to the foremast and the second number refers to the mainmast, as shown in the example below. These plans show the foremast and mainmast on the left, with the mizzenmast on the right.
Step 2
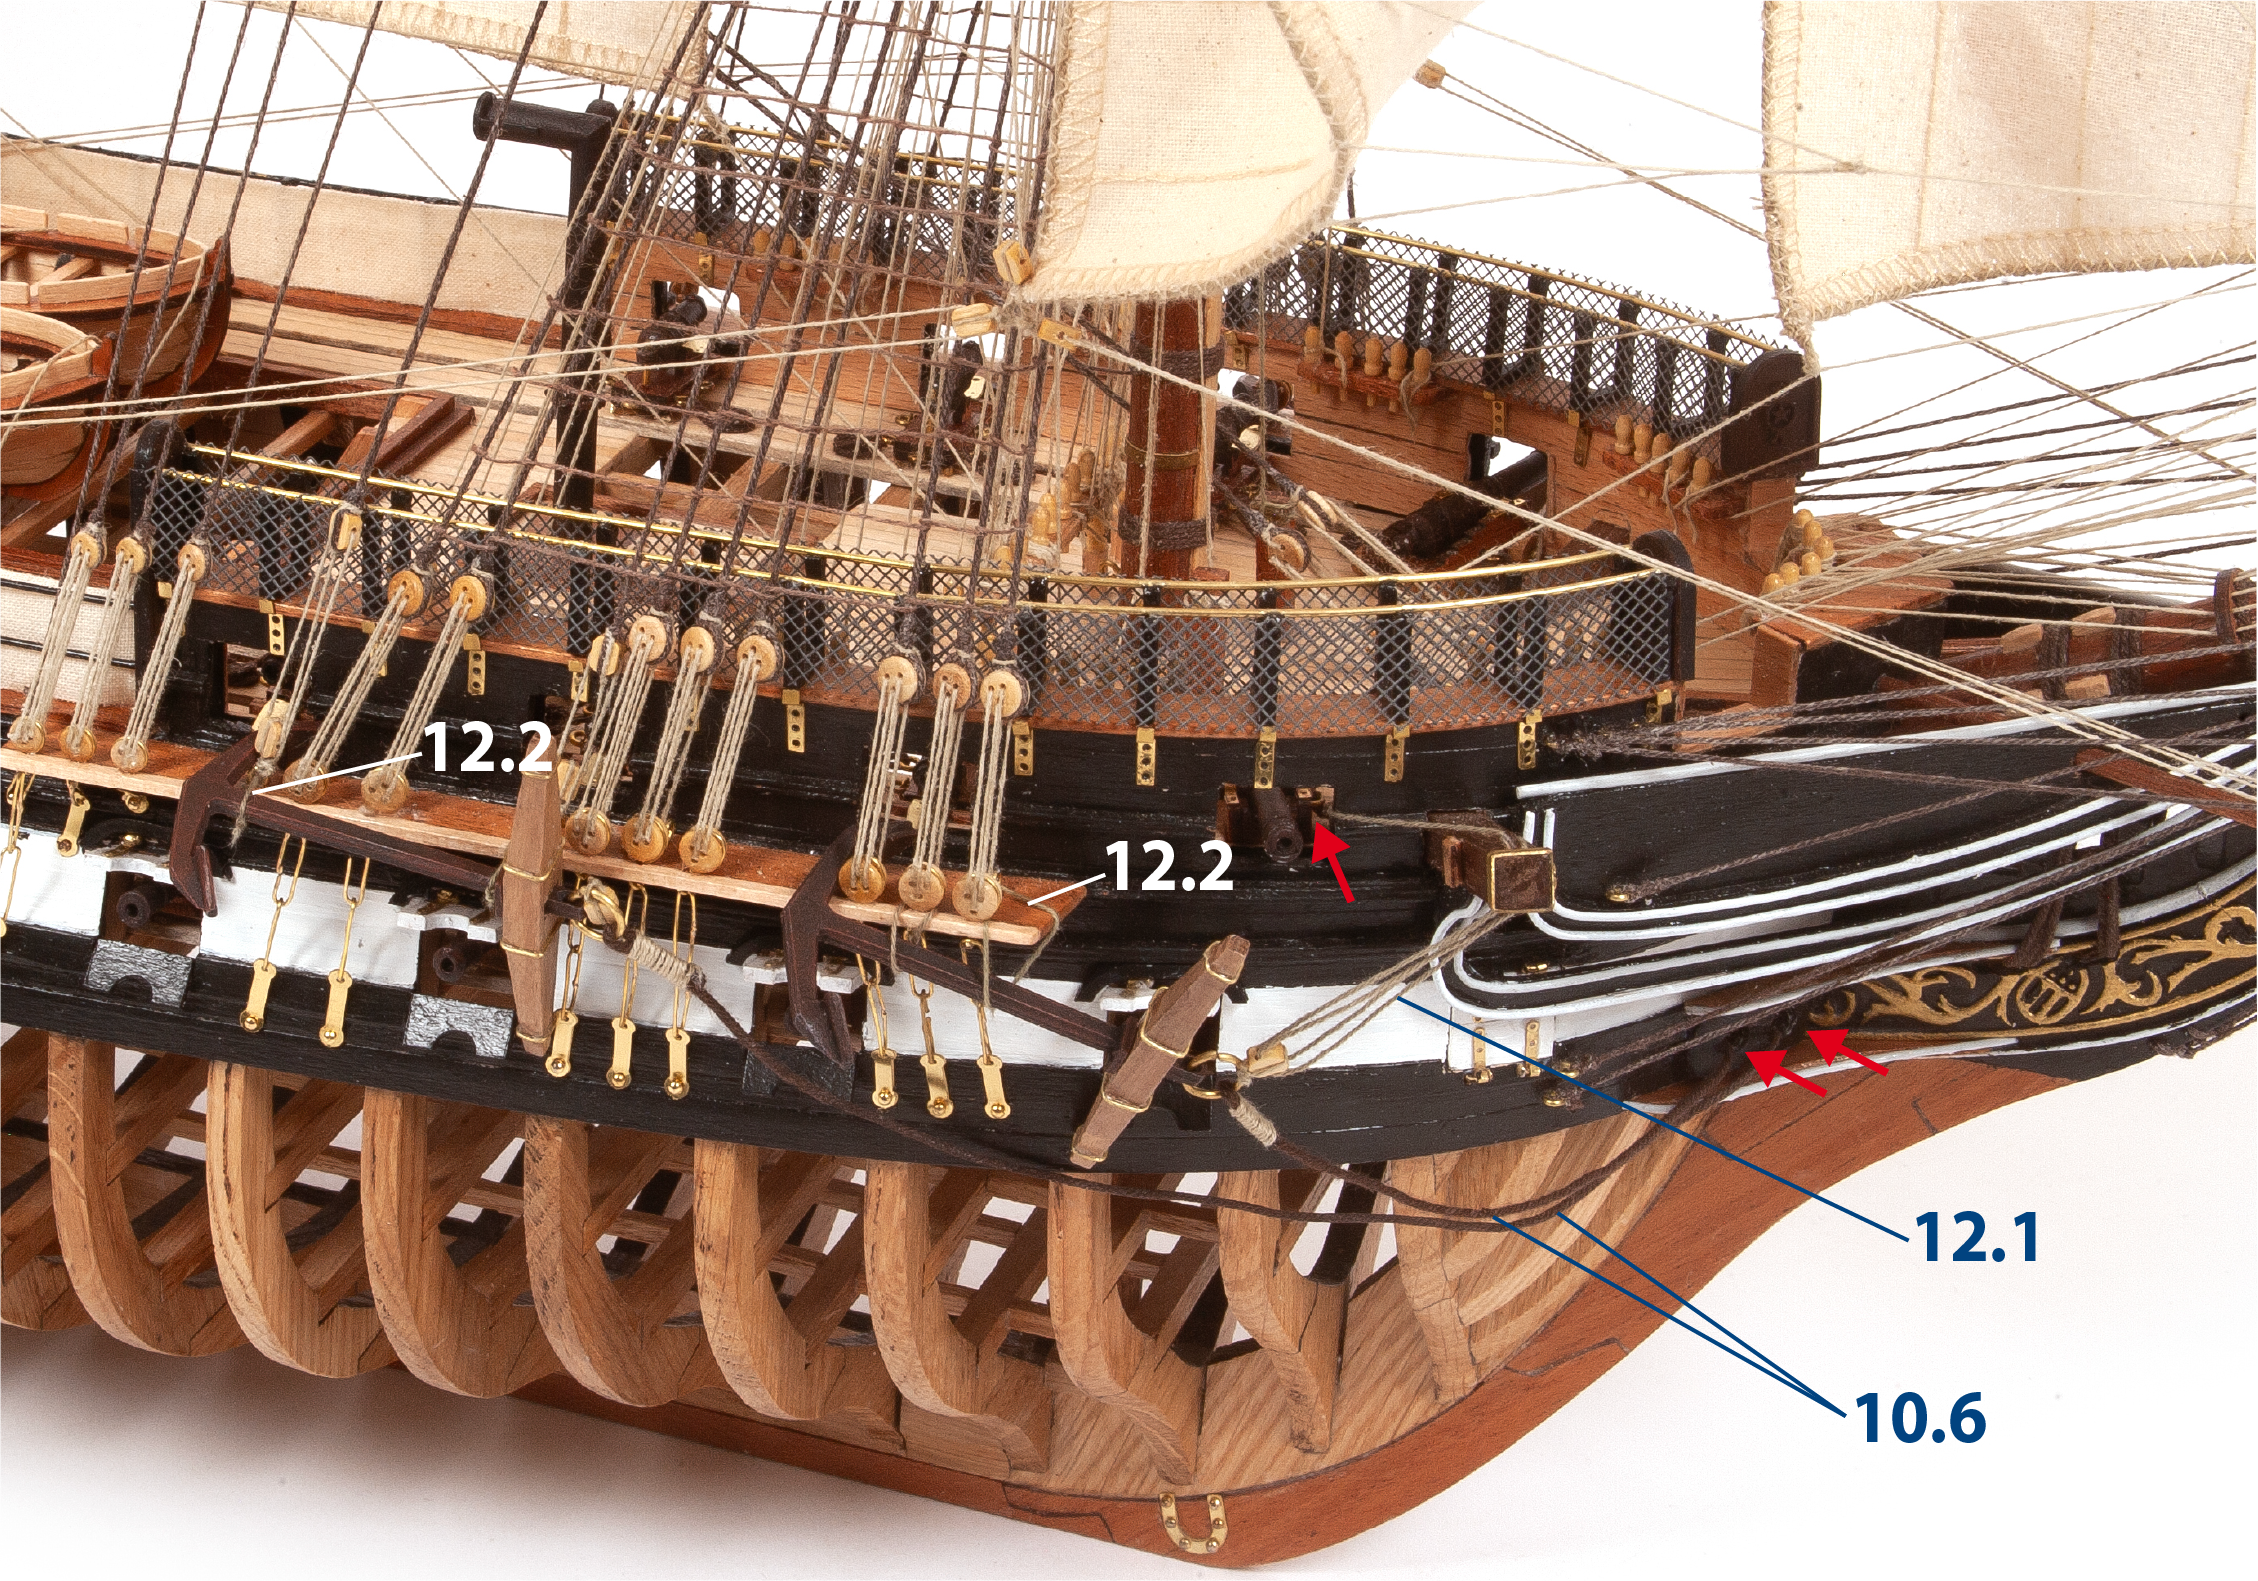
Once the rigging has been completed, the anchors can be attached. Adjust the length of threads 10.6 and insert them into the holes at the bow. Then rig thread 12.1 (ø0.15 x 200 mm) as shown on the bowsprit rigging plan. Tie the anchors with thread 12.2 (ø0.15 x 150 mm).
Step 3
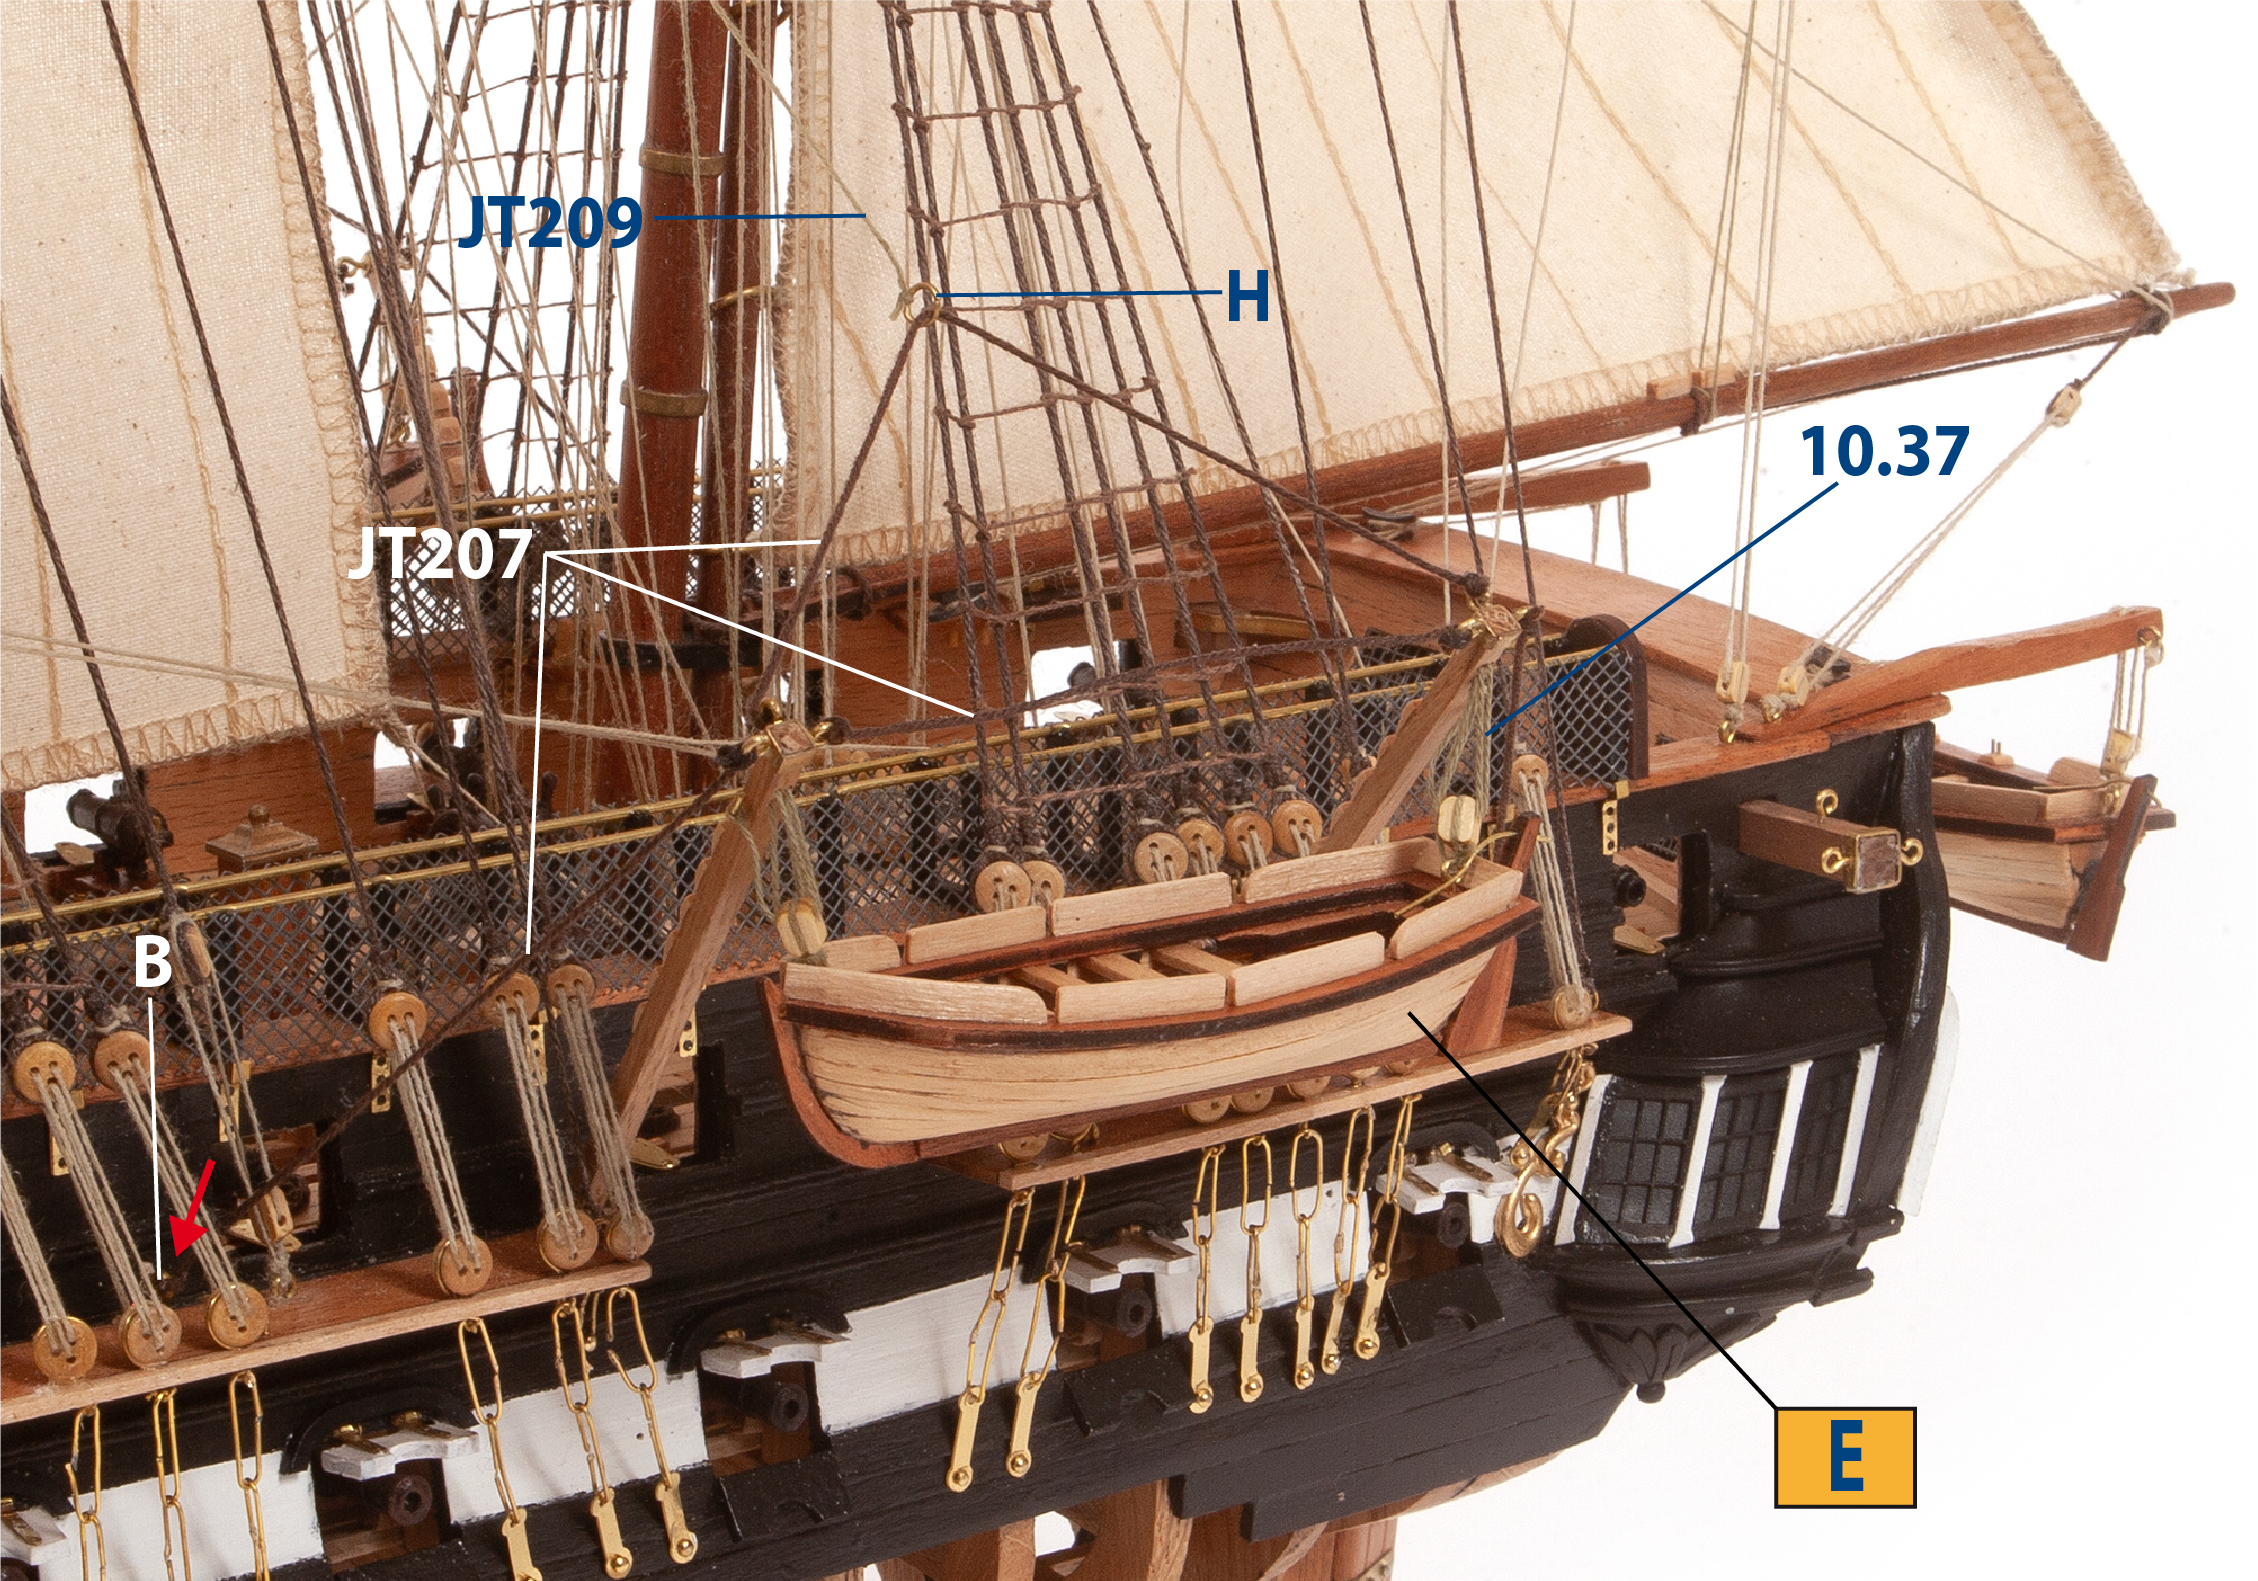
Adjust and fit the davits from pack 6, stage 31, step 16. Then, make and attach threads JT207 and JT209 as shown in the rigging plans. Attach boat E using blocks and thread 10.37, following the same method as the stern boat (pack 10, stage 60).
| JT207 | ø0.50 x 150 brown thread |
| JT209 | ø0.15 x 200 mm thread |
| 10.37 | ø0.15 x 250 mm thread |
Step 4
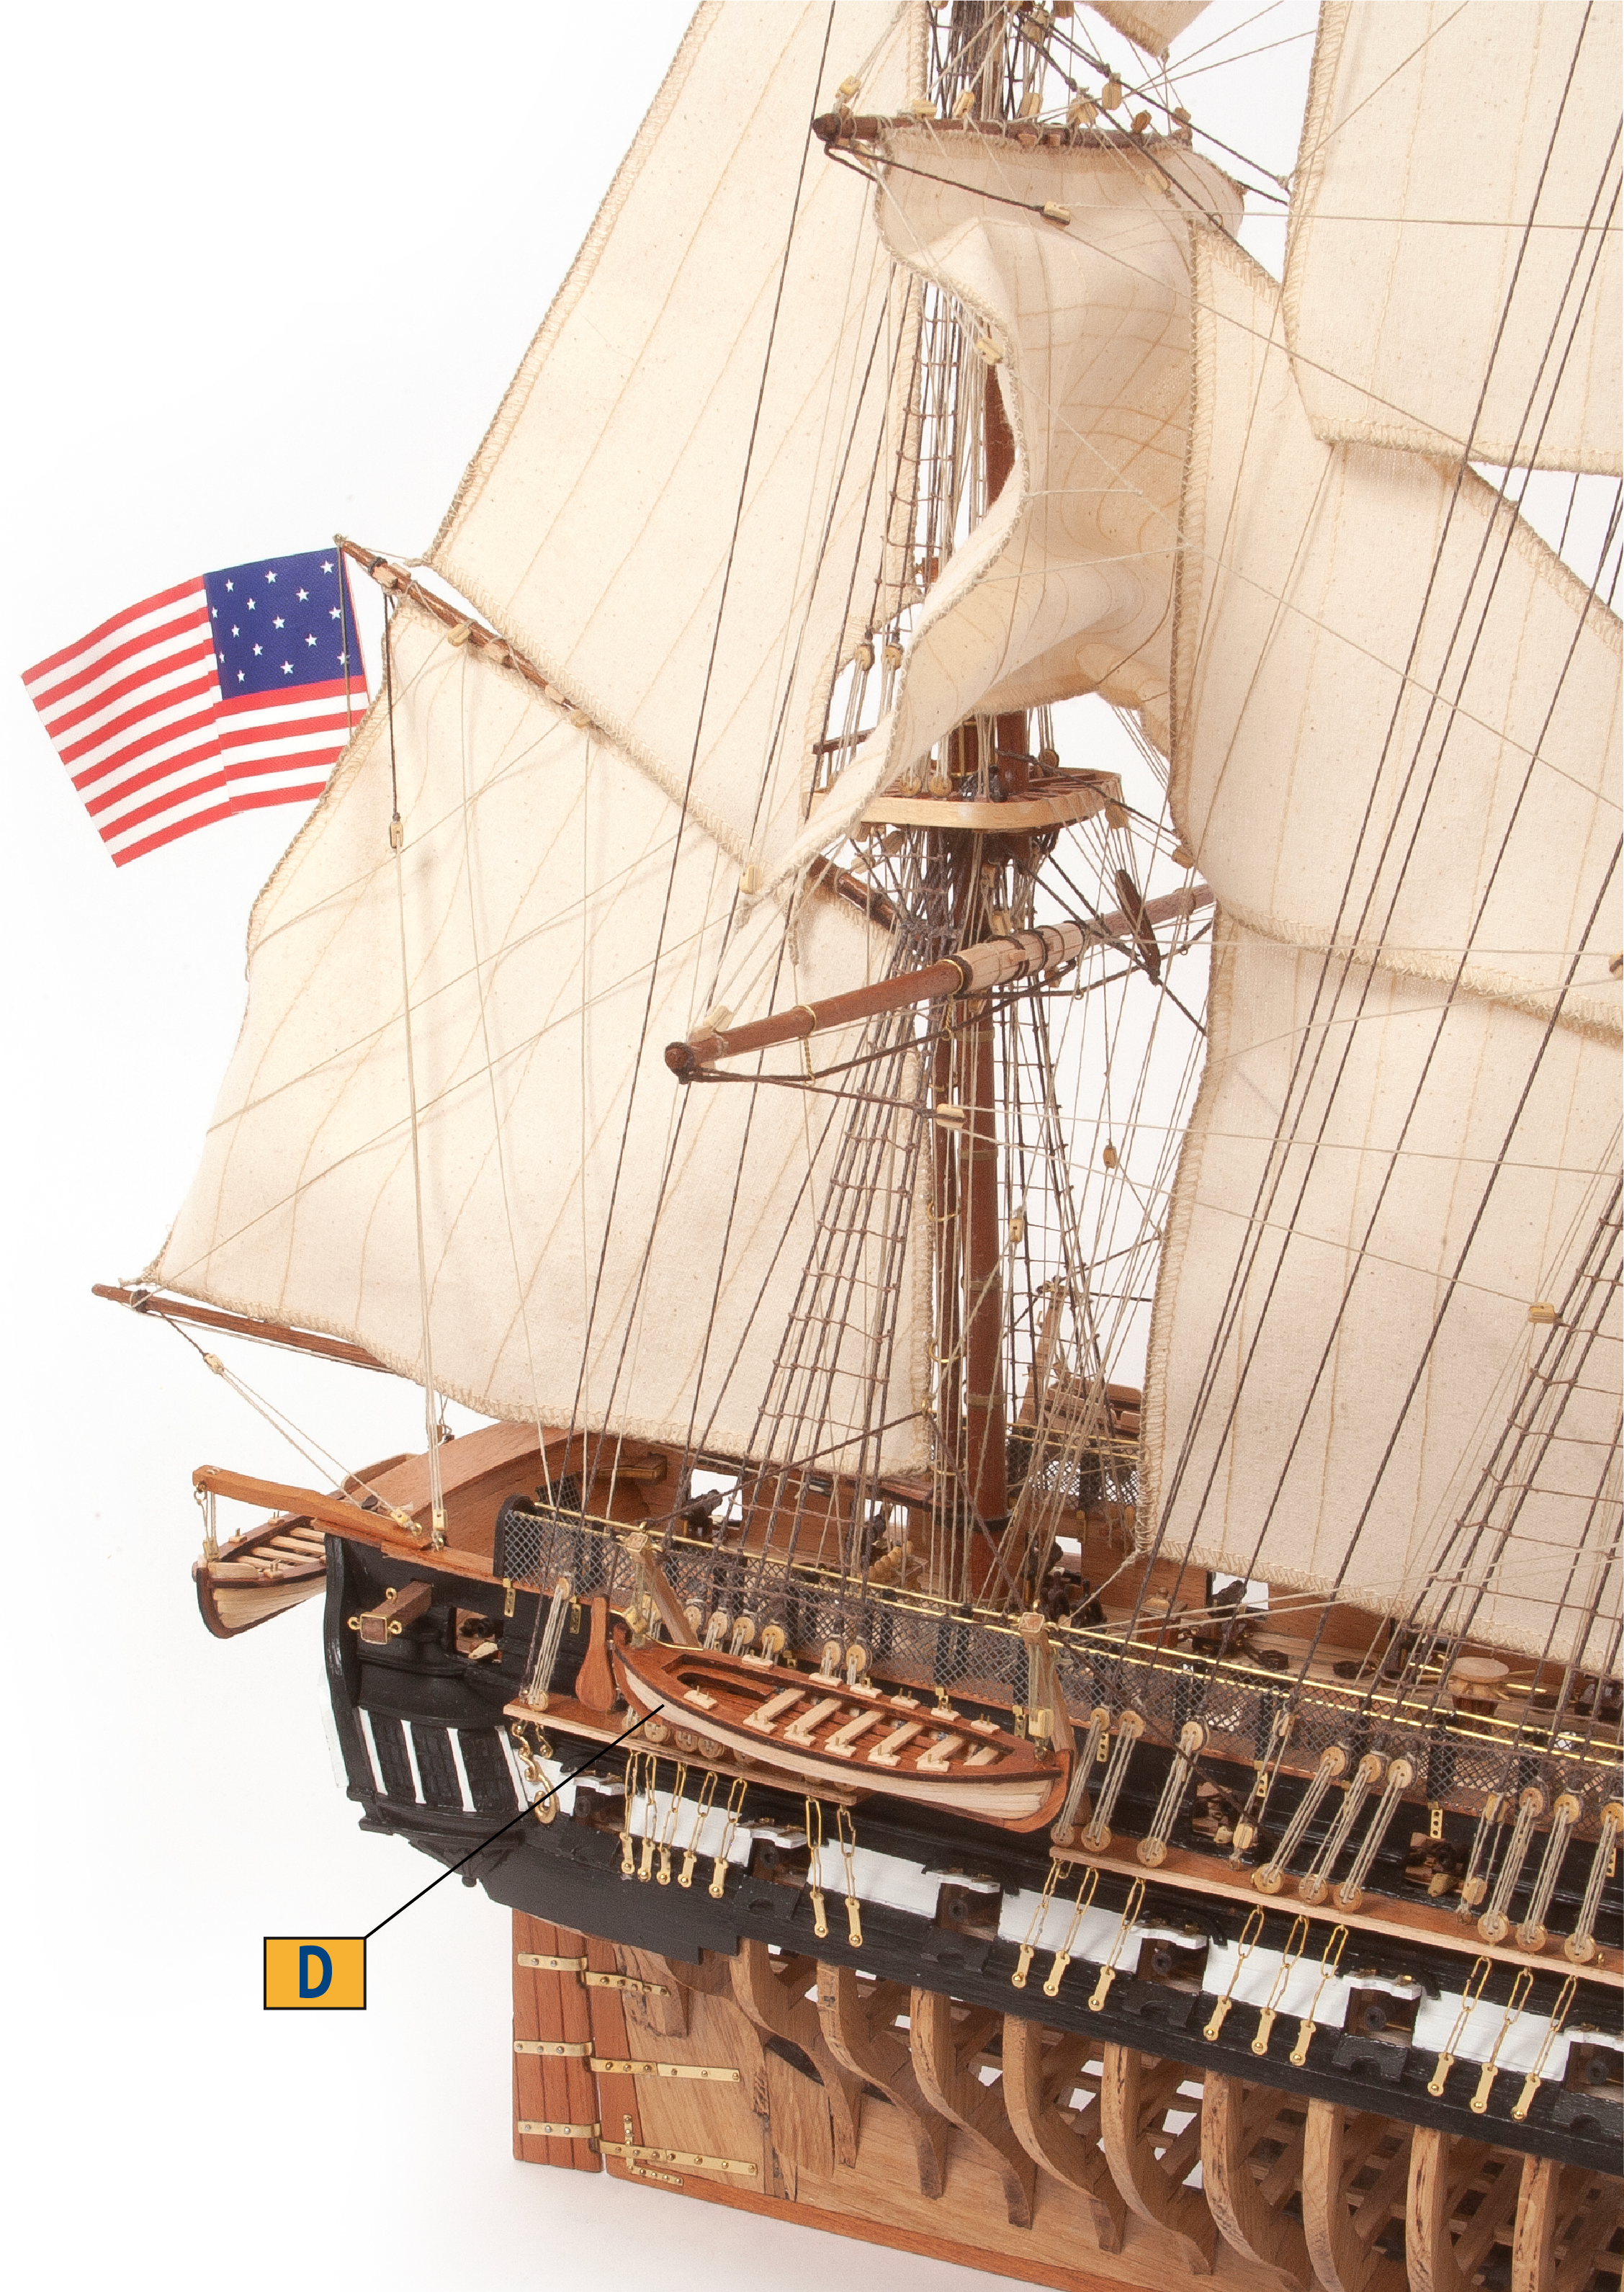
Fit boat D on the other side of the hull in the same way.
Step 1
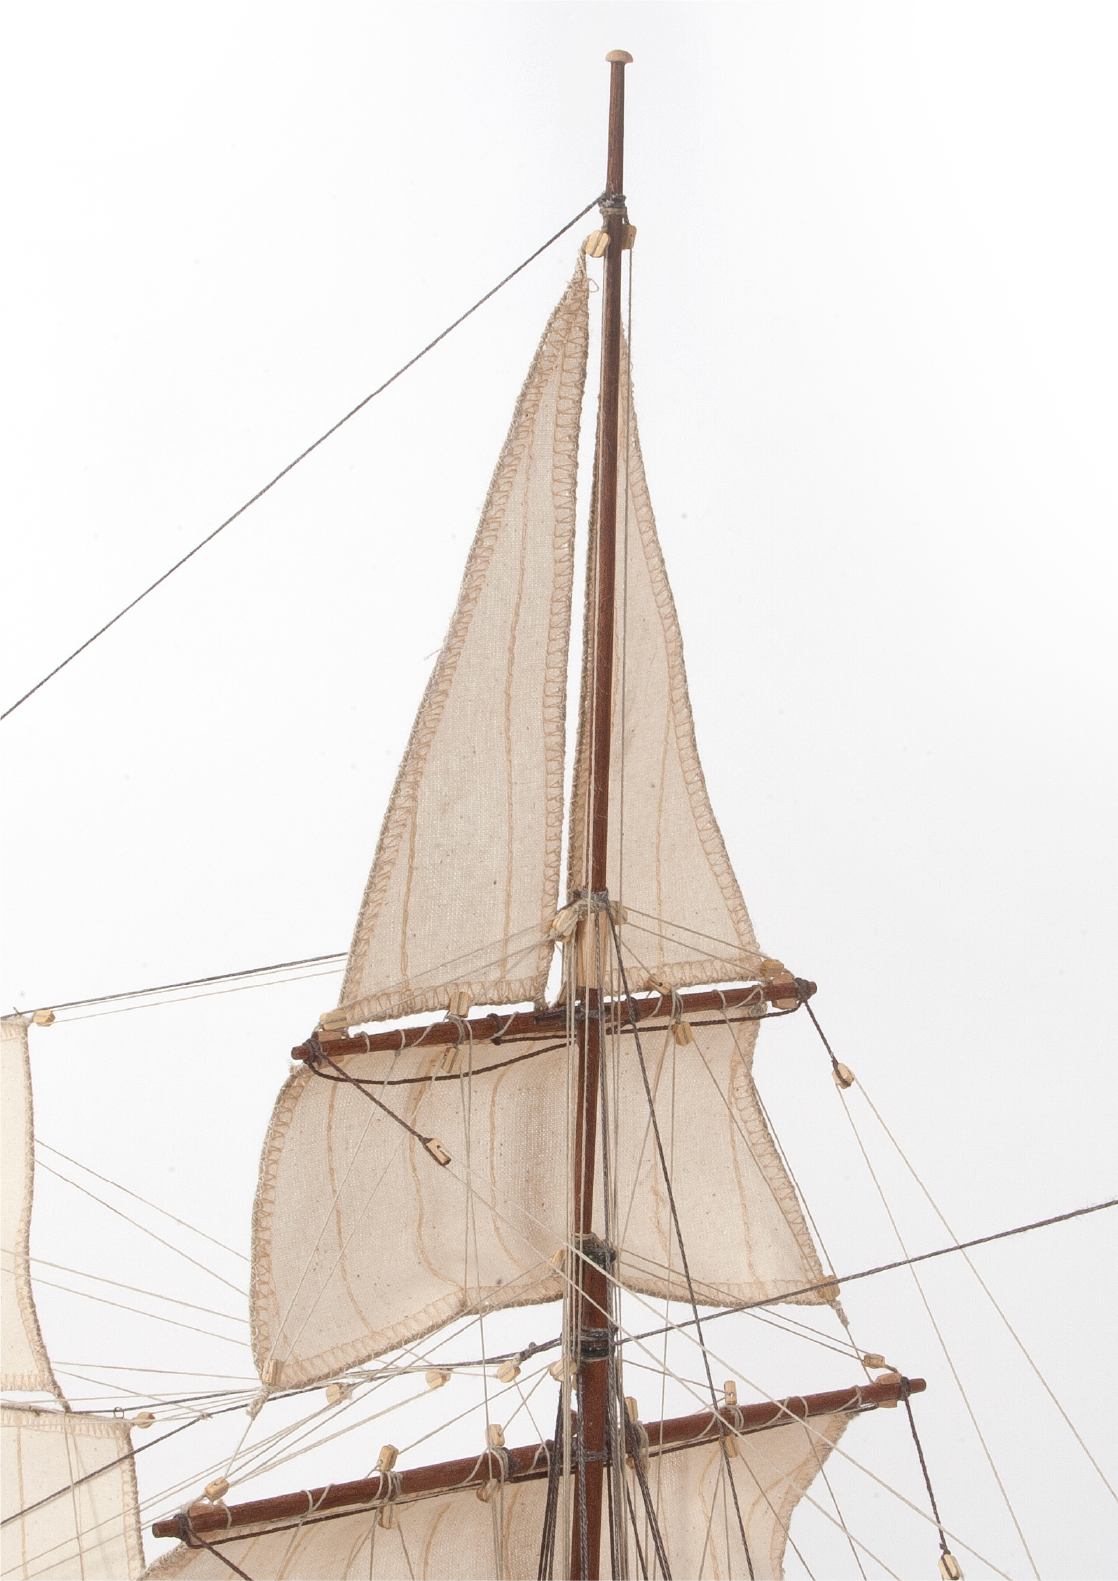
This image shows the detail of the sails at the top of the masts.
Step 2
This image shows the detail of the bowsprit in place.

Step 3
This image shows the area around the fighting tops with all the rigging lines in place.
Step 4
This image shows the ensign attached at the stern.
Step 1
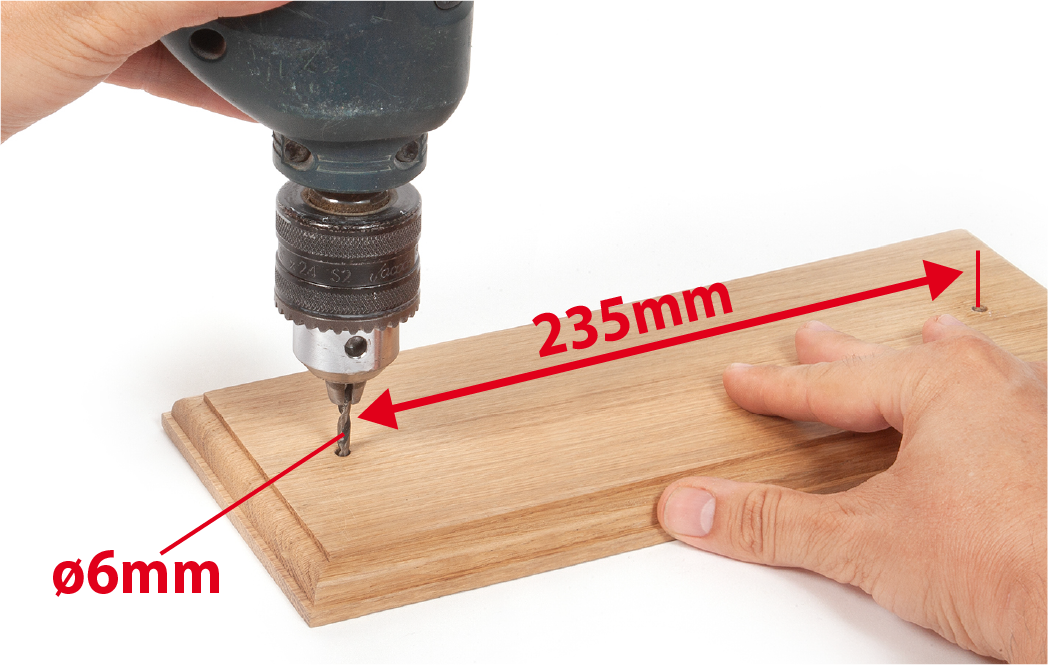
Drill two ø6 mm holes, centred on the display base (supplied in pack 7), to fit the supports. Space them 235 mm apart, centre to centre.
Step 2
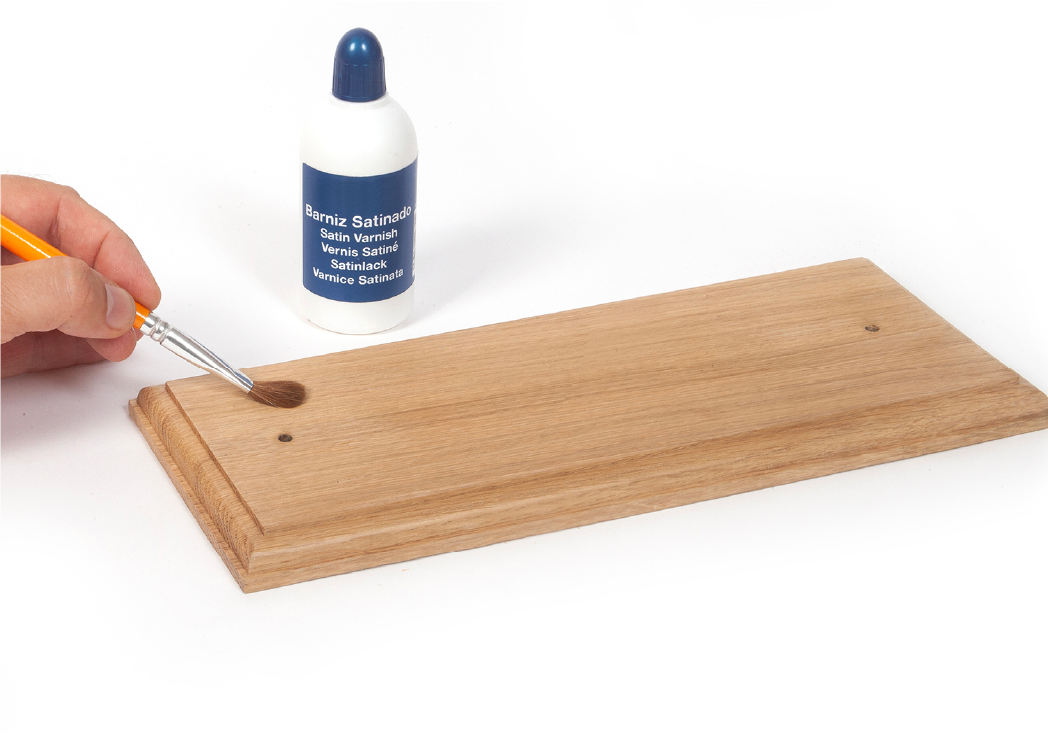
Sand all surfaces of the display base then apply varnish. Set aside until dry.
Step 3
Insert and glue the supports (supplied in pack 7) into the holes, aligned to accommodate the keel of the ship. Glue the U.S.S. Constitution nameplate onto the display base.
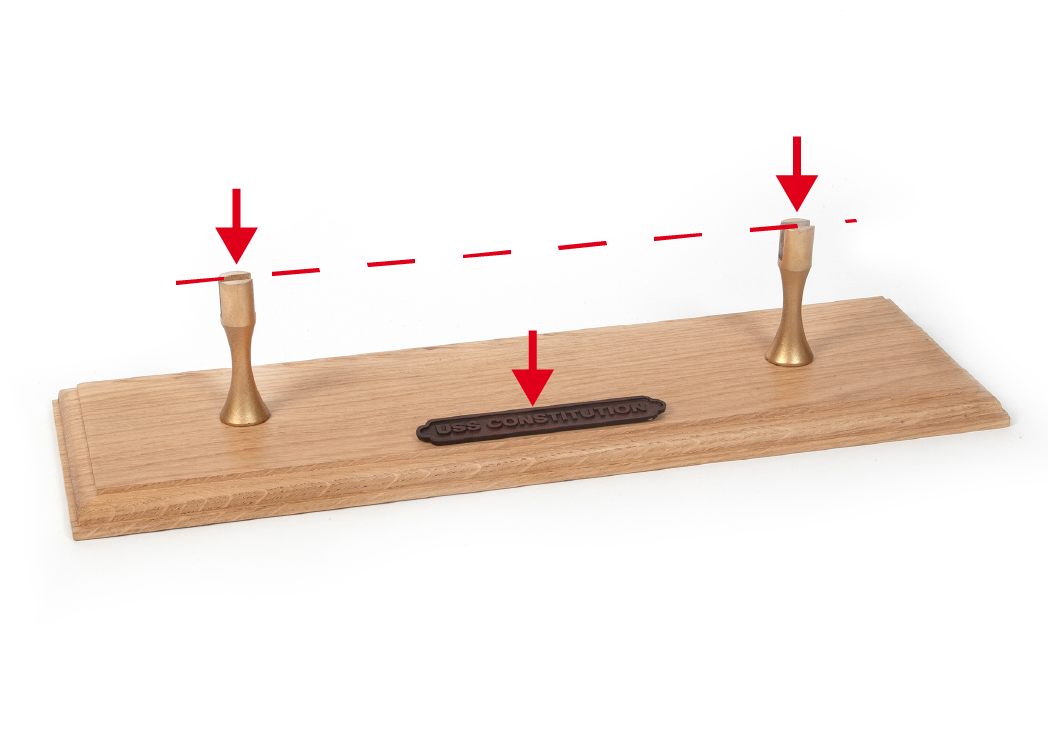
Step 4
Finally, place the model on the supports. You may need to make some adjustments so that the hull of the boat sits correctly on the supports.
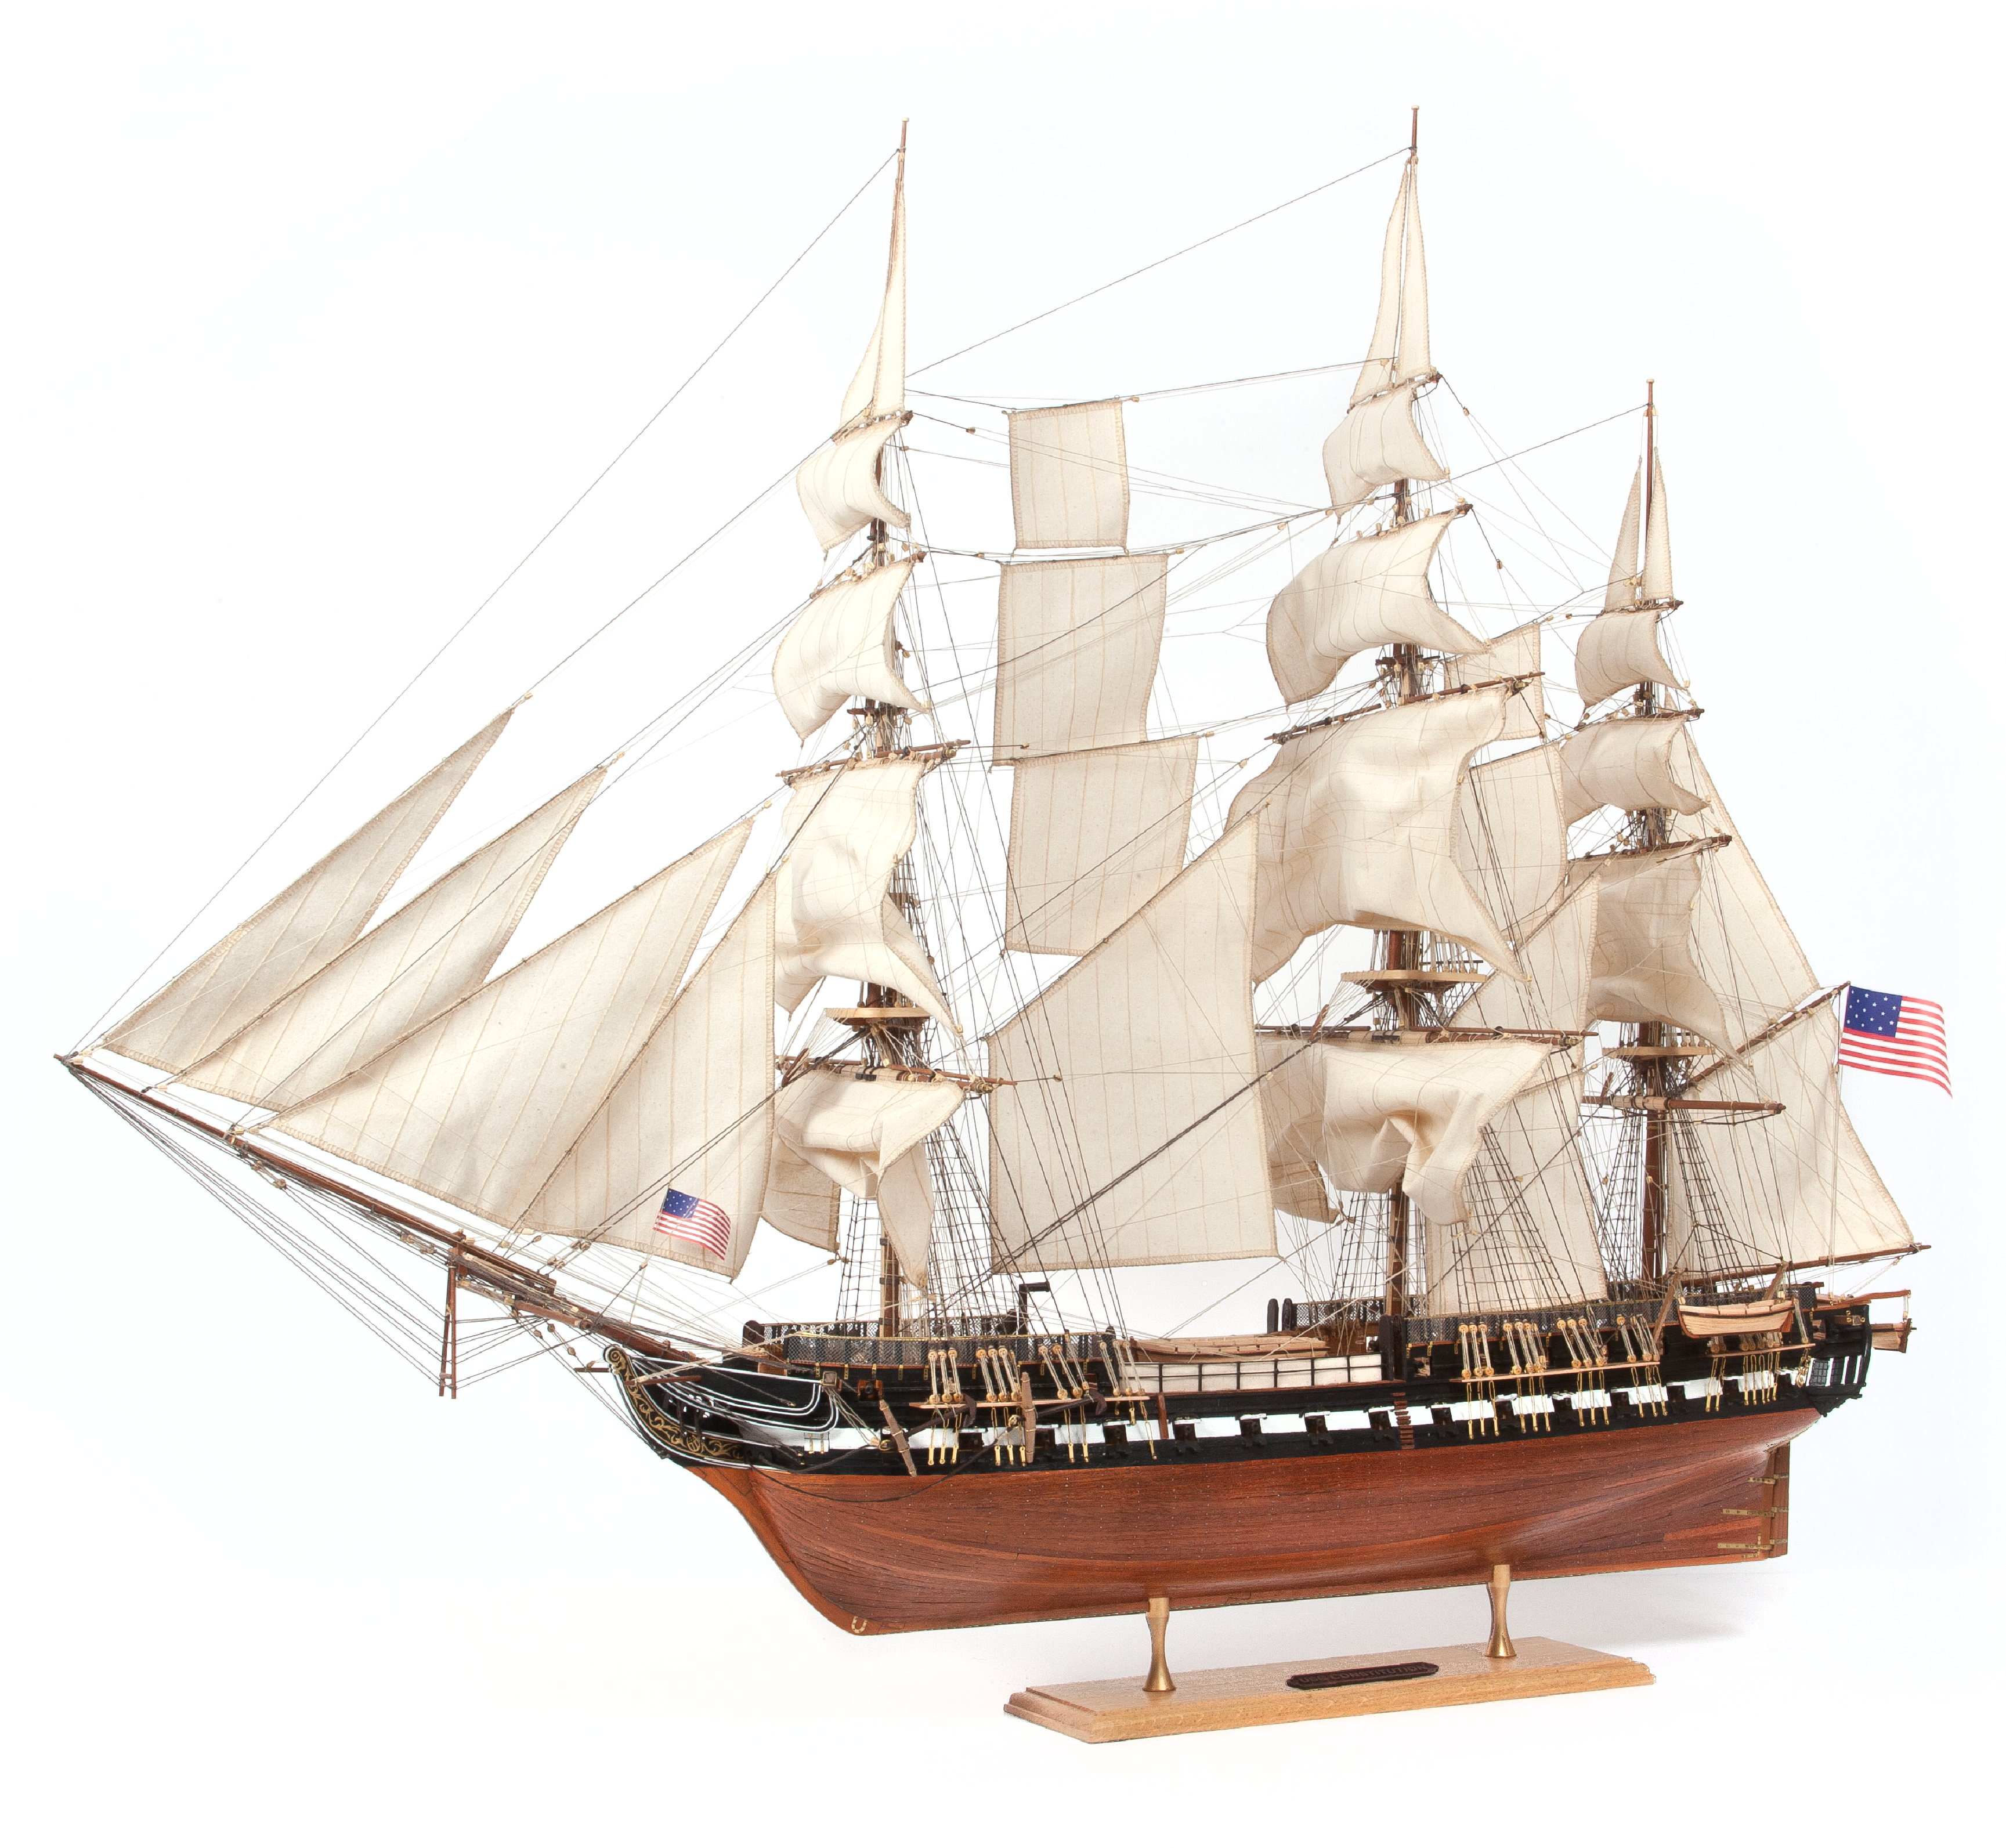
Your model is now complete!
Don’t forget, as an Agora Advantage Club member you will have Reward points to redeem. You may now have enough points to enjoy a free pack 1 for your next model.