Pack 10
BUILD INSTRUCTIONS
Advice from the experts
Spare screws are included with each part. Occasionally, you may be instructed to keep spare or unused screws for a later stage. Keep these spares in a safe place and label them correctly.
Please make sure you don’t mix up the screws. They look quite similar, but the threads do vary slightly. Using the wrong screws may damage the parts. Only use the correct size screwdriver that fits the screw head firmly.
When securing parts together using multiple screws, fit each screw loosely to ensure all the parts are correctly aligned before gently tightening them firmly, but not overtight, in the order in which you placed them.
The screwdriver can be magnetized by stroking it with a magnet (fridge magnet, etc.) enabling it to hold the screws and make assembly easier.
If a screw is tight going into a metal part, do not force it as you may shear the head off. Remove it and put a tiny smear of Vaseline, soap or light oil on the thread. That will lubricate it and make it easier to tighten.
Some parts will require a little glue for assembly. Please apply glue sparingly and use a cocktail stick so that you don’t use too much nor apply the glue too heavily. We recommend superglue gel or Extra Thin Liquid modeling glue. Where possible, parts should be test-fitted in place before gluing.
Make sure you have good ventilation when using adhesives and to replace caps firmly.
Use a magnet to help find screws that have fallen on the floor.
Use masking tape to hold parts temporarily in place.
Cut parts from a sprue (framework) with side cutters or a craft knife. Side cutters tend to be easiest.
During the course of this build, you will receive many pieces that you will assemble immediately – following the instructions in the corresponding stage – and other pieces that you should store safely to one side, for use in future assembly stages.
Always protect the paint finish on components by placing a cutting mat, sheet of white paper or soft cloth on your work surface.
When plugging in wires, ensure the power is switched off. Tweezers can be used to fit the PVC wires by gripping carefully around 5mm from the end of the wire. If a wire needs to be removed from a socket, do not pull on the wire as this could damage the connection. Grip the plug with tweezers to remove it.
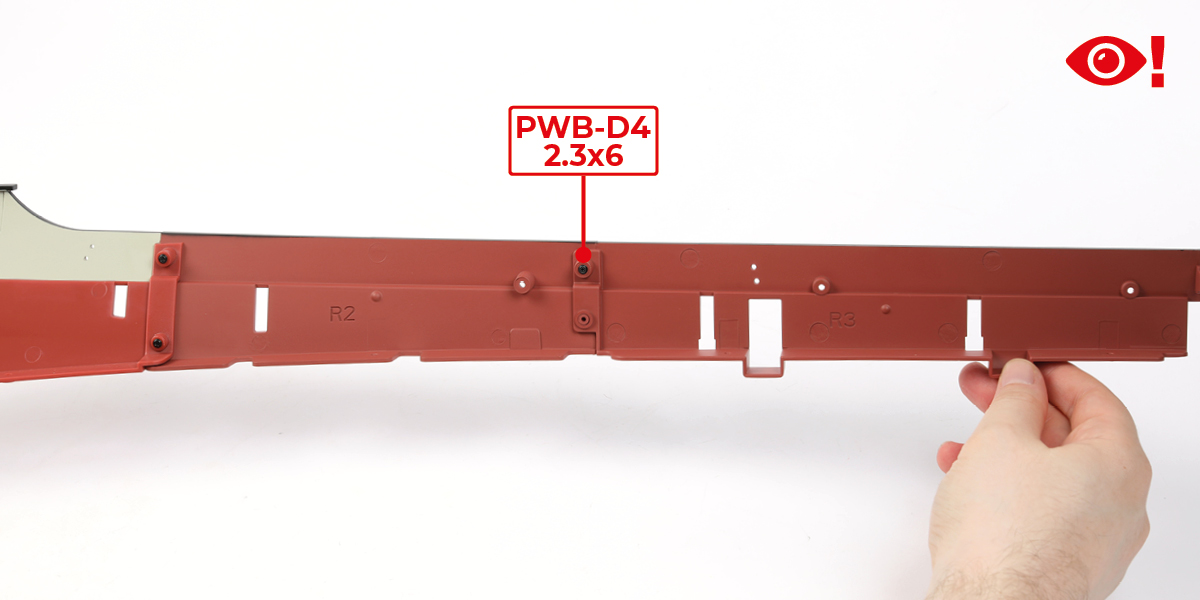
 When you see this symbol, pay attention to the instruction text in bold and check the orientation of the parts in the image as this will be particularly important for assembly in later stages.
WARNING: Some parts are assembled using magnets. These magnets can cause serious injury if they are swallowed. Keep away from children. If you suspect a magnet has been swallowed, seek medical help straight away.
This is not a toy. Not suitable for children under 14 years old due to small parts. Adult supervision required.
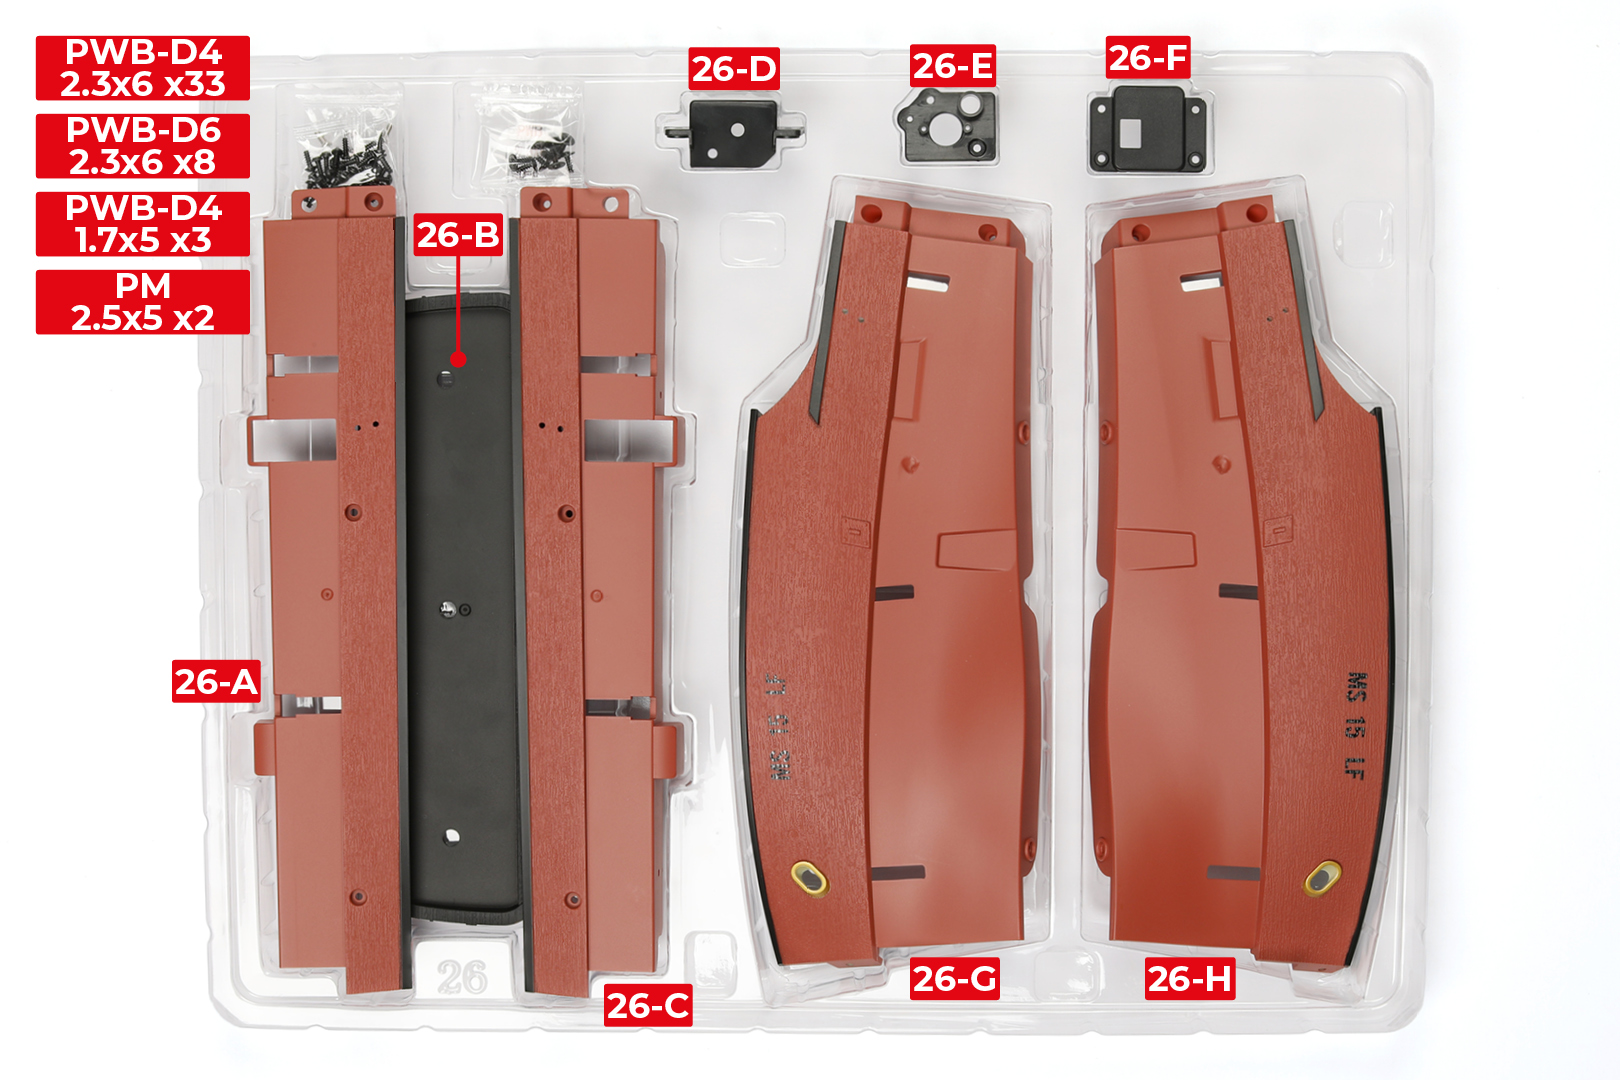
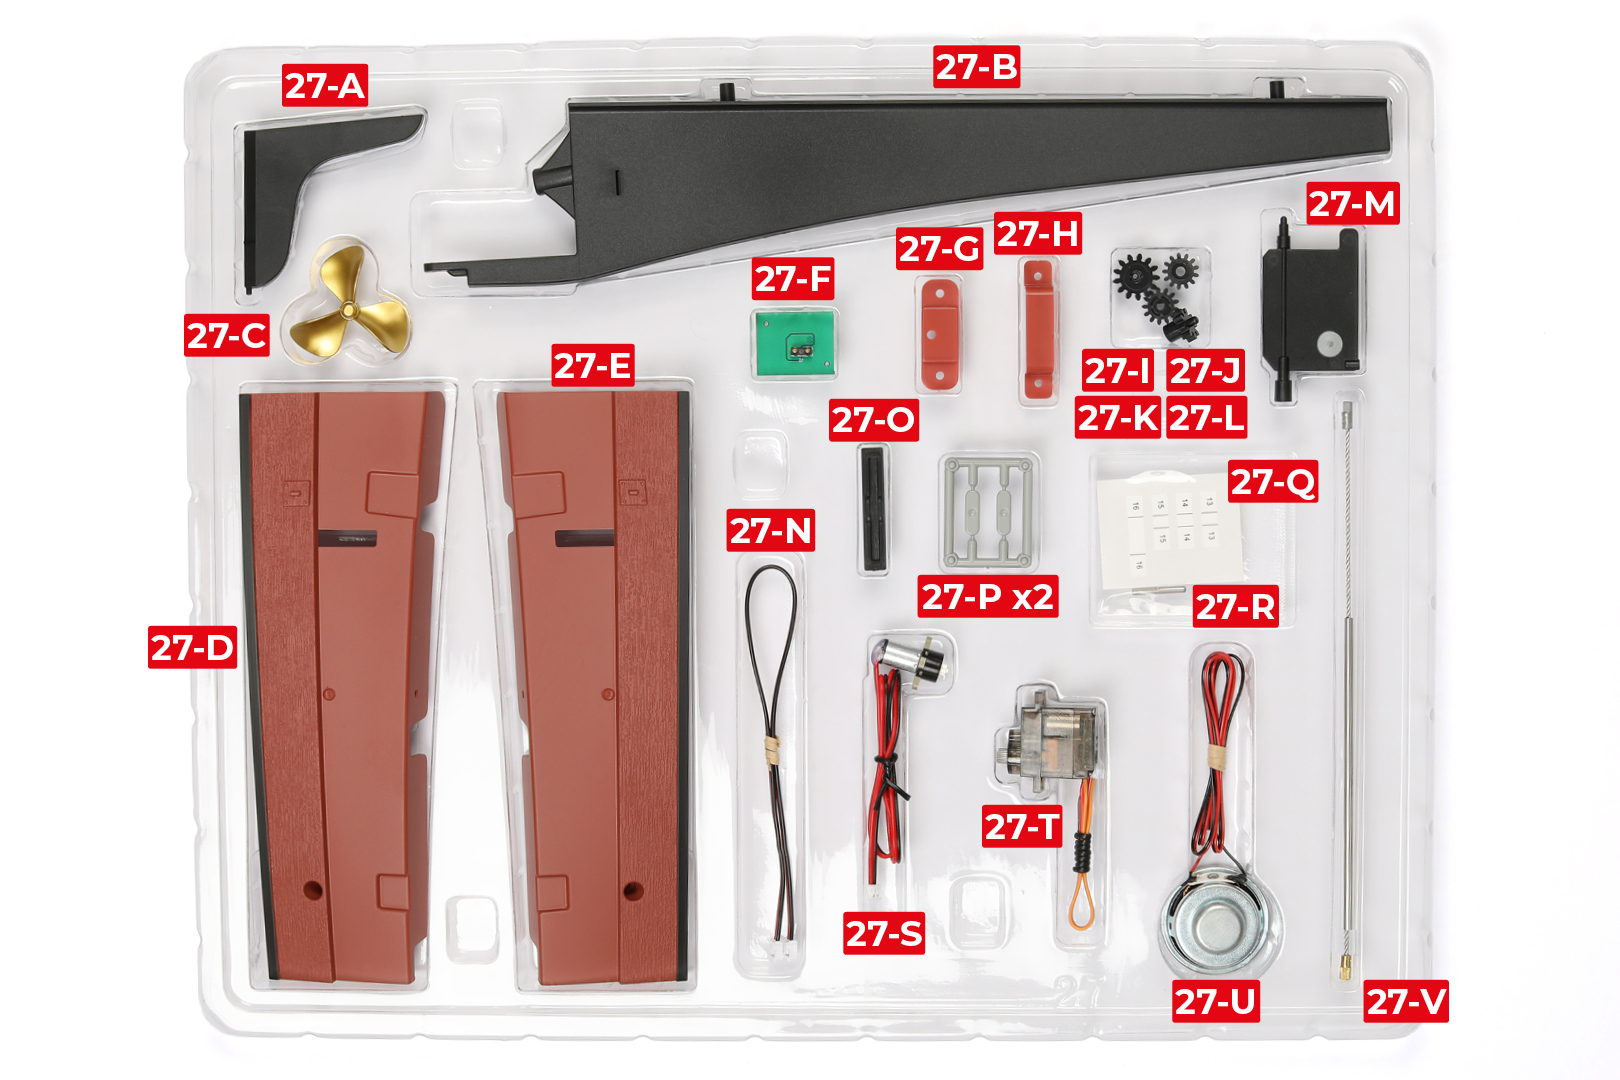
PACK 10 PARTS
Step 1
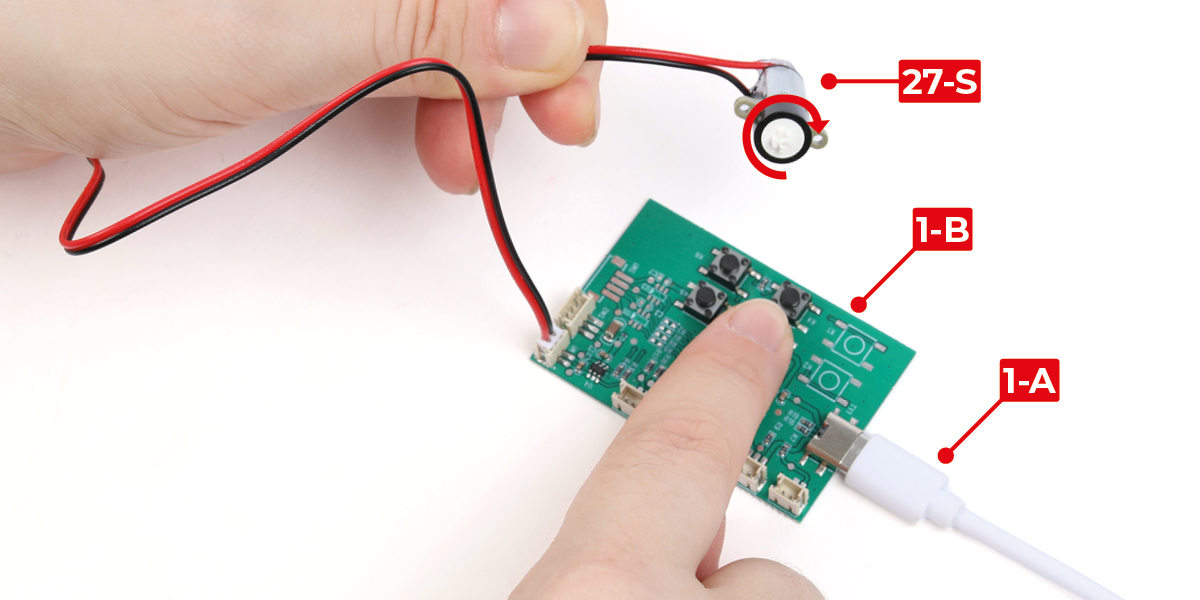
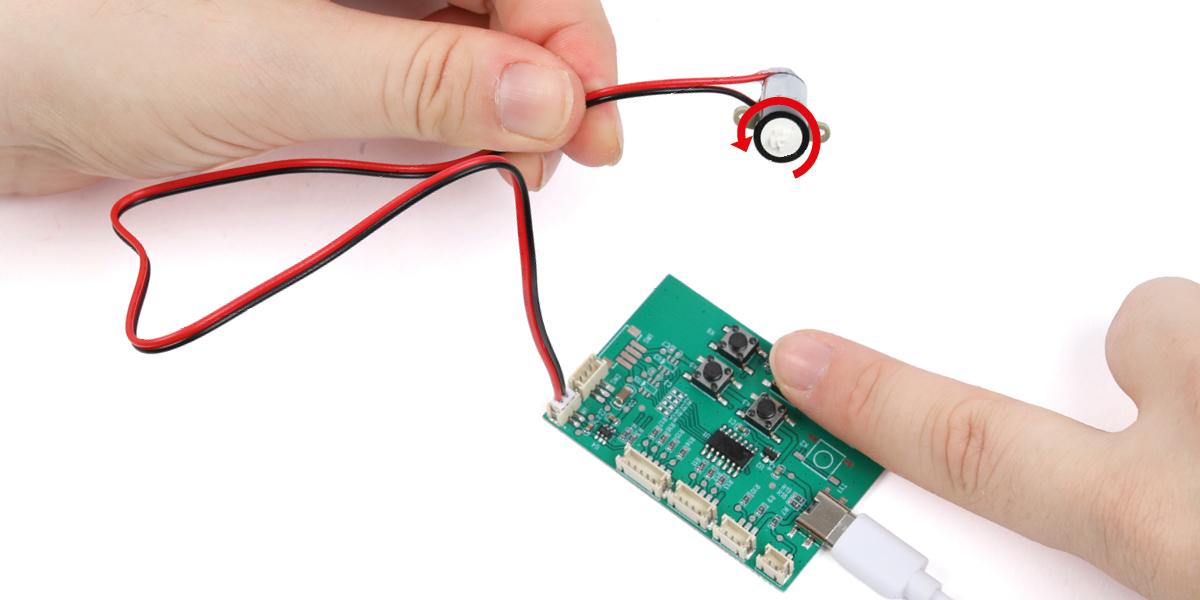
Plug the motor 27-S into the circuit tester (1-B), then press each button separately. The motor should rotate clockwise and counterclockwise, as shown.
Step 2
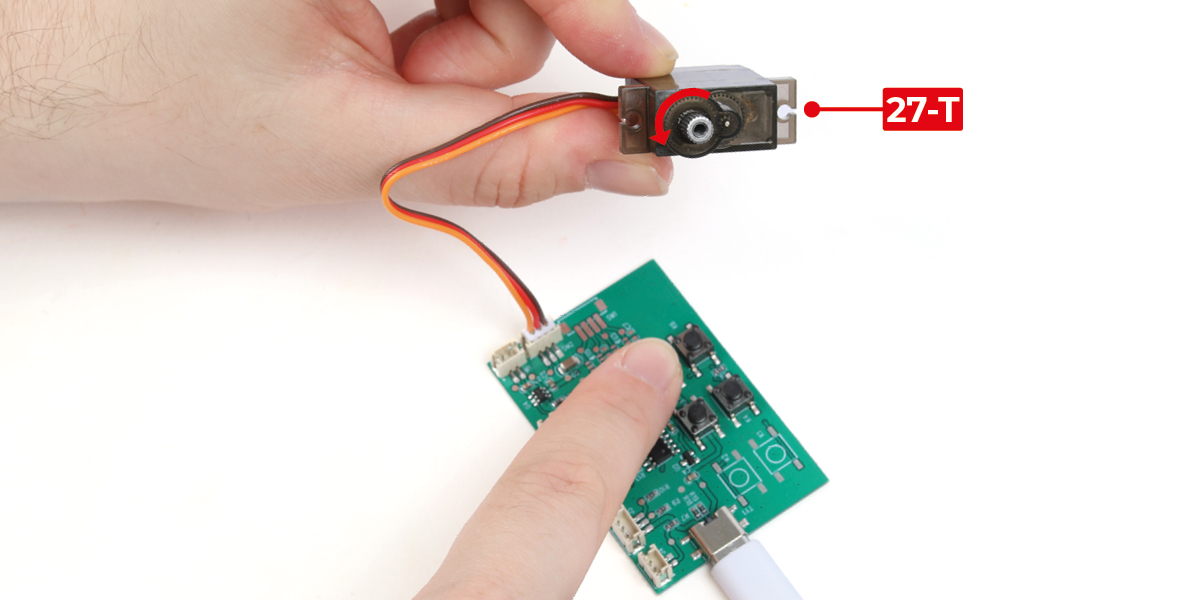
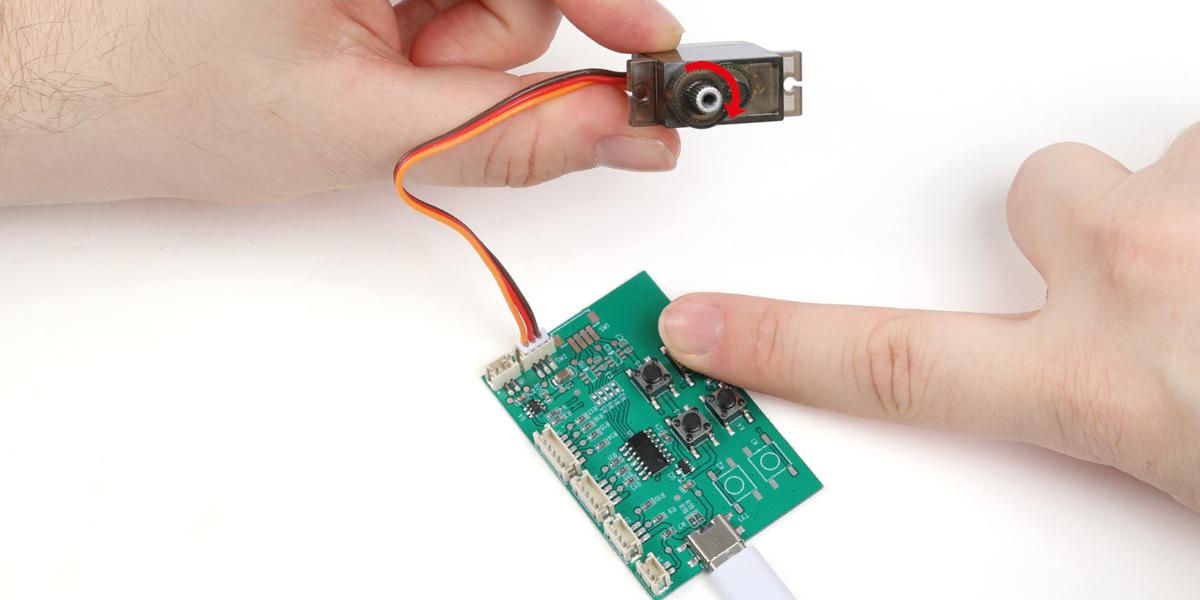
Plug the servomotor 27-T into the circuit tester, then press each button separately. The servomotor should rotate approximately one turn clockwise when one button is pressed and approximately one turn counterclockwise when the other is pressed, as shown.
Step 3
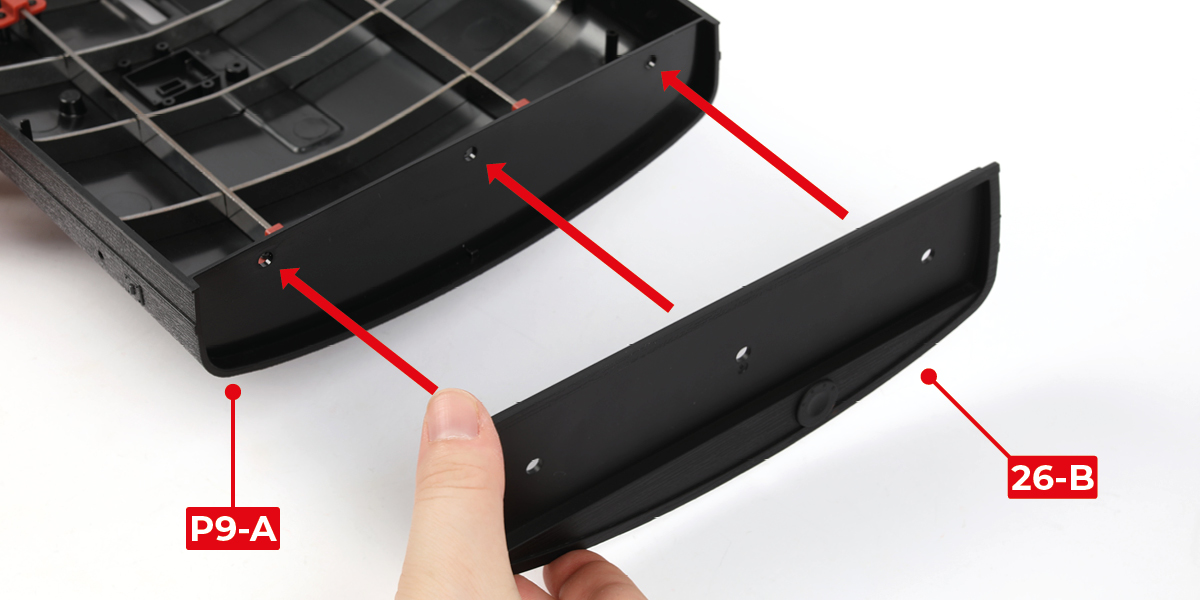
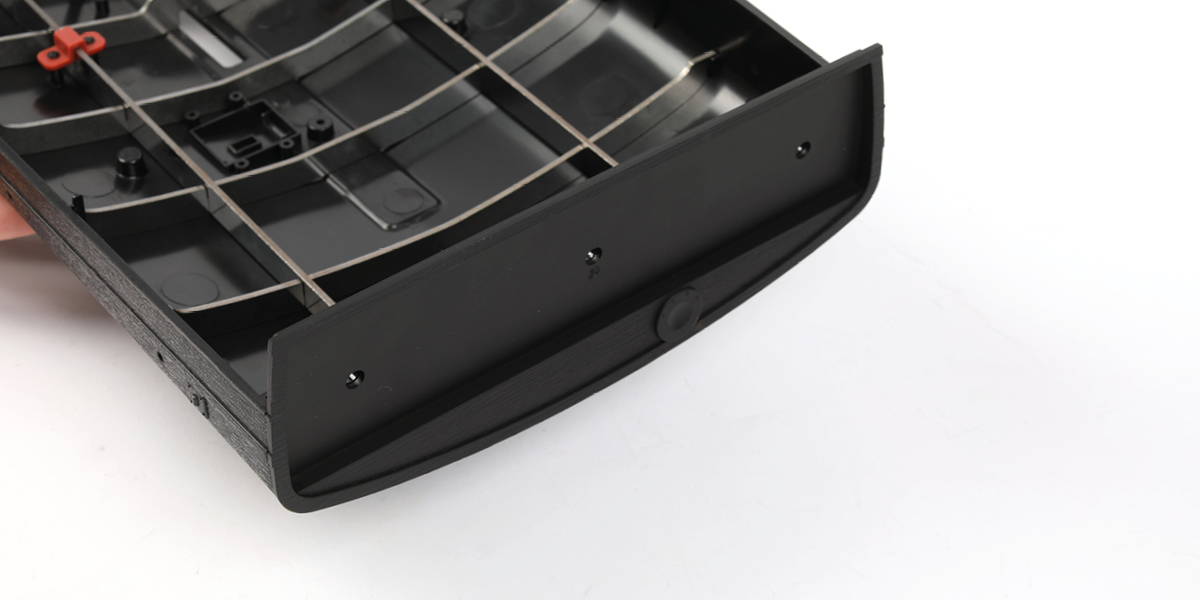
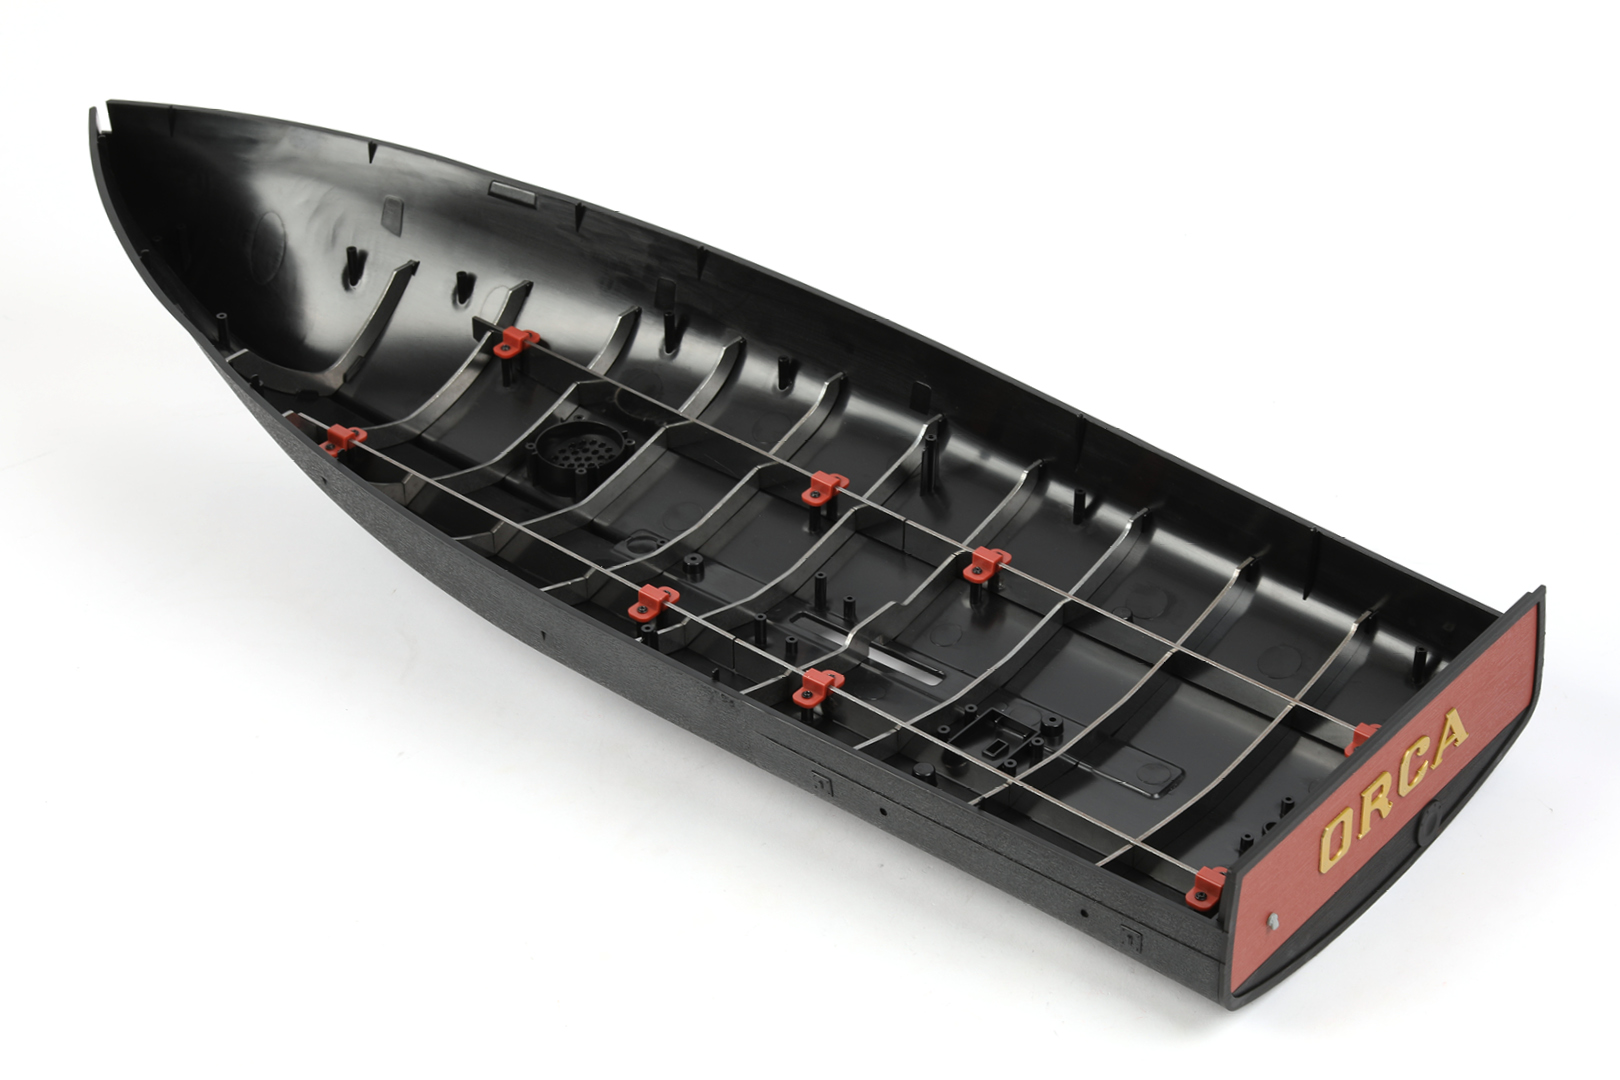
Position part 26-B onto the hull assembly from pack 9.
Step 4
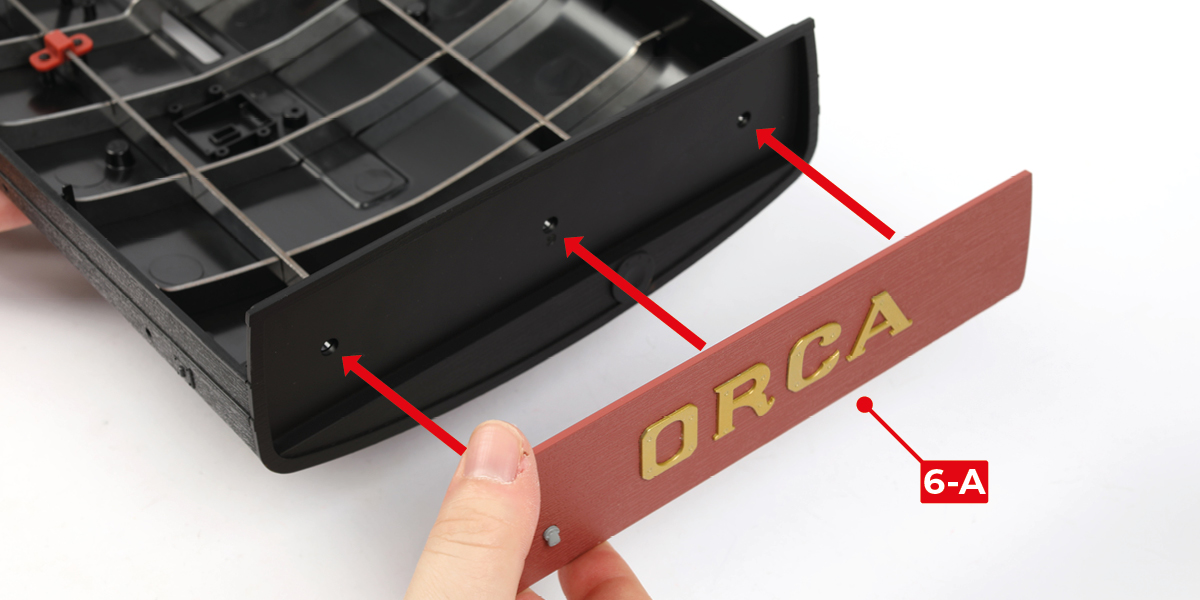
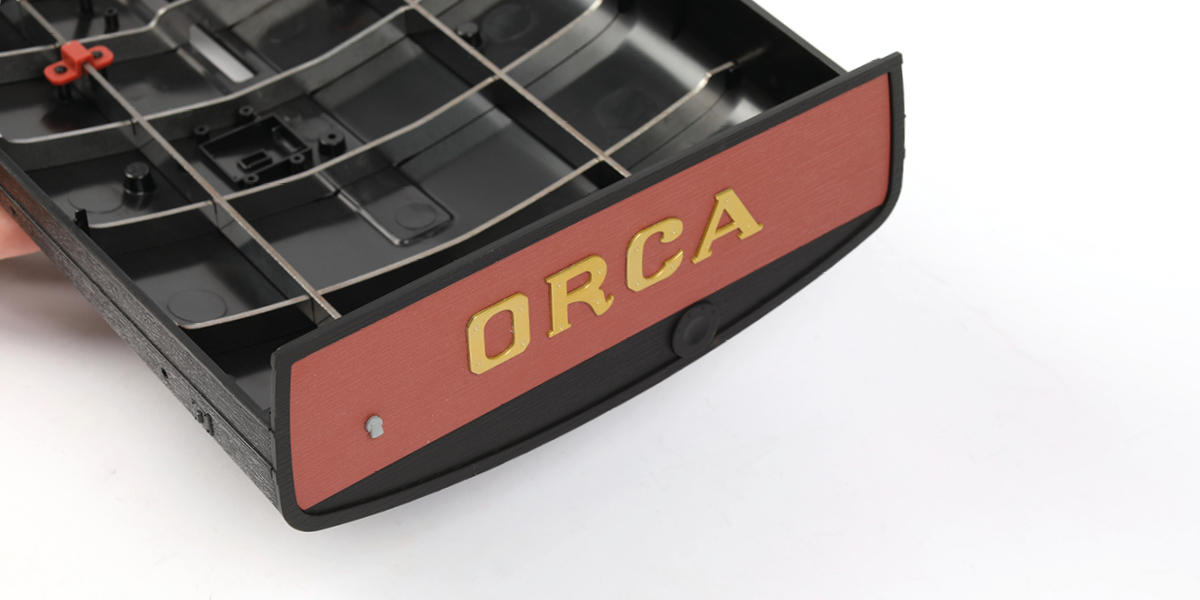
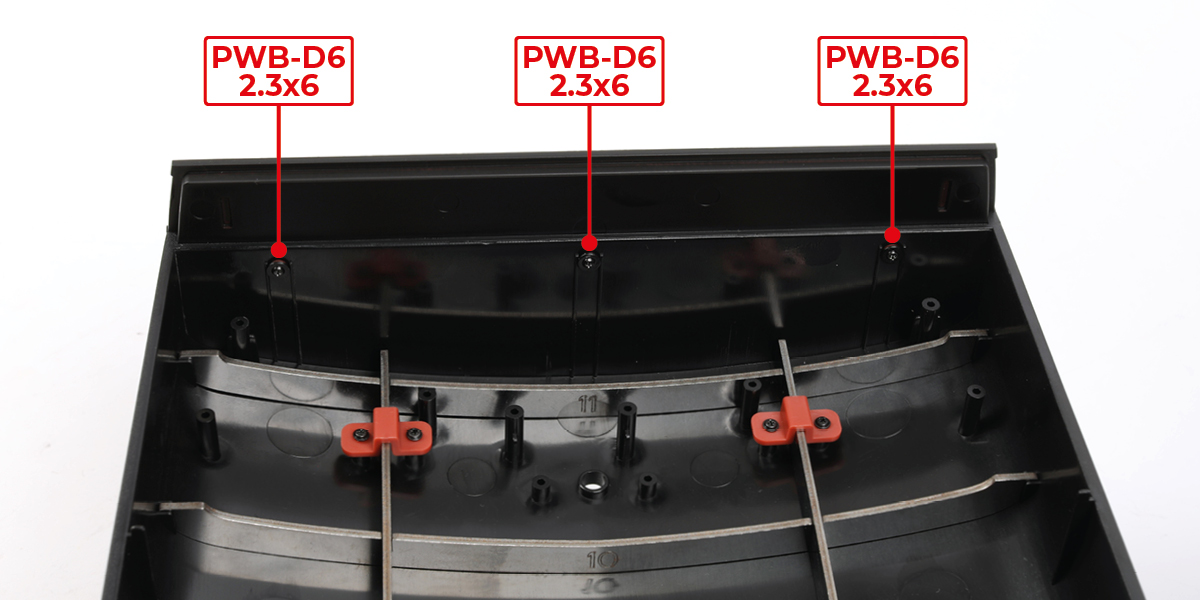
Position the transom panel from pack 2 onto the assembly, then secure the transom using three PWB-D6 2.3x6 screws.
STAGE COMPLETE
Step 1
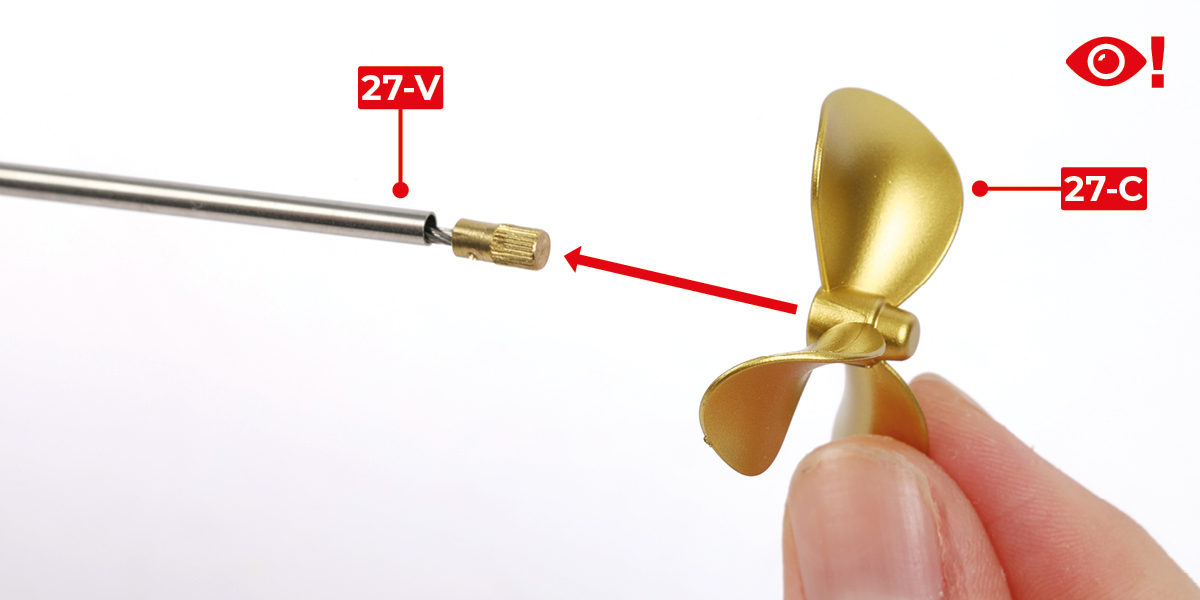
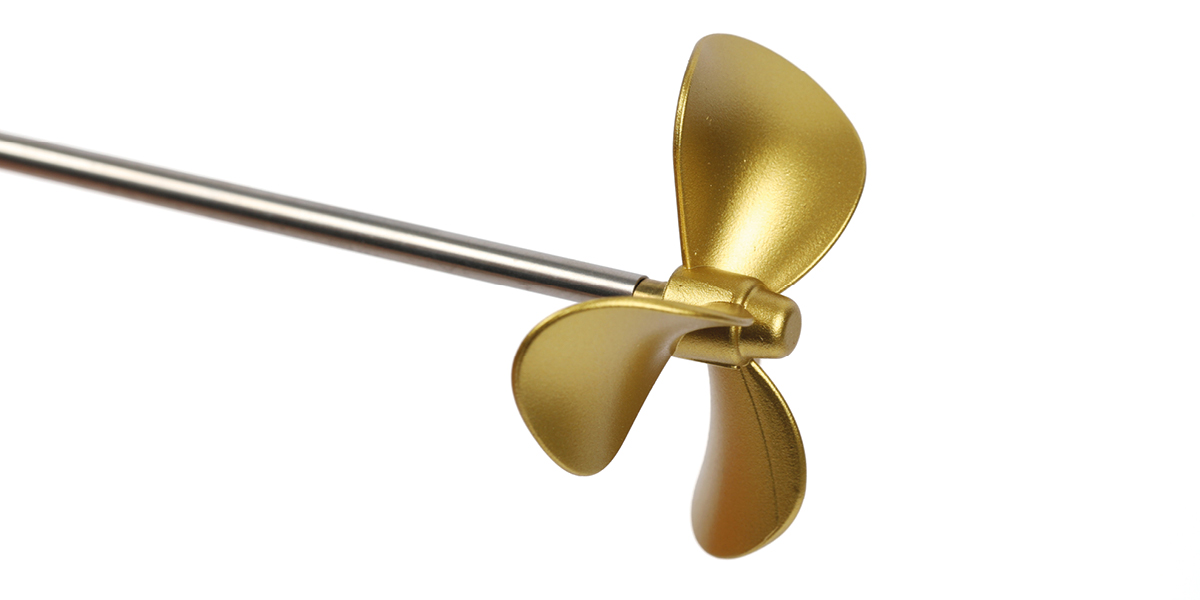
Glue the propeller 27-C to the propeller shaft 27-V. Make sure not to apply any glue between the brass tip and the prop shaft housing.
Step 2
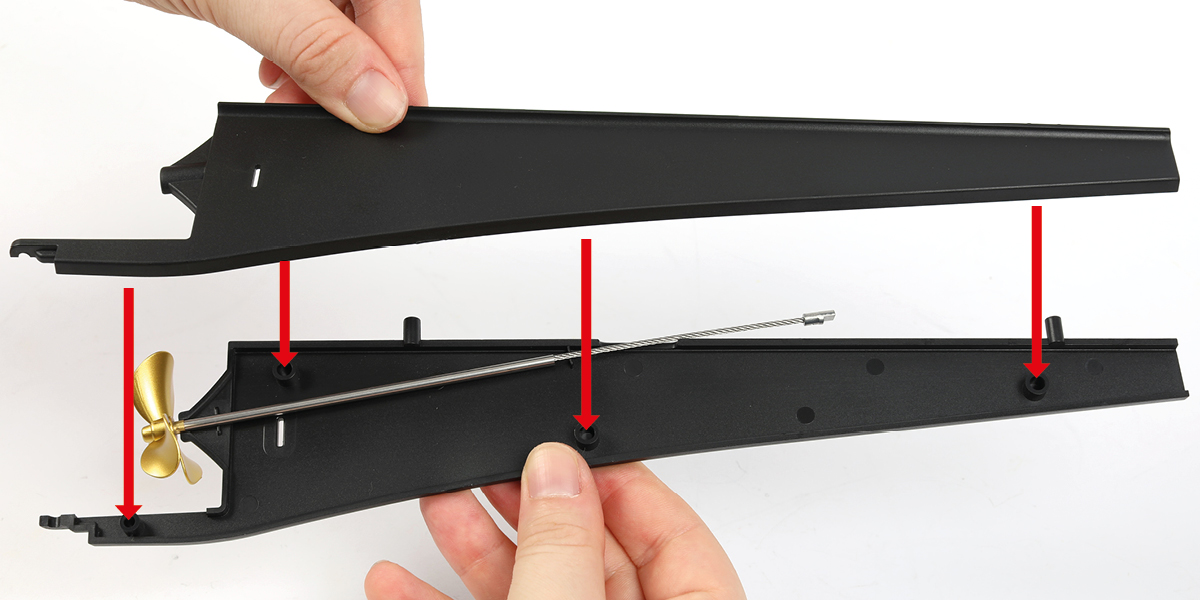
Separate the two halves of keel 27-B.
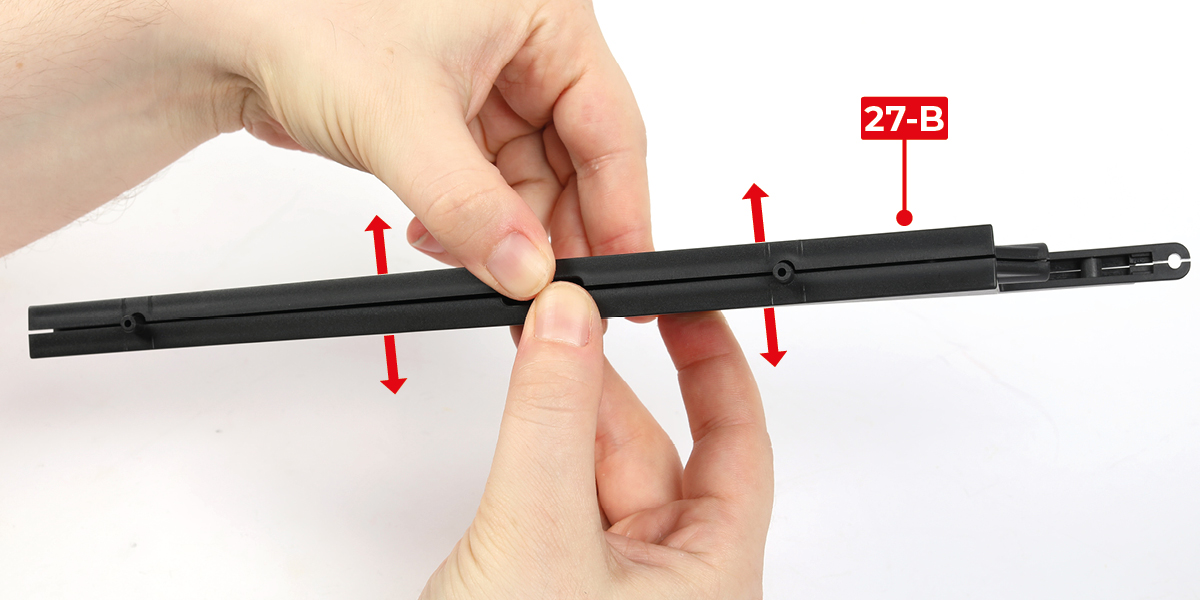
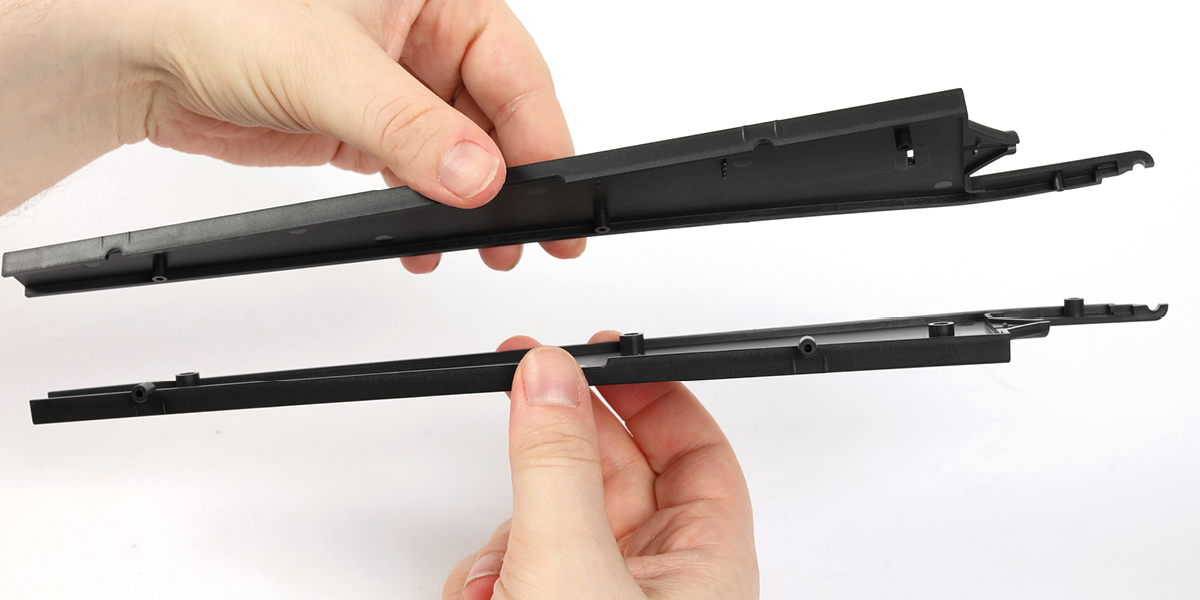
Step 3
Position the propeller shaft on one half of part 27-B.
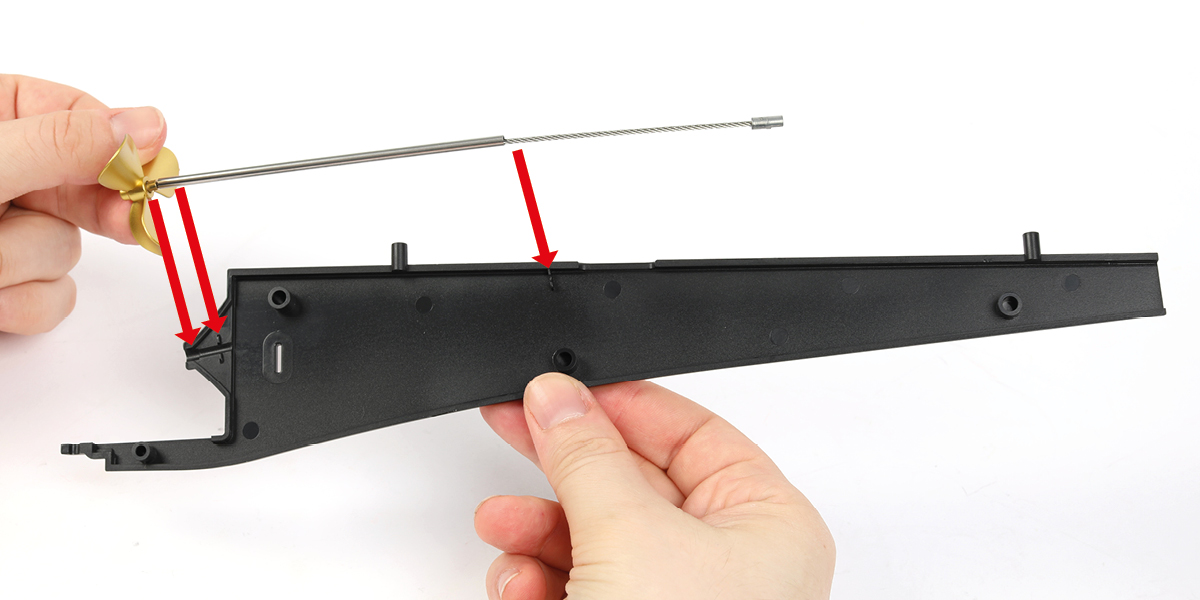
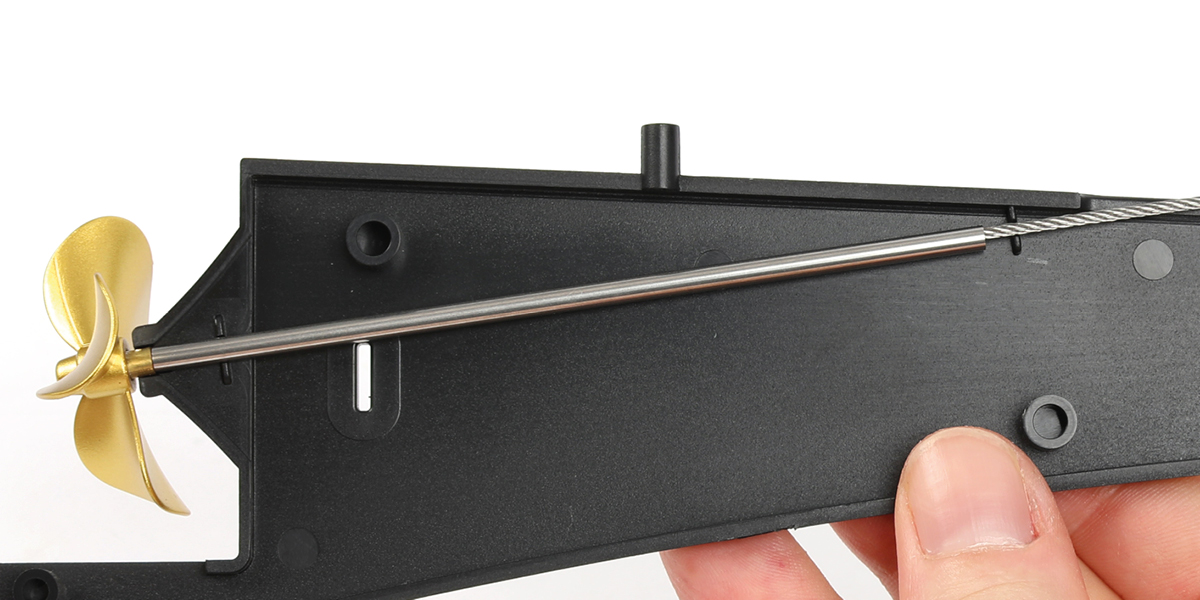
Step 4
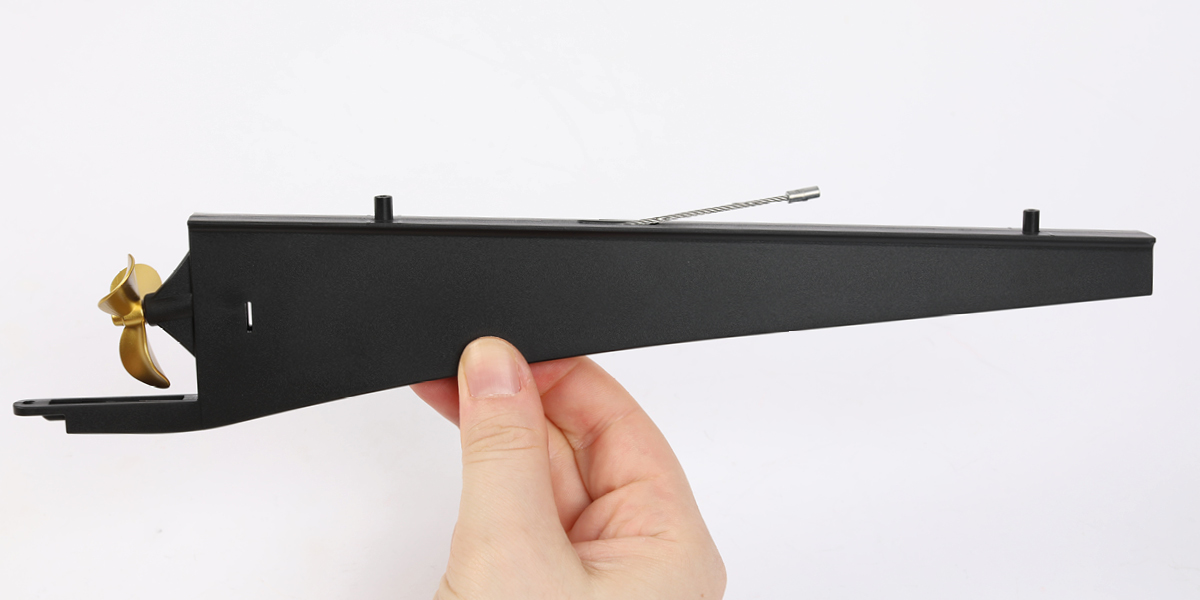
Press the two halves of the keel together.
Step 5
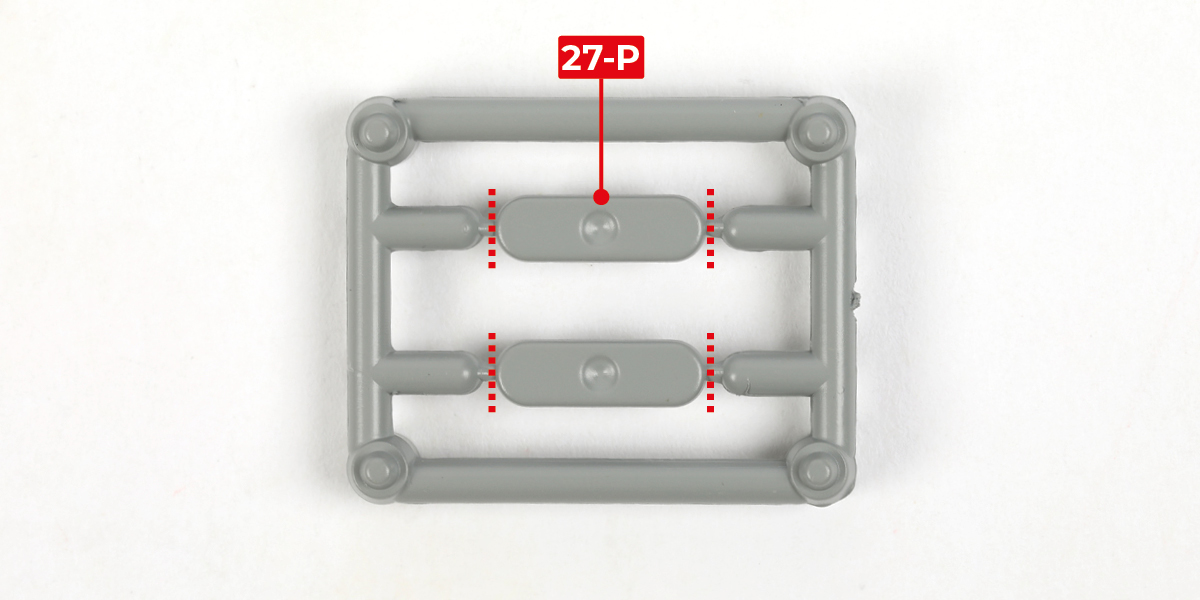
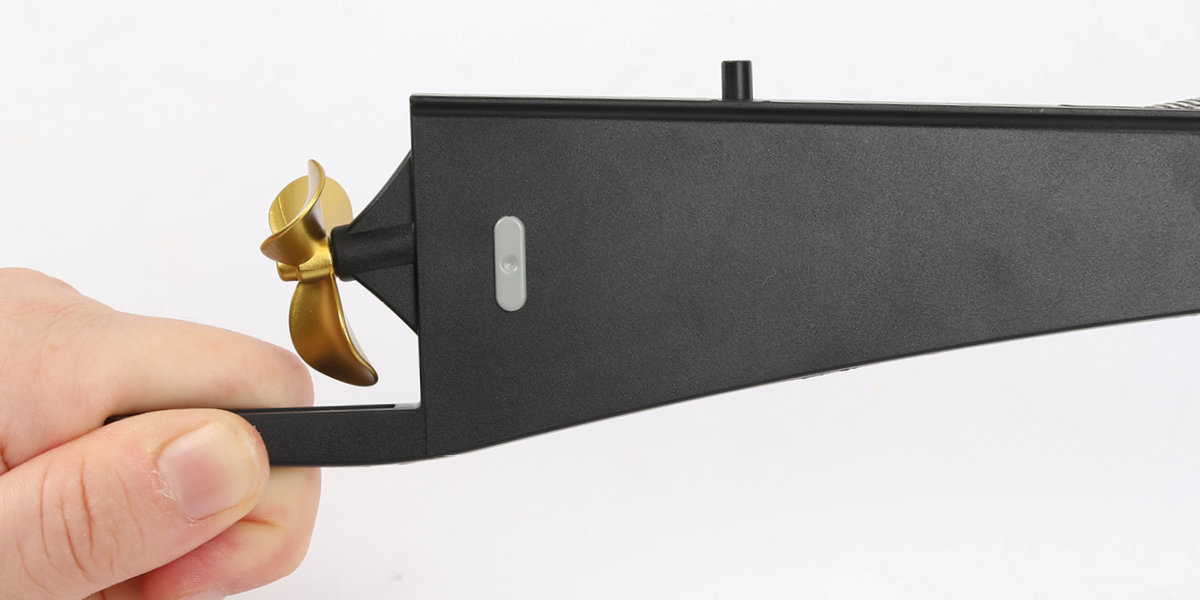
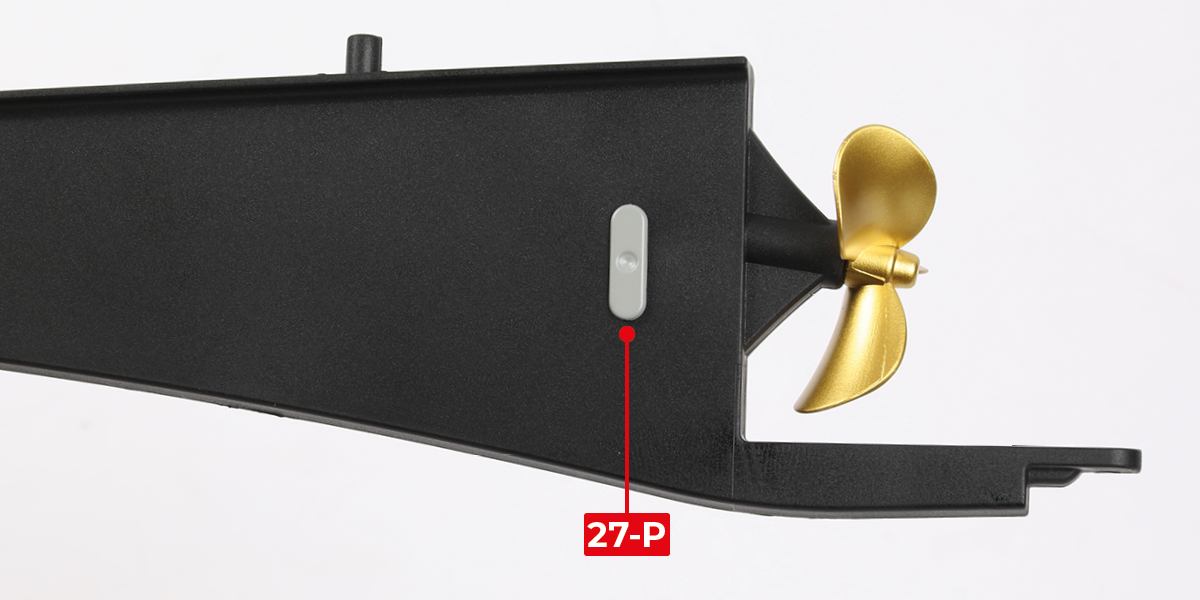
Cut both zinc anodes 27-P from the sprue.
Step 6
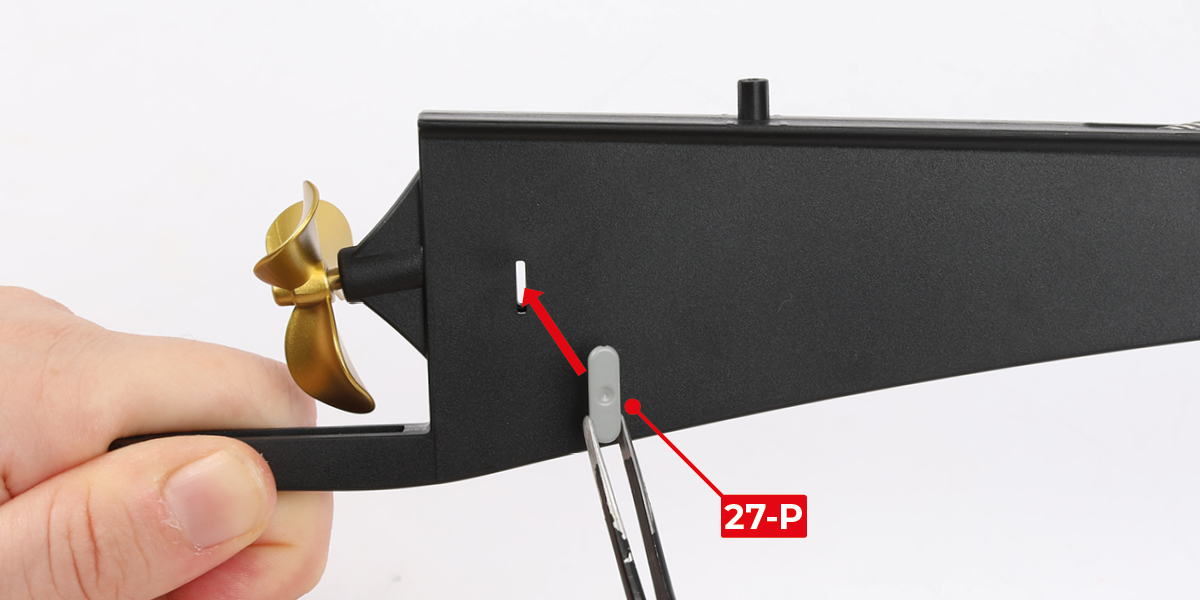
Glue parts 27-P to each side of the keel, as shown.
Step 7
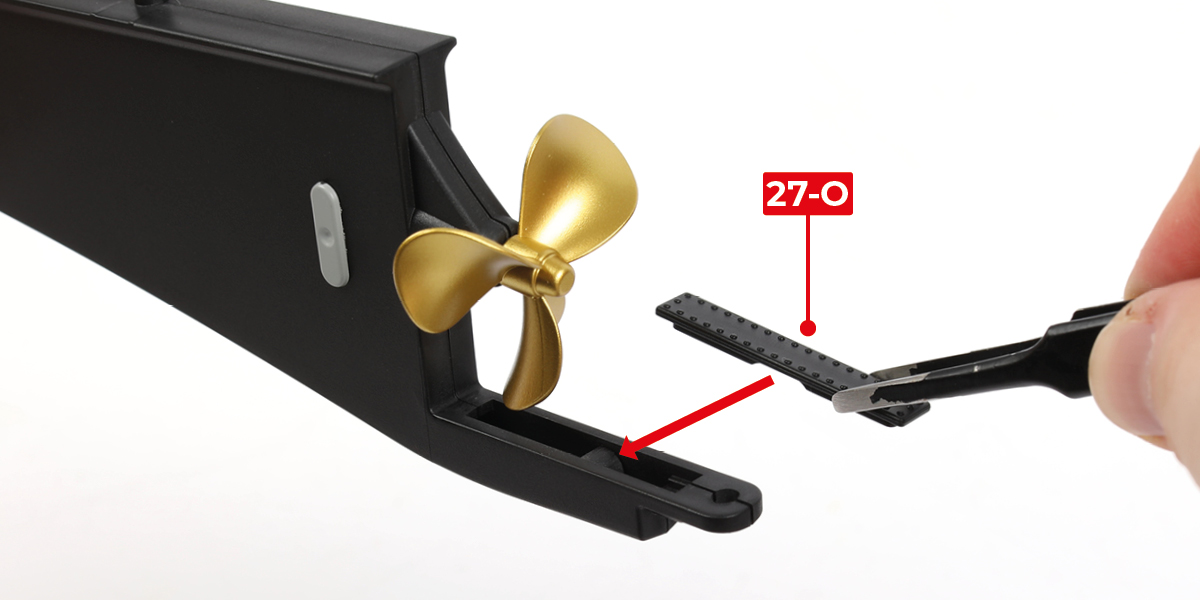
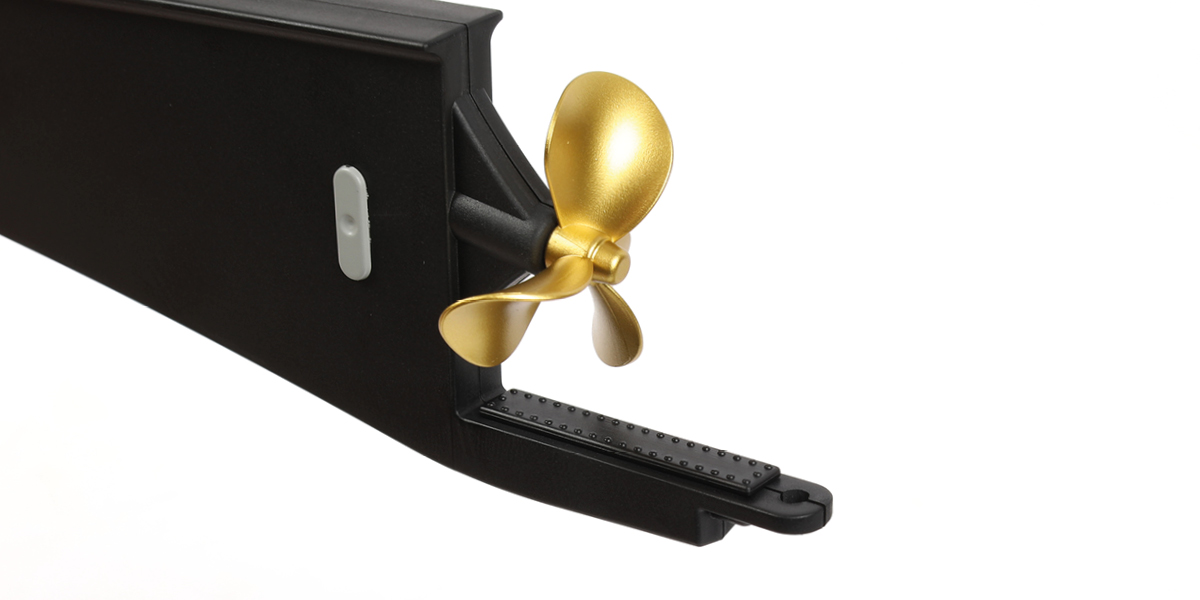
Glue the heel shoe 27-O to the keel.
Step 8
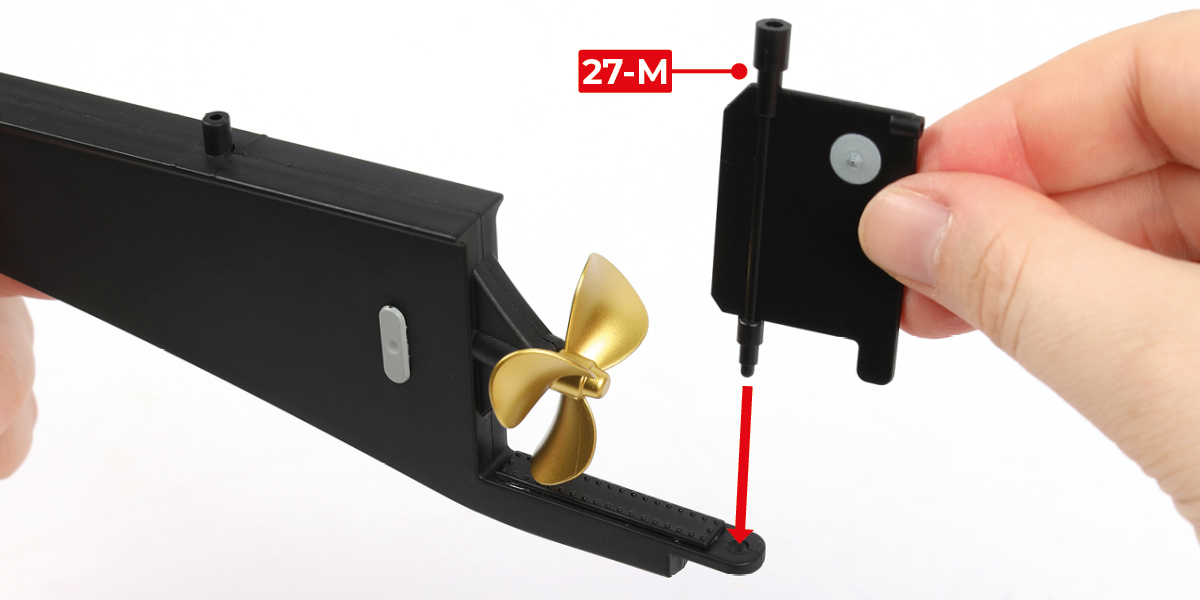
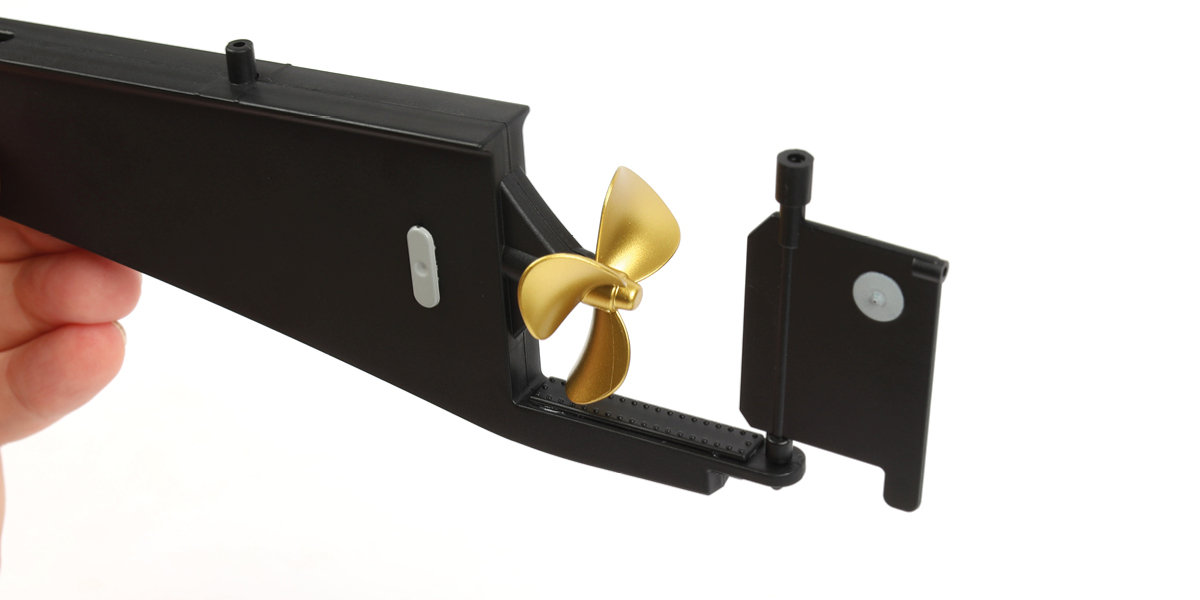
Position the rudder 27-M on the keel.
Step 9
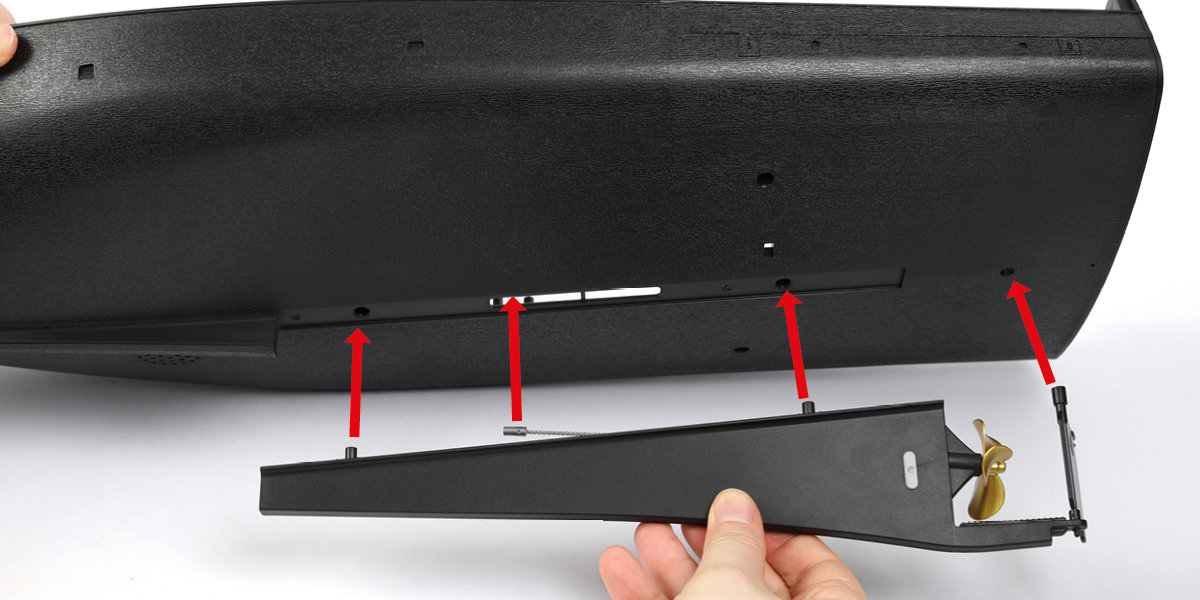
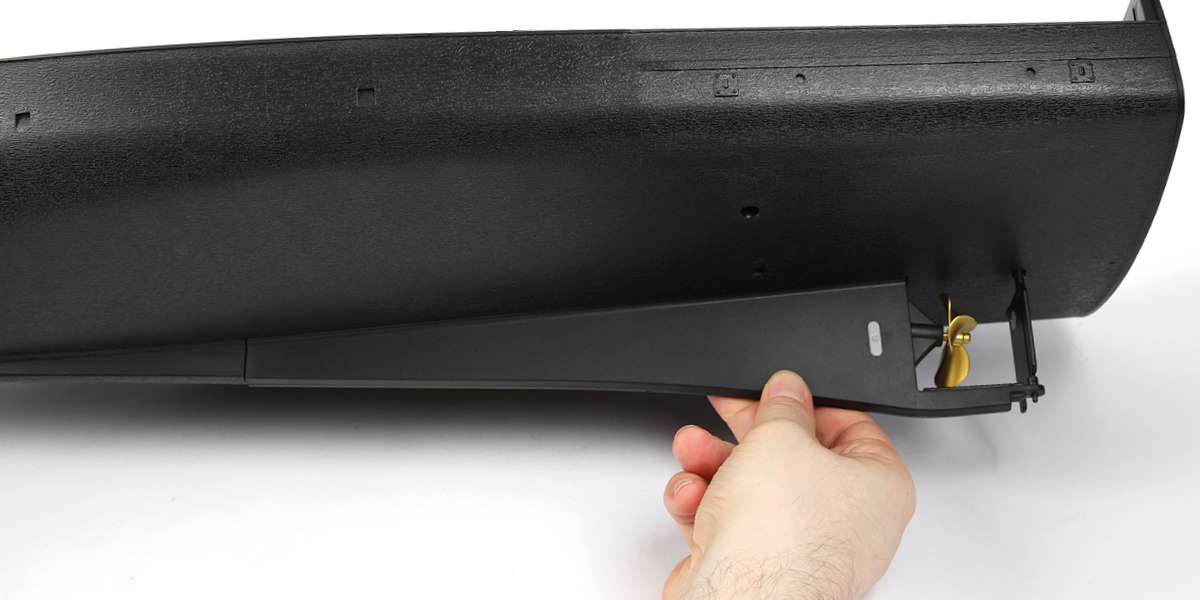
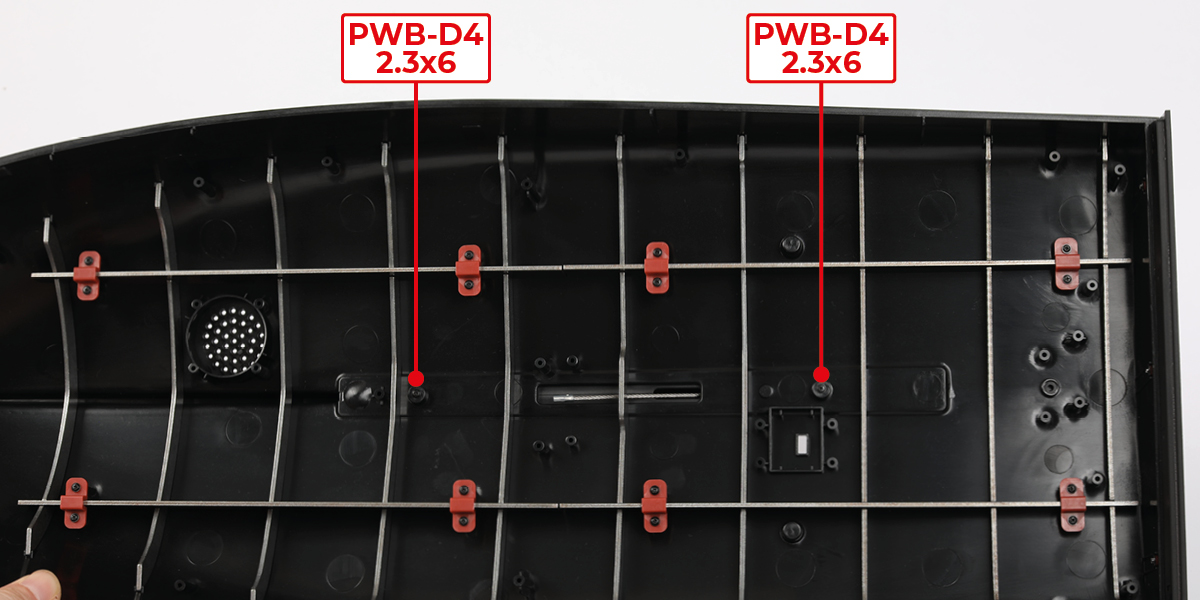
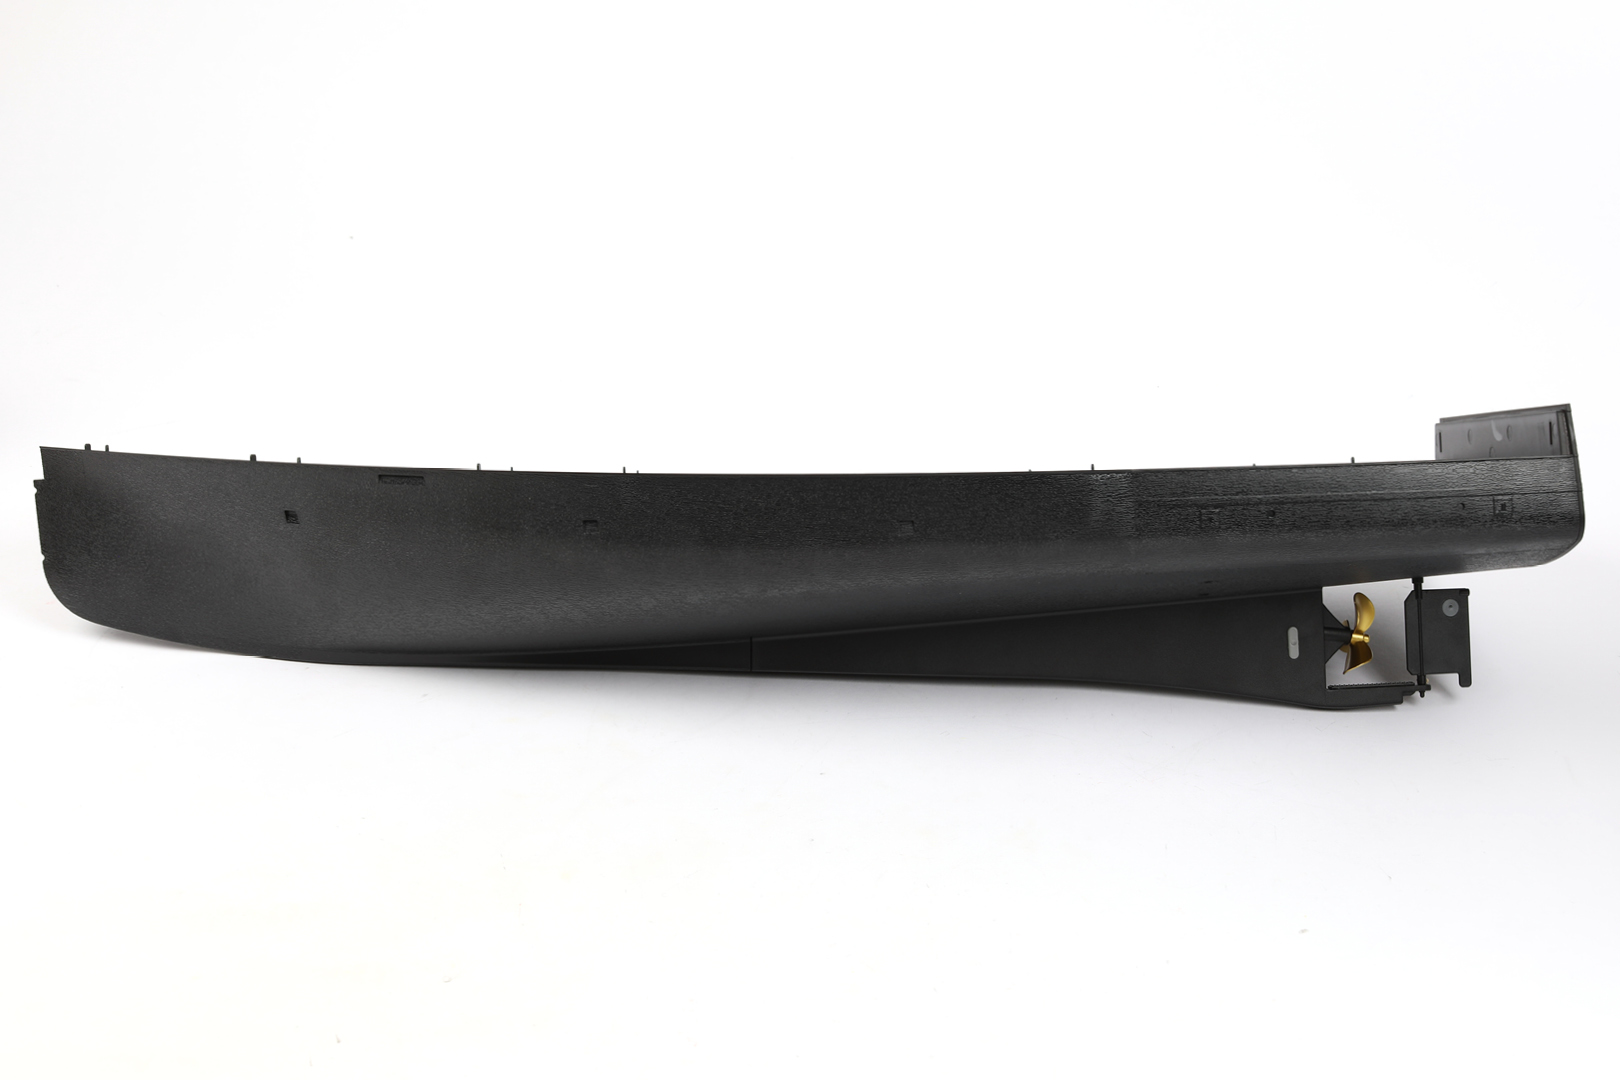
Position the keel on the hull, then secure the keel using two PWB-D4 2.3x6 screws.
STAGE COMPLETE
Step 1
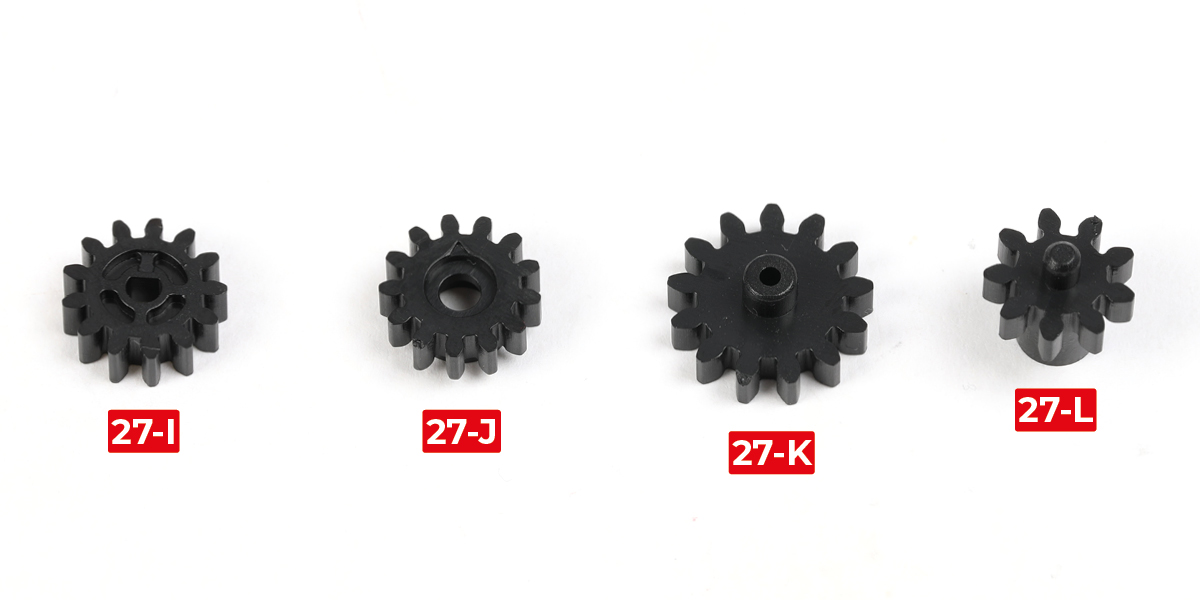
Identify gears 27-I, 27-J, 27-K, and 27-L using the image.
Step 2
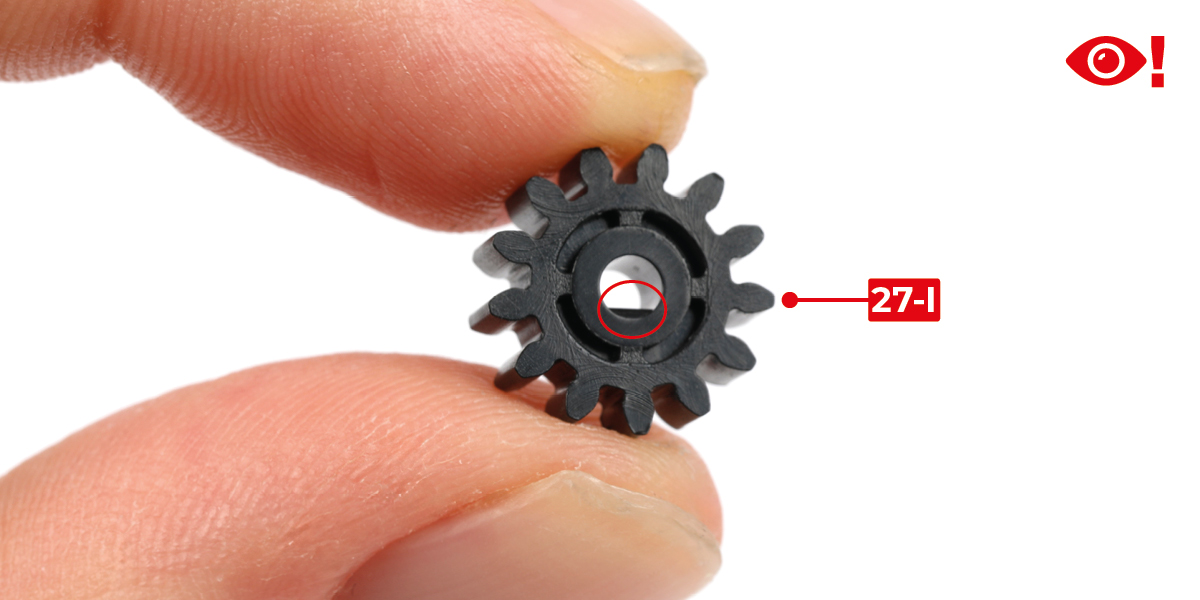
Note that the hole in gear 27-I has an indentation on one side, circled in the first image. Insert rod 27-R into gear 27-I, as shown.
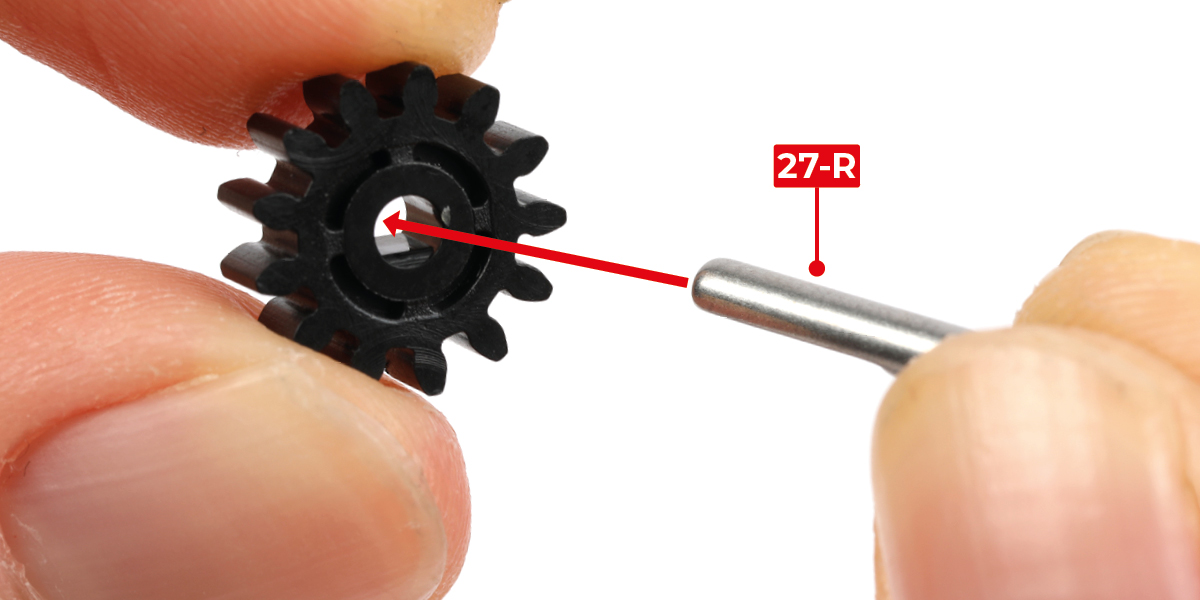
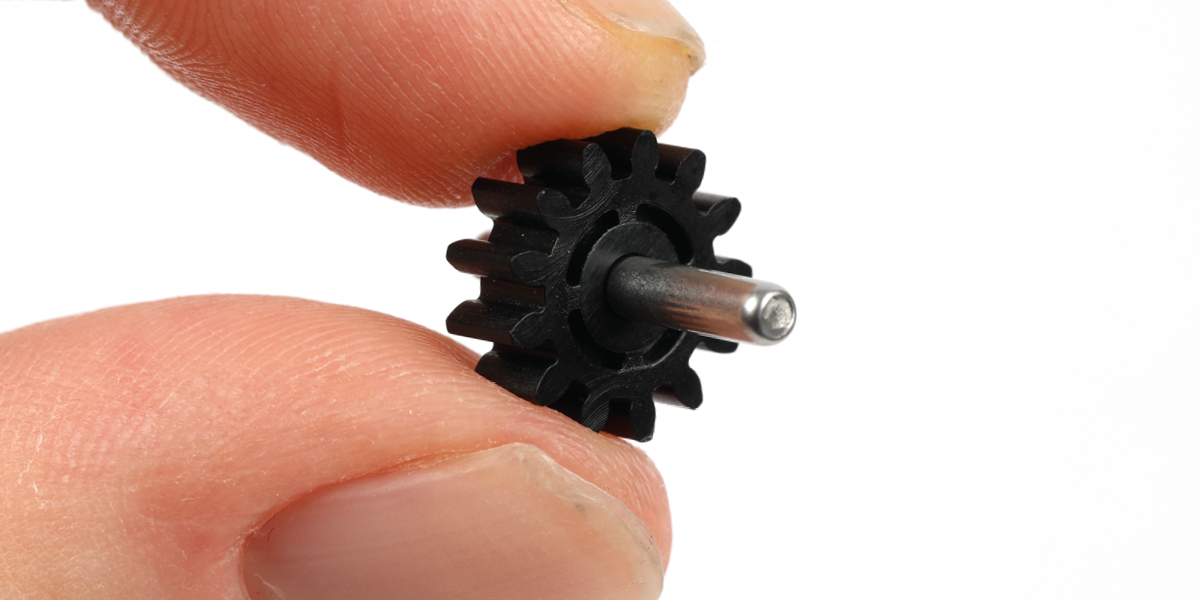
Step 3
Hold the rudder straight from below the hull, as shown in the first image. From inside the hull, insert the rod into the slot in the rudder to position the gear.
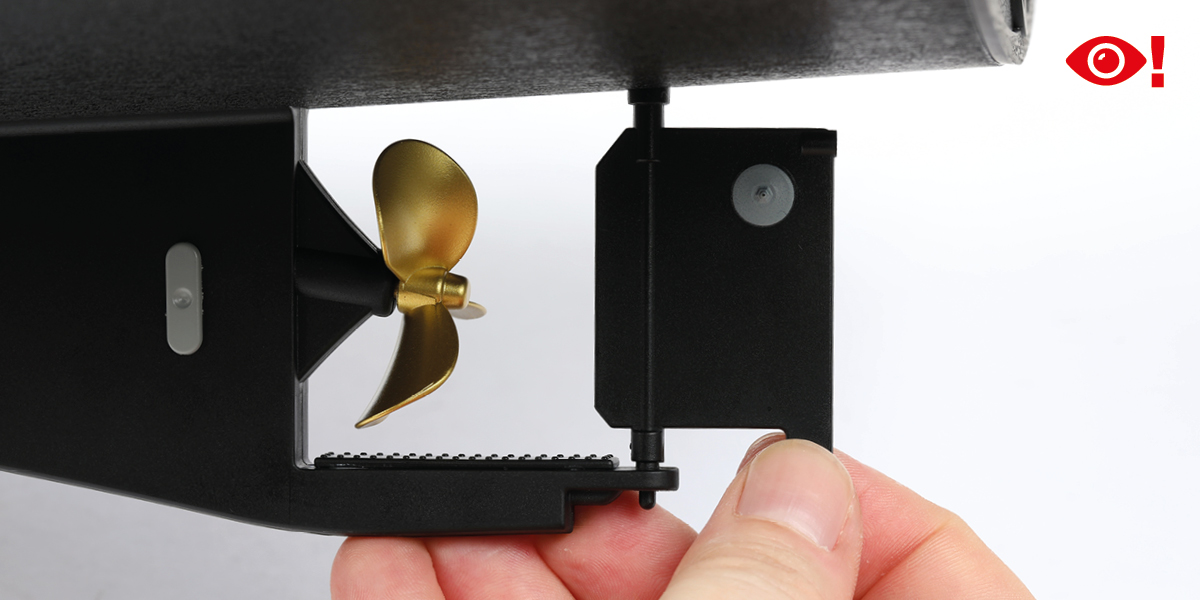
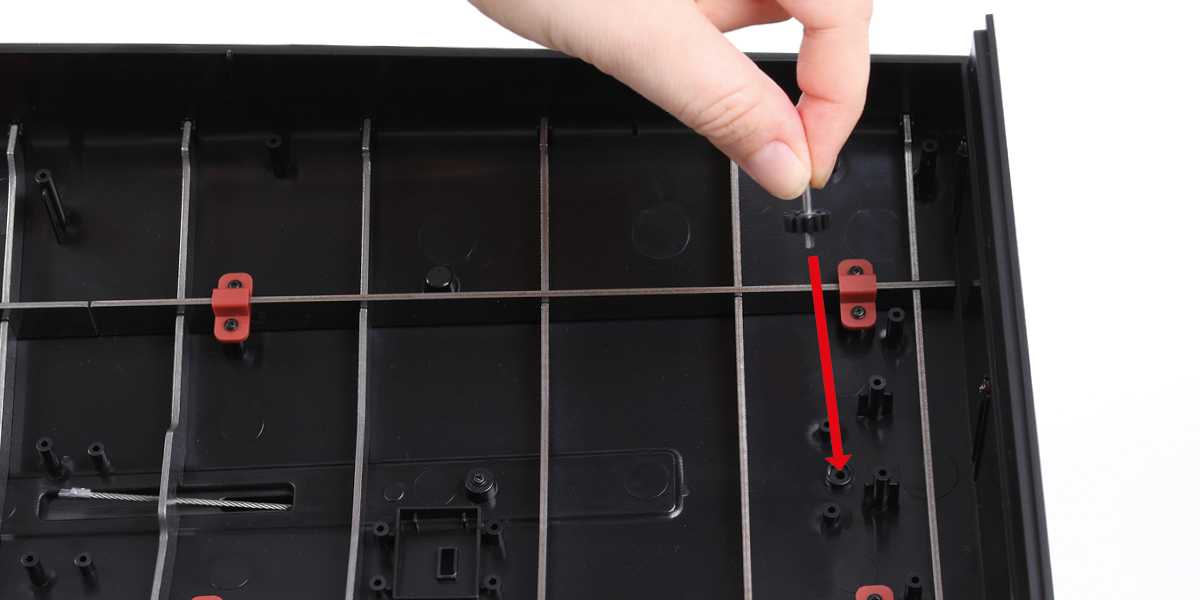
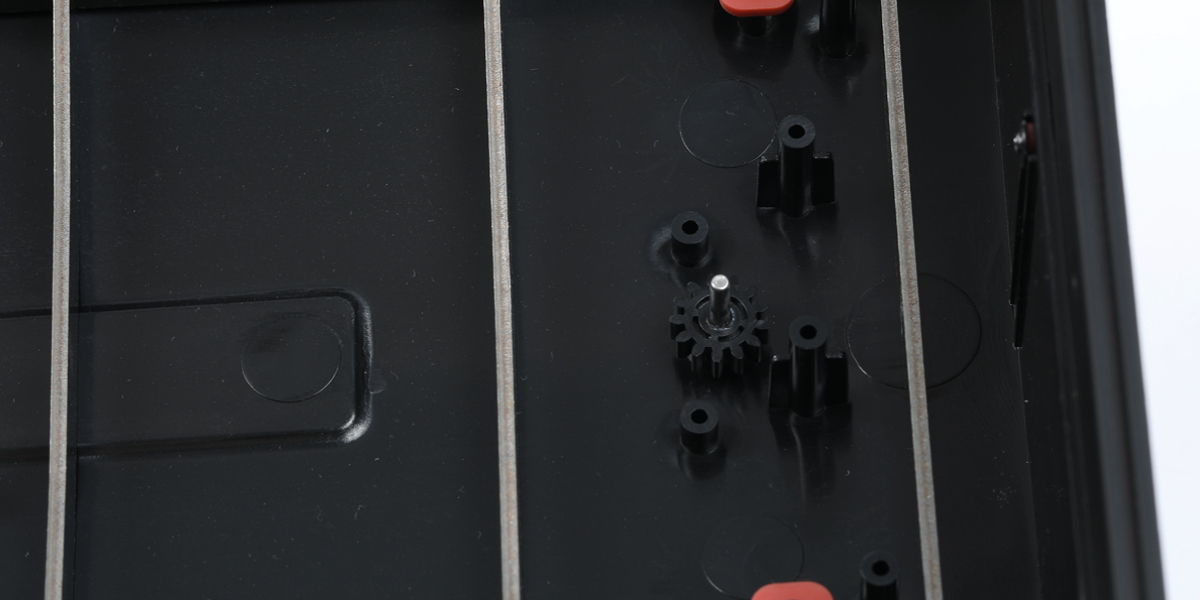
Step 4
Position part 27-G on the hull, then secure it using two PWB-D4 2.3x6 screws.
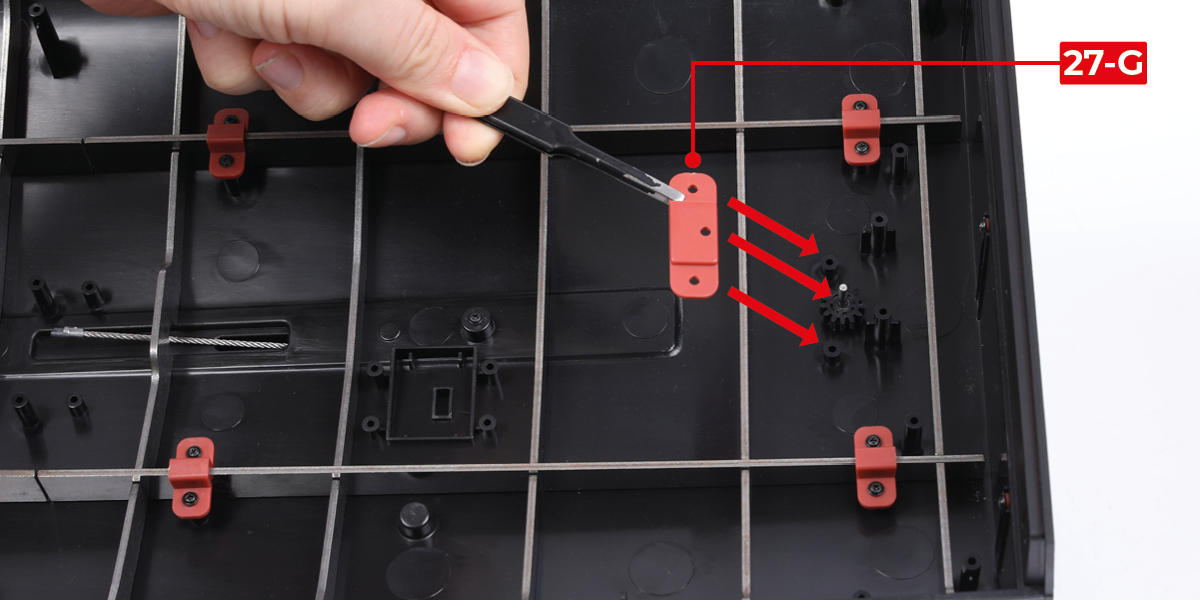
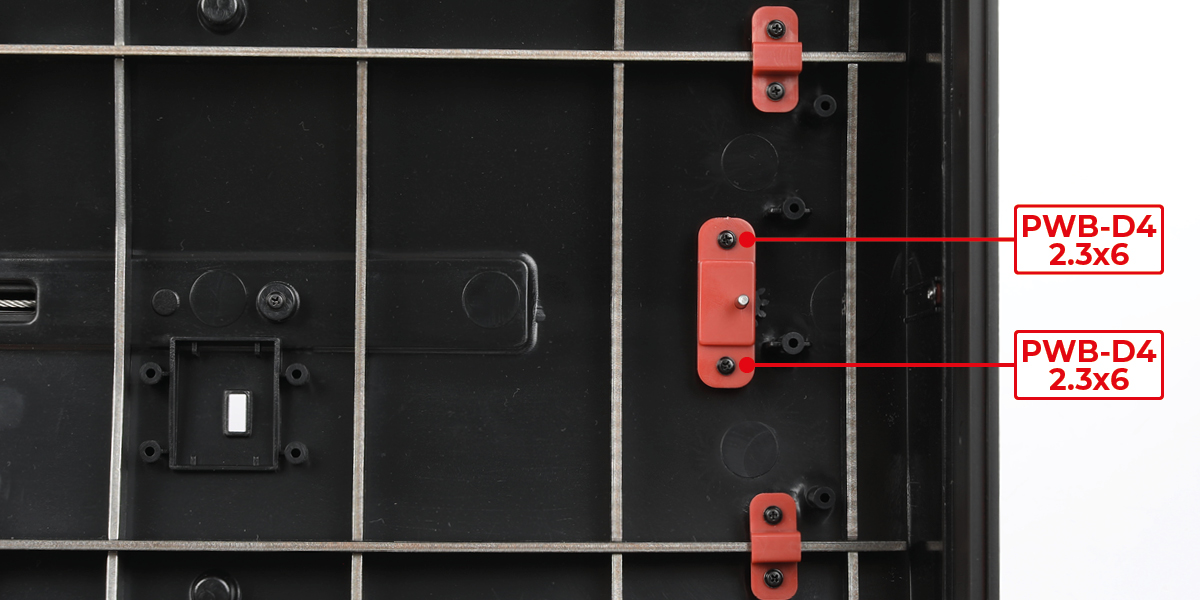
Step 5
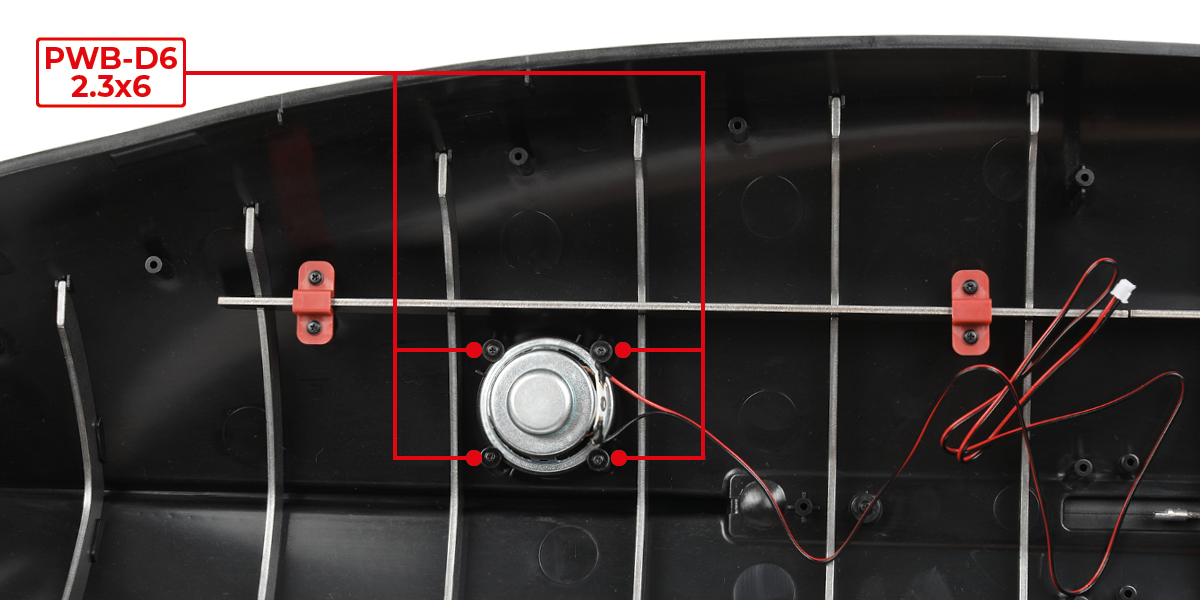
Position the speaker 27-U on the hull, then secure it using four PWB-D6 2.3x6 screws.
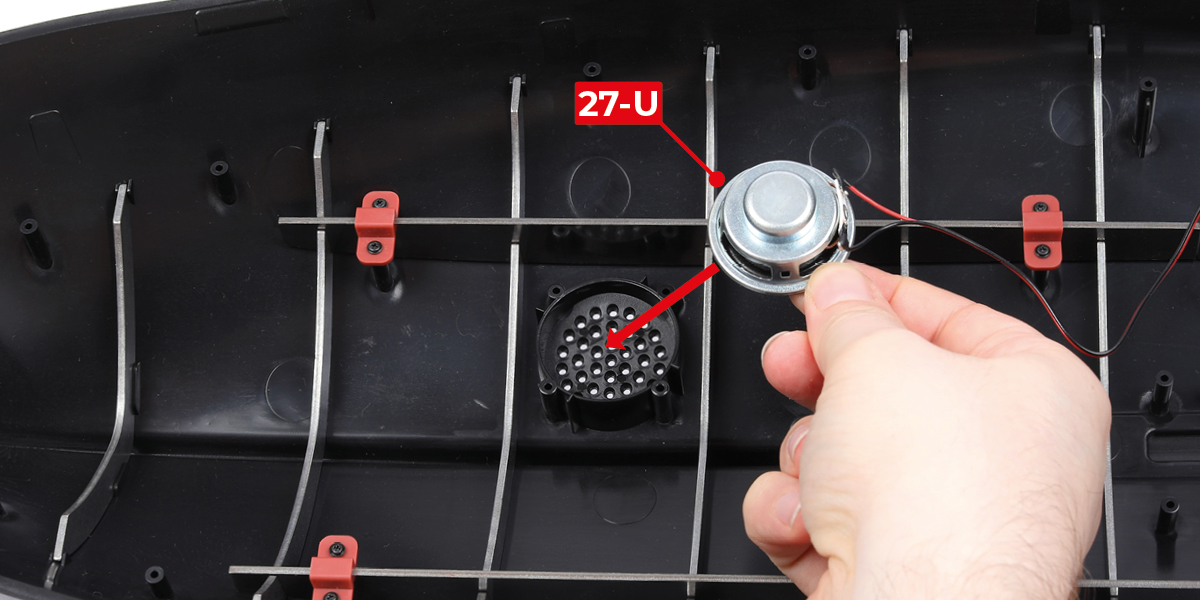
Step 6
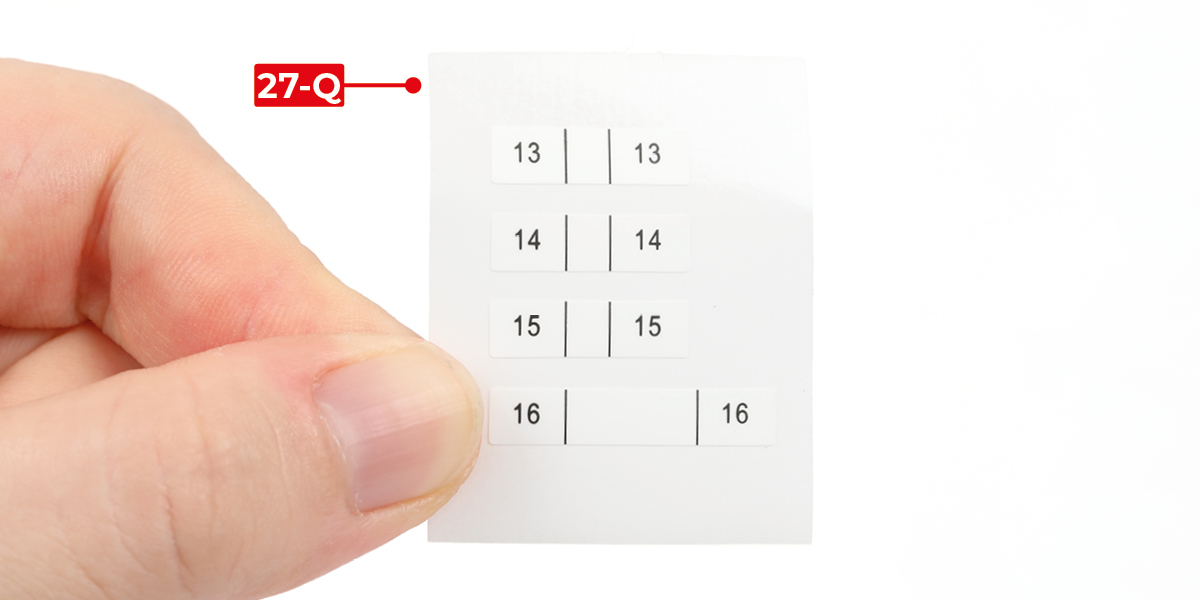
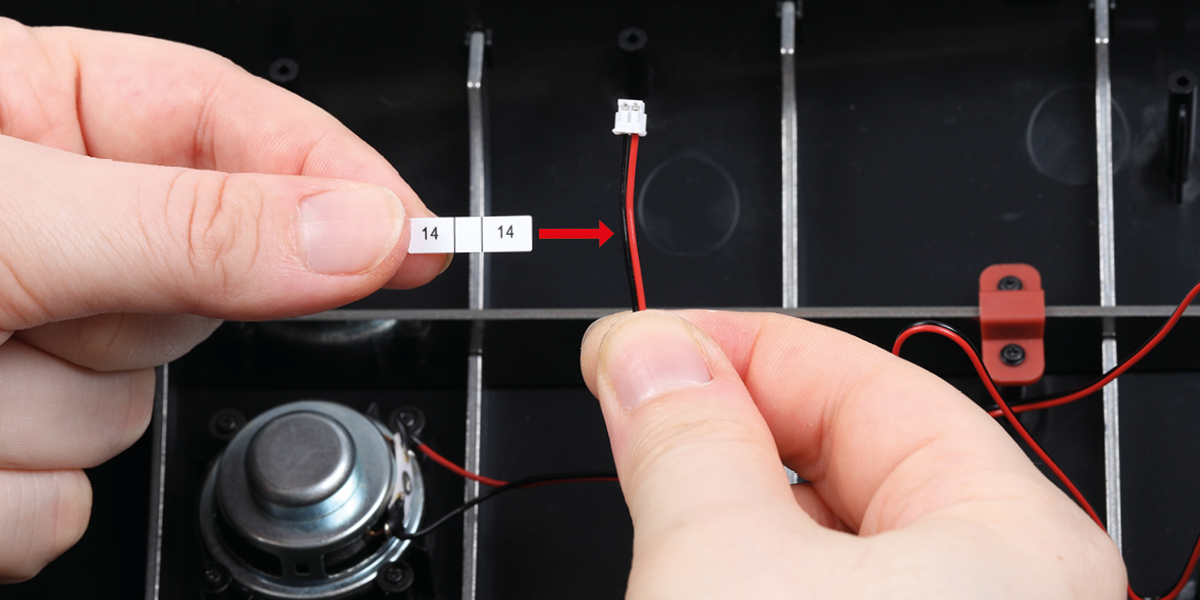
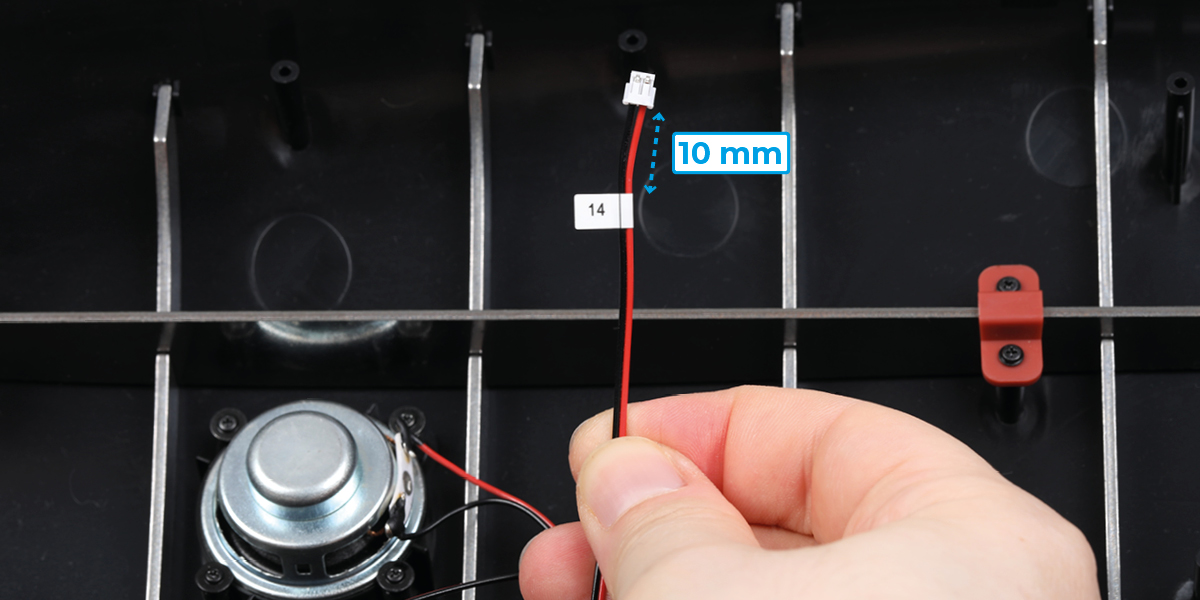
Wrap a number 14 label from sheet 27-Q around the speaker wire. Position the label 10 mm from the plug.
Step 7
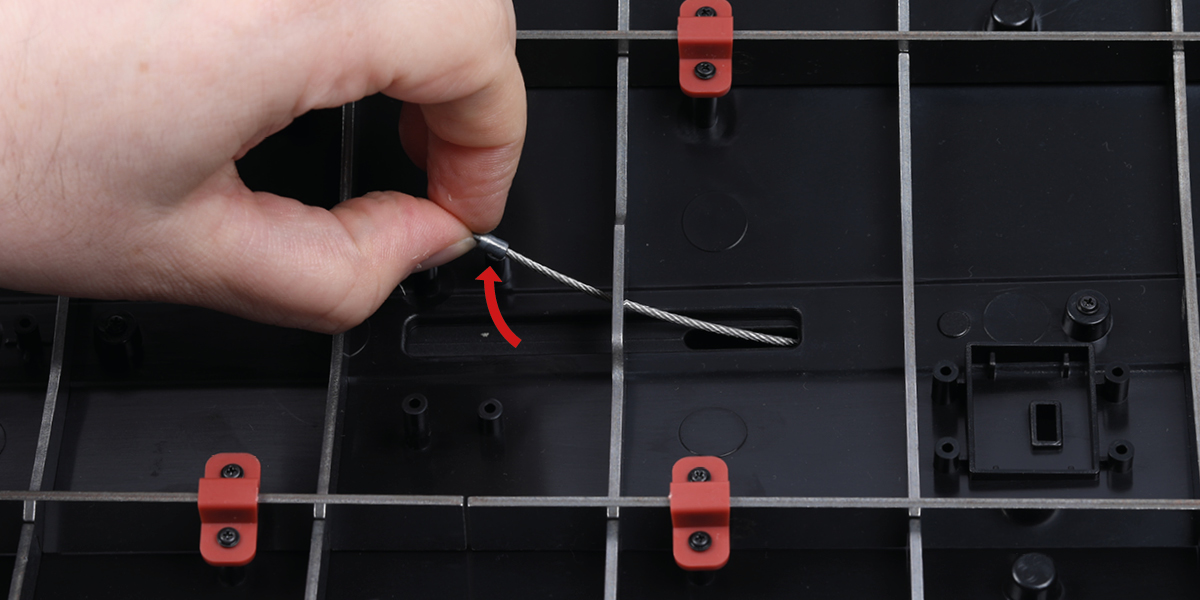
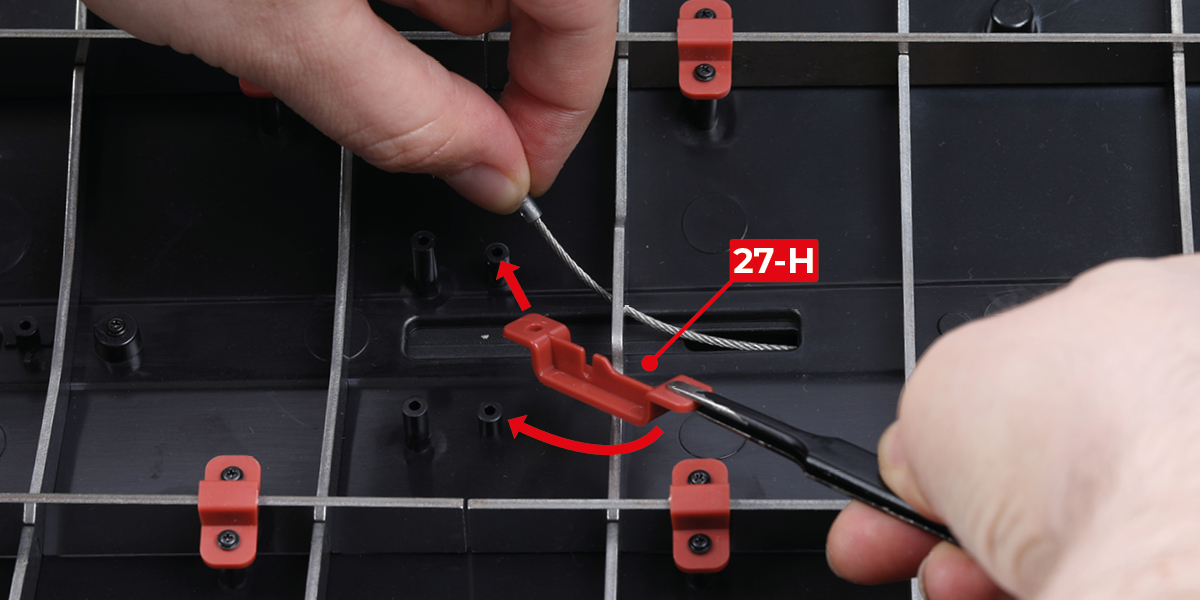
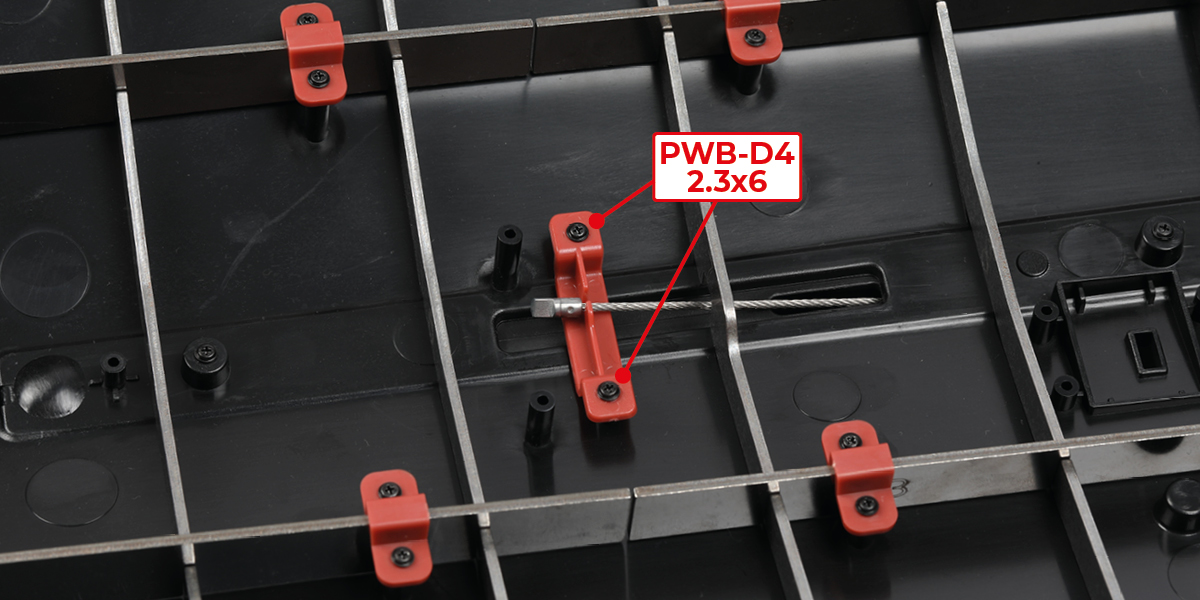
Lift up the propeller shaft, then position part 27-H and secure it using two PWB-D4 2.3x6 screws.
Step 8
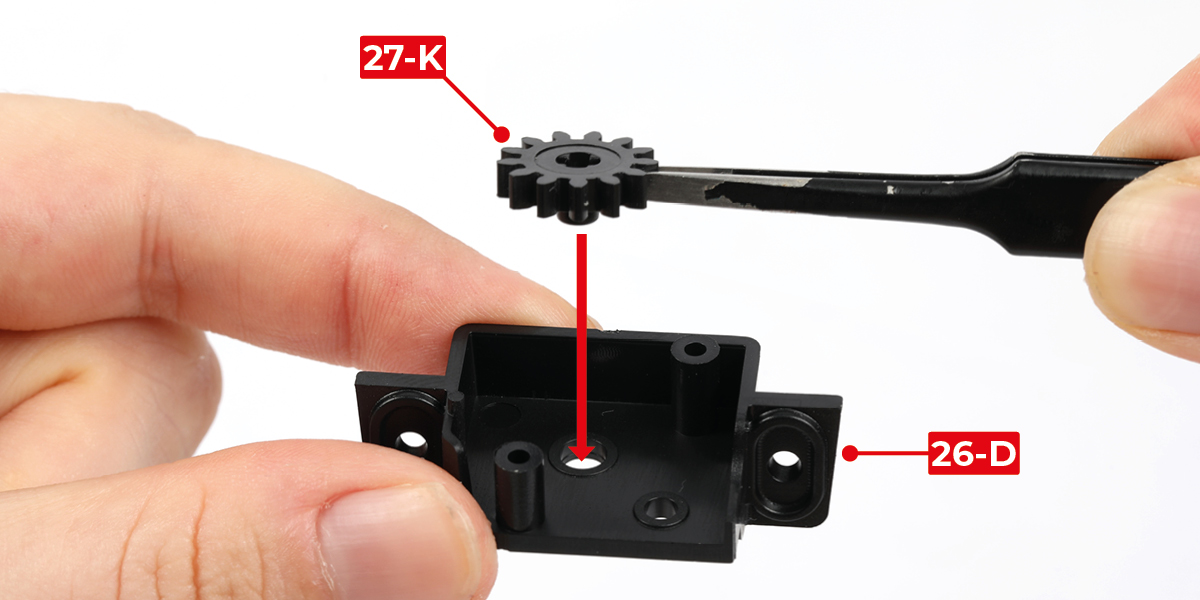
Place gear 27-K onto part 26-D.
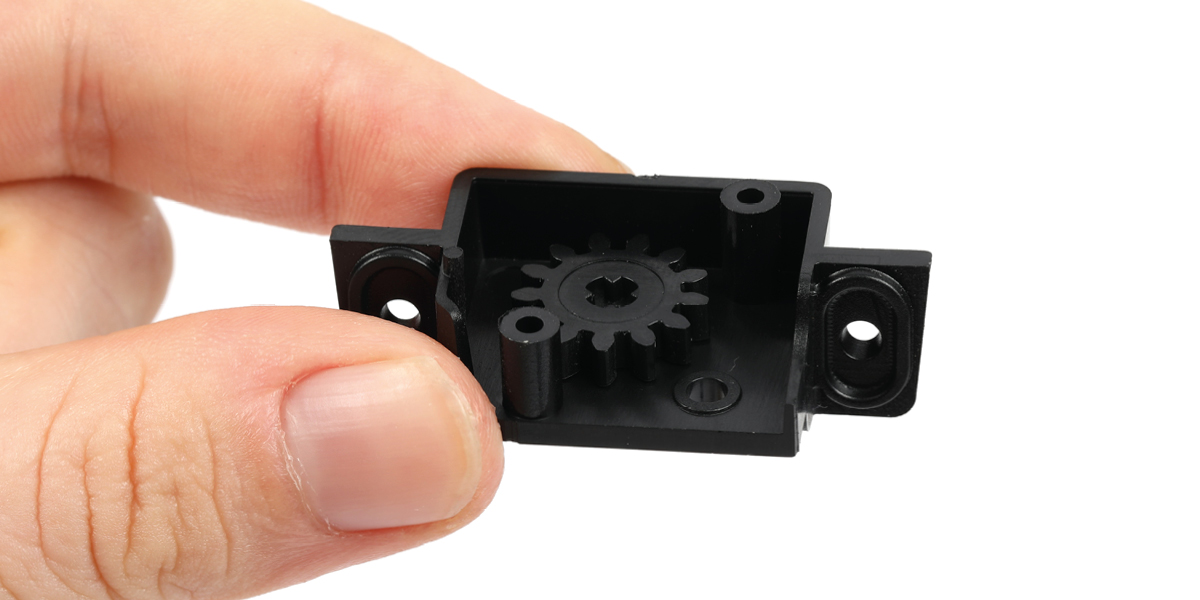
Step 9
Place gear 27-L onto the assembly.
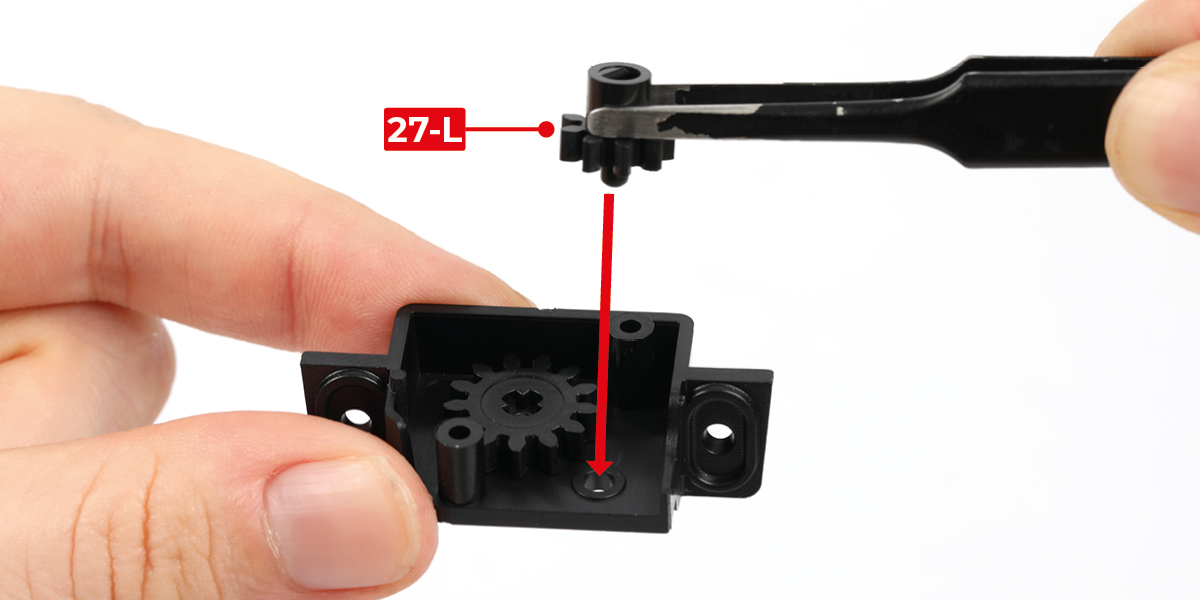
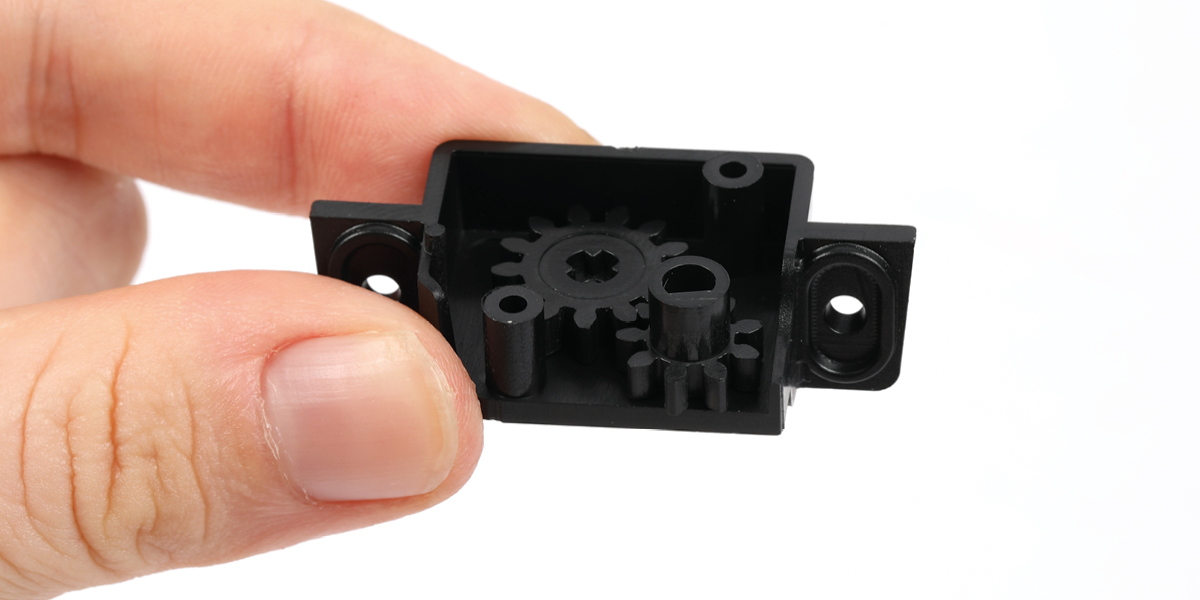
Step 10
Position part 26-E on the assembly, then secure it using two PWB-D4 2.3x6 screws.
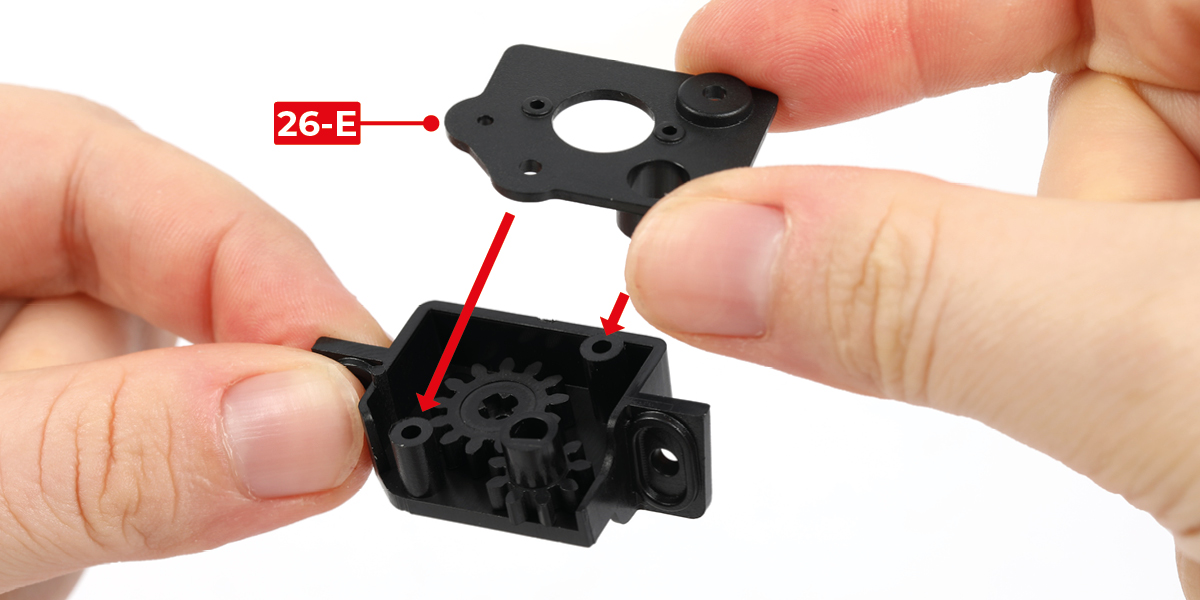
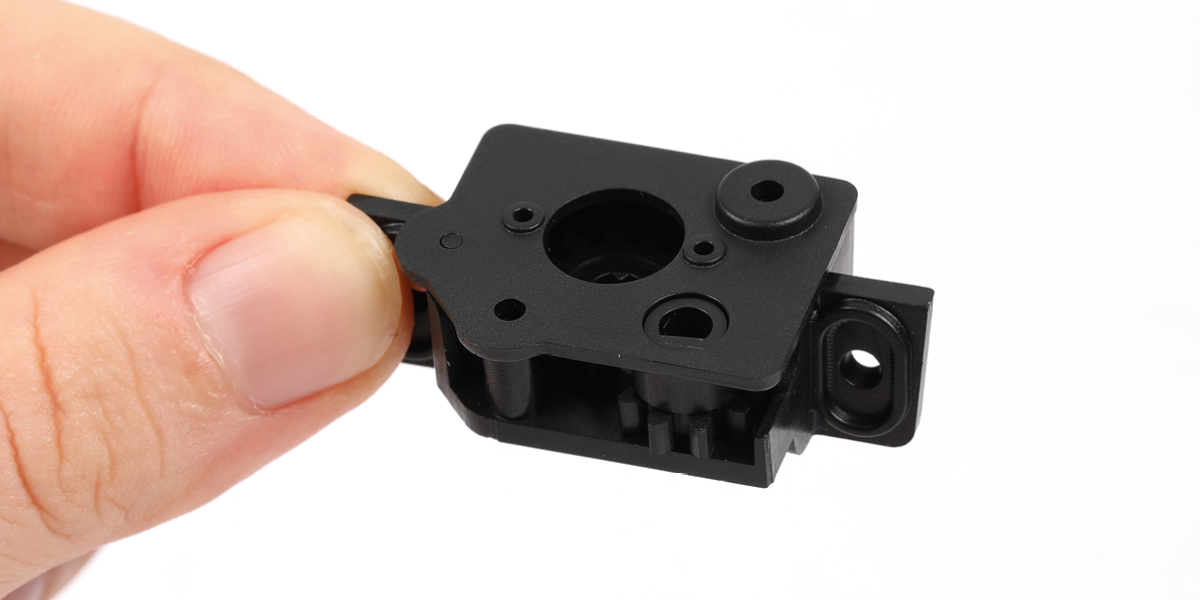
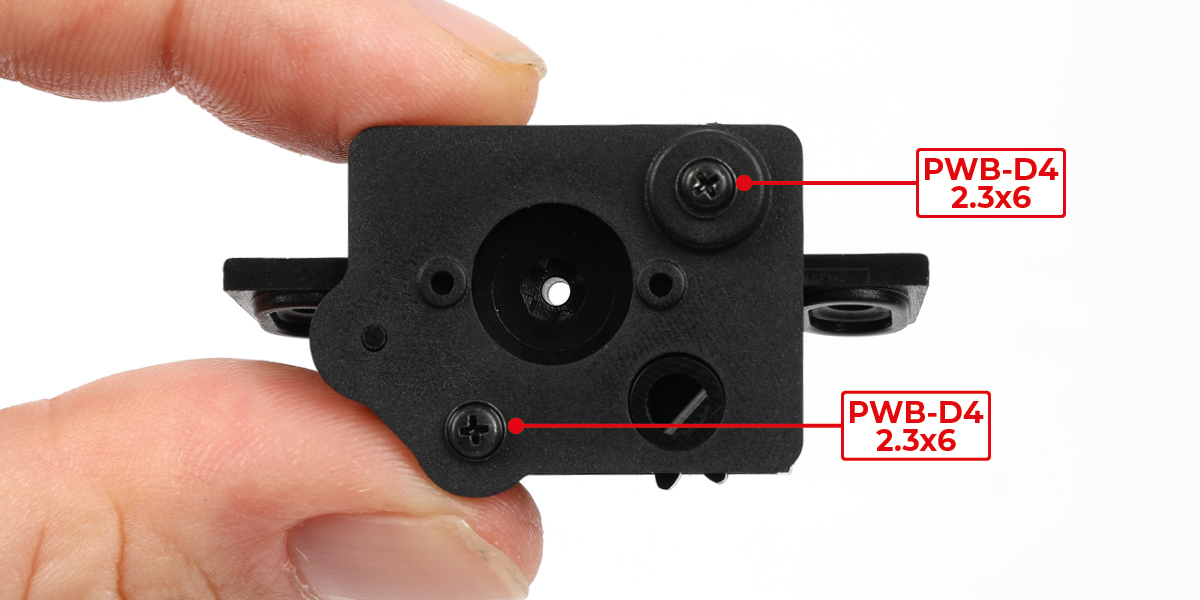
Step 11
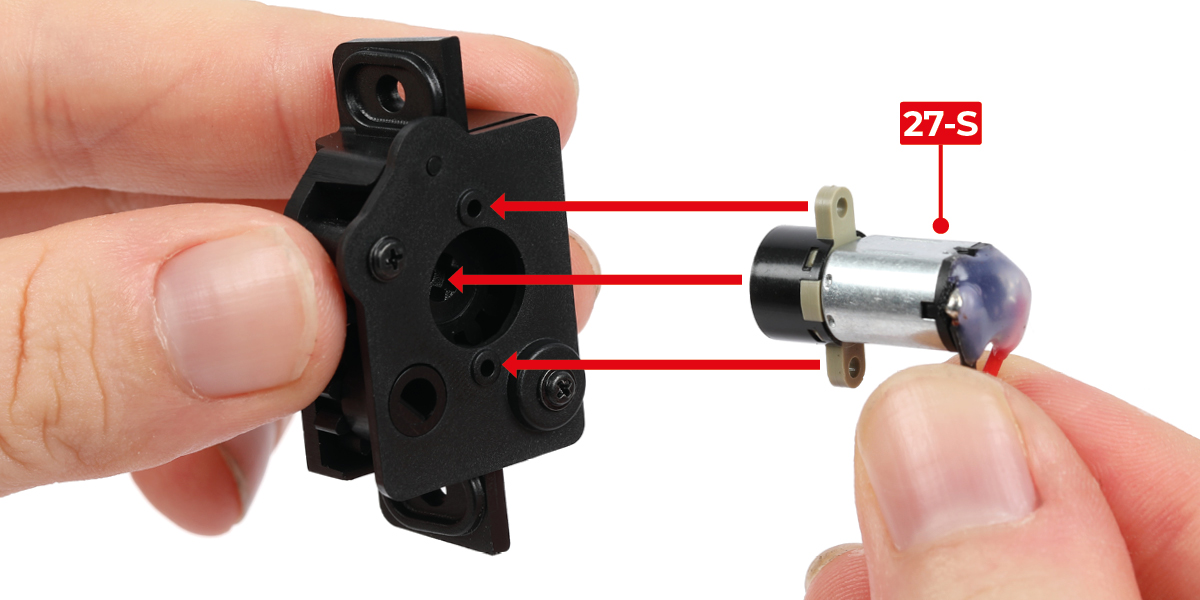
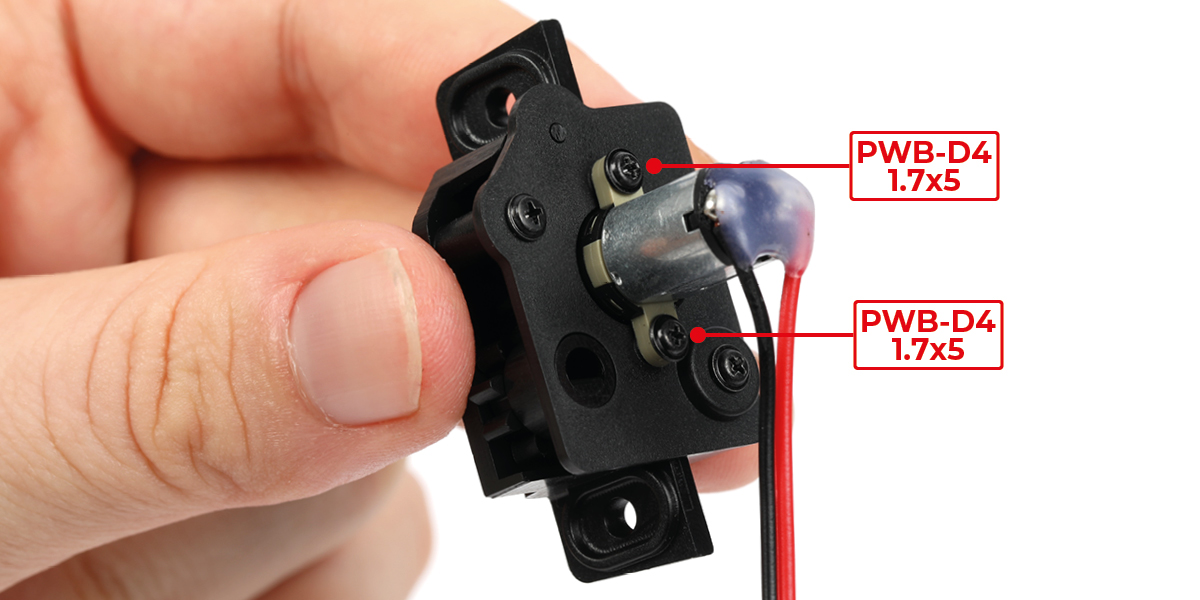
Position the motor 27-S on the assembly, then secure it using two PWB-D4 1.7x5 screws.
Step 12
Position the motor assembly on the hull and connect the propeller shaft, as shown. Secure the motor assembly to the hull using two PWB-D4 2.3x6 screws.
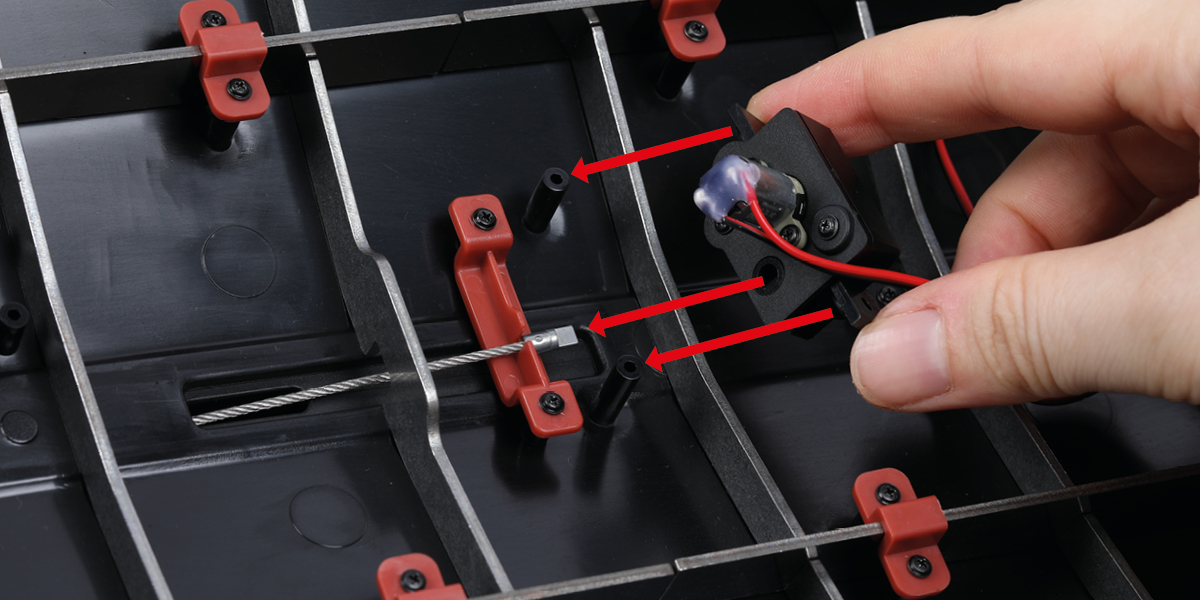
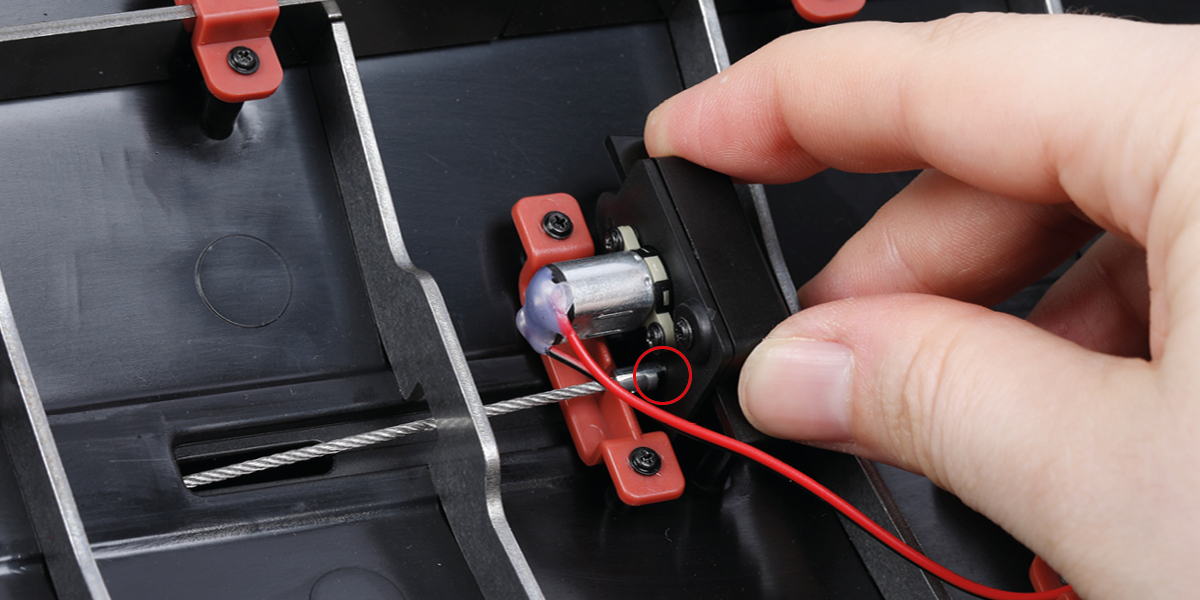
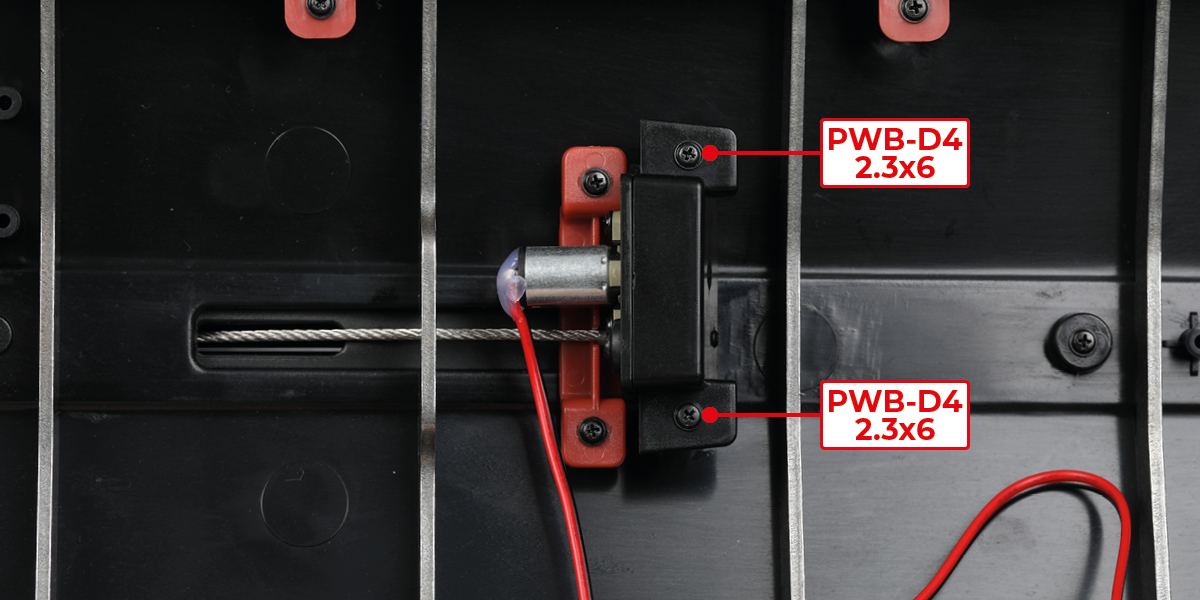
Step 13
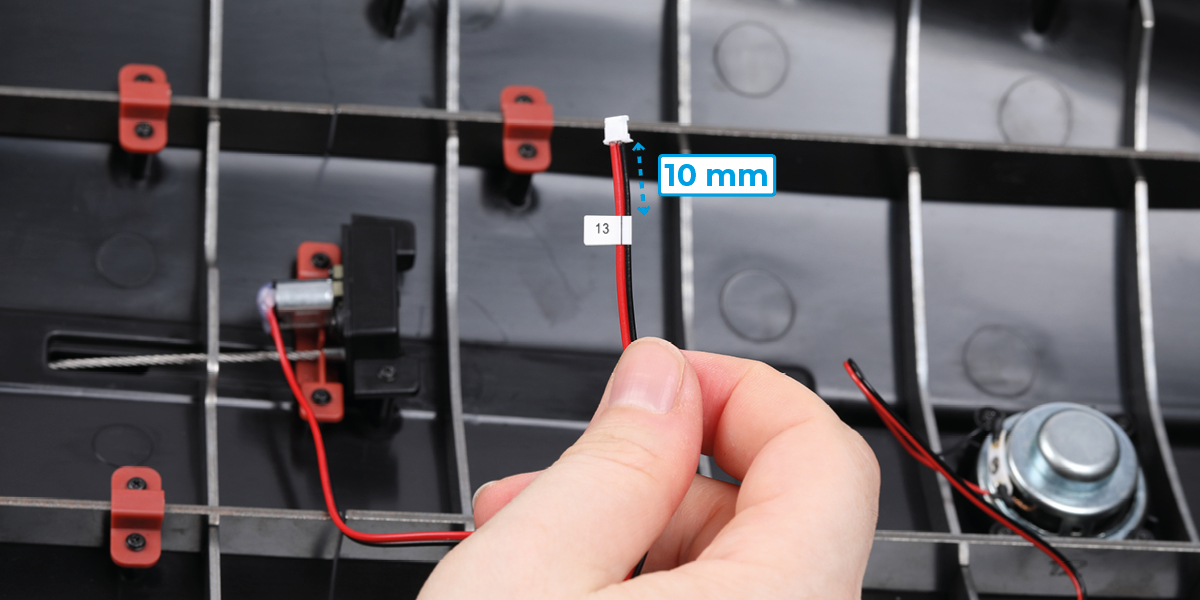
Wrap a number 13 label around the wire from the motor. Position the label 10 mm from the plug.
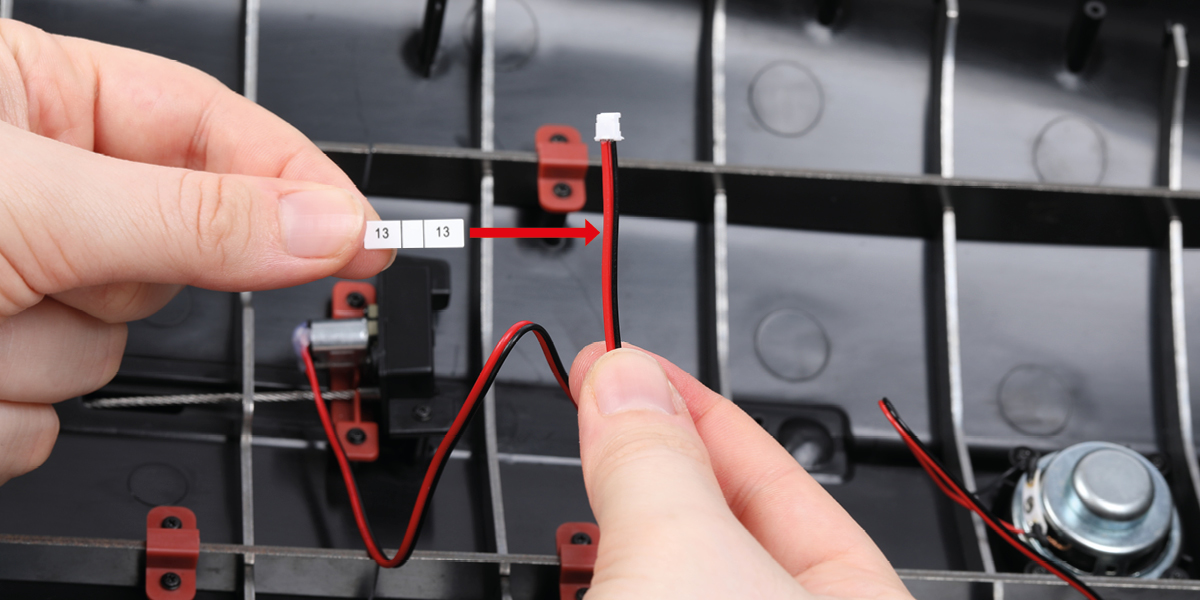
Step 14
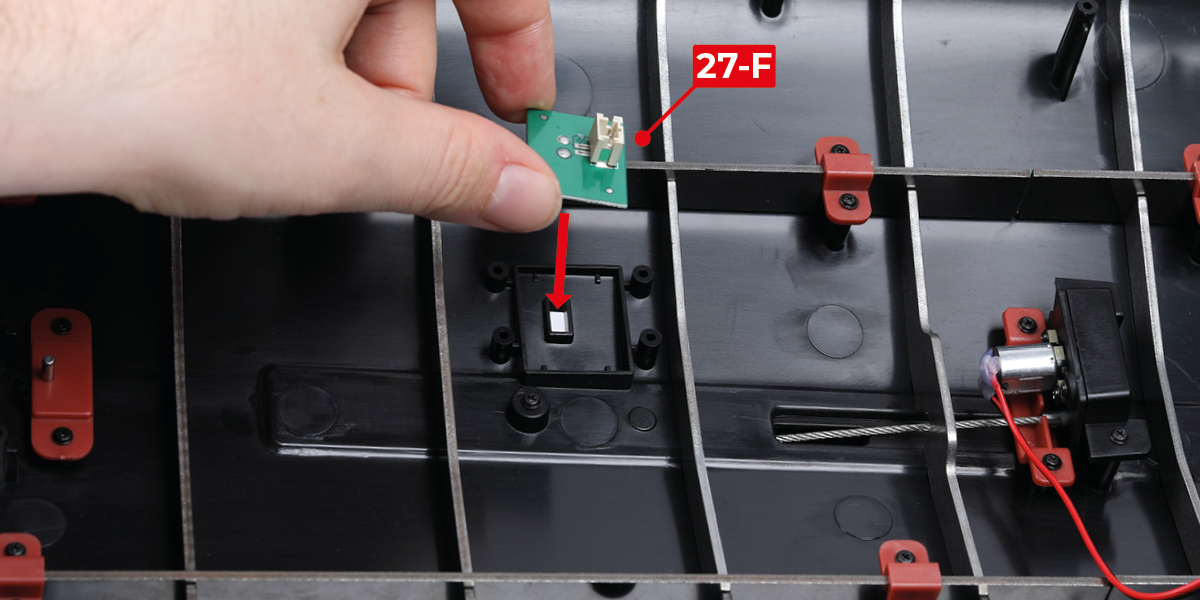
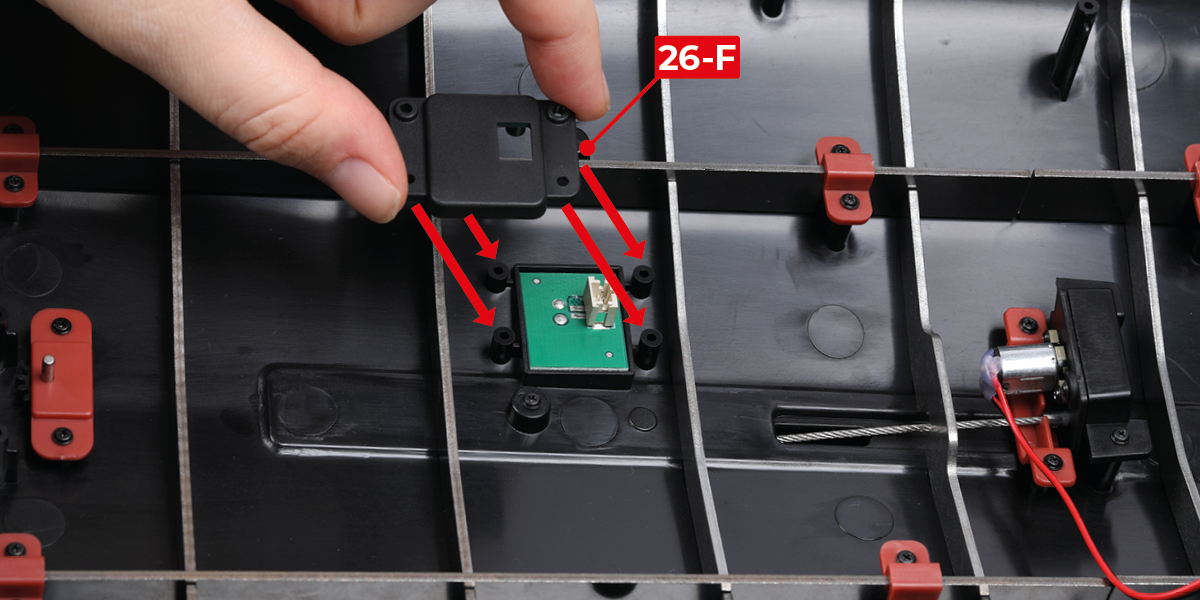
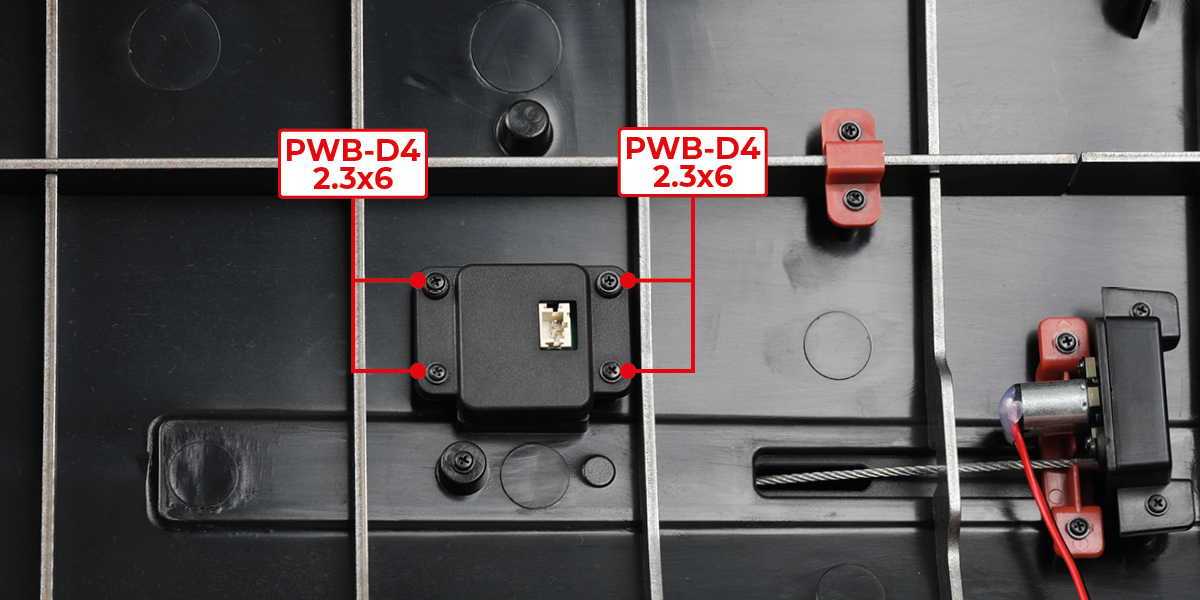
Position part 27-F on the hull, then position part 26-F on top and secure it using four PWB-D4 2.3x6 screws.
STAGE COMPLETE
Step 1
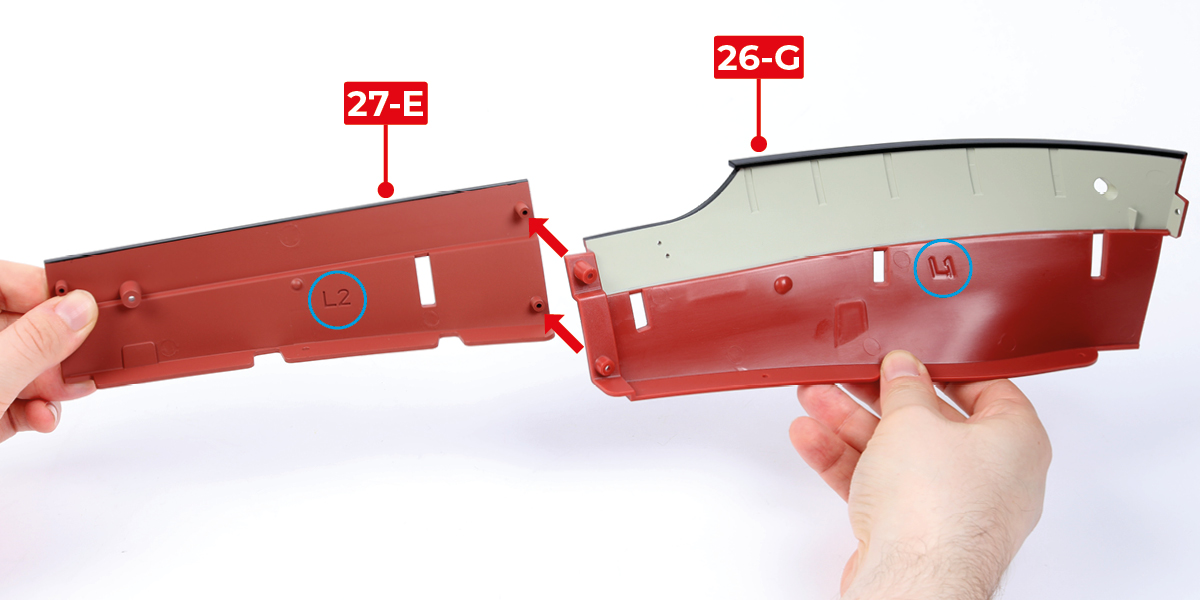
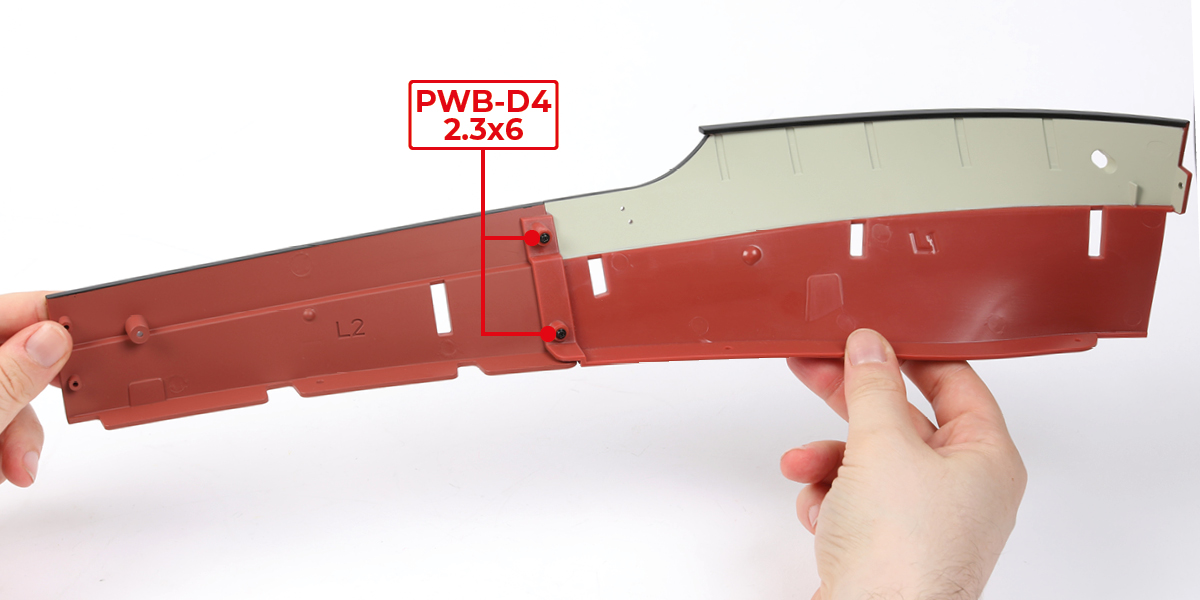
Position part 26-G (L1) on part 27-E (L2), then secure it using two PWB-D4 2.3x6 screws.
Step 2
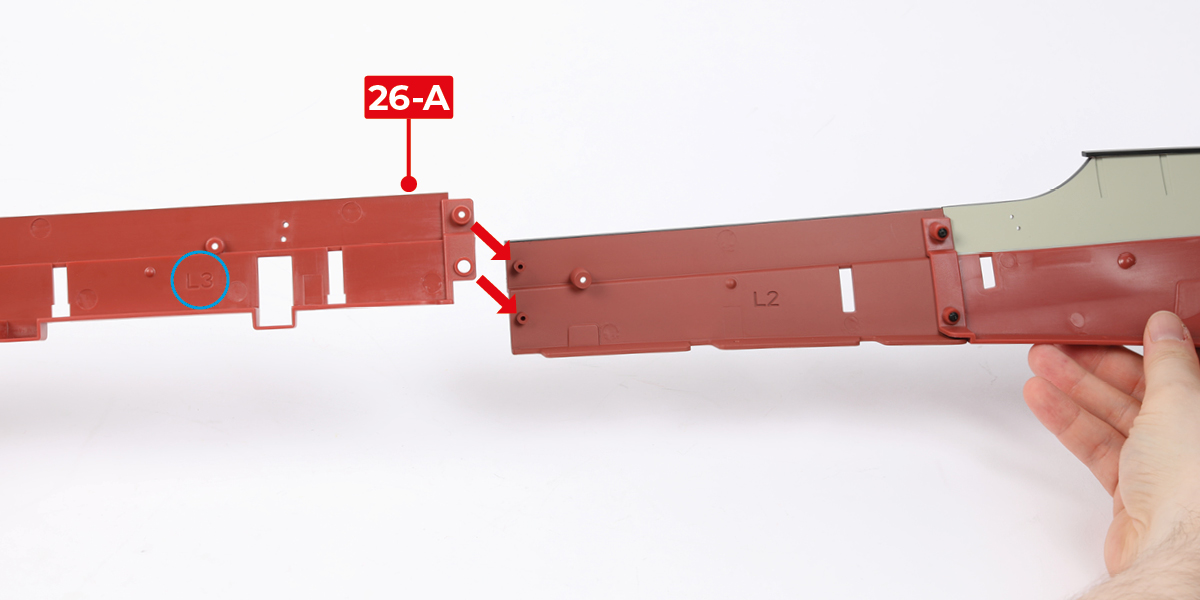
Position part 26-A (L3) on the assembly, then secure it using one PWB-D4 2.3x6 screw in the upper hole only. Leave the lower hole empty.
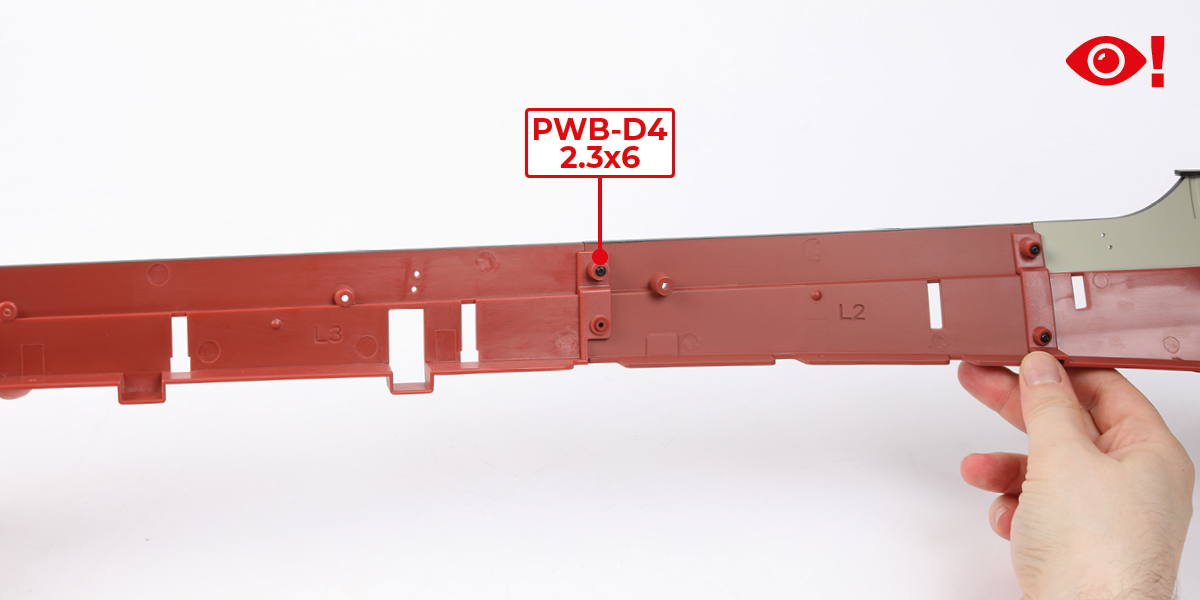
Step 3
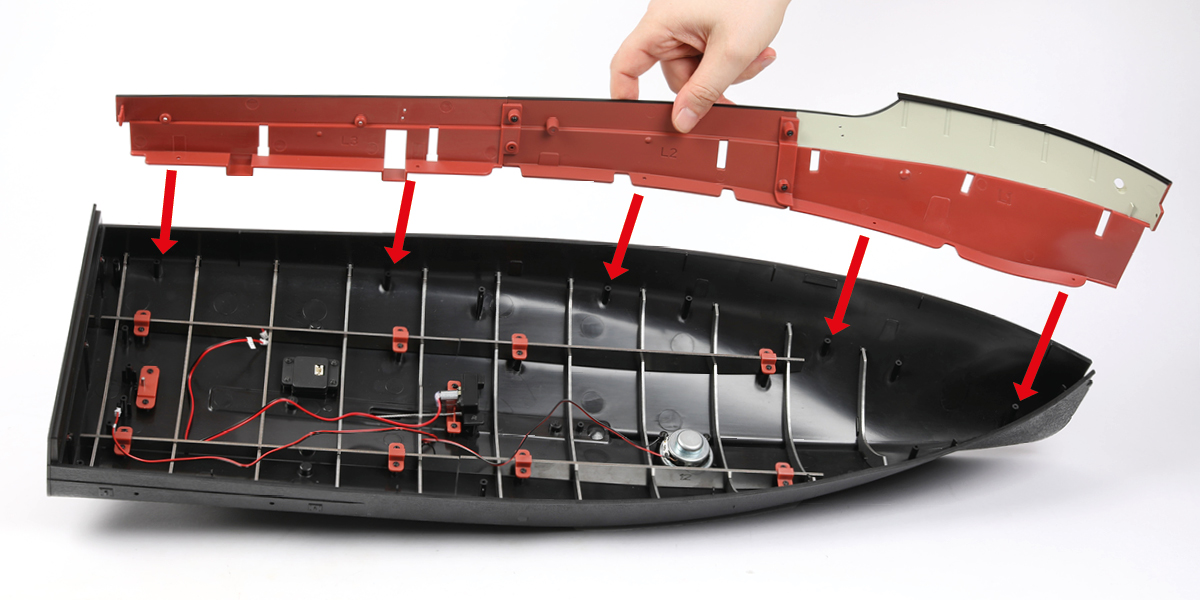
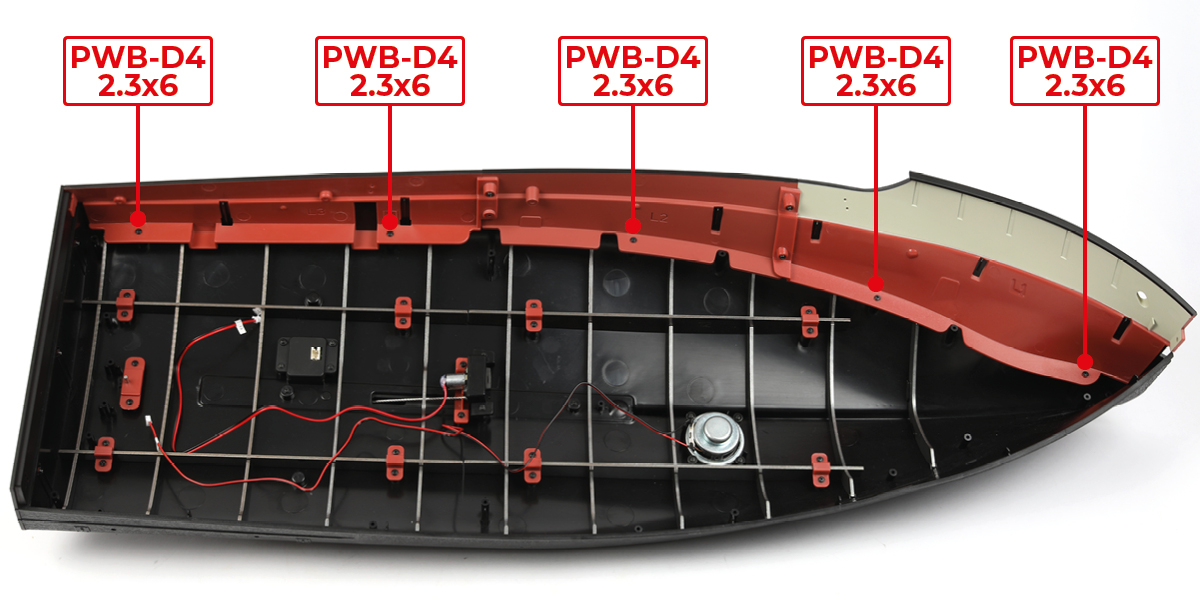
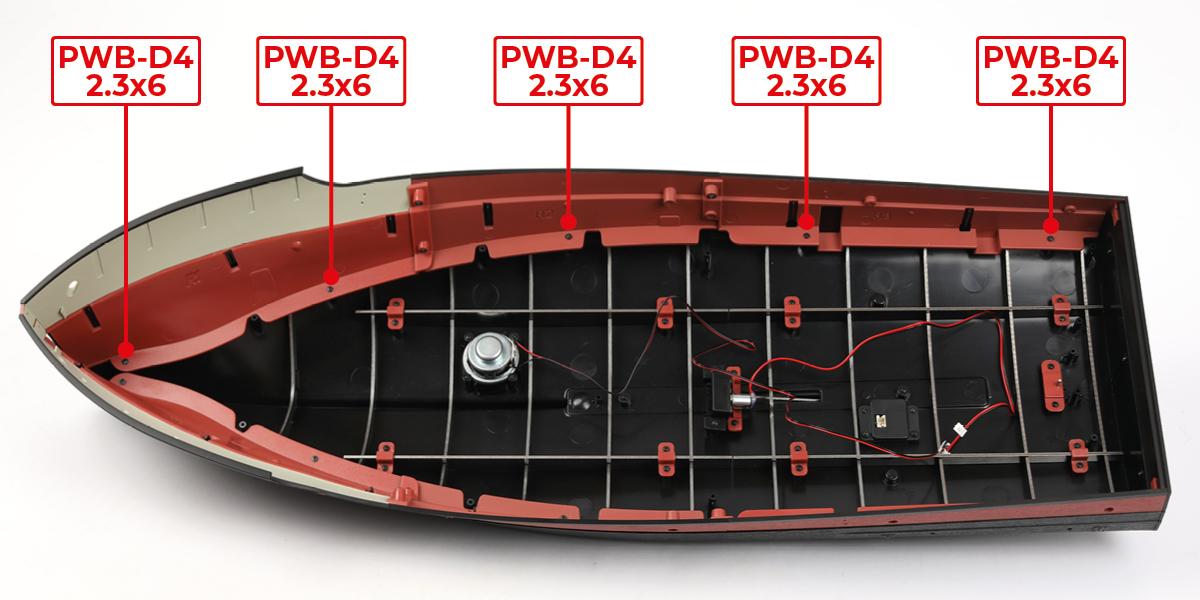
Position the assembly on the hull, then secure it using five PWB-D4 2.3x6 screws.
Step 4
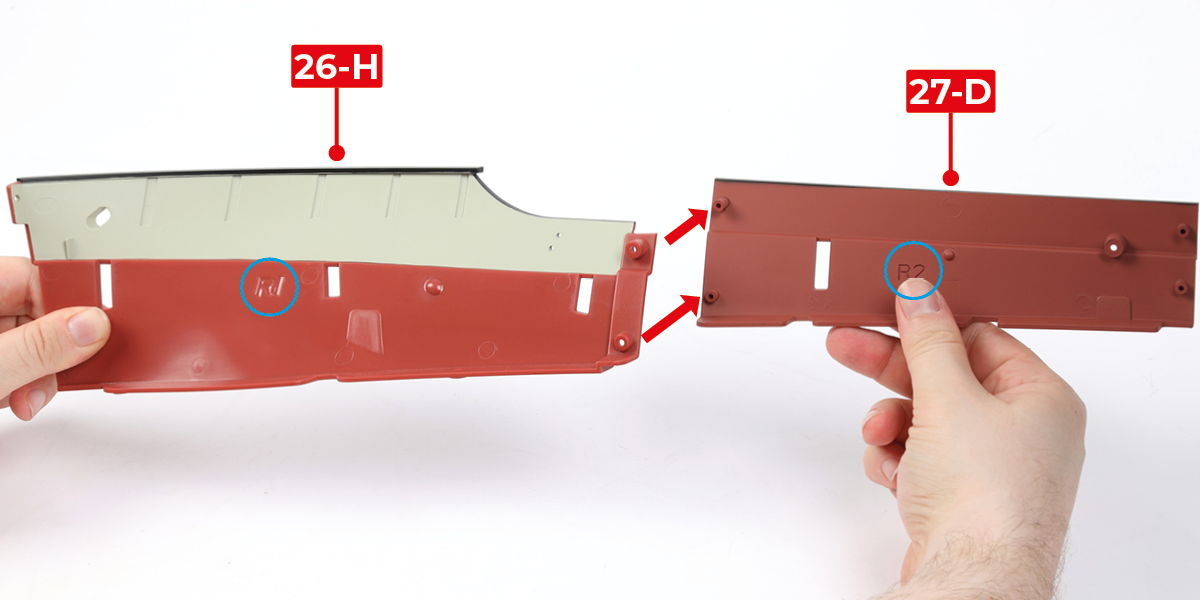
Position part 26-H (R1) on part 27-D (R2), then secure it using two PWB-D4 2.3x6 screws.
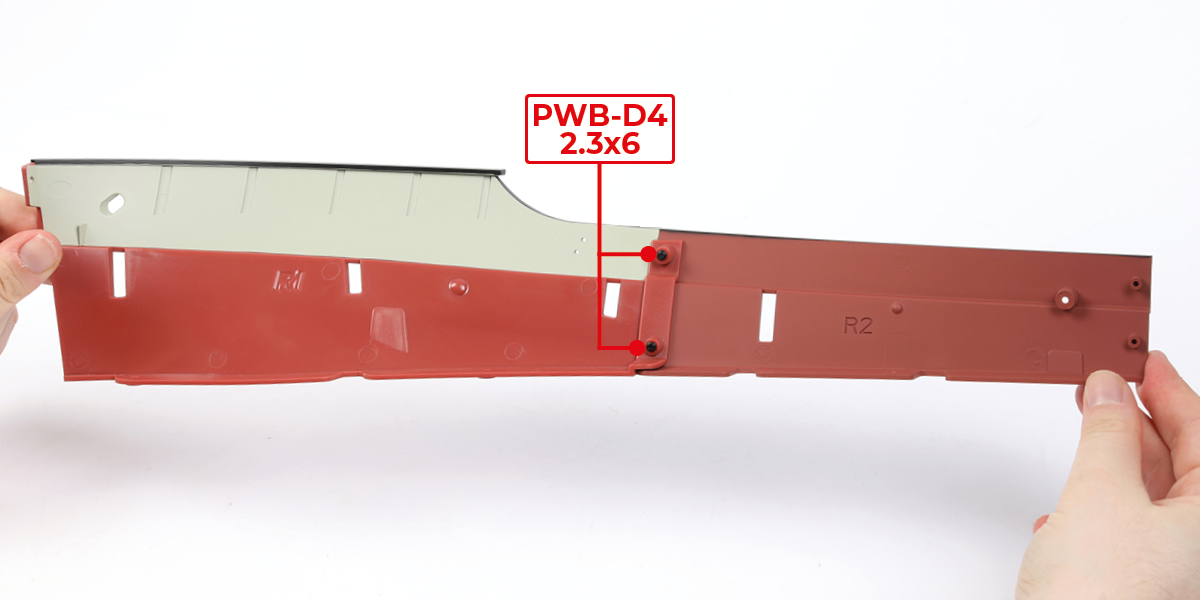
Step 5
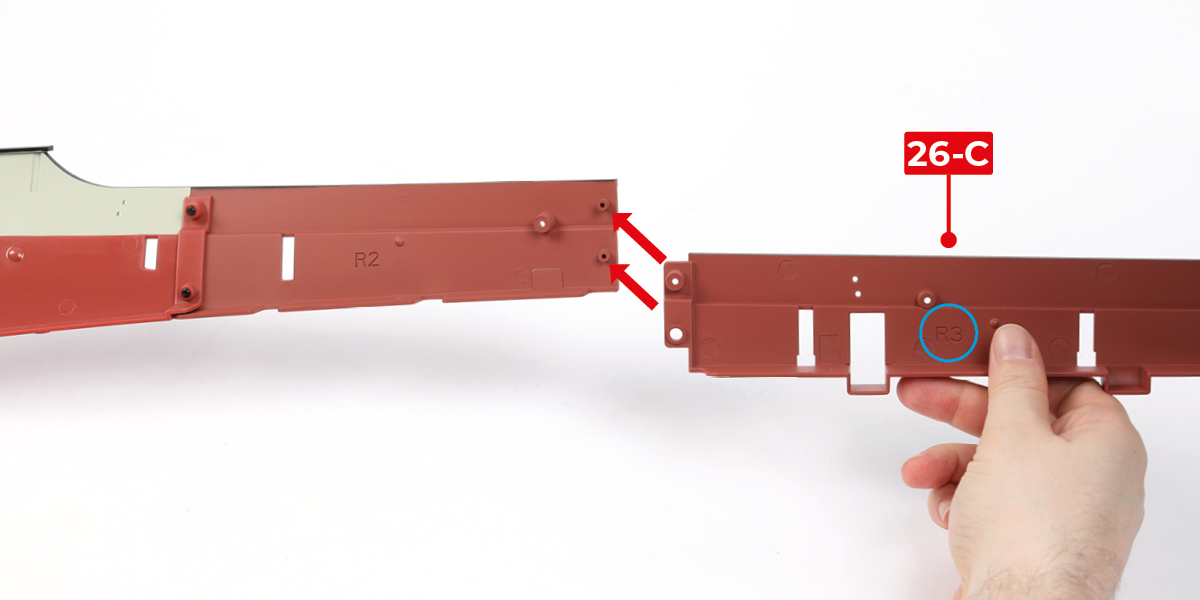
Position part 26-C (R3) on the assembly, then secure it using one PWB-D4 2.3x6 screw in the upper hole only. Leave the lower hole empty.
Step 6
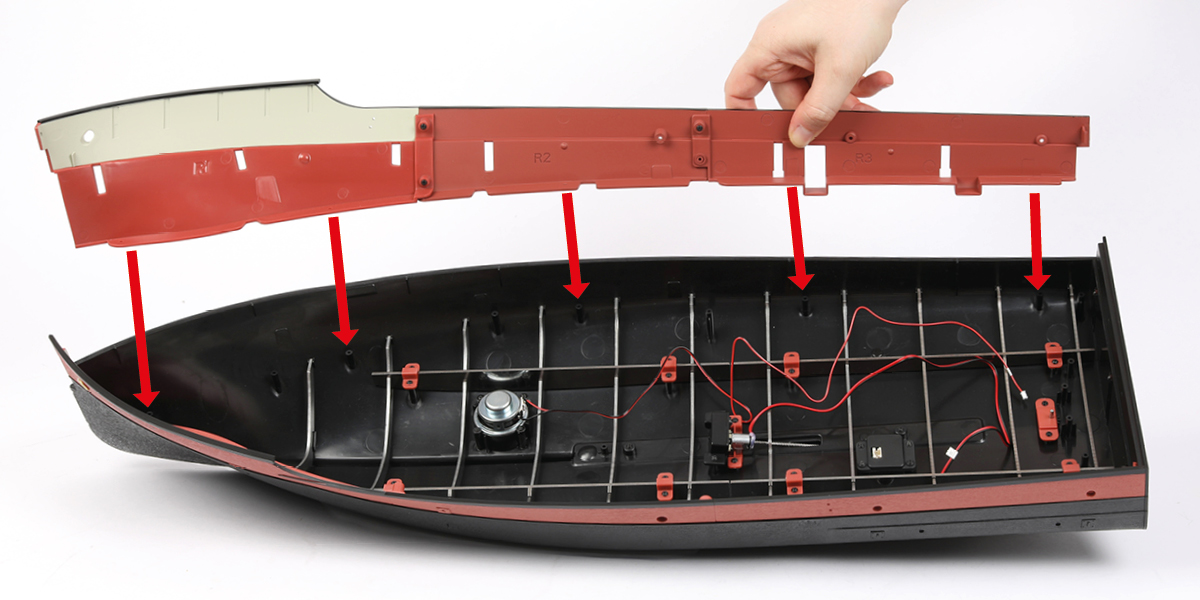
Position the assembly on the hull, then secure it using five PWB-D4 2.3x6 screws.
Step 7
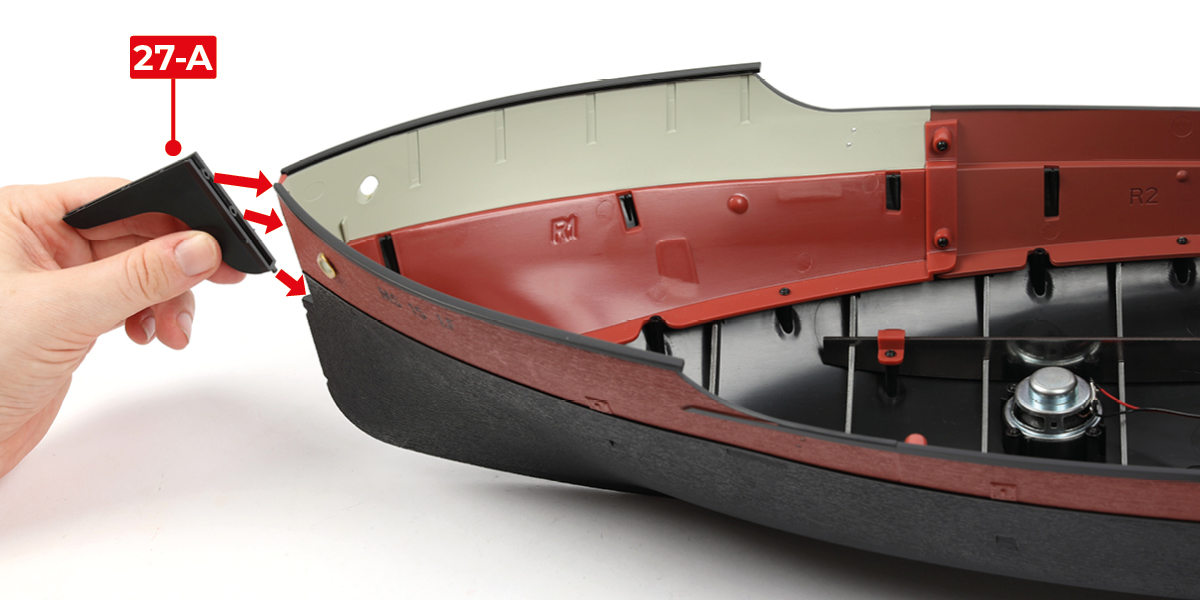
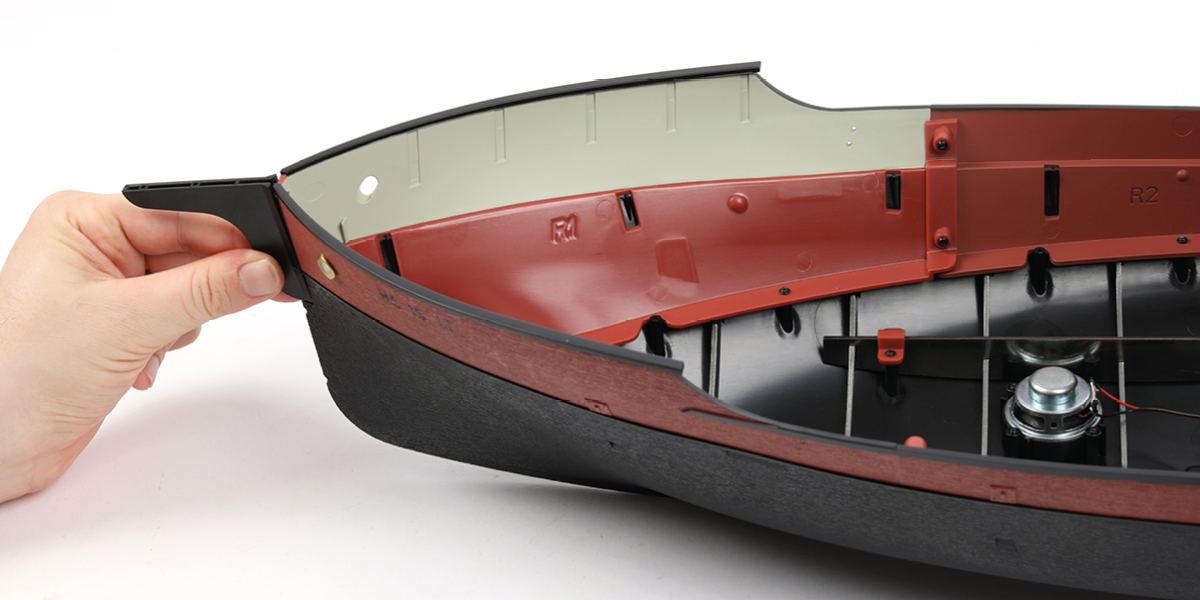
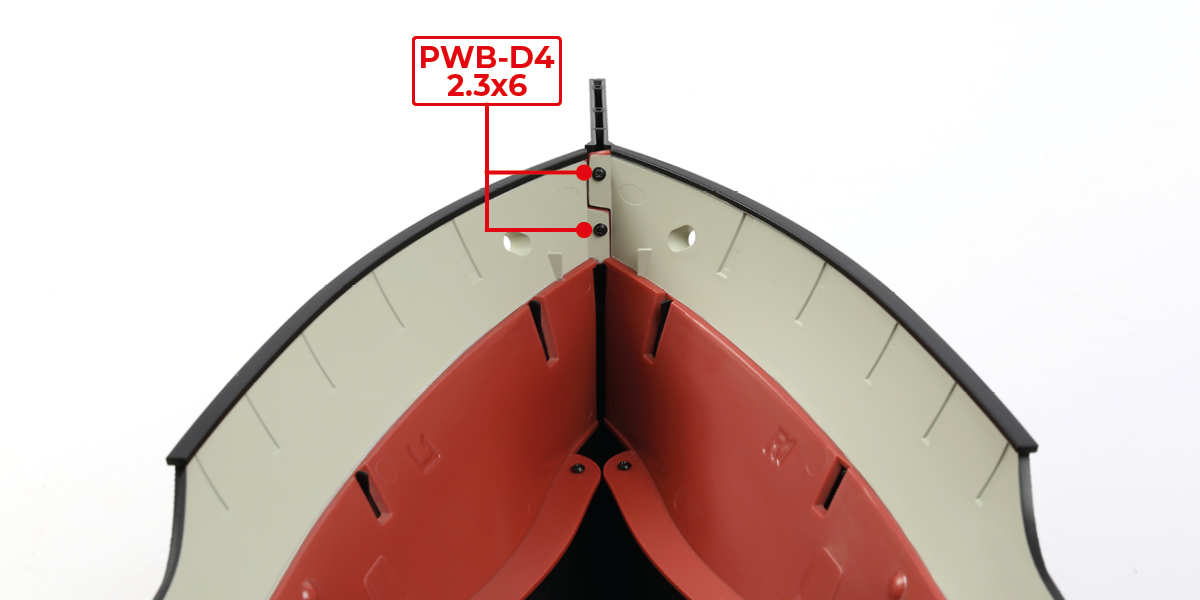
Position the stem 27-A on the upper hull panels, then secure it using two PWB-D4 2.3x6 screws.
STAGE COMPLETE
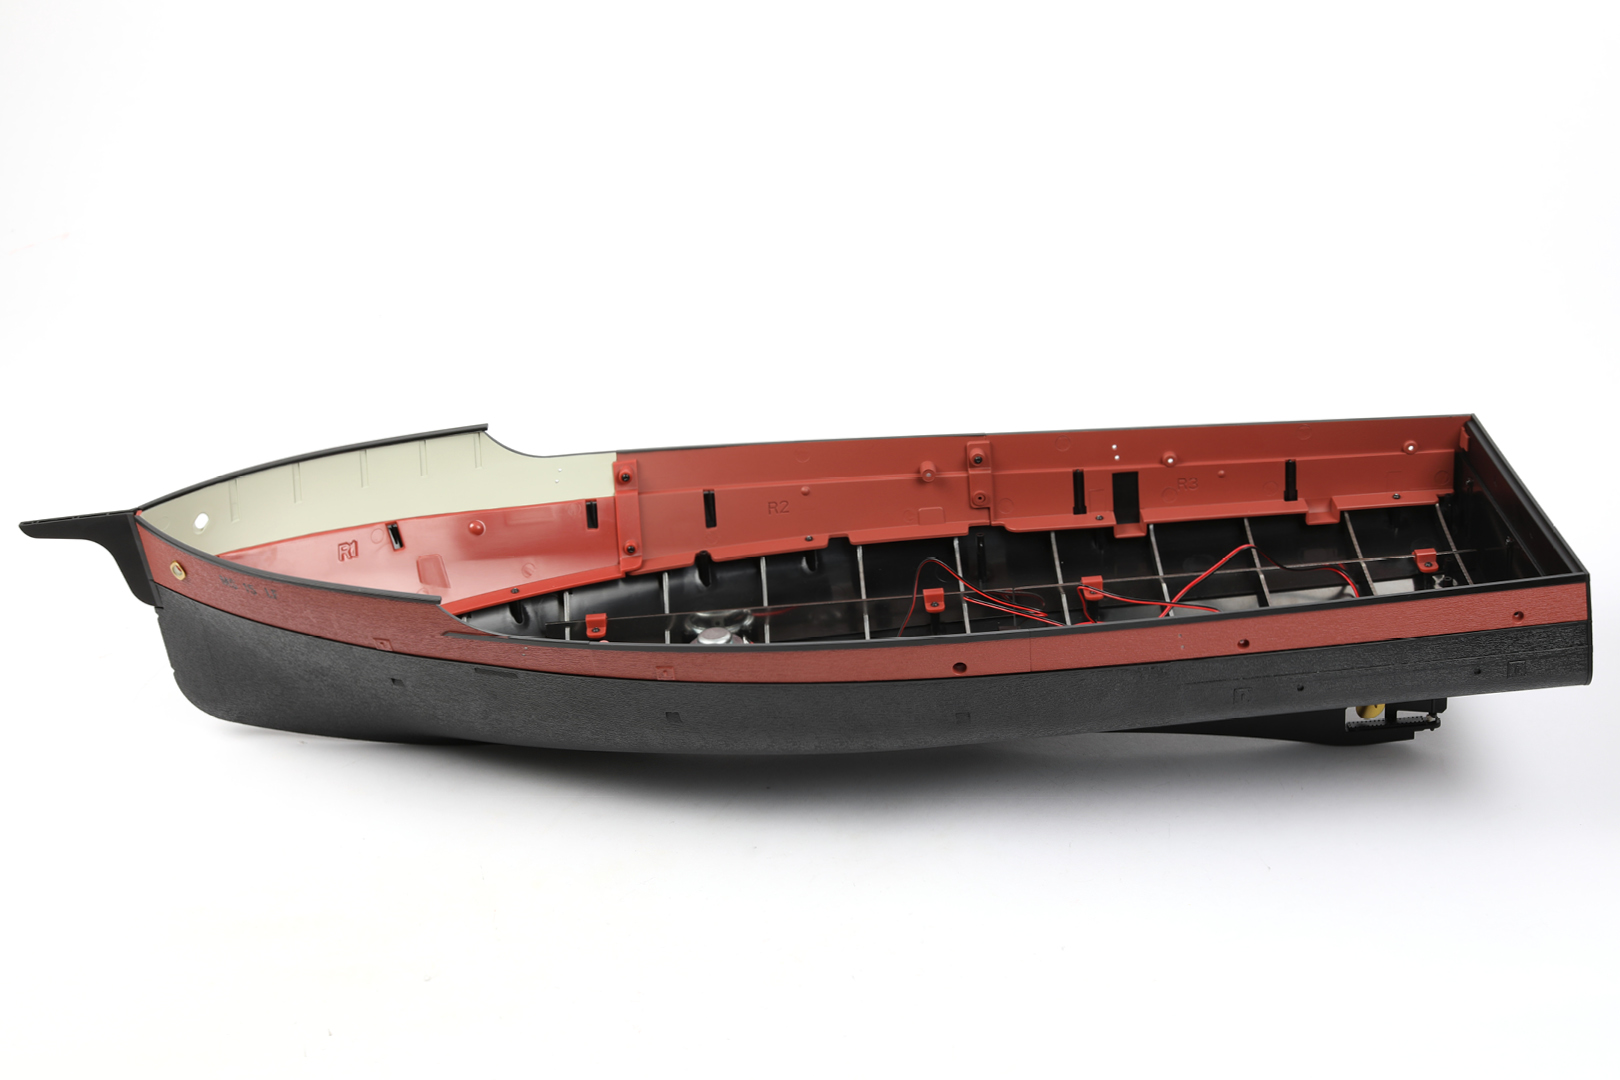
Step 1
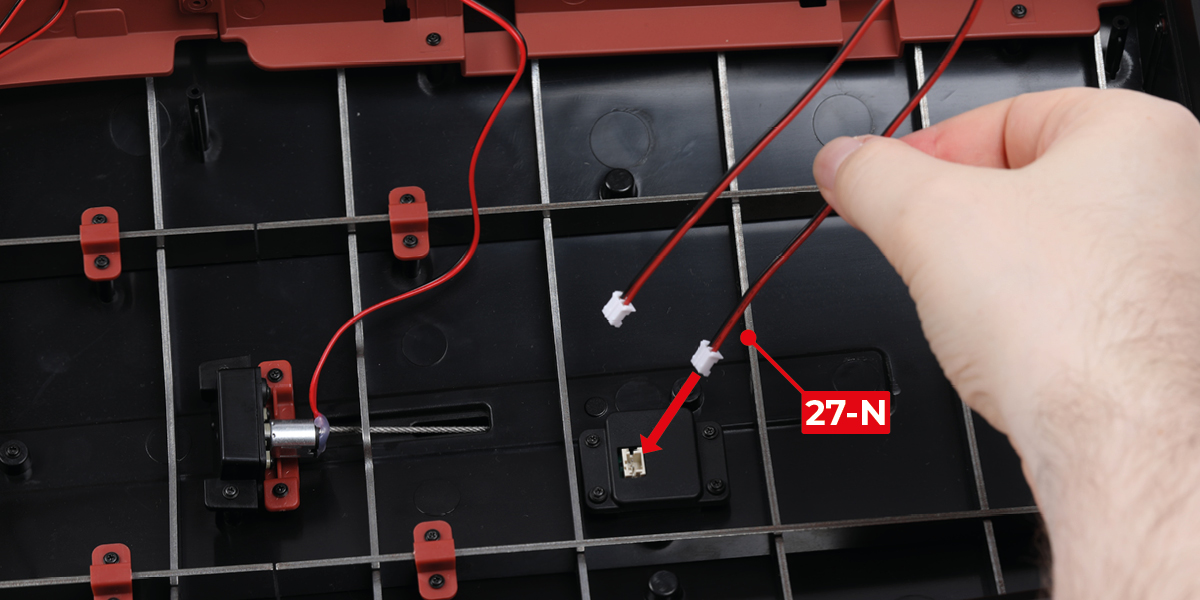
Plug wire 27-N into the socket shown.
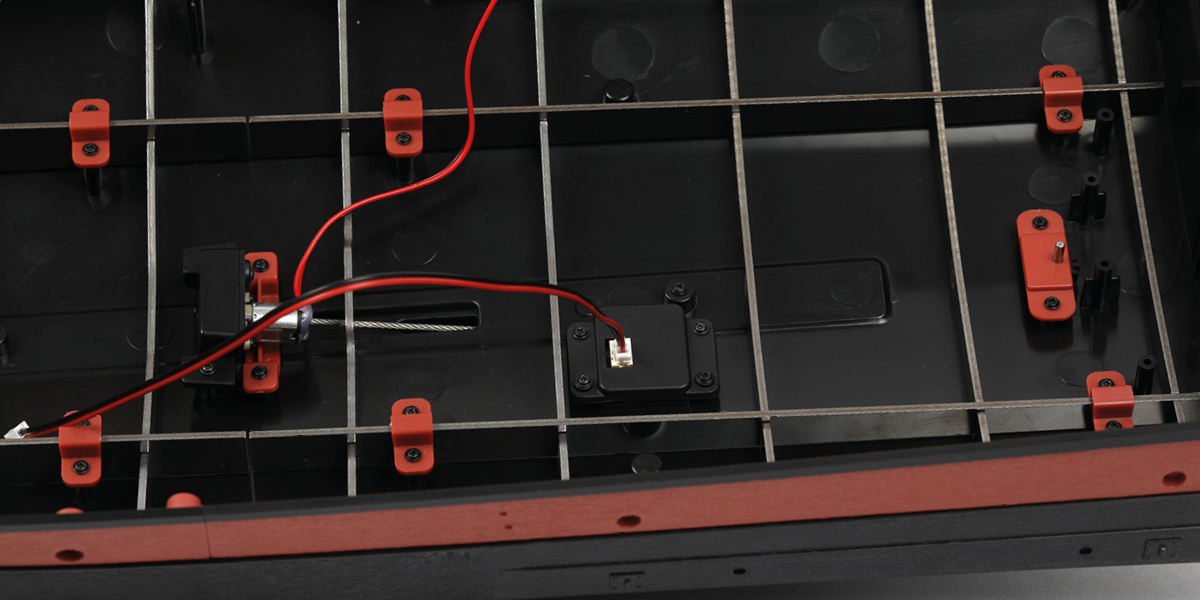
Step 2
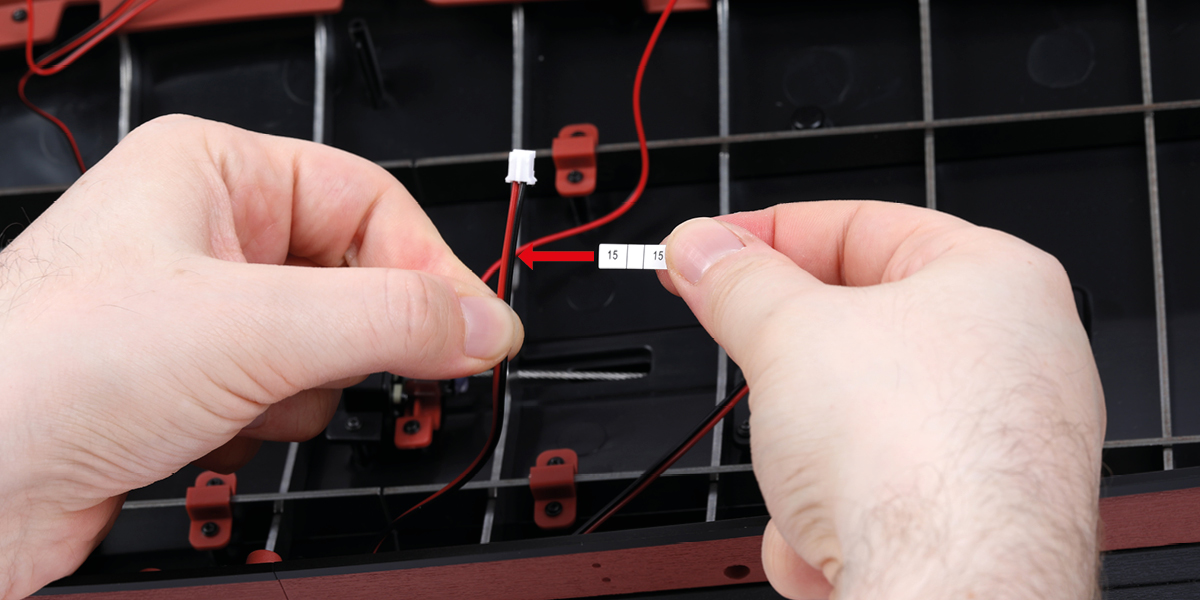
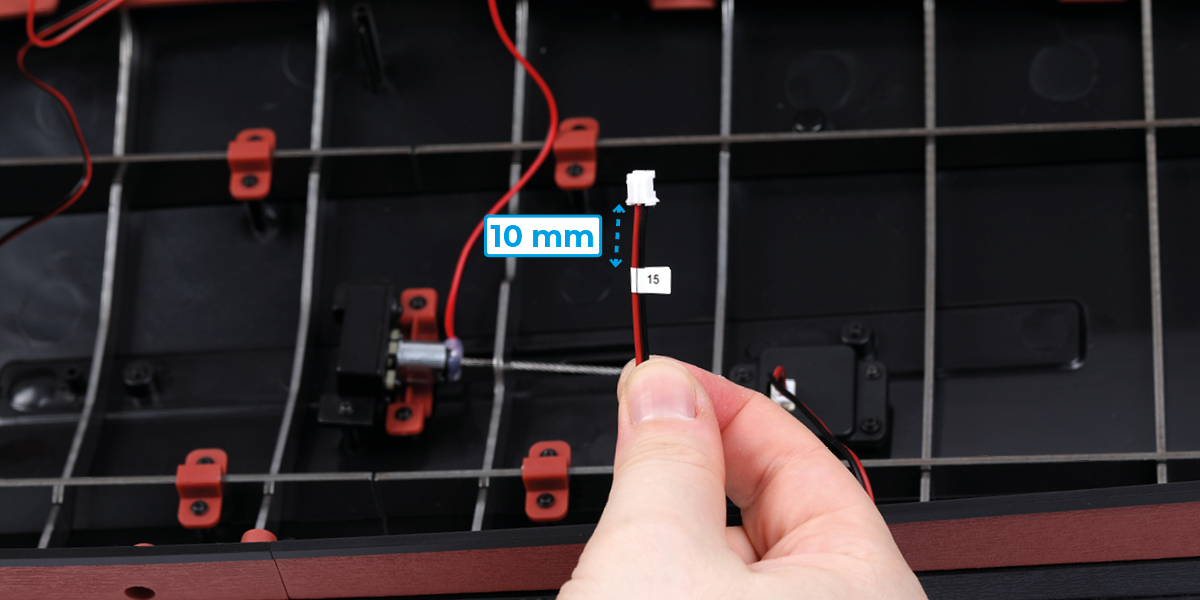
At the opposite end, wrap a number 15 label around wire 27-N, positioning the label 10 mm from the plug, as shown.
Step 3
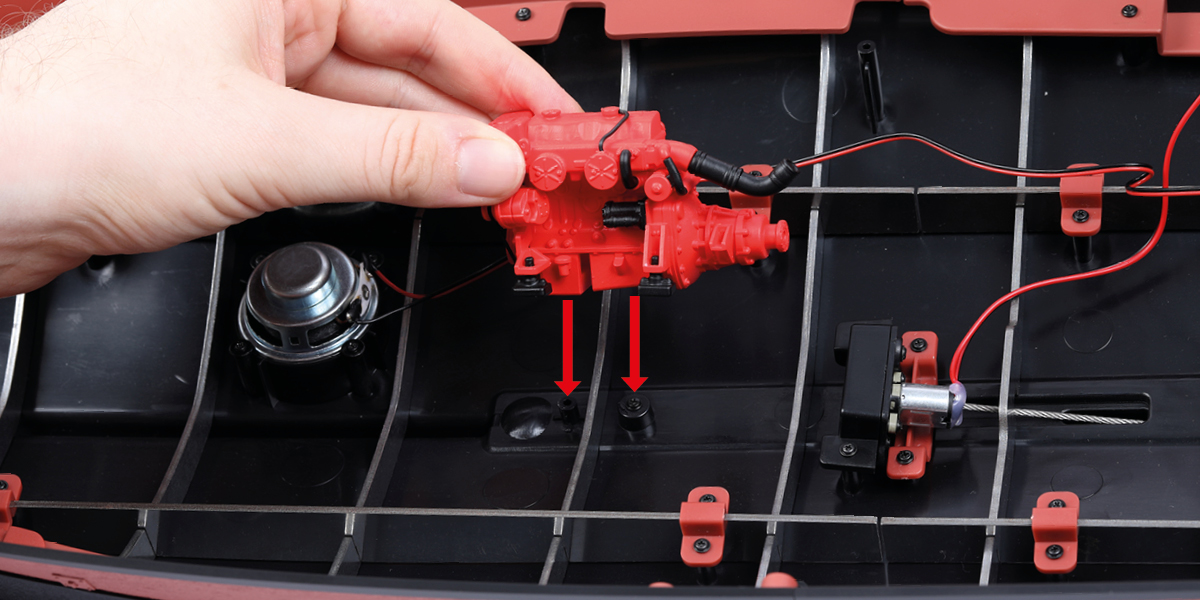
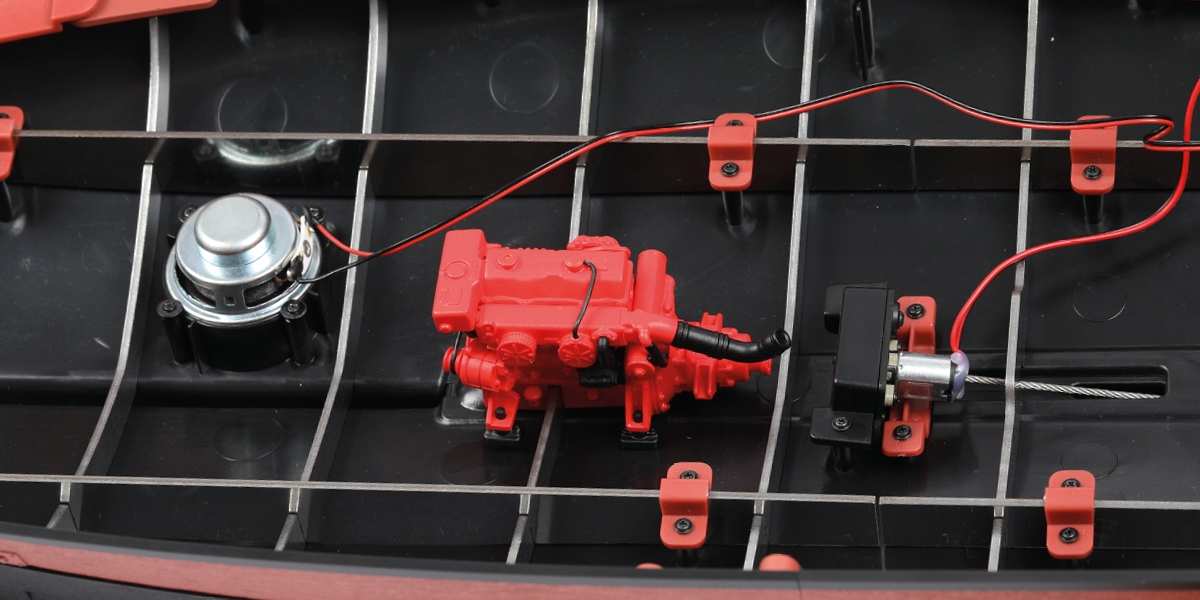
Glue the engine from pack 7 onto the hull.
Step 4
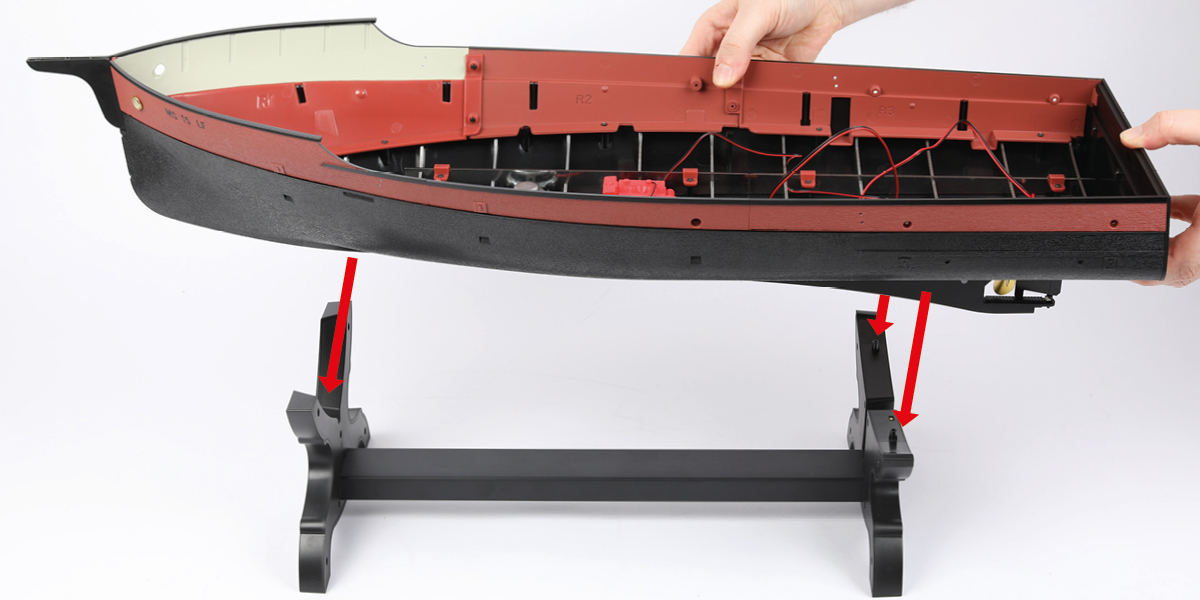
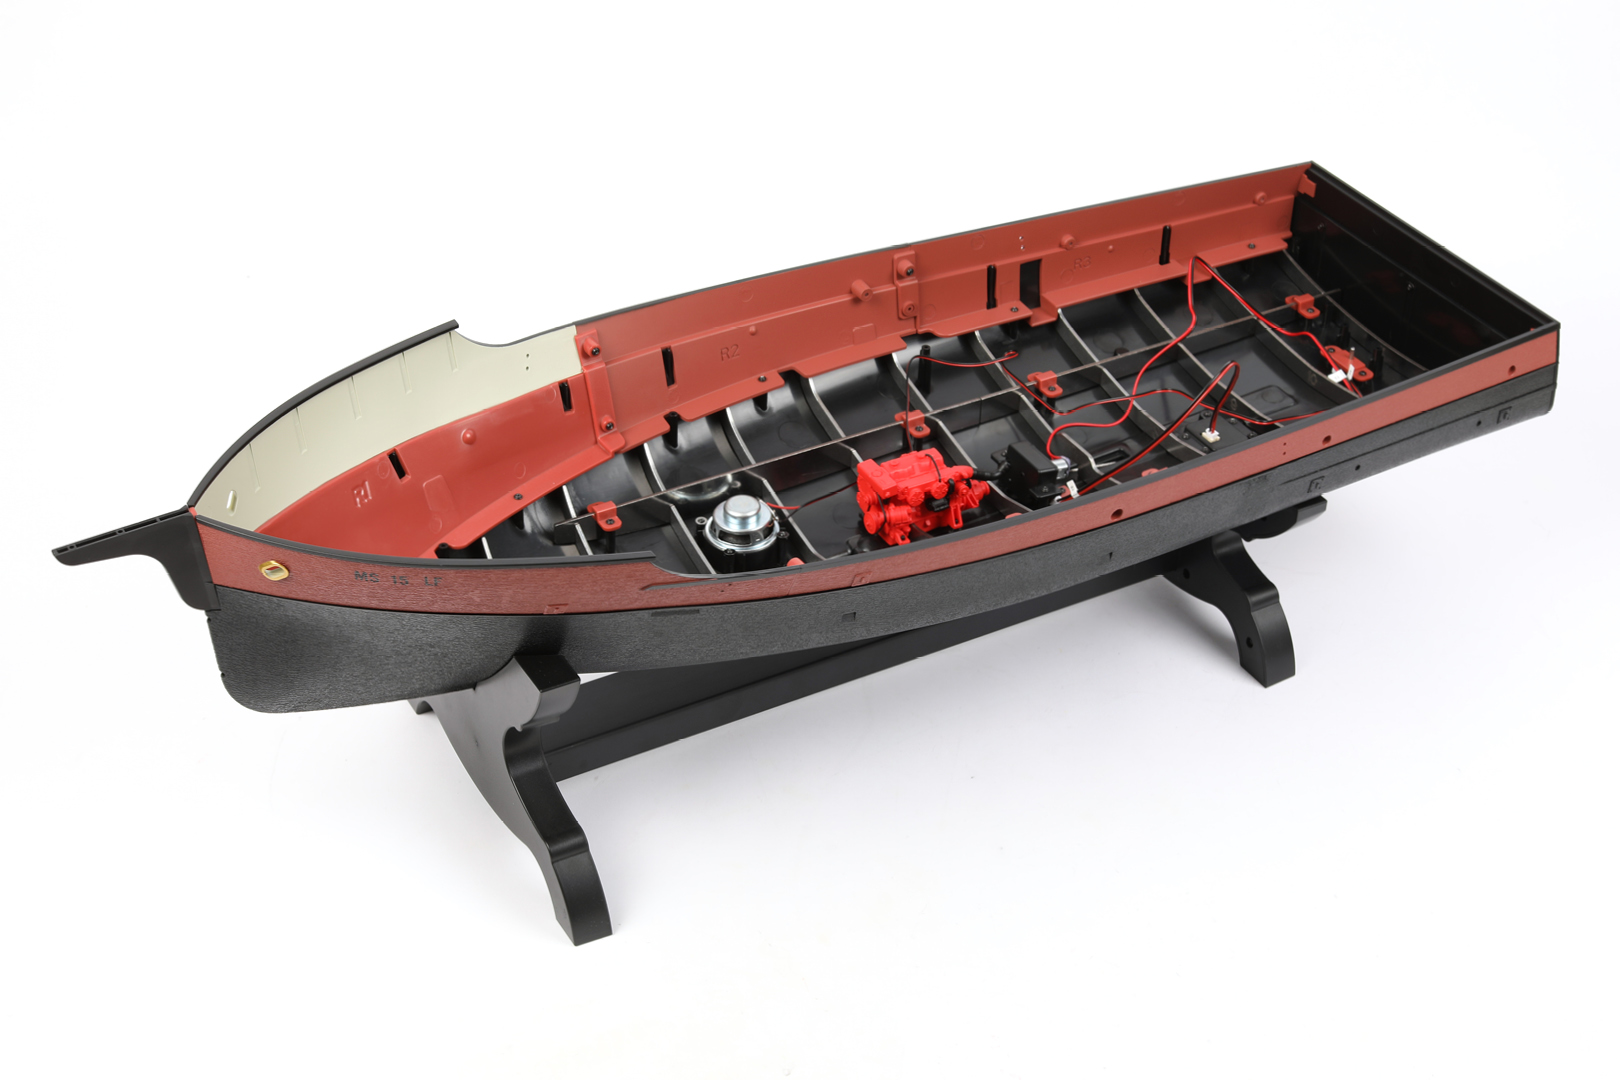
Place the hull onto the display stand from pack 8.
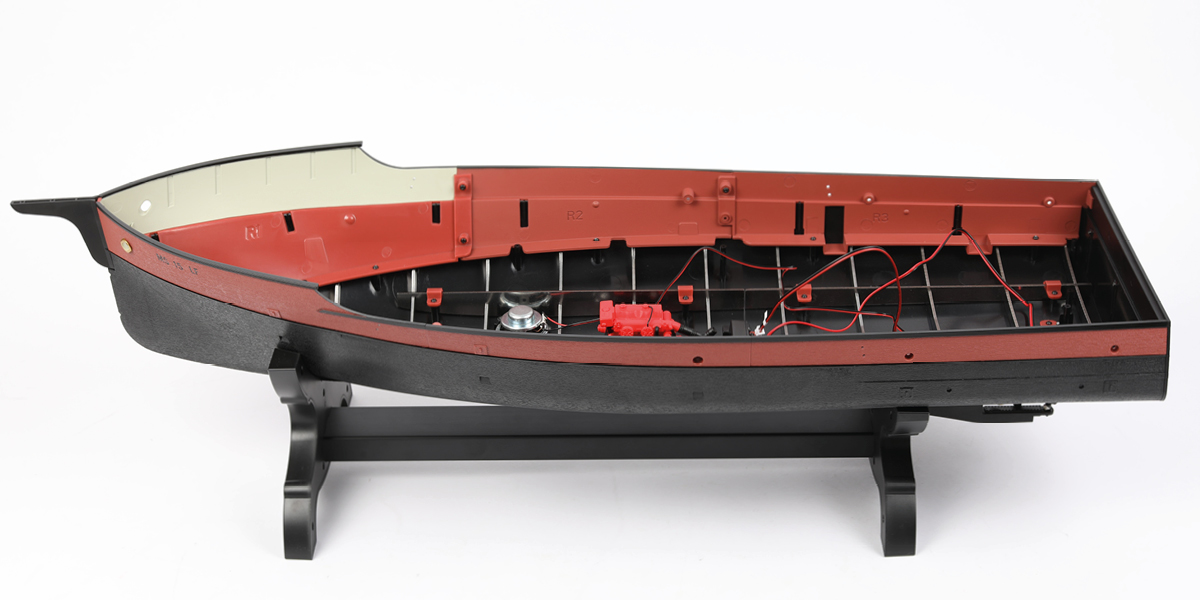
STAGE COMPLETE
Step 1
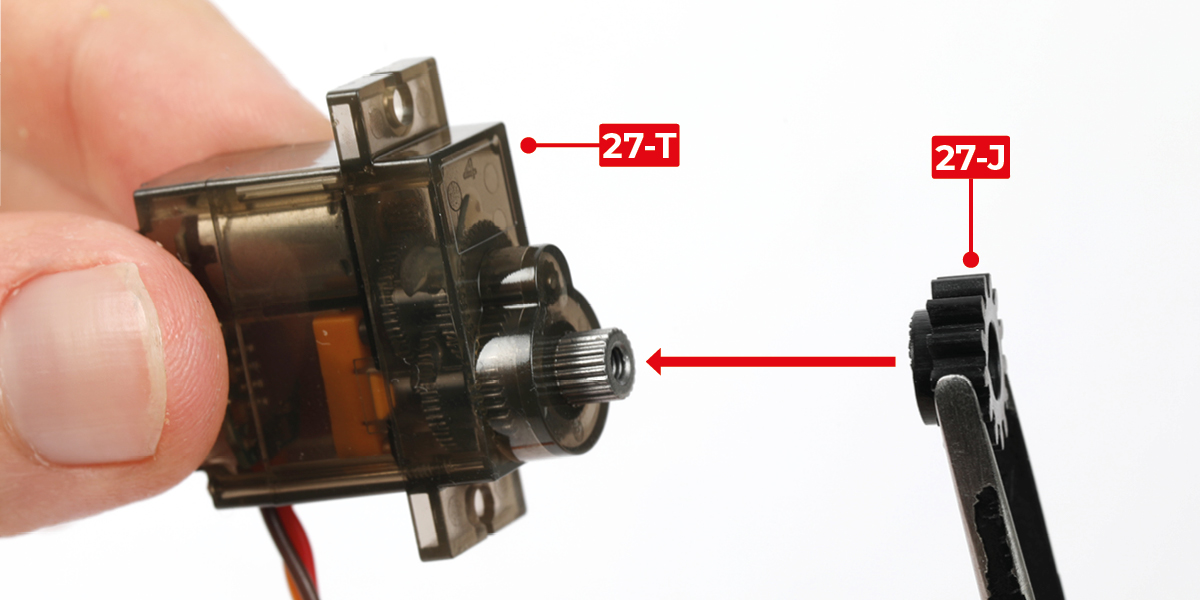
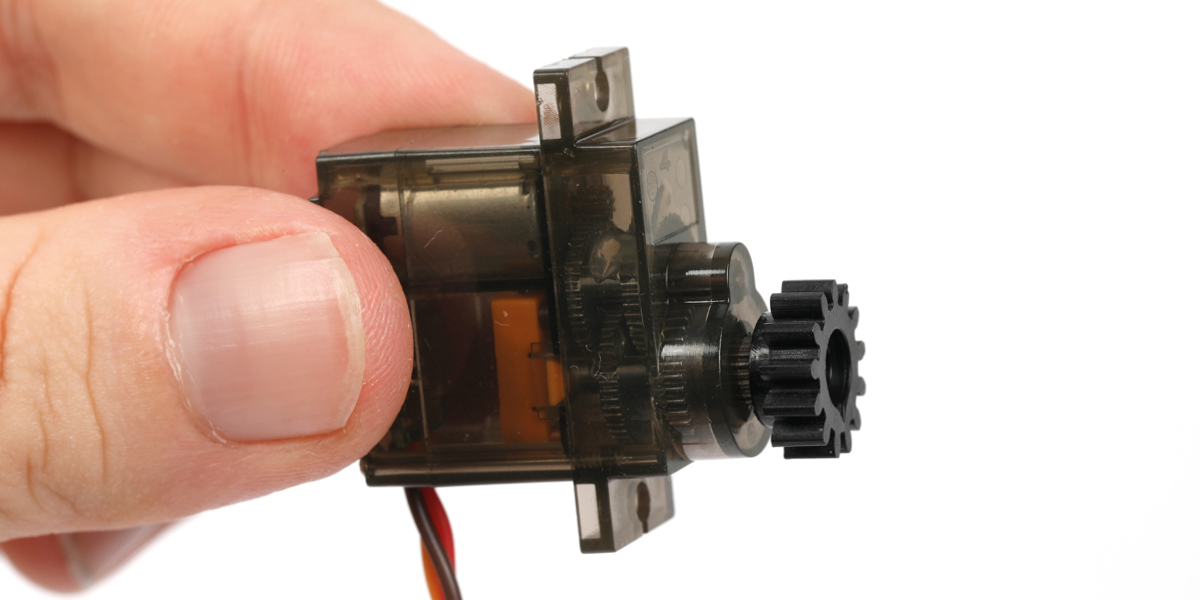
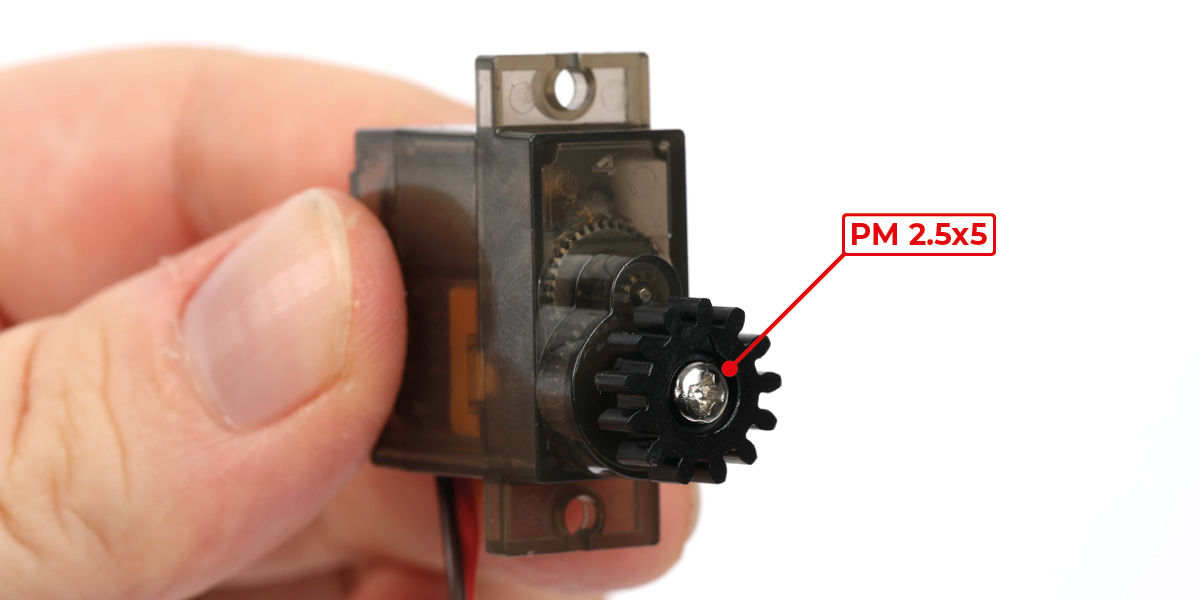
Fit gear 27-J onto the shaft of servomotor 27-T, then secure the gear using one PM 2.5x5 screw.
Step 2
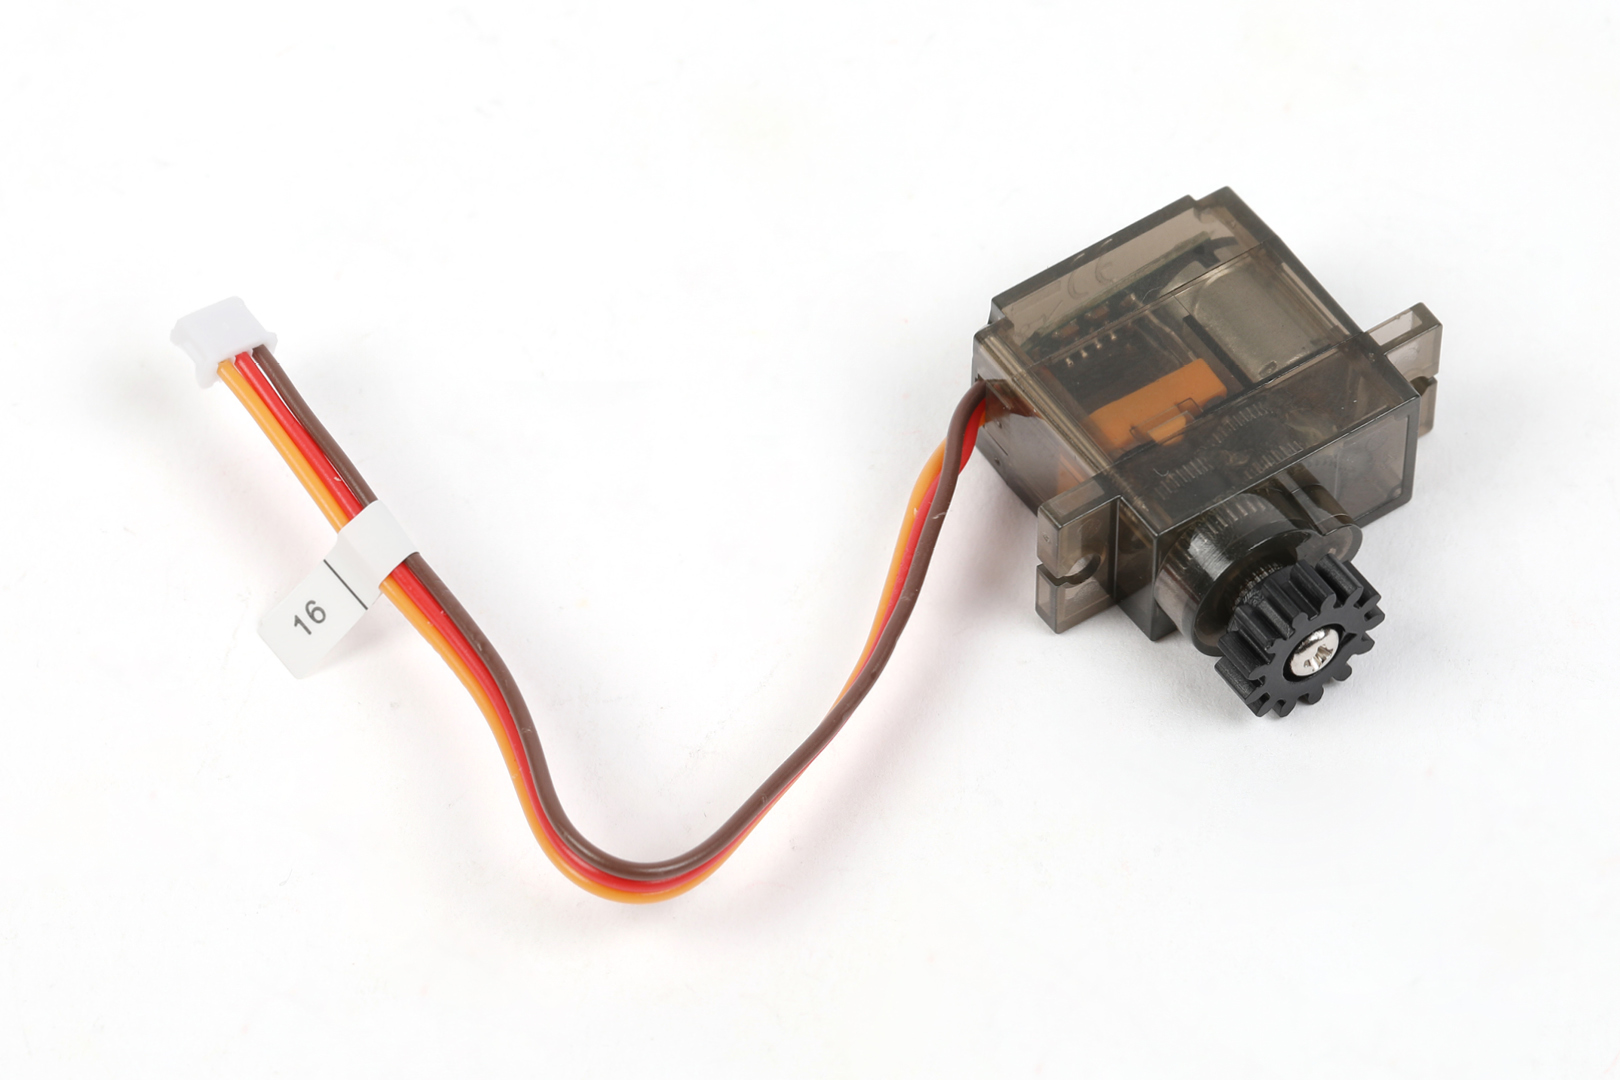
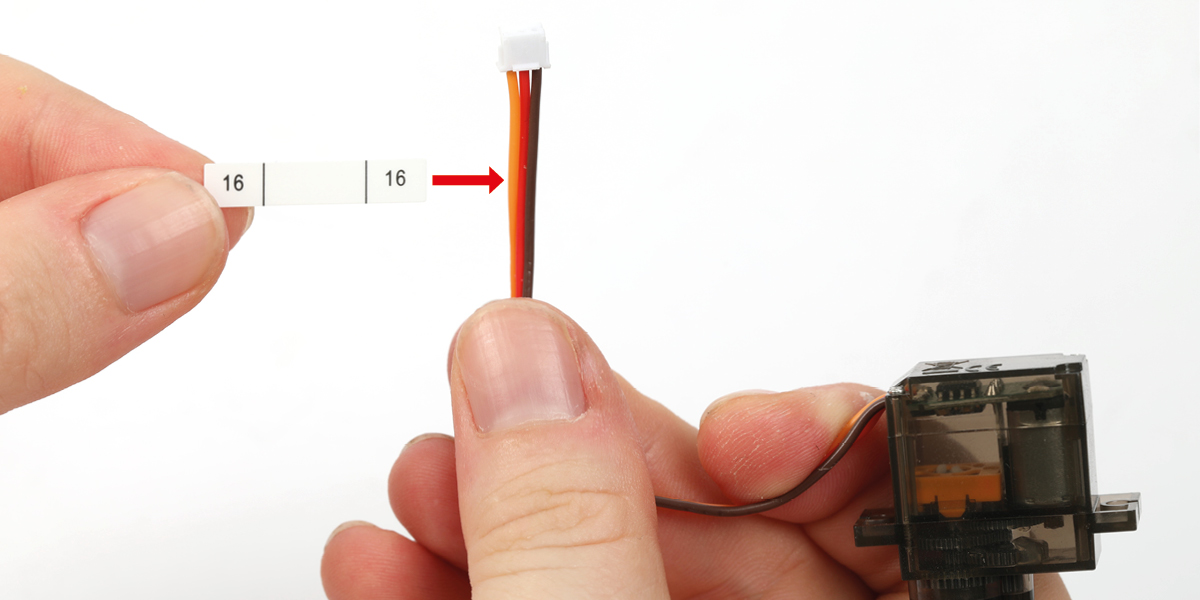
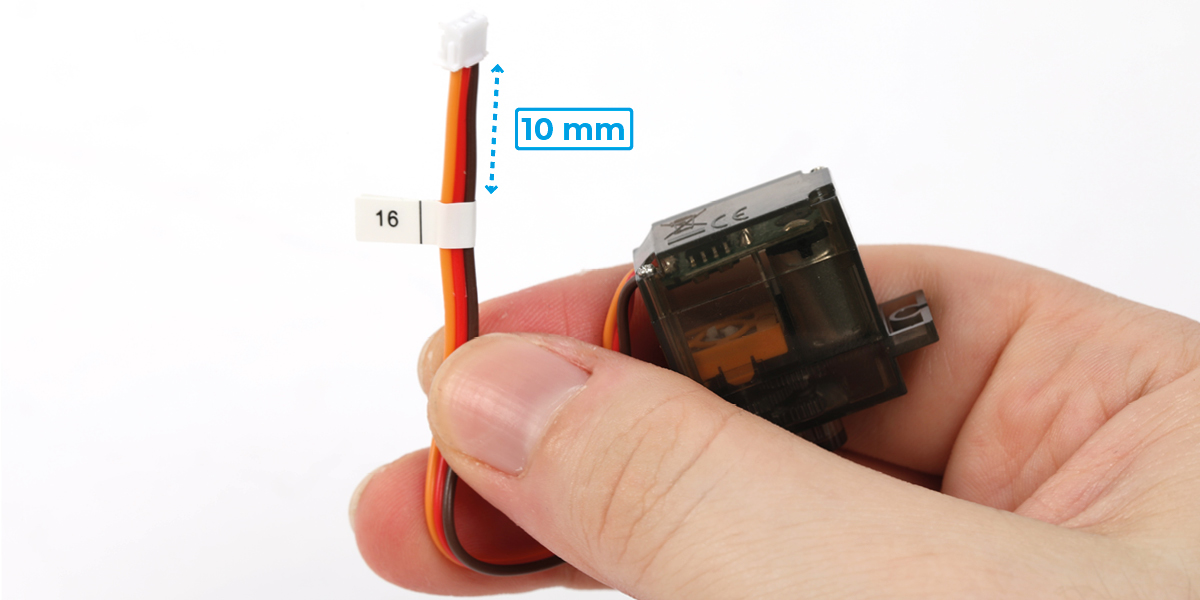
Wrap a number 16 label around the wire from the servomotor, positioning the label 10 mm from the plug.
STAGE COMPLETE